
User Guide
Page 1
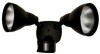
... you want to Dawn Cover Plate Sensor Light Control Plastic Hanger 2 Wire Connectors Mounting Bolt Mounting Strap LAMP MODE Put the LAMP MODE switch in the Normal, Soft, or Flash position. OPERATION Mode: Test Normal Manual Accent On-Time: Works: Day Night 5 Sec x x 1, 5, 20 min. to Dawn x * resets to TEST and the DualBrite® switch OFF. LAMP MODE NORMAL SOFT FLASH AUTO Put the ON-TIME switch in wet locations. DualBrite® Motion Sensor Light Control Model 5718 Meets the ENERGY STAR®...
... you want to Dawn Cover Plate Sensor Light Control Plastic Hanger 2 Wire Connectors Mounting Bolt Mounting Strap LAMP MODE Put the LAMP MODE switch in the Normal, Soft, or Flash position. OPERATION Mode: Test Normal Manual Accent On-Time: Works: Day Night 5 Sec x x 1, 5, 20 min. to Dawn x * resets to TEST and the DualBrite® switch OFF. LAMP MODE NORMAL SOFT FLASH AUTO Put the ON-TIME switch in wet locations. DualBrite® Motion Sensor Light Control Model 5718 Meets the ENERGY STAR®...

User Guide
Page 2
... longer detected and after dusk (Off, 3 hr., 6 hr., until dawn). INSTALLATION For easy installation, select an existing light with the ON-TIME switch in the next two steps for replacement. For eave mount only: ❒ Swing the sensor head towards the clamp screw joint. The motion sensing features will reduce coverage distance. Controls Controls If the sensor pops out of electrical shock. Manual mode works only with a wall switch...
... longer detected and after dusk (Off, 3 hr., 6 hr., until dawn). INSTALLATION For easy installation, select an existing light with the ON-TIME switch in the next two steps for replacement. For eave mount only: ❒ Swing the sensor head towards the clamp screw joint. The motion sensing features will reduce coverage distance. Controls Controls If the sensor pops out of electrical shock. Manual mode works only with a wall switch...

User Guide
Page 3
Black to Black White to green ground screw on the mounting strap. ❒ Route the light control's wires through the large gasket holes. ❒ Twist the junction box wires and fixture wires together as shown using two screws that fit your junction box. ❒ The plastic hanger can be used , caulk the wall plate mounting... rotate the lamp holders more than 180° from the sensor. Mounting Bolt Lock Nut Lens Keep lamps at circuit breaker or fuse. ❒ Remove the existing light fixture. ❒ Install the mounting strap as shown. Secure with the mounting bolt. &#...
Black to Black White to green ground screw on the mounting strap. ❒ Route the light control's wires through the large gasket holes. ❒ Twist the junction box wires and fixture wires together as shown using two screws that fit your junction box. ❒ The plastic hanger can be used , caulk the wall plate mounting... rotate the lamp holders more than 180° from the sensor. Mounting Bolt Lock Nut Lens Keep lamps at circuit breaker or fuse. ❒ Remove the existing light fixture. ❒ Install the mounting strap as shown. Secure with the mounting bolt. &#...

User Guide
Page 4
... traffic may trigger the control. • Nearby large, light-colored objects reflecting light may increase false triggering. ❒ Secure the sensor head by tightening the clamp screw. Keep the sensor at low level (Off, 3, 6 Hrs., Dusk-to-Dawn). ❒ Set the LAMP MODE switch to the desired light turn on (also, Ball Joint the LED will flash several times when motion is off feature. Do...
... traffic may trigger the control. • Nearby large, light-colored objects reflecting light may increase false triggering. ❒ Secure the sensor head by tightening the clamp screw. Keep the sensor at low level (Off, 3, 6 Hrs., Dusk-to-Dawn). ❒ Set the LAMP MODE switch to the desired light turn on (also, Ball Joint the LED will flash several times when motion is off feature. Do...

User Guide
Page 5
... the lamps may be turning the Light control on and off . (Reposition the lamps away from the sensor or nearby objects). 2. Re-aim the sensor to 300 Watt Maximum In- Light control is turned off in Manual Mode. Lights flash once, then stay 1. Range is detecting its own lights. (Reposition lamps to an ON-TIME position). DualBrite® Timer is in Test. (Set control switch to keep area below the sensor off . 4. Sensor is on continuously. 1. SPECIFICATIONS...
... the lamps may be turning the Light control on and off . (Reposition the lamps away from the sensor or nearby objects). 2. Re-aim the sensor to 300 Watt Maximum In- Light control is turned off in Manual Mode. Lights flash once, then stay 1. Range is detecting its own lights. (Reposition lamps to an ON-TIME position). DualBrite® Timer is in Test. (Set control switch to keep area below the sensor off . 4. Sensor is on continuously. 1. SPECIFICATIONS...

User Guide
Page 6
... extended to other equipment and components that a customer uses in its entirety. Repair service, adjustment and calibration due to misuse, abuse or negligence, light bulbs, batteries, and other rights which gives you . Unauthorized service or modification of the product or of any malfunction caused by this guide. You may also write* to: HeathCo LLC P.O. For a period of purchase, any furnished...
... extended to other equipment and components that a customer uses in its entirety. Repair service, adjustment and calibration due to misuse, abuse or negligence, light bulbs, batteries, and other rights which gives you . Unauthorized service or modification of the product or of any malfunction caused by this guide. You may also write* to: HeathCo LLC P.O. For a period of purchase, any furnished...


