

RX-V3075/V2075 Owners Manual
Page 13
...BI-AMP R EXTRA SP1 L ANTENNA (4 RADIO) AM FM 75Ω SINGLE AC IN (RX-V3075) * The area around the video/audio output jacks is a control expansion terminal for custom...audio signals (p.41). Consult your dealer for connecting to an infrared signal receiver/emitter that support the trigger function (p.48). D RS-232C terminal ...3 NET ) 5V 0.5A PHONO AV 1 (1 BD/DVD) AV 2 AV 3 AV 4 GND L HDMI OUT 1 2 ARC (ZONE OUT) AV 1 (1 BD/DVD) AV 2 AV 3 HDMI AV 4 AV 5 AV 6 AV 7 AV OUT MONITOR OUT/ ZONE OUT Y AV 1 A COMPONENT VIDEO PB PR Y AV 3 PB C PR MONITOR OUT/ZONE...
...BI-AMP R EXTRA SP1 L ANTENNA (4 RADIO) AM FM 75Ω SINGLE AC IN (RX-V3075) * The area around the video/audio output jacks is a control expansion terminal for custom...audio signals (p.41). Consult your dealer for connecting to an infrared signal receiver/emitter that support the trigger function (p.48). D RS-232C terminal ...3 NET ) 5V 0.5A PHONO AV 1 (1 BD/DVD) AV 2 AV 3 AV 4 GND L HDMI OUT 1 2 ARC (ZONE OUT) AV 1 (1 BD/DVD) AV 2 AV 3 HDMI AV 4 AV 5 AV 6 AV 7 AV OUT MONITOR OUT/ ZONE OUT Y AV 1 A COMPONENT VIDEO PB PR Y AV 3 PB C PR MONITOR OUT/ZONE...

RX-V3075/V2075 Owners Manual
Page 15
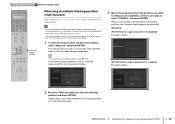
...MULTI MULTI CH INPUT jacks USB USB jack (on the backlight of the remote control keys for playback. F LIGHT key (RX-V3075 only) Turns on the front panel) NET NETWORK jack (press repeatedly to select a desired network source) TUNER FM/AM... radio [A], [B], [C] Change the external device to the previous screen. 0 MODE key Switches the iPod operation modes (p.75). Remote control 1 2 3 4 5 SOURCE RECEIVER AV 1 2 3 5 6 7 AUDIO 1 2 3 PHONO TUNER 1 MULTI USB [ A ] [ B ] SCENE 2 3 4 V-AUX 4 NET [ C ] 4 6 7 8 9 : 7 A B PROGRAM MUTE...
...MULTI MULTI CH INPUT jacks USB USB jack (on the backlight of the remote control keys for playback. F LIGHT key (RX-V3075 only) Turns on the front panel) NET NETWORK jack (press repeatedly to select a desired network source) TUNER FM/AM... radio [A], [B], [C] Change the external device to the previous screen. 0 MODE key Switches the iPod operation modes (p.75). Remote control 1 2 3 4 5 SOURCE RECEIVER AV 1 2 3 5 6 7 AUDIO 1 2 3 PHONO TUNER 1 MULTI USB [ A ] [ B ] SCENE 2 3 4 V-AUX 4 NET [ C ] 4 6 7 8 9 : 7 A B PROGRAM MUTE...

RX-V3075/V2075 Owners Manual
Page 16
... the party mode (p.93). Q LEVEL key Adjusts the volume of each device before using (p.133). (RX-V3075) FEATURES ➤ Part names and functions En 16 L ZONE key Changes the zone that is controlled... IN7PUT MU1T0E CLAS2SICAL MO5VIE TV 8 TV VOL 0 CLL3IVUEB STE6REO 9 TV CH ENT ENTERTAIN TUN./ CH STRAIGHT SDPLIRUEERECETP LEVEL ZONE SETUP M N O P Q R I J K L AV 1 2 3 5 6 7 AUDIO 1 2 3 PHONO TUNER 1 MULTI USB [ A ] [ B ] SCENE 2 3 4 V-AUX 4 NET [ C ] 4 PROGRAM MUTE... of the remote control cover SOURCE RECEIVER I Sound mode keys Select a sound mode (p.64).
... the party mode (p.93). Q LEVEL key Adjusts the volume of each device before using (p.133). (RX-V3075) FEATURES ➤ Part names and functions En 16 L ZONE key Changes the zone that is controlled... IN7PUT MU1T0E CLAS2SICAL MO5VIE TV 8 TV VOL 0 CLL3IVUEB STE6REO 9 TV CH ENT ENTERTAIN TUN./ CH STRAIGHT SDPLIRUEERECETP LEVEL ZONE SETUP M N O P Q R I J K L AV 1 2 3 5 6 7 AUDIO 1 2 3 PHONO TUNER 1 MULTI USB [ A ] [ B ] SCENE 2 3 4 V-AUX 4 NET [ C ] 4 PROGRAM MUTE... of the remote control cover SOURCE RECEIVER I Sound mode keys Select a sound mode (p.64).

RX-V3075/V2075 Owners Manual
Page 51
...you will be seated most frequently. 1 2 3 4 5 6 7 8 9 Automatic speaker setup SOURCE RECEIVER SOURCE/RECEIVER The following page to start the measurement. In this case, press SOURCE/RECEIVER (to light up to 8 different positions in orange) and then use the cursor keys. b Use ... remote control may be set to "No": "Measuring at the listening position you want others to select "Multi Position" (p.51) or "Angle" (p.52) (RX-V3075 only) and press ENTER. AV 1 2 3 5 6 7 AUDIO 1 2 3 PHONO TUNER 1 MULTI USB [ A ] [B] SCENE 2 3 4 V-AUX 4 NET [ C ] 4 PROGRAM MUTE...
...you will be seated most frequently. 1 2 3 4 5 6 7 8 9 Automatic speaker setup SOURCE RECEIVER SOURCE/RECEIVER The following page to start the measurement. In this case, press SOURCE/RECEIVER (to light up to 8 different positions in orange) and then use the cursor keys. b Use ... remote control may be set to "No": "Measuring at the listening position you want others to select "Multi Position" (p.51) or "Angle" (p.52) (RX-V3075 only) and press ENTER. AV 1 2 3 5 6 7 AUDIO 1 2 3 PHONO TUNER 1 MULTI USB [ A ] [B] SCENE 2 3 4 V-AUX 4 NET [ C ] 4 PROGRAM MUTE...

RX-V3075/V2075 Owners Manual
Page 53
... and press ENTER. The following screen appears on the TV when the measurement finishes. (RX-V2075) (RX-V3075 [when angle measurement is disabled]) Proceed to Step 3. (RX-V3075 [when angle measurement is set the YPAO microphone to select "YES" and press ENTER...; Optimizing the speaker settings automatically (YPAO) En 53 Use the tripod screws to fix the microphone base in 10 seconds. 1 2 3 4 5 6 7 8 9 Automatic speaker setup SOURCE RECEIVER AV 1 2 3 5 6 7 AUDIO 1 2 3 PHONO TUNER 1 MULTI USB [ A ] [B] SCENE 2 3 4 V-AUX 4 NET [ C ] 4 PROGRAM MUTE VOLUME TOP MENU...
... and press ENTER. The following screen appears on the TV when the measurement finishes. (RX-V2075) (RX-V3075 [when angle measurement is disabled]) Proceed to Step 3. (RX-V3075 [when angle measurement is set the YPAO microphone to select "YES" and press ENTER...; Optimizing the speaker settings automatically (YPAO) En 53 Use the tripod screws to fix the microphone base in 10 seconds. 1 2 3 4 5 6 7 8 9 Automatic speaker setup SOURCE RECEIVER AV 1 2 3 5 6 7 AUDIO 1 2 3 PHONO TUNER 1 MULTI USB [ A ] [B] SCENE 2 3 4 V-AUX 4 NET [ C ] 4 PROGRAM MUTE VOLUME TOP MENU...
RX-V3075/V2075 Owners Manual
Page 55
... keys to the next listening position and press ENTER. The following screen appears automatically. (RX-V2075) (RX-V3075 [when angle measurement is disabled]) Proceed to Step 5. (RX-V3075 [when angle measurement is set to "Yes", follow the procedure below for measurement...." (p.59) or "Warning messages" (p.60). 1 To start the measurement, use the cursor keys to start in 10 seconds. 1 2 3 4 5 6 7 8 9 Automatic speaker setup SOURCE RECEIVER AV 1 2 3 5 6 7 AUDIO 1 2 3 PHONO TUNER 1 MULTI USB [ A ] [B] SCENE 2 3 4 V-AUX 4 NET [ C ] 4 PROGRAM MUTE VOLUME TOP MENU ON ...
... keys to the next listening position and press ENTER. The following screen appears automatically. (RX-V2075) (RX-V3075 [when angle measurement is disabled]) Proceed to Step 5. (RX-V3075 [when angle measurement is set to "Yes", follow the procedure below for measurement...." (p.59) or "Warning messages" (p.60). 1 To start the measurement, use the cursor keys to start in 10 seconds. 1 2 3 4 5 6 7 8 9 Automatic speaker setup SOURCE RECEIVER AV 1 2 3 5 6 7 AUDIO 1 2 3 PHONO TUNER 1 MULTI USB [ A ] [B] SCENE 2 3 4 V-AUX 4 NET [ C ] 4 PROGRAM MUTE VOLUME TOP MENU ON ...

RX-V3075/V2075 Owners Manual
Page 57
... is connected with the correct polarity (+/-). Distance from the listening position to each speaker Output level adjustment for each speaker (RX-V3075 only) Angle of each speaker Normal: The speaker cable is sensitive to heat, so should not be placed anywhere ...). The following screen appears. • A speaker with a problem is indicated with the reverse polarity (+/-). 1 2 3 4 5 6 7 8 9 Automatic speaker setup SOURCE RECEIVER AV 1 2 3 5 6 7 AUDIO 1 2 3 PHONO TUNER 1 MULTI USB [ A ] [B] SCENE 2 3 4 V-AUX 4 NET [ C ] 4 PROGRAM MUTE VOLUME TOP MENU ON SCREEN...
... is connected with the correct polarity (+/-). Distance from the listening position to each speaker Output level adjustment for each speaker (RX-V3075 only) Angle of each speaker Normal: The speaker cable is sensitive to heat, so should not be placed anywhere ...). The following screen appears. • A speaker with a problem is indicated with the reverse polarity (+/-). 1 2 3 4 5 6 7 8 9 Automatic speaker setup SOURCE RECEIVER AV 1 2 3 5 6 7 AUDIO 1 2 3 PHONO TUNER 1 MULTI USB [ A ] [B] SCENE 2 3 4 V-AUX 4 NET [ C ] 4 PROGRAM MUTE VOLUME TOP MENU ON SCREEN...


