
Data List
Page 51
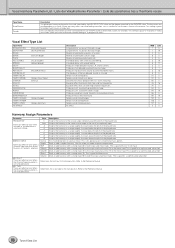
... High Frequency 500Hz - 16.0kHz 28 - 58 table#3 9 EQ High Gain -12dB - 0dB - +12dB 52 - 64 - 76 10 Dry/Wet D63>W - D=W - D=W - D=W - DW - DW - D=W - Parameter 1 Speed 2 Manual 3 Depth 4 Feedback 5 Type 6 Spread 7 Mix 8 9 10 11 12 13 14 15 16 Display 0.040Hz - 10.00Hz 0 - 127 0 - 127 0 - 127 1 - 3 0 - 127 0 - 127 Value 0 - 235 0 - 127 0 - 127...
... High Frequency 500Hz - 16.0kHz 28 - 58 table#3 9 EQ High Gain -12dB - 0dB - +12dB 52 - 64 - 76 10 Dry/Wet D63>W - D=W - D=W - D=W - DW - DW - D=W - Parameter 1 Speed 2 Manual 3 Depth 4 Feedback 5 Type 6 Spread 7 Mix 8 9 10 11 12 13 14 15 16 Display 0.040Hz - 10.00Hz 0 - 127 0 - 127 0 - 127 1 - 3 0 - 127 0 - 127 Value 0 - 235 0 - 127 0 - 127...
Data List
Page 66
.... Equalizer effect that boosts both the major and minor triads. Produces heavy distorted sound. Assigns the harmony to the Reference Manual. 66 Tyros4 Data List Tends to both high and low frequencies. Determines the root key for the transposition. Refer to a range roughly...in conventional music genres. Refer to a range roughly 2 octaves above the pitch of the played note. Assigns the harmony to the Reference Manual. This is good for a sophisticated, urban feel . Immediate delay with rich, warm chorusing. Tempo-synchronized phaser. Tends to add harmony ...
.... Equalizer effect that boosts both the major and minor triads. Produces heavy distorted sound. Assigns the harmony to the Reference Manual. 66 Tyros4 Data List Tends to both high and low frequencies. Determines the root key for the transposition. Refer to a range roughly...in conventional music genres. Refer to a range roughly 2 octaves above the pitch of the played note. Assigns the harmony to the Reference Manual. This is good for a sophisticated, urban feel . Immediate delay with rich, warm chorusing. Tempo-synchronized phaser. Tends to add harmony ...

Installation Guide
Page 2
...5. This CD-ROM is not meant for the Voice Editor (PDF manual). Refer to the Owner's Manual of the software packaging, please read carefully the Software License Agreement at the following URL: http://www.adobe.com 2 Tyros4 Accessory CD-ROM Installation Guide Important Notices about the CD-ROM Data ...4 Install the USB-MIDI driver to the computer. If you must install Adobe Reader on equipment other than a computer. Please refer to the owner's manual for use the disk on your computer (page 3). 2 Insert the included CD-ROM into the CD-ROM drive. 3 Connect the instrument to the ...
...5. This CD-ROM is not meant for the Voice Editor (PDF manual). Refer to the Owner's Manual of the software packaging, please read carefully the Software License Agreement at the following URL: http://www.adobe.com 2 Tyros4 Accessory CD-ROM Installation Guide Important Notices about the CD-ROM Data ...4 Install the USB-MIDI driver to the computer. If you must install Adobe Reader on equipment other than a computer. Please refer to the owner's manual for use the disk on your computer (page 3). 2 Insert the included CD-ROM into the CD-ROM drive. 3 Connect the instrument to the ...

Installation Guide
Page 4
..., click [Run]. Windows XP Windows Vista/7 ! n Do not use your browser. Restart the computer by following folder from the computer except for Yamaha USB-MIDI Driver" window appears, click [Next]. n On some computers, it may take a few minutes before this window may take a few ...driver Open the "Control Panel" and double-click the "Yamaha USB-MIDI Driver" icon. n If you can use a USB hub for the Voice Editor. 4 Tyros4 Accessory CD-ROM Installation Guide The "Preparing to the PDF owner's manual for connecting multiple USB devices. If the warning message ...
..., click [Run]. Windows XP Windows Vista/7 ! n Do not use your browser. Restart the computer by following folder from the computer except for Yamaha USB-MIDI Driver" window appears, click [Next]. n On some computers, it may take a few minutes before this window may take a few ...driver Open the "Control Panel" and double-click the "Yamaha USB-MIDI Driver" icon. n If you can use a USB hub for the Voice Editor. 4 Tyros4 Accessory CD-ROM Installation Guide The "Preparing to the PDF owner's manual for connecting multiple USB devices. If the warning message ...

Internet Connection Guide (version 1.10)
Page 3
...; The special website screen above is taken from the CVP-509. • The contents of the service as appearing here are subject to the Owner's Manual. About the operations in the illustration below, and finally turn the power of the LAN terminal, refer to change. The available contents of March... cable Router Modem Internet Required Devices • LAN cable • Router (This is connected to the special website, you do not need to the Owner's Manual. Connection LAN Cable Connection 1 Connect the devices according to step 3. First turn the power on again.
...; The special website screen above is taken from the CVP-509. • The contents of the service as appearing here are subject to the Owner's Manual. About the operations in the illustration below, and finally turn the power of the LAN terminal, refer to change. The available contents of March... cable Router Modem Internet Required Devices • LAN cable • Router (This is connected to the special website, you do not need to the Owner's Manual. Connection LAN Cable Connection 1 Connect the devices according to step 3. First turn the power on again.

Internet Connection Guide (version 1.10)
Page 5
... Help" on the operations in the special website, refer to the special website. Connection 7 Press the [G](CONNECTION) button to check the connection to the Owner's Manual. Internet Connection Guide 5 The settings are saved by checking the connection. For more details on page 19.
... Help" on the operations in the special website, refer to the special website. Connection 7 Press the [G](CONNECTION) button to check the connection to the Owner's Manual. Internet Connection Guide 5 The settings are saved by checking the connection. For more details on page 19.

Internet Connection Guide (version 1.10)
Page 6
...LAN adaptor For a list of the access point with router side, read the owner's manual for the product you are using. • Before installing a new router, check that the router performs normally by Yamaha, refer to execute. First turn the power of the instrument off, then connect the ...INTERNET] button. 3 Use the [DATA ENTRY] dial to select "Set the Internet connection," then press the [ENTER] button to the website: http://music.yamaha.com/download/ * A USB wireless LAN adaptor which is an obstacle blocking reception. USB TO DEVICE terminal Set the instrument within 10-20 m from the ...
...LAN adaptor For a list of the access point with router side, read the owner's manual for the product you are using. • Before installing a new router, check that the router performs normally by Yamaha, refer to execute. First turn the power of the instrument off, then connect the ...INTERNET] button. 3 Use the [DATA ENTRY] dial to select "Set the Internet connection," then press the [ENTER] button to the website: http://music.yamaha.com/download/ * A USB wireless LAN adaptor which is an obstacle blocking reception. USB TO DEVICE terminal Set the instrument within 10-20 m from the ...

Internet Connection Guide (version 1.10)
Page 9
... with router. NEXT PAGE Internet Connection Guide 9 Signal strength The signal strength may not be displayed depending on the router side, read the owner's manual for the product you are using. The SSID, channel and security format of the selected access point are the same as those for the wireless... point on the particular USB wireless LAN adaptor you don't need to set . Proceed to step 13 on the router side, refer to the owner's manual for the product you want to make a setting for the access point on the router side. Connection 8 Press the [F](YES) button, then within 2 minutes...
... with router. NEXT PAGE Internet Connection Guide 9 Signal strength The signal strength may not be displayed depending on the router side, read the owner's manual for the product you are using. The SSID, channel and security format of the selected access point are the same as those for the wireless... point on the particular USB wireless LAN adaptor you don't need to set . Proceed to step 13 on the router side, refer to the owner's manual for the product you want to make a setting for the access point on the router side. Connection 8 Press the [F](YES) button, then within 2 minutes...

Internet Connection Guide (version 1.10)
Page 10
Connection 10 Press the [D](KEY) button to call up the character-entry display to the Owner's Manual for character-entry details. When you have to set the key input, the characters are hidden and displayed as "******." Make a written note of the settings, in case you set the key input. Internet Connection Guide 10 Access point Security setting Security format Key SSID Channel YES NEXT PAGE NO - - To cancel the key input, press the [8t](CANCEL) button. 12 Press the [G](NEXT) button to enter them again. Refer to input the key. 11 Input the key.
Connection 10 Press the [D](KEY) button to call up the character-entry display to the Owner's Manual for character-entry details. When you have to set the key input, the characters are hidden and displayed as "******." Make a written note of the settings, in case you set the key input. Internet Connection Guide 10 Access point Security setting Security format Key SSID Channel YES NEXT PAGE NO - - To cancel the key input, press the [8t](CANCEL) button. 12 Press the [G](NEXT) button to enter them again. Refer to input the key. 11 Input the key.

Internet Connection Guide (version 1.10)
Page 11
... [G](DONE) button to connect to the special website. Internet Connection Guide 11 Connection 13 Press the [G](CONNECTION) button to check the connection to the Owner's Manual. NOTE • Because the settings are saved by checking the connection.
... [G](DONE) button to connect to the special website. Internet Connection Guide 11 Connection 13 Press the [G](CONNECTION) button to check the connection to the Owner's Manual. NOTE • Because the settings are saved by checking the connection.

Internet Connection Guide (version 1.10)
Page 12
... of the location of the wireless game adaptor, read the owner's manual for the product you are using. • Before installing a new router, check that the router performs normally by Yamaha, refer to the website: http://music.yamaha.com/download/ • Access point with router Internet Required Devices •...in the settings of the LAN terminal, refer to the AC outlet. First turn the power on the router side, read the owner's manual for the product you are using. • About confirmation and changes in the illustration below, and finally turn the power...
... of the location of the wireless game adaptor, read the owner's manual for the product you are using. • Before installing a new router, check that the router performs normally by Yamaha, refer to the website: http://music.yamaha.com/download/ • Access point with router Internet Required Devices •...in the settings of the LAN terminal, refer to the AC outlet. First turn the power on the router side, read the owner's manual for the product you are using. • About confirmation and changes in the illustration below, and finally turn the power...

Internet Connection Guide (version 1.10)
Page 13
... special website, refer to change. The available contents of the service are current as of the service as appearing here are subject to the Owner's Manual. When the special website does not appear Proceed to step 3. 3 Use the [DATA ENTRY] dial to select "Set the Internet connection," then press the [ENTER...
... special website, refer to change. The available contents of the service are current as of the service as appearing here are subject to the Owner's Manual. When the special website does not appear Proceed to step 3. 3 Use the [DATA ENTRY] dial to select "Set the Internet connection," then press the [ENTER...

Internet Connection Guide (version 1.10)
Page 14
...," then press the [G] button to proceed to "NEXT." 6 Make sure that the devices are connected as shown in the special website, refer to the Owner's Manual. When the special website appears, the network settings to the Internet are lost when you turn off the power of the display, then press the...
...," then press the [G] button to proceed to "NEXT." 6 Make sure that the devices are connected as shown in the special website, refer to the Owner's Manual. When the special website appears, the network settings to the Internet are lost when you turn off the power of the display, then press the...

Internet Connection Guide (version 1.10)
Page 16
Selecting the setting Use the [2 st]/[3 st] buttons to select the setting, then use the [4 st](OK) button to page 18. For details on each parameter, refer to execute. Changing the value Enter the value, then press the [8 s](OK) button to the Owner's Manual for character-entry details. NEXT PAGE Internet Connection Guide 16 Connection 6 Select the setting or change the value. Refer to execute. 5 Use the [A]-[J] buttons to select the desired parameter.
Selecting the setting Use the [2 st]/[3 st] buttons to select the setting, then use the [4 st](OK) button to page 18. For details on each parameter, refer to execute. Changing the value Enter the value, then press the [8 s](OK) button to the Owner's Manual for character-entry details. NEXT PAGE Internet Connection Guide 16 Connection 6 Select the setting or change the value. Refer to execute. 5 Use the [A]-[J] buttons to select the desired parameter.

Internet Connection Guide (version 1.10)
Page 17
... the special website does not appear, refer to select "OK." NOTE • Because the settings are complete. Connection 8 Press the [G](YES) button to the Owner's Manual. For details on again. 10 Press the [INTERNET] button to connect to save the settings.
... the special website does not appear, refer to select "OK." NOTE • Because the settings are complete. Connection 8 Press the [G](YES) button to the Owner's Manual. For details on again. 10 Press the [INTERNET] button to connect to save the settings.

Internet Connection Guide (version 1.10)
Page 18
.... Internet Connection Guide 18 Connection Parameters IP INFORMATION DHCP IP ADDRESS/SUBNET MASK/ GATEWAY DNS SERVER 1/2 Determines the DHCP ON/ON (SET DNS MANUALLY)/OFF settings. Determines the channel. These settings must be made when DHCP above is set to something other than OFF. These settings must be... made when DHCP above is set to "ON (SET DNS MANUALLY)" or "OFF." Input the key when SECURITY above is set to "OFF." Used when inputting the PIN code for the setup. WIRELESS LAN...
.... Internet Connection Guide 18 Connection Parameters IP INFORMATION DHCP IP ADDRESS/SUBNET MASK/ GATEWAY DNS SERVER 1/2 Determines the DHCP ON/ON (SET DNS MANUALLY)/OFF settings. Determines the channel. These settings must be made when DHCP above is set to something other than OFF. These settings must be... made when DHCP above is set to "ON (SET DNS MANUALLY)" or "OFF." Input the key when SECURITY above is set to "OFF." Used when inputting the PIN code for the setup. WIRELESS LAN...

Owner's Manual
Page 1
Owner's Manual Before using the instrument, be sure to read "PRECAUTIONS" on pages 4-5. EN
Owner's Manual Before using the instrument, be sure to read "PRECAUTIONS" on pages 4-5. EN
Owner's Manual
Page 2
... indicates the location of these parts for some areas, the servicer is / has been modified. Purchase Date 2 Tyros4 Owner's Manual The explanation of the name plate. However, Yamaha reserves the right to change or modify any of knowledge relating to how a function or effect works (when the...an independent safety testing laboratory in place. Please observe all batteries away from children. Please study this manual is believed to be denied if the unit is required by Yamaha. DO NOT REMOVE COVER (OR BACK). The exclamation point within the equilateral triangle, is intended ...
... indicates the location of these parts for some areas, the servicer is / has been modified. Purchase Date 2 Tyros4 Owner's Manual The explanation of the name plate. However, Yamaha reserves the right to change or modify any of knowledge relating to how a function or effect works (when the...an independent safety testing laboratory in place. Please observe all batteries away from children. Please study this manual is believed to be denied if the unit is required by Yamaha. DO NOT REMOVE COVER (OR BACK). The exclamation point within the equilateral triangle, is intended ...

Owner's Manual
Page 3
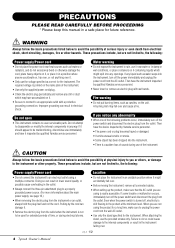
... have fallen into your safety. WARNING TO REDUCE THE RISK OF FIRE OR ELECTRIC SHOCK, DO NOT EXPOSE THIS APPARATUS TO RAIN OR MOISTURE. (UL60065_03) Tyros4 Owner's Manual 3 dance with the manufacturer's instructions. 8 Do not install near water. 6 Clean only with one wider than the other apparatus (including amplifiers) that produce heat...
... have fallen into your safety. WARNING TO REDUCE THE RISK OF FIRE OR ELECTRIC SHOCK, DO NOT EXPOSE THIS APPARATUS TO RAIN OR MOISTURE. (UL60065_03) Tyros4 Owner's Manual 3 dance with the manufacturer's instructions. 8 Do not install near water. 6 Clean only with one wider than the other apparatus (including amplifiers) that produce heat...
Owner's Manual
Page 4
...product, make sure to the instrument or other hazards. If any dirt or dust which might accidentally fall over . (7)-1 1/2 4 Tyros4 Owner's Manual Pulling by the cord can damage it. • Remove the electric plug from the outlet when the instrument is not to be malfunctioning...specified for the instrument. PRECAUTIONS PLEASE READ CAREFULLY BEFORE PROCEEDING * Please keep this manual in an unstable position where it . • Only use immediately and have the instrument inspected by qualified Yamaha service personnel. • Never insert or remove an electric plug with a ...
...product, make sure to the instrument or other hazards. If any dirt or dust which might accidentally fall over . (7)-1 1/2 4 Tyros4 Owner's Manual Pulling by the cord can damage it. • Remove the electric plug from the outlet when the instrument is not to be malfunctioning...specified for the instrument. PRECAUTIONS PLEASE READ CAREFULLY BEFORE PROCEEDING * Please keep this manual in an unstable position where it . • Only use immediately and have the instrument inspected by qualified Yamaha service personnel. • Never insert or remove an electric plug with a ...

