
Setup Guide
Page 1
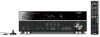
Easy Setup Guide NATURAL SOUND AV RECEIVER RX-V571 YPAO MIC INFO MEMORY PRESET FM AM TUNING PHONES USB SILENT CINEMA iPod/iPhone INPUT BD DVD SCENE TV CD TONE CONTROL PROGRAM RADIO STRAIGHT VIDEO AUX HDMI IN VIDEO L AUDIO R DIRECT VOLUME The Easy Setup Guide explains the general procedures for better use. • " " indicates the cautions concerning operations or setup of this guide. † Speaker cable (for connection according to the "Owner's Manual" contained in this guide and the "Owner's Manual" can be downloaded from BD/DVD. About the symbols in...
Easy Setup Guide NATURAL SOUND AV RECEIVER RX-V571 YPAO MIC INFO MEMORY PRESET FM AM TUNING PHONES USB SILENT CINEMA iPod/iPhone INPUT BD DVD SCENE TV CD TONE CONTROL PROGRAM RADIO STRAIGHT VIDEO AUX HDMI IN VIDEO L AUDIO R DIRECT VOLUME The Easy Setup Guide explains the general procedures for better use. • " " indicates the cautions concerning operations or setup of this guide. † Speaker cable (for connection according to the "Owner's Manual" contained in this guide and the "Owner's Manual" can be downloaded from BD/DVD. About the symbols in...

Setup Guide
Page 2
Other layouts (except for 5.1-channel speaker layout and 7.1-channel speaker layout) are shown in as shown below. 2 Placing speakers Place the speakers in the "Owner's Manual." 5.1-channel system 7.1-channel system 60° 60° 80° 80° 2 60° 60° 80° 80° 30 cm (1 ft.) or more FL FR C SL SR SBL SBR SW Front speaker (L) Front speaker (R) Center speaker Surround speaker (L) Surround speaker (R) Surround back speaker (L) Surround back speaker (R) Subwoofer
Other layouts (except for 5.1-channel speaker layout and 7.1-channel speaker layout) are shown in as shown below. 2 Placing speakers Place the speakers in the "Owner's Manual." 5.1-channel system 7.1-channel system 60° 60° 80° 80° 2 60° 60° 80° 80° 30 cm (1 ft.) or more FL FR C SL SR SBL SBR SW Front speaker (L) Front speaker (R) Center speaker Surround speaker (L) Surround speaker (R) Surround back speaker (L) Surround back speaker (R) Subwoofer

Setup Guide
Page 3
and Canada models) Use the speakers with an impedance of at least 6Ω. • Use a subwoofer with the metal areas of terminal. 4 Tighten the terminal. Banana plug 1 Connect the front speakers ( / ) to the The unit (rear) R FRONT L CENTER R SURROUND L SURROUND BACK/ R BI-AMP L SINGLE SPEAKERS SUBWOOFER 3 If the speaker cables short circuit, "CHECK SP WIRES!" If the wires are colorcoded to prevent confusion, you should connect the black side to the negative...
and Canada models) Use the speakers with an impedance of at least 6Ω. • Use a subwoofer with the metal areas of terminal. 4 Tighten the terminal. Banana plug 1 Connect the front speakers ( / ) to the The unit (rear) R FRONT L CENTER R SURROUND L SURROUND BACK/ R BI-AMP L SINGLE SPEAKERS SUBWOOFER 3 If the speaker cables short circuit, "CHECK SP WIRES!" If the wires are colorcoded to prevent confusion, you should connect the black side to the negative...

Setup Guide
Page 4
... unit (rear) R FRONT L CENTER R SURROUND L SURROUND BACK/ R BI-AMP L SINGLE SPEAKERS SUBWOOFER SPEAKERS SUBWOOFER For the 7.1-channel system Connect the surround back speakers ( / ) to the SURROUND ( / ) terminals. The unit (rear) R FRONT L CENTER R SURROUND L SURROUND BACK/ R BI-AMP L SINGLE 4 Connect the subwoofer ( SUBWOOFER jack. ) to connect the subwoofer. Monaural pin cable 4 The unit (rear) R FRONT L CENTER R SURROUND L SURROUND BACK/ R BI-AMP L SINGLE SPEAKERS SUBWOOFER Use a monaural pin cable to the Before connecting the subwoofer, turn off...
... unit (rear) R FRONT L CENTER R SURROUND L SURROUND BACK/ R BI-AMP L SINGLE SPEAKERS SUBWOOFER SPEAKERS SUBWOOFER For the 7.1-channel system Connect the surround back speakers ( / ) to the SURROUND ( / ) terminals. The unit (rear) R FRONT L CENTER R SURROUND L SURROUND BACK/ R BI-AMP L SINGLE 4 Connect the subwoofer ( SUBWOOFER jack. ) to connect the subwoofer. Monaural pin cable 4 The unit (rear) R FRONT L CENTER R SURROUND L SURROUND BACK/ R BI-AMP L SINGLE SPEAKERS SUBWOOFER Use a monaural pin cable to the Before connecting the subwoofer, turn off...

Setup Guide
Page 5
... (Digital optical) TV HDMI input HDMI output OPTICAL BD/DVD player HDMI HDMI O HDMI HDMI HDMI HDMI OUT jack ARC HDMI HDMI 1 HDMI1 jack (General model only) Set the switch position of the VOLTAGE SELECTOR according to your local voltage BEFORE plugging the power cable into an electric outlet Turn on the unit NATURAL SOUND AV RECEIVER RX-V571 YPAO MIC INFO MEMORY PRESET FM AM TUNING PHONES USB SILENT CINEMA iPod/iPhone INPUT BD DVD SCENE TV CD TONE CONTROL PROGRAM RADIO STRAIGHT The unit (front) VIDEO AUX HDMI IN VIDEO L AUDIO R DIRECT VOLUME 1 Connect...
... (Digital optical) TV HDMI input HDMI output OPTICAL BD/DVD player HDMI HDMI O HDMI HDMI HDMI HDMI OUT jack ARC HDMI HDMI 1 HDMI1 jack (General model only) Set the switch position of the VOLTAGE SELECTOR according to your local voltage BEFORE plugging the power cable into an electric outlet Turn on the unit NATURAL SOUND AV RECEIVER RX-V571 YPAO MIC INFO MEMORY PRESET FM AM TUNING PHONES USB SILENT CINEMA iPod/iPhone INPUT BD DVD SCENE TV CD TONE CONTROL PROGRAM RADIO STRAIGHT The unit (front) VIDEO AUX HDMI IN VIDEO L AUDIO R DIRECT VOLUME 1 Connect...

Setup Guide
Page 6
... DVD SETUP SCENE TV CD RADIO OPTION ENTER VOLUME RETURN DISPLAY SETUP Cursor keys ENTER RETURN VOLUME CROSSOVER/ HIGH CUT TOP MENU MODE POP-UP MUTE MENU MIN MAX MIN MAX • When a subwoofer with "Language" in the room. If you are in the "Setup" menu referring to "Owner's Manual" (p.75). • Turn on the next page. • If a message such as a microphone stand. The unit (front) CODE SET SOURCE RECEIVER HDMI 1 2 3 4 5 1 5 TUNER AV 2 3 V-AUX 4 6 AUDIO...
... DVD SETUP SCENE TV CD RADIO OPTION ENTER VOLUME RETURN DISPLAY SETUP Cursor keys ENTER RETURN VOLUME CROSSOVER/ HIGH CUT TOP MENU MODE POP-UP MUTE MENU MIN MAX MIN MAX • When a subwoofer with "Language" in the room. If you are in the "Setup" menu referring to "Owner's Manual" (p.75). • Turn on the next page. • If a message such as a microphone stand. The unit (front) CODE SET SOURCE RECEIVER HDMI 1 2 3 4 5 1 5 TUNER AV 2 3 V-AUX 4 6 AUDIO...

Setup Guide
Page 7
... red-boxed "Reverse." b Confirm that "Save / Exit" is selected, and then press ENTER. Press RETURN, and go to heat. If the speakers are connected incorrectly: Turn off the unit and connect the speaker cables again, and then try YPAO measurement again. 7 3 Confirm that "Wiring" is selected. When "W-1: Out of the measurement. Warning messages may appear depending on the left column. Protect...
... red-boxed "Reverse." b Confirm that "Save / Exit" is selected, and then press ENTER. Press RETURN, and go to heat. If the speakers are connected incorrectly: Turn off the unit and connect the speaker cables again, and then try YPAO measurement again. 7 3 Confirm that "Wiring" is selected. When "W-1: Out of the measurement. Warning messages may appear depending on the left column. Protect...

Setup Guide
Page 8
... 2 Play a BD/DVD with a BD/DVD player. 3 Press VOLUME to select "HDMI1" as PCM). RETURN TOP MENU MODE VOLUME VOLUME POP-UP MUTE 1 2 3 4 5 6 7 8 9 INPUT MUTE 0 10 TV TV VOL TV CH ENT • "STRAIGHT" is only output from each speaker. More various features! CODE SET SOURCE RECEIVER HDMI 1 2 3 4 5 1 5 TUNER AV 2 3 V-AUX 4 6 AUDIO DOCK USB HDMI1 1 Press HDMI1 to adjust the volume. can play an iPod with the unit using a USB cable supplied with the unit. 6 Playing back a BD/DVD Let's play...
... 2 Play a BD/DVD with a BD/DVD player. 3 Press VOLUME to select "HDMI1" as PCM). RETURN TOP MENU MODE VOLUME VOLUME POP-UP MUTE 1 2 3 4 5 6 7 8 9 INPUT MUTE 0 10 TV TV VOL TV CH ENT • "STRAIGHT" is only output from each speaker. More various features! CODE SET SOURCE RECEIVER HDMI 1 2 3 4 5 1 5 TUNER AV 2 3 V-AUX 4 6 AUDIO DOCK USB HDMI1 1 Press HDMI1 to adjust the volume. can play an iPod with the unit using a USB cable supplied with the unit. 6 Playing back a BD/DVD Let's play...


