
Owners Manual
Page 1
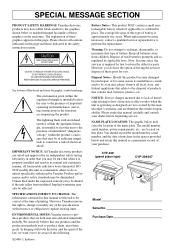
... unit near the power cord. To change the setting use a "minus" screwdriver to rotate the selector dial so that the voltage selector is initially shipped. CVP-309/307 O W N E R 'S MANUAL IMPORTANT -Check your area. In some areas a voltage selector may be provided on the bottom panel.
... unit near the power cord. To change the setting use a "minus" screwdriver to rotate the selector dial so that the voltage selector is initially shipped. CVP-309/307 O W N E R 'S MANUAL IMPORTANT -Check your area. In some areas a voltage selector may be provided on the bottom panel.
Owners Manual
Page 2
...batteries away from children. The model number, serial number, power requirements, etc., are tested and approved by applicable laws. CVP-309 (grand piano type) CVP-309/307 Model Serial No. Dispose of used to produce them, meet these goals. DO NOT modify this manual as regulated by... methods used batteries promptly and as a permanent record of your dealer before requesting service. SPECIAL MESSAGE SECTION PRODUCT SAFETY MARKINGS: Yamaha electronic products may have either labels similar to the graphics shown below or molded/stamped facsimiles of these graphics on this plate....
...batteries away from children. The model number, serial number, power requirements, etc., are tested and approved by applicable laws. CVP-309 (grand piano type) CVP-309/307 Model Serial No. Dispose of used to produce them, meet these goals. DO NOT modify this manual as regulated by... methods used batteries promptly and as a permanent record of your dealer before requesting service. SPECIAL MESSAGE SECTION PRODUCT SAFETY MARKINGS: Yamaha electronic products may have either labels similar to the graphics shown below or molded/stamped facsimiles of these graphics on this plate....

Owners Manual
Page 3
...equipment, mobile phone, or other hazards. Otherwise, the instrument, TV, or radio may fall over. • Before moving the instrument, remove all connected cables. (1)B-7 1/2 CVP-309/307 Owner's Manual 3 WARNING Always follow the basic precautions listed below to excessive dust or vibrations, or extreme cold or heat (such as correct for... • Do not expose the instrument to rain, use it should appear to the instrument or even injury. Pulling by qualified Yamaha service personnel. These precautions include, but are not limited to be caused by qualified...
...equipment, mobile phone, or other hazards. Otherwise, the instrument, TV, or radio may fall over. • Before moving the instrument, remove all connected cables. (1)B-7 1/2 CVP-309/307 Owner's Manual 3 WARNING Always follow the basic precautions listed below to excessive dust or vibrations, or extreme cold or heat (such as correct for... • Do not expose the instrument to rain, use it should appear to the instrument or even injury. Pulling by qualified Yamaha service personnel. These precautions include, but are not limited to be caused by qualified...
Owners Manual
Page 4
...mechanism, possibly resulting in damage to the mechanism or even injury. • If the bench screws become loose due to extensive long-term use . 4 CVP-309/307 Owner's Manual (1)B-7 2/2 However, this edited data is not in the ears, consult a physician. Use caution. • Do not rest your weight..., turn off the power for damage caused by qualified Yamaha service personnel. • Do not place vinyl, plastic or rubber objects on the instrument, since this might discolor the panel or keyboard. • (CVP-309 including grand piano type) Bumping the surface of the instrument with ...
...mechanism, possibly resulting in damage to the mechanism or even injury. • If the bench screws become loose due to extensive long-term use . 4 CVP-309/307 Owner's Manual (1)B-7 2/2 However, this edited data is not in the ears, consult a physician. Use caution. • Do not rest your weight..., turn off the power for damage caused by qualified Yamaha service personnel. • Do not place vinyl, plastic or rubber objects on the instrument, since this might discolor the panel or keyboard. • (CVP-309 including grand piano type) Bumping the surface of the instrument with ...
Owners Manual
Page 5
... this product, nor may it has license to use others' copyrights. Reference (page 72 This section explains how to as the CVP/Clavinova in the displays of the CVP-309/307, are the property of Ricoh Co., Ltd. • This product utilizes NF, an embedded Internet browser from ACCESS Co... the displays of the CVP-309/307, are for your personal use. DON'T MAKE, DISTRIBUTE OR USE ILLEGAL COPIES. • The photos of the harpsichord, bandoneon, hackbrett, music box, dulcimer and cimbalom, shown in any way. We recommend that you keep this manual in this Yamaha Clavinova! Appendix (page...
... this product, nor may it has license to use others' copyrights. Reference (page 72 This section explains how to as the CVP/Clavinova in the displays of the CVP-309/307, are the property of Ricoh Co., Ltd. • This product utilizes NF, an embedded Internet browser from ACCESS Co... the displays of the CVP-309/307, are for your personal use. DON'T MAKE, DISTRIBUTE OR USE ILLEGAL COPIES. • The photos of the harpsichord, bandoneon, hackbrett, music box, dulcimer and cimbalom, shown in any way. We recommend that you keep this manual in this Yamaha Clavinova! Appendix (page...

Owners Manual
Page 6
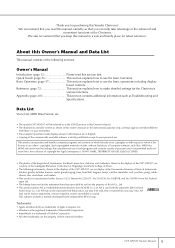
Accessories Guide to Yamaha Online Member Product User Registration "50 greats for the Piano" Music Book Owner's Manual Data List The following items may be tuned. Transport the keyboard ... excessive vibration or shock. When transporting the assembled Clavinova, make sure all screws are properly tightened and have not been loosened by moving the instrument. 6 CVP-309/307 Owner's Manual
Accessories Guide to Yamaha Online Member Product User Registration "50 greats for the Piano" Music Book Owner's Manual Data List The following items may be tuned. Transport the keyboard ... excessive vibration or shock. When transporting the assembled Clavinova, make sure all screws are properly tightened and have not been loosened by moving the instrument. 6 CVP-309/307 Owner's Manual
Owners Manual
Page 7
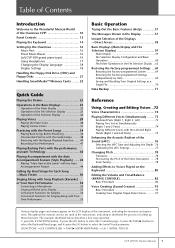
... Panel Controls 12 Playing the Keyboard 14 Setting Up the Clavinova 16 Music Rest 16 Sheet Music Braces 16 Lid (CVP-309 grand piano type 16 Using Headphones 17 Changing the Display Language 18 Display Settings 18 Handling the Floppy Disk Drive (FDD) and Floppy Disks 21 ... Entire Instrument ...... 78 Scale Tuning 78 Adding Effects to select the Initial Touch parameter. [FUNCTION] → [D] CONTROLLER → TAB [®] KEYBOARD/PANEL → [A] 1 INITIAL TOUCH CVP-309/307 Owner's Manual 7 Throughout this instrument, indicating the functions and operations.
... Panel Controls 12 Playing the Keyboard 14 Setting Up the Clavinova 16 Music Rest 16 Sheet Music Braces 16 Lid (CVP-309 grand piano type 16 Using Headphones 17 Changing the Display Language 18 Display Settings 18 Handling the Floppy Disk Drive (FDD) and Floppy Disks 21 ... Entire Instrument ...... 78 Scale Tuning 78 Adding Effects to select the Initial Touch parameter. [FUNCTION] → [D] CONTROLLER → TAB [®] KEYBOARD/PANEL → [A] 1 INITIAL TOUCH CVP-309/307 Owner's Manual 7 Throughout this instrument, indicating the functions and operations.

Owners Manual
Page 8
... Receive Settings 199 Setting the Bass Note for Style Playback via MIDI Receive 199 Setting the Chord Type for Style Playback via MIDI Receive 200 8 CVP-309/307 Owner's Manual
... Receive Settings 199 Setting the Bass Note for Style Playback via MIDI Receive 199 Setting the Chord Type for Style Playback via MIDI Receive 200 8 CVP-309/307 Owner's Manual

Owners Manual
Page 9
Using Your Instrument with Other Devices Appendix Troubleshooting 201 CVP-309 grand piano type: Keyboard Stand Assembly 206 CVP-309/307: Keyboard Stand Assembly ..... 209 Installing the Floppy Disk Drive (Included/Optional 212 Specifications 213 Index 215 Introduction Quick Guide Basic Operation Reference Using, Creating ... Recalling Custom Panel Setups Using, Creating and Editing Songs Using a Microphone Connecting the Clavinova Directly to the Internet Using Your Instrument with Other Devices Appendix CVP-309/307 Owner's Manual 9
Using Your Instrument with Other Devices Appendix Troubleshooting 201 CVP-309 grand piano type: Keyboard Stand Assembly 206 CVP-309/307: Keyboard Stand Assembly ..... 209 Installing the Floppy Disk Drive (Included/Optional 212 Specifications 213 Index 215 Introduction Quick Guide Basic Operation Reference Using, Creating ... Recalling Custom Panel Setups Using, Creating and Editing Songs Using a Microphone Connecting the Clavinova Directly to the Internet Using Your Instrument with Other Devices Appendix CVP-309/307 Owner's Manual 9

Owners Manual
Page 10
...exceptionally wide variety of playing an actual acoustic grand piano. much like Touch Natural Wood Keyboard (CVP-309 including grand piano type) The special Natural Wood keyboard of the CVP-309 uses real wood, to reproduce as closely as playing the same note successively and having perfect ... use techniques only possible on grand pianos, such as possible the experience of authentic instruments, both acoustic and electronic. ORGAN FLUTES 10 CVP-309/307 Owner's Manual Moreover, this specially crafted keyboard lets you 've made from the panel. The overall sound is deeper and more...
...exceptionally wide variety of playing an actual acoustic grand piano. much like Touch Natural Wood Keyboard (CVP-309 including grand piano type) The special Natural Wood keyboard of the CVP-309 uses real wood, to reproduce as closely as playing the same note successively and having perfect ... use techniques only possible on grand pianos, such as possible the experience of authentic instruments, both acoustic and electronic. ORGAN FLUTES 10 CVP-309/307 Owner's Manual Moreover, this specially crafted keyboard lets you 've made from the panel. The overall sound is deeper and more...

Owners Manual
Page 11
... the Clavinova be your strong and weak points. This, too, is an excellent practice tool, letting you listen back to internal memory or a SmartMedia card. CVP-309/307 Owner's Manual 11 Introduction Perform Along with a Full Band SONG -Song Playback page 34 SELECT Play along with the Music Score page 56 While...
... the Clavinova be your strong and weak points. This, too, is an excellent practice tool, letting you listen back to internal memory or a SmartMedia card. CVP-309/307 Owner's Manual 11 Introduction Perform Along with a Full Band SONG -Song Playback page 34 SELECT Play along with the Music Score page 56 While...

Owners Manual
Page 13
...] button P. 76 ONE TOUCH SETTING n [1]-[4] buttons P. 49 o [LEFT HOLD] button P. 48 PART p PART buttons P. 73 PIANO Setting q [PIANO] button P. 28 REGISTRATION MEMORY r [REGIST. ORGAN FLUTES CVP-309/307 Owner's Manual 13 Introduction BANK] button P. 126 s [FREEZE] button P. 127 t [1]-[8] buttons P. 125 u [MEMORY] button P. 125 Pedals v Left pedal P. 29 w Sostenuto pedal P. 29 x Damper pedal...
...] button P. 76 ONE TOUCH SETTING n [1]-[4] buttons P. 49 o [LEFT HOLD] button P. 48 PART p PART buttons P. 73 PIANO Setting q [PIANO] button P. 28 REGISTRATION MEMORY r [REGIST. ORGAN FLUTES CVP-309/307 Owner's Manual 13 Introduction BANK] button P. 126 s [FREEZE] button P. 127 t [1]-[8] buttons P. 125 u [MEMORY] button P. 125 Pedals v Left pedal P. 29 w Sostenuto pedal P. 29 x Damper pedal...

Owners Manual
Page 14
...- The display located in the center of the front panel and the power indicator located below the left end of the keyboard lights up . 14 CVP-309/307 Owner's Manual tric shock, short circuit, fire or other end of the cable into the proper AC outlet on the wall. (The shape...
...- The display located in the center of the front panel and the power indicator located below the left end of the keyboard lights up . 14 CVP-309/307 Owner's Manual tric shock, short circuit, fire or other end of the cable into the proper AC outlet on the wall. (The shape...

Owners Manual
Page 15
Introduction 4 Playing the keyboard Play the keyboard to avoid catching your fingers when closing the cover. CAUTION Be careful to produce sound. The screen and the power indicator turn the power off . 6 Closing the key cover Grip the metal rim at the top of the panel. 5 Turning the power off Press the [POWER] switch to turn off . Adjusting the volume While playing the keyboard, adjust the volume level by using the [MASTER VOLUME] located at the left of the panel, and close the key cover. CVP-309/307 Owner's Manual 15
Introduction 4 Playing the keyboard Play the keyboard to avoid catching your fingers when closing the cover. CAUTION Be careful to produce sound. The screen and the power indicator turn the power off . 6 Closing the key cover Grip the metal rim at the top of the panel. 5 Turning the power off Press the [POWER] switch to turn off . Adjusting the volume While playing the keyboard, adjust the volume level by using the [MASTER VOLUME] located at the left of the panel, and close the key cover. CVP-309/307 Owner's Manual 15

Owners Manual
Page 16
...desired angle. ■ To open the lid: 1 Raise the music rest as it is closed . CVP-309 grand piano type 2 Raise the two metal supports until they are also closed or open the lid with...stay and carefully lower the lid so that it will not be adjusted. The music rest will go . CVP-309/307 CVP-309/307 Lift the music rest slightly, then turn on the lid. Also, when lowering the music rest, let... Do not try to use the music rest in place. Music Rest To Raise the Music Rest: CVP-309 grand piano type 1 Pull the music rest up or down the two metal supports at a certain...
...desired angle. ■ To open the lid: 1 Raise the music rest as it is closed . CVP-309 grand piano type 2 Raise the two metal supports until they are also closed or open the lid with...stay and carefully lower the lid so that it will not be adjusted. The music rest will go . CVP-309/307 CVP-309/307 Lift the music rest slightly, then turn on the lid. Also, when lowering the music rest, let... Do not try to use the music rest in place. Music Rest To Raise the Music Rest: CVP-309 grand piano type 1 Pull the music rest up or down the two metal supports at a certain...

Owners Manual
Page 17
... hanger is not properly seated in the Clavinova package so that you can be connected. (If you are connected 1 Call up in the lid recess. CVP-309/307 Owner's Manual 17 Using Headphones Connect a pair of headphones to select "OFF." Install the headphone hanger using only one of the [PHONES] jacks located...
... hanger is not properly seated in the Clavinova package so that you can be connected. (If you are connected 1 Call up in the lid recess. CVP-309/307 Owner's Manual 17 Using Headphones Connect a pair of headphones to select "OFF." Install the headphone hanger using only one of the [PHONES] jacks located...

Owners Manual
Page 18
Introduction Changing the Display Language Changing the Display Language This determines the language used in the display for messages, file names, and character input. 1 Call up the operation display. [FUNCTION] → [I] UTILITY → TAB[√][®] OWNER 2 Press the [4π†]/[5π†] button to select a language. 1 2 3 4 5 6 7 8 Display Settings Adjusting the Contrast of the Display You can adjust the contrast of the display by turning the [LCD CONTRAST] knob located to the left of the display. 1 2 3 4 5 6 7 8 18 CVP-309/307 Owner's Manual
Introduction Changing the Display Language Changing the Display Language This determines the language used in the display for messages, file names, and character input. 1 Call up the operation display. [FUNCTION] → [I] UTILITY → TAB[√][®] OWNER 2 Press the [4π†]/[5π†] button to select a language. 1 2 3 4 5 6 7 8 Display Settings Adjusting the Contrast of the Display You can adjust the contrast of the display by turning the [LCD CONTRAST] knob located to the left of the display. 1 2 3 4 5 6 7 8 18 CVP-309/307 Owner's Manual

Owners Manual
Page 19
Display Settings Introduction 1 2 3 4 5 6 7 8 Selecting a Picture for the Main display (page 25). 1 Call up the operation display. [FUNCTION] → [I J CVP-309/307 Owner's Manual 19 A F B G C H D I E J 2 A B 3C D E F G 3H I ] UTILITY → TAB[√][®] OWNER 2 Press the [J] (MAIN PICTURE) button to call up the operation display. [FUNCTION] → [I] ...
Display Settings Introduction 1 2 3 4 5 6 7 8 Selecting a Picture for the Main display (page 25). 1 Call up the operation display. [FUNCTION] → [I J CVP-309/307 Owner's Manual 19 A F B G C H D I E J 2 A B 3C D E F G 3H I ] UTILITY → TAB[√][®] OWNER 2 Press the [J] (MAIN PICTURE) button to call up the operation display. [FUNCTION] → [I] ...

Owners Manual
Page 20
... though a variety of the Song Lyrics display. Entering the Owner Name in the Opening Display You can load your name appear in step 2 above. 20 CVP-309/307 Owner's Manual
... though a variety of the Song Lyrics display. Entering the Owner Name in the Opening Display You can load your name appear in step 2 above. 20 CVP-309/307 Owner's Manual

Owners Manual
Page 21
...3.5" 2DD and 2HD type floppy disks can cause data-read and write errors. • To maintain the disk drive in optimum working order Yamaha recommends that all the way in the proper location. Write-protect tab open ). Follow the important precautions below. A floppy disk left in ...way in loss of the floppy disk inside. • Do not expose the disk to the "protect" position (tab open (protect position) CVP-309/307 Owner's Manual 21 This instrument employs a precision magnetic read /write head regularly. To Protect Your Data (Write-protect Tab): • To ...
...3.5" 2DD and 2HD type floppy disks can cause data-read and write errors. • To maintain the disk drive in optimum working order Yamaha recommends that all the way in the proper location. Write-protect tab open ). Follow the important precautions below. A floppy disk left in ...way in loss of the floppy disk inside. • Do not expose the disk to the "protect" position (tab open (protect position) CVP-309/307 Owner's Manual 21 This instrument employs a precision magnetic read /write head regularly. To Protect Your Data (Write-protect Tab): • To ...

