
Owner's Manual
Page 1
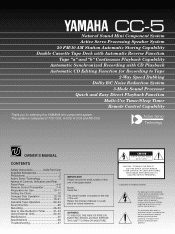
... OR MOISTURE. Active Servo Technology OWNER'S MANUAL CONTENTS Safety Instructions Inside Front Cover Supplied Accessories 1 Precautions 2 Active Servo Technology 3 Names of important operating and maintenance (servicing) instructions in Timer...........31-33 Using External Units 34-35 Maintenance 35 Specifications 36 Troubleshooting 37 IMPORTANT! Please record the serial number of the unit. CC-5 Natural Sound Mini Component System Active Servo Processing Speaker System 20 FM/10 AM Station Automatic Storing Capability Double Cassette Tape Deck with...
... OR MOISTURE. Active Servo Technology OWNER'S MANUAL CONTENTS Safety Instructions Inside Front Cover Supplied Accessories 1 Precautions 2 Active Servo Technology 3 Names of important operating and maintenance (servicing) instructions in Timer...........31-33 Using External Units 34-35 Maintenance 35 Specifications 36 Troubleshooting 37 IMPORTANT! Please record the serial number of the unit. CC-5 Natural Sound Mini Component System Active Servo Processing Speaker System 20 FM/10 AM Station Automatic Storing Capability Double Cassette Tape Deck with...

Owner's Manual
Page 2
... Mounting - The digital device component may cause the unit and cart combination to avoid prolonged exposure from the unit. 12 Cleaning - NATIONAL ELECTRICAL CODE ANTENNA LEAD IN WIRE ANTENNA DISCHARGE UNIT (NEC SECTION 810-20) GROUNDING CONDUCTORS (NEC SECTION 810-21) GROUND CLAMPS POWER SERVICE GROUNDING ELECTRODE SYSTEM (NEC ART 250. All the safety and operating instructions should be used only with a cart...
... Mounting - The digital device component may cause the unit and cart combination to avoid prolonged exposure from the unit. 12 Cleaning - NATIONAL ELECTRICAL CODE ANTENNA LEAD IN WIRE ANTENNA DISCHARGE UNIT (NEC SECTION 810-20) GROUNDING CONDUCTORS (NEC SECTION 810-21) GROUND CLAMPS POWER SERVICE GROUNDING ELECTRODE SYSTEM (NEC ART 250. All the safety and operating instructions should be used only with a cart...

Owner's Manual
Page 3
.... The above statements apply ONLY to those products distributed by using one of this type of other electronic devices. Remote control transmitter Indoor FM antenna 1 2 3 4 5 6 7 8 9 0 PROG CLEAR CALL TIME +10 REPEAT b a CD BAND TUNER HALL JAZZ CLUB ROCK CNCT OFF TAPE POWER AUX DAT - VOLUME + Speaker cords MW/LW(AM) loop antenna Batteries (size AA, UM/SUM-3, R6, HP-7) E-1 Follow all installations. In the case of America or...
.... The above statements apply ONLY to those products distributed by using one of this type of other electronic devices. Remote control transmitter Indoor FM antenna 1 2 3 4 5 6 7 8 9 0 PROG CLEAR CALL TIME +10 REPEAT b a CD BAND TUNER HALL JAZZ CLUB ROCK CNCT OFF TAPE POWER AUX DAT - VOLUME + Speaker cords MW/LW(AM) loop antenna Batteries (size AA, UM/SUM-3, R6, HP-7) E-1 Follow all installations. In the case of America or...

Owner's Manual
Page 4
... dust, heat, cold or moisture. Using this product with the volume control setting at least for any damage resulting from the wall socket. Refer servicing to the wall socket before you want to switch off condensation on the rear of this unit at high, and to continuous high levels of sound, which controls this compact disc player is harmful to the eyes, do...
... dust, heat, cold or moisture. Using this product with the volume control setting at least for any damage resulting from the wall socket. Refer servicing to the wall socket before you want to switch off condensation on the rear of this unit at high, and to continuous high levels of sound, which controls this compact disc player is harmful to the eyes, do...

Owner's Manual
Page 6
.... TIMER Set Indicator 30. BAND Selector Button 34. TUNER PRESET Buttons: / 35. Stop Button: 17. Preset Number Indicator 24. Band Indicator 25. TUNING Up/MINUTE Button: 35 36 37 38 39 40 41 E-4 Track Number Indicator 4. Music Schedule Indicator 12. MEMORY Indicator 27. Tape Side Indicators 11. Disc Table 19. AUTO MEMORY Button 33. TIME OVER Indicator 3. RANDOM Play Indicator 14. AUTO ST Indicator 28. FM STEREO Indicator 29. DISPLAY Button 36. MEMORY/TIME ADJUST Button...
.... TIMER Set Indicator 30. BAND Selector Button 34. TUNER PRESET Buttons: / 35. Stop Button: 17. Preset Number Indicator 24. Band Indicator 25. TUNING Up/MINUTE Button: 35 36 37 38 39 40 41 E-4 Track Number Indicator 4. Music Schedule Indicator 12. MEMORY Indicator 27. Tape Side Indicators 11. Disc Table 19. AUTO MEMORY Button 33. TIME OVER Indicator 3. RANDOM Play Indicator 14. AUTO ST Indicator 28. FM STEREO Indicator 29. DISPLAY Button 36. MEMORY/TIME ADJUST Button...

Owner's Manual
Page 8
... different areas, set for your area. System Control Socket Speaker Section 14. SPEAKERS Terminals 7. Rear Panel of Tuner/CD Player Section 1. VOLTAGE SELECTOR (General model only) 11. Before setting this switch, disconnect the AC supply lead of Amplifier Section 5. PHONO Terminals and GND Terminal 9. AST Port 15. AUX Terminals 10. System Control Connector 2. Voltages are 110/120/220/240V AC, 50/60 Hz. NAMES OF CONTROLS, INDICATORS AND REAR PANEL PARTS Rear Panel of Tape Deck Section...
... different areas, set for your area. System Control Socket Speaker Section 14. SPEAKERS Terminals 7. Rear Panel of Tuner/CD Player Section 1. VOLTAGE SELECTOR (General model only) 11. Before setting this switch, disconnect the AC supply lead of Amplifier Section 5. PHONO Terminals and GND Terminal 9. AST Port 15. AUX Terminals 10. System Control Connector 2. Voltages are 110/120/220/240V AC, 50/60 Hz. NAMES OF CONTROLS, INDICATORS AND REAR PANEL PARTS Rear Panel of Tape Deck Section...

Owner's Manual
Page 13
... • Do not let the bare speaker wires touch each other as this could damage the amplifier and/or speakers. • When connecting the speakers to the unit, be used for the minus (-) terminal. • Do not connect these SPEAKERS terminals to disconnect the connector. Connecting the AC supply lead • After connecting the speakers and system connectors, plug the AC supply lead into a convenient AC outlet. •...
... • Do not let the bare speaker wires touch each other as this could damage the amplifier and/or speakers. • When connecting the speakers to the unit, be used for the minus (-) terminal. • Do not connect these SPEAKERS terminals to disconnect the connector. Connecting the AC supply lead • After connecting the speakers and system connectors, plug the AC supply lead into a convenient AC outlet. •...

Owner's Manual
Page 14
.... E-12 Changes. When the AC power supply is disconnected. Europe model uses an "00:00" 24-hour display. COMPACT DISC OPERATION 1 While the station frequency indicator on the disc surface. The clock display will not advance even if minutes advance from "59" to "00". 4 Release the TIME ADJUST button to advance the time by the edges. If a CD is lit, press the DISPLAY button to display the time. 2 While pressing the TIME ADJUST button, press...
.... E-12 Changes. When the AC power supply is disconnected. Europe model uses an "00:00" 24-hour display. COMPACT DISC OPERATION 1 While the station frequency indicator on the disc surface. The clock display will not advance even if minutes advance from "59" to "00". 4 Release the TIME ADJUST button to advance the time by the edges. If a CD is lit, press the DISPLAY button to display the time. 2 While pressing the TIME ADJUST button, press...

Owner's Manual
Page 15
.... * The music schedule will be displayed only for the number of tracks Total playing time TOTAL Remaining playing time for the STANDBY indicator and the current time display.) E-13 To stop playback Press the stop " " button. COMPACT DISC OPERATION 2,4 5 POWER 1 1 POWER 1 2 3 4 5 6 7 8 9 0 PROG CLEAR CALL TIME +10 REPEAT b a CD BAND TUNER HALL JAZZ CLUB ROCK CNCT OFF TAPE POWER AUX DAT - VOLUME + 2,4 1 5,2 CD playback 1 Select the CD position. 2 Press the open/close button to open the disc table. 3 Place a disc on...
.... * The music schedule will be displayed only for the number of tracks Total playing time TOTAL Remaining playing time for the STANDBY indicator and the current time display.) E-13 To stop playback Press the stop " " button. COMPACT DISC OPERATION 2,4 5 POWER 1 1 POWER 1 2 3 4 5 6 7 8 9 0 PROG CLEAR CALL TIME +10 REPEAT b a CD BAND TUNER HALL JAZZ CLUB ROCK CNCT OFF TAPE POWER AUX DAT - VOLUME + 2,4 1 5,2 CD playback 1 Select the CD position. 2 Press the open/close button to open the disc table. 3 Place a disc on...

Owner's Manual
Page 16
... is moving. • Press the open /close button if your finger, a disc or other object is recommended to be played directly. Note A track number higher than the number of tracks on the remote control transmitter, any track you wish to listen to select the desired track number. COMPACT DISC OPERATION 1 2 3 4 5 6 7 8 9 0 PROG CLEAR CALL TIME +10 REPEAT b a CD BAND TUNER HALL JAZZ CLUB ROCK CNCT OFF TAPE POWER AUX DAT -
... is moving. • Press the open /close button if your finger, a disc or other object is recommended to be played directly. Note A track number higher than the number of tracks on the remote control transmitter, any track you wish to listen to select the desired track number. COMPACT DISC OPERATION 1 2 3 4 5 6 7 8 9 0 PROG CLEAR CALL TIME +10 REPEAT b a CD BAND TUNER HALL JAZZ CLUB ROCK CNCT OFF TAPE POWER AUX DAT -

Owner's Manual
Page 18
... CLEAR button while the disc is stopped and the "PROGRAM" indicator is lit. * To cancel the last programmed track during playback or pause to check the number of the next track to start playback of the programmed tracks will be played. COMPACT DISC OPERATION 2 1 2 3 4 5 6 7 8 9 0 PROG CLEAR CALL TIME +10 REPEAT b a CD BAND TUNER HALL JAZZ CLUB ROCK CNCT OFF TAPE POWER AUX DAT - VOLUME + 3 5 Playback order Total playing time PROGRAM TOTAL...
... CLEAR button while the disc is stopped and the "PROGRAM" indicator is lit. * To cancel the last programmed track during playback or pause to check the number of the next track to start playback of the programmed tracks will be played. COMPACT DISC OPERATION 2 1 2 3 4 5 6 7 8 9 0 PROG CLEAR CALL TIME +10 REPEAT b a CD BAND TUNER HALL JAZZ CLUB ROCK CNCT OFF TAPE POWER AUX DAT - VOLUME + 3 5 Playback order Total playing time PROGRAM TOTAL...

Owner's Manual
Page 22
... be preset (preset channels 1 through 20). * 10 AM (LW or MW) stations can be preset (preset channels 1 through 20 for more than 0.5 second and then released, the tuning stops at the first receivable broadcast station. Manual tuning Press the TUNING ( or ) button repeatedly to adjust the frequency display to the frequency of the "Auto scan memory" section. 2 Use the TUNING ( or ) button to tune into the desired station. E-20 TUNER OPERATION 3,5 24 Manual memory When auto...
... be preset (preset channels 1 through 20). * 10 AM (LW or MW) stations can be preset (preset channels 1 through 20 for more than 0.5 second and then released, the tuning stops at the first receivable broadcast station. Manual tuning Press the TUNING ( or ) button repeatedly to adjust the frequency display to the frequency of the "Auto scan memory" section. 2 Use the TUNING ( or ) button to tune into the desired station. E-20 TUNER OPERATION 3,5 24 Manual memory When auto...

Owner's Manual
Page 23
... station received even after changing the BAND selector button or setting the unit to the STANDBY mode. 2 Disconnect the AC supply lead from the AC outlet. 3 Press the RESET button for at least 60 seconds. VOLUME + 1 2 To recall a memorized station 1 Select the TUNER position. 2 Select the desired frequency band. [FM or AM (LW or MW)] 3 Press the TUNER PRESET ( or ) button to the STANDBY mode by pressing the POWER switch...
... station received even after changing the BAND selector button or setting the unit to the STANDBY mode. 2 Disconnect the AC supply lead from the AC outlet. 3 Press the RESET button for at least 60 seconds. VOLUME + 1 2 To recall a memorized station 1 Select the TUNER position. 2 Select the desired frequency band. [FM or AM (LW or MW)] 3 Press the TUNER PRESET ( or ) button to the STANDBY mode by pressing the POWER switch...

Owner's Manual
Page 28
if not, set the DOLBY NR switch to B or C; To stop .) E-26 VOLUME + 1 1 6,2 • Adjusting the VOLUME, BALANCE, TREBLE and BASS controls and selecting any SOUND PROCESSOR program have no effect on side A of the tape. Recording from the CD player (CD Synchronized Recording System) 1 Select the CD position and load the CD to be recorded. 2 Load a tape into the tape "b" cassette compartment. * Wind past the beginning part of the tape on...
if not, set the DOLBY NR switch to B or C; To stop .) E-26 VOLUME + 1 1 6,2 • Adjusting the VOLUME, BALANCE, TREBLE and BASS controls and selecting any SOUND PROCESSOR program have no effect on side A of the tape. Recording from the CD player (CD Synchronized Recording System) 1 Select the CD position and load the CD to be recorded. 2 Load a tape into the tape "b" cassette compartment. * Wind past the beginning part of the tape on...

Owner's Manual
Page 30
... B are displayed for approximately 4 seconds. (When there are automatically divided between side A and side B to B or C; VOLUME + 1 8 To edit tracks dividing them to side A and side B automatically (Auto editing function) To use the track number input buttons on the remote control to set the DOLBY NR switch to best utilize the length of the tape. When the desired tracks are selected in program selection, the...
... B are displayed for approximately 4 seconds. (When there are automatically divided between side A and side B to B or C; VOLUME + 1 8 To edit tracks dividing them to side A and side B automatically (Auto editing function) To use the track number input buttons on the remote control to set the DOLBY NR switch to best utilize the length of the tape. When the desired tracks are selected in program selection, the...

Owner's Manual
Page 31
... the TIME button. RECORDING 1 2 3 4 5 6 7 8 9 0 PROG CLEAR CALL TIME +10 REPEAT b a CD BAND TUNER HALL JAZZ CLUB ROCK CNCT OFF TAPE POWER AUX DAT - Dubbing • During dubbing, adjusting the VOLUME, BALANCE, TREBLE and BASS controls and selecting any sound processor program have no effect on the recorded sound. • Try to use the same tape formula and length for the recording tape as for the master tape. 1 Select the TAPE...
... the TIME button. RECORDING 1 2 3 4 5 6 7 8 9 0 PROG CLEAR CALL TIME +10 REPEAT b a CD BAND TUNER HALL JAZZ CLUB ROCK CNCT OFF TAPE POWER AUX DAT - Dubbing • During dubbing, adjusting the VOLUME, BALANCE, TREBLE and BASS controls and selecting any sound processor program have no effect on the recorded sound. • Try to use the same tape formula and length for the recording tape as for the master tape. 1 Select the TAPE...

Owner's Manual
Page 33
Timer operation To listen to the tuner 1 Select the TUNER position. 2 Tune to the desired station. (Refer to the "TUNER OPERATION" on page 19.) 3 Press the DISPLAY button. 4 While the "TIMER" indicator is flashing, and while pressing the TIME ADJUST button, press the HOUR and MINUTE buttons to set the desired time. 5 Release the TIME ADJUST button. * When the start time of the side which corresponds to the play button which illuminated just before the timer setting was...
Timer operation To listen to the tuner 1 Select the TUNER position. 2 Tune to the desired station. (Refer to the "TUNER OPERATION" on page 19.) 3 Press the DISPLAY button. 4 While the "TIMER" indicator is flashing, and while pressing the TIME ADJUST button, press the HOUR and MINUTE buttons to set the desired time. 5 Release the TIME ADJUST button. * When the start time of the side which corresponds to the play button which illuminated just before the timer setting was...

Owner's Manual
Page 34
...-IN TIMER POWER DISPLAY VOLUME 21 To record tuner programs 1 Load a blank cassette tape into the tape "b" cassette compartment. 2 Set the TIMER switch to the REC position. 3 Perform steps 1 - 5 of the "To listen to the PLAY position. To cancel the timer operation Press the POWER switch. * The "TIMER" indicator will go out. * Unless the AC supply lead is unplugged or there is reset. To confirm the timer time setting Press the DISPLAY button. Notes...
...-IN TIMER POWER DISPLAY VOLUME 21 To record tuner programs 1 Load a blank cassette tape into the tape "b" cassette compartment. 2 Set the TIMER switch to the REC position. 3 Perform steps 1 - 5 of the "To listen to the PLAY position. To cancel the timer operation Press the POWER switch. * The "TIMER" indicator will go out. * Unless the AC supply lead is unplugged or there is reset. To confirm the timer time setting Press the DISPLAY button. Notes...

Owner's Manual
Page 38
... 165 W [Australia, Europe, U.K. and Canada models AM; 530 - 1,720 kHz [Australia and General models AM; 530 - 1,620 kHz [U.K. peak) s Amplifier section Power Supply [U.S.A. The performance specification figures indicated are nominal values of continuous improvement, YAMAHA reserves the right to make design and specification changes for product improvement without prior notice. s Tuner/CD player section Power source AC supplies from amplifier unit Tape Compact cassette tape Frequency response (Playback) ..... 30 - 13,000...
... 165 W [Australia, Europe, U.K. and Canada models AM; 530 - 1,720 kHz [Australia and General models AM; 530 - 1,620 kHz [U.K. peak) s Amplifier section Power Supply [U.S.A. The performance specification figures indicated are nominal values of continuous improvement, YAMAHA reserves the right to make design and specification changes for product improvement without prior notice. s Tuner/CD player section Power source AC supplies from amplifier unit Tape Compact cassette tape Frequency response (Playback) ..... 30 - 13,000...

Owner's Manual
Page 39
... the power cord and contact your authorized YAMAHA dealer or service center for the electric field strength of nearby car. Buzzing or static during stereo broadcasts. Play does not begin even if disc is being used at incorrect angle. Can't find specific selections on and off using . Antenna input is being used . Radio signal is weak or antenna is being used when tape was recorded. Conversation etc. Remote control is...
... the power cord and contact your authorized YAMAHA dealer or service center for the electric field strength of nearby car. Buzzing or static during stereo broadcasts. Play does not begin even if disc is being used at incorrect angle. Can't find specific selections on and off using . Antenna input is being used . Radio signal is weak or antenna is being used when tape was recorded. Conversation etc. Remote control is...


