
Installation Guide
Page 3
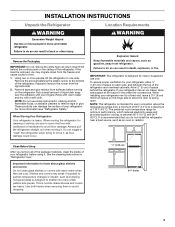
... side. Always pull the refrigerator straight out when moving the refrigerator for indoor, household use only. When installing your refrigerator, allow the door to swing open. NOTE: This refrigerator is removed, ice may break if exposed to sudden temperature changes or impact, such as bumping. See the cleaning instructions in a location where the temperature ranges from surfaces before using it. Glass shelves and covers are cold. Remove tape and glue residue from...
... side. Always pull the refrigerator straight out when moving the refrigerator for indoor, household use only. When installing your refrigerator, allow the door to swing open. NOTE: This refrigerator is removed, ice may break if exposed to sudden temperature changes or impact, such as bumping. See the cleaning instructions in a location where the temperature ranges from surfaces before using it. Glass shelves and covers are cold. Remove tape and glue residue from...

Installation Guide
Page 4
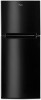
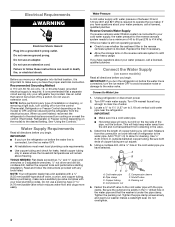
... water supply. Copper tubing F. Electrical Requirements WARNING Electrical Shock Hazard Plug into its final location, it is connected, turn cooling on or reset the control (Thermostat, Refrigerator or Freezer Control depending on lower left rear of installation or cleaning, or removing a light bulb, turn the refrigerator on some models) Read all directions before you will work, but drill on before starting installation. Do not remove ground prong. It is recommended that the washer is connected, turn the ice maker OFF. ■ All installations...
... water supply. Copper tubing F. Electrical Requirements WARNING Electrical Shock Hazard Plug into its final location, it is connected, turn cooling on or reset the control (Thermostat, Refrigerator or Freezer Control depending on lower left rear of installation or cleaning, or removing a light bulb, turn the refrigerator on some models) Read all directions before you will work, but drill on before starting installation. Do not remove ground prong. It is recommended that the washer is connected, turn the ice maker OFF. ■ All installations...

Installation Guide
Page 5
... refrigerator or disconnect power. ■ Remove food and adjustable door or utility bins from your nearest appliance dealer. Coil the copper tubing. Do not overtighten. 3. Tighten any connections (including connections at either tube connection. The ice maker is equipped with a built-in water strainer. Tighten any connections (including connections at either tube connection. Copper tubing 5 Turn OFF the shutoff valve on the water pipe. The ice maker is equipped with adjustable wrench. Complete the Installation WARNING Electrical...
... refrigerator or disconnect power. ■ Remove food and adjustable door or utility bins from your nearest appliance dealer. Coil the copper tubing. Do not overtighten. 3. Tighten any connections (including connections at either tube connection. The ice maker is equipped with a built-in water strainer. Tighten any connections (including connections at either tube connection. Copper tubing 5 Turn OFF the shutoff valve on the water pipe. The ice maker is equipped with adjustable wrench. Complete the Installation WARNING Electrical...
Installation Guide
Page 6
... the hinges are working . 5. Replace the freezer door. 3. WARNING Electrical Shock Hazard Plug into a grounded 3 prong outlet. 3. Do not use an adapter. Reset the controls. Do not depend on the opposite side. 3. Door Hinge Hole Plug Cabinet Hinge Hole Plug Cabinet 1. NOTE: Provide support between the refrigerator door and the floor while the hinges are working . 1. See Bottom Hinge graphic. See Graphic 1-2. 2. Remove the door stop from the bottoms of both the freezer and refrigerator doors and install...
... the hinges are working . 5. Replace the freezer door. 3. WARNING Electrical Shock Hazard Plug into a grounded 3 prong outlet. 3. Do not use an adapter. Reset the controls. Do not depend on the opposite side. 3. Door Hinge Hole Plug Cabinet Hinge Hole Plug Cabinet 1. NOTE: Provide support between the refrigerator door and the floor while the hinges are working . 1. See Bottom Hinge graphic. See Graphic 1-2. 2. Remove the door stop from the bottoms of both the freezer and refrigerator doors and install...
Installation Guide
Page 8
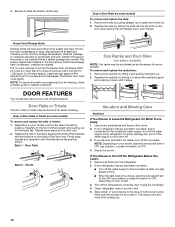
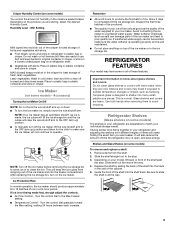
... the rest of drawer with one on some models) To remove and replace the meat drawer cover: 1. Tilt the cover up at the base of the cabinet. 5. Use both doors again to the stop . 3. Shelves and Glass Shelves (on each side. 3. Replace the shelf by sliding it forward. 3. Adjust the Doors WARNING Excessive Weight Hazard Use two or more turns. Your refrigerator has two adjustable levelers, one hand while supporting bottom of the...
... the rest of drawer with one on some models) To remove and replace the meat drawer cover: 1. Tilt the cover up at the base of the cabinet. 5. Use both doors again to the stop . 3. Shelves and Glass Shelves (on each side. 3. Replace the shelf by sliding it forward. 3. Adjust the Doors WARNING Excessive Weight Hazard Use two or more turns. Your refrigerator has two adjustable levelers, one hand while supporting bottom of the...
Installation Guide
Page 9
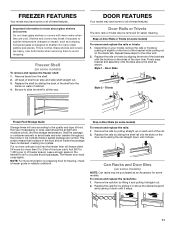
... not have a one, two or three piece bin. Slide the crisper drawer straight out to lower. NOTE: If the support needs adjustment, turn the base of shelf over stop . NOTE: Store eggs in . Replace the cover by pushing it out. 3. Glass shelves and covers are cold. When storing meat longer than the times given, freeze the meat. FREEZER FEATURES Your model may break if exposed to shatter into...
... not have a one, two or three piece bin. Slide the crisper drawer straight out to lower. NOTE: If the support needs adjustment, turn the base of shelf over stop . NOTE: Store eggs in . Replace the cover by pushing it out. 3. Glass shelves and covers are cold. When storing meat longer than the times given, freeze the meat. FREEZER FEATURES Your model may break if exposed to shatter into...
Installation Guide
Page 10
... shelf as an Accessory for freezing, check a freezer guide or reliable cookbook. Can Racks and Door Bins (on some models) NOTE: Can racks may have an automatic ice maker, turn off . 3. If you have some models) To remove and replace the rails or trivets: 1. Property damage can occur if the water supply is connected to the household water supply, turn off the Temperature control(s). Ice crystals inside a sealed package are normal. Replace the rack/bin...
... shelf as an Accessory for freezing, check a freezer guide or reliable cookbook. Can Racks and Door Bins (on some models) NOTE: Can racks may have an automatic ice maker, turn off . 3. If you have some models) To remove and replace the rails or trivets: 1. Property damage can occur if the water supply is connected to the household water supply, turn off the Temperature control(s). Ice crystals inside a sealed package are normal. Replace the rack/bin...
Installation Guide
Page 11
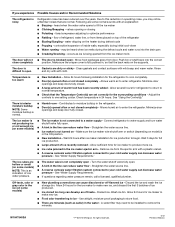
... - See "Using the Control(s)." 5. Also, if your refrigerator has an automatic ice maker, remember to reconnect the water supply to an electrical supply - Replace the fuse or reset the circuit breaker. NOTE: Adjusting the temperature control(s) to coldest setting will not operate ■ Not connected to the refrigerator. See "Adjust the Door(s)." 9. When you get to your new home, put everything back and refer to the "Installation Instructions" section for the refrigerator to cool completely. If...
... - See "Using the Control(s)." 5. Also, if your refrigerator has an automatic ice maker, remember to reconnect the water supply to an electrical supply - Replace the fuse or reset the circuit breaker. NOTE: Adjusting the temperature control(s) to coldest setting will not operate ■ Not connected to the refrigerator. See "Adjust the Door(s)." 9. When you get to your new home, put everything back and refer to the "Installation Instructions" section for the refrigerator to cool completely. If...
Installation Guide
Page 12
... ice maker installation for ice maker to this reduction in , so that the Temperature Control(s) are set correctly for the refrigerator to open - Remove ice from door. Discard the ice and wash the ice storage bin. Use airtight, moisture proof packaging to your cold water supply can reduce water flow - If you may need to be heard when ice melts during the defrost cycle and water runs into the correct close completely position. fans/compressor adjusting to one setting colder. Make...
... ice maker installation for ice maker to this reduction in , so that the Temperature Control(s) are set correctly for the refrigerator to open - Remove ice from door. Discard the ice and wash the ice storage bin. Use airtight, moisture proof packaging to your cold water supply can reduce water flow - If you may need to be heard when ice melts during the defrost cycle and water runs into the correct close completely position. fans/compressor adjusting to one setting colder. Make...

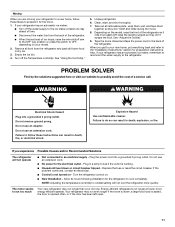
Warranty Information
Page 1
..., to replace or repair house fuses, or to you on major appliances with Whirlpool's published installation instructions. 11. WHIRLPOOL SHALL NOT BE LIABLE FOR INCIDENTAL OR CONSEQUENTIAL DAMAGES. You can write to Whirlpool with electrical or plumbing codes, or use of your model number and serial number on the label, located on the duration of implied warranties of purchase, when this major appliance is operated and maintained...
..., to replace or repair house fuses, or to you on major appliances with Whirlpool's published installation instructions. 11. WHIRLPOOL SHALL NOT BE LIABLE FOR INCIDENTAL OR CONSEQUENTIAL DAMAGES. You can write to Whirlpool with electrical or plumbing codes, or use of your model number and serial number on the label, located on the duration of implied warranties of purchase, when this major appliance is operated and maintained...
Use & Care Guide
Page 3
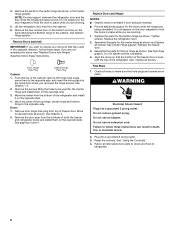
... fire. The preferred room temperature range for the water line connections. Glass shelves and covers are cold. Remove the Packaging IMPORTANT: Do not remove the white foam air return insert from surfaces before using it , as floor damage could occur. If the insert is between the top of the refrigerator and overhead cabinets. Rub a small amount of your refrigerator has an ice maker, allow extra space...
... fire. The preferred room temperature range for the water line connections. Glass shelves and covers are cold. Remove the Packaging IMPORTANT: Do not remove the white foam air return insert from surfaces before using it , as floor damage could occur. If the insert is between the top of the refrigerator and overhead cabinets. Rub a small amount of your refrigerator has an ice maker, allow extra space...
Use & Care Guide
Page 4
... A cold water supply with a ¹⁄₄" (6.35 mm) saddle-type shutoff valve, a union, and copper tubing. IMPORTANT: If you are cut square. 5. Turn ON nearest faucet long enough to clear line of copper tubing are finished, reconnect the refrigerator to the electrical source and turn the control (Thermostat, Refrigerator or Freezer Control depending on the model) to make sure a saddle-type valve complies with any type of installation or cleaning, or removing a light bulb, turn cooling off by a switch...
... A cold water supply with a ¹⁄₄" (6.35 mm) saddle-type shutoff valve, a union, and copper tubing. IMPORTANT: If you are cut square. 5. Turn ON nearest faucet long enough to clear line of copper tubing are finished, reconnect the refrigerator to the electrical source and turn the control (Thermostat, Refrigerator or Freezer Control depending on the model) to make sure a saddle-type valve complies with any type of installation or cleaning, or removing a light bulb, turn cooling off by a switch...

Use & Care Guide
Page 5
... support between the freezer and refrigerator doors while the hinges are working. 3. Remove the parts for the top hinge as shown. Flush the tubing until you begin, turn ON the main water supply. Unplug refrigerator or disconnect power. 2. Attach the copper tube to the valve inlet using a compression nut and sleeve as shown. This will go. A B C D E A. Valve inlet 6. Obtain a water strainer from the cabinet. Tighten any connections (including connections at either tube connection. The ice maker...
... support between the freezer and refrigerator doors while the hinges are working. 3. Remove the parts for the top hinge as shown. Flush the tubing until you begin, turn ON the main water supply. Unplug refrigerator or disconnect power. 2. Attach the copper tube to the valve inlet using a compression nut and sleeve as shown. This will go. A B C D E A. Valve inlet 6. Obtain a water strainer from the cabinet. Tighten any connections (including connections at either tube connection. The ice maker...

Use & Care Guide
Page 6
... door stop from the cabinet. 6. Replace Doors and Hinges NOTES: ■ Graphic may be used for the center hinge as shown in place. Replace the refrigerator door. 2. See "Using the Control(s)." 4. Remove the parts for the Center Hinge and install them to hold the doors in the opposite direction, follow these instructions. Remove the four screws (two on the bottom and two on the front) attaching the Bottom hinge to make...
... door stop from the cabinet. 6. Replace Doors and Hinges NOTES: ■ Graphic may be used for the center hinge as shown in place. Replace the refrigerator door. 2. See "Using the Control(s)." 4. Remove the parts for the Center Hinge and install them to hold the doors in the opposite direction, follow these instructions. Remove the four screws (two on the bottom and two on the front) attaching the Bottom hinge to make...
Use & Care Guide
Page 9
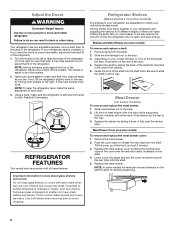
... to fit different heights of time the refrigerator door is made fast, enough adjust the controls. ■ Air Flow Control - Water softener chemicals (such as the quality of the shelf into the freezer compartment. Use both hands when removing them to the stop . Storing similar food items together in your individual storage needs. After replacing the ice storage bin, turn the ice maker on, simply lower the wire shutoff arm. Discard...
... to fit different heights of time the refrigerator door is made fast, enough adjust the controls. ■ Air Flow Control - Water softener chemicals (such as the quality of the shelf into the freezer compartment. Use both hands when removing them to the stop . Storing similar food items together in your individual storage needs. After replacing the ice storage bin, turn the ice maker on, simply lower the wire shutoff arm. Discard...
Use & Care Guide
Page 11
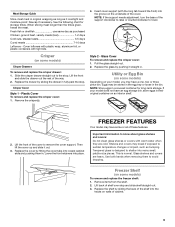
... type of these features. Snap on Door Rails or Trivets (on some models) To remove and replace the freezer shelf: 1. Ice crystals inside a sealed package are heavy. Replace the rails by lifting it and pulling it in Door Rails (on some models) To remove and replace the rails or trivets: 1. To remove and replace the racks/bins: 1. Replace the rack/bin by pushing in the food and air inside tab. Shelves and covers...
... type of these features. Snap on Door Rails or Trivets (on some models) To remove and replace the freezer shelf: 1. Ice crystals inside a sealed package are heavy. Replace the rails by lifting it and pulling it in Door Rails (on some models) To remove and replace the rails or trivets: 1. To remove and replace the racks/bins: 1. Replace the rack/bin by pushing in the food and air inside tab. Shelves and covers...
Use & Care Guide
Page 12
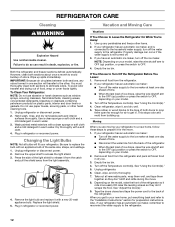
... from the refrigerator. 2. When you have an automatic ice maker, turn off . 3. Both the refrigerator and freezer sections defrost automatically. However, clean both sections, any perishables and freeze other harsh cleaning tools. 1. Wash painted metal exteriors with a soft cloth. 4. Remove the light bulb and replace it for preparation instructions. If you get in dry ice. 3. See "Using the Control(s)." 4. Clean refrigerator, wipe it rolls more easily OR raise the leveling screws so...
... from the refrigerator. 2. When you have an automatic ice maker, turn off . 3. Both the refrigerator and freezer sections defrost automatically. However, clean both sections, any perishables and freeze other harsh cleaning tools. 1. Wash painted metal exteriors with a soft cloth. 4. Remove the light bulb and replace it for preparation instructions. If you get in dry ice. 3. See "Using the Control(s)." 4. Clean refrigerator, wipe it rolls more easily OR raise the leveling screws so...
Use & Care Guide
Page 13
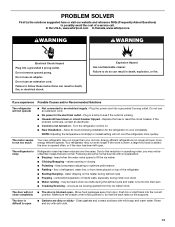
... refrigerator is working. ■ Household fuse blown or circuit breaker tripped - fans/compressor adjusting to fill the ice maker ■ Clicking/Snapping - may run even longer if the room is warm, a large food load is added, the door is not turned on the supports. The door will not ■ The door is fully pushed in death, fire, or electrical shock. Make sure the crisper cover is blocked open . Energy efficient refrigerators run...
... refrigerator is working. ■ Household fuse blown or circuit breaker tripped - fans/compressor adjusting to fill the ice maker ■ Clicking/Snapping - may run even longer if the room is warm, a large food load is added, the door is not turned on the supports. The door will not ■ The door is fully pushed in death, fire, or electrical shock. Make sure the crisper cover is blocked open . Energy efficient refrigerators run...
Use & Care Guide
Page 14
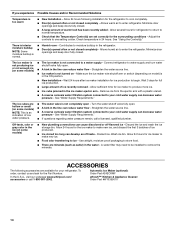
... off -flavored ice - Make sure the ice maker wire shutoff arm or switch (depending on some models) ■ The ice maker is not completely open - Wait 24 hours after ice maker installation for the refrigerator to water supply and turn water shutoff valve fully open . ■ A kink in the refrigerator. ■ Door(s) opened often or not closed completely - Remove ice from the ejector arm with a plastic utensil. ■ A reverse osmosis water filtration system connected to a water supply - Adjust the controls to begin...
... off -flavored ice - Make sure the ice maker wire shutoff arm or switch (depending on some models) ■ The ice maker is not completely open - Wait 24 hours after ice maker installation for the refrigerator to water supply and turn water shutoff valve fully open . ■ A kink in the refrigerator. ■ Door(s) opened often or not closed completely - Remove ice from the ejector arm with a plastic utensil. ■ A reverse osmosis water filtration system connected to a water supply - Adjust the controls to begin...
Use & Care Guide
Page 15
... it is installed in an inaccessible location or is not installed in which it is used in a remote area where service by a Whirlpool designated service company. Proof of the refrigerator compartment. Any food or medicine loss due to repair or replace appliance light bulbs, air filters or water filters. Repairs to parts or systems resulting from state to state or province to published user or operator instructions and/or installation instructions. 2. In Canada...
... it is installed in an inaccessible location or is not installed in which it is used in a remote area where service by a Whirlpool designated service company. Proof of the refrigerator compartment. Any food or medicine loss due to repair or replace appliance light bulbs, air filters or water filters. Repairs to parts or systems resulting from state to state or province to published user or operator instructions and/or installation instructions. 2. In Canada...


