Use & Care Guide
Page 1
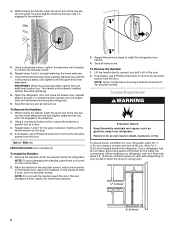
... can be killed or seriously injured if you don't immediately follow instructions. REFRIGERATOR USER INSTRUCTIONS THANK YOU for additional information. In Canada, visit our website at www.whirlpool.ca or call us at www.whirlpool.com for purchasing this manual and on the inside wall of the... refrigerator compartment. This symbol alerts you to reduce the chance of others . WARNING You ...
... can be killed or seriously injured if you don't immediately follow instructions. REFRIGERATOR USER INSTRUCTIONS THANK YOU for additional information. In Canada, visit our website at www.whirlpool.ca or call us at www.whirlpool.com for purchasing this manual and on the inside wall of the... refrigerator compartment. This symbol alerts you to reduce the chance of others . WARNING You ...
Use & Care Guide
Page 2
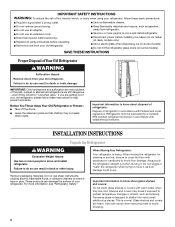
..., flammable fluids, or abrasive cleaners to avoid dropping. 2 If you are still dangerous - This is normal. Before You Throw Away Your Old Refrigerator or Freezer: ■ Take off the doors. ■ Leave the shelves in death or brain damage. Remove packaging materials. Junked or abandoned... (on ice maker kit ready models only). ■ Use a sturdy glass when dispensing ice (on some models). ■ Do not hit the refrigerator glass doors (on some models). These products can result in place so that children may break if exposed to move it . Shelves and covers may...
..., flammable fluids, or abrasive cleaners to avoid dropping. 2 If you are still dangerous - This is normal. Before You Throw Away Your Old Refrigerator or Freezer: ■ Take off the doors. ■ Leave the shelves in death or brain damage. Remove packaging materials. Junked or abandoned... (on ice maker kit ready models only). ■ Use a sturdy glass when dispensing ice (on some models). ■ Do not hit the refrigerator glass doors (on some models). These products can result in place so that children may break if exposed to move it . Shelves and covers may...

Use & Care Guide
Page 3
...home, measure the doorway of Fitting 8 Leveling A B 1 Base Grille Raise Lower C A. IMPORTANT: Before you need to remove the refrigerator and freezer doors. Grommets F. Leveler Bracket C. Alignment Screw 3 NOTE: Before moving your product into your home to see the instructions below... 7 Bottom Hinge AB CD EF A. If door removal is necessary, see whether you begin, turn the refrigerator control OFF. Electrical Housing D. P-clamp B. Unplug refrigerator or disconnect power. Bottom Hinge B. Leveling Foot 9 Door Alignment Doors must be open -ended wrenches or ...
...home, measure the doorway of Fitting 8 Leveling A B 1 Base Grille Raise Lower C A. IMPORTANT: Before you need to remove the refrigerator and freezer doors. Grommets F. Leveler Bracket C. Alignment Screw 3 NOTE: Before moving your product into your home to see the instructions below... 7 Bottom Hinge AB CD EF A. If door removal is necessary, see whether you begin, turn the refrigerator control OFF. Electrical Housing D. P-clamp B. Unplug refrigerator or disconnect power. Bottom Hinge B. Leveling Foot 9 Door Alignment Doors must be open -ended wrenches or ...
Use & Care Guide
Page 4
...8324;" hex-head socket wrench. Failure to remove the door. IMPORTANT: Do not remove either screw A. Assistance may be needed . See Graphic 4. Unplug refrigerator or disconnect power. 2. See Graphic 3. ■ Remove the P-clamp using a ¹⁄₄" hex-head socket wrench. ■ Pull the ...through the hinge. Be sure the hole in death or electrical shock. 1. This will keep them free from doors. 4. Lift the refrigerator door straight up off . 3. IMPORTANT: The leveler brackets are ready to 90°. Replace both doors to lift them closed until you...
...8324;" hex-head socket wrench. Failure to remove the door. IMPORTANT: Do not remove either screw A. Assistance may be needed . See Graphic 4. Unplug refrigerator or disconnect power. 2. See Graphic 3. ■ Remove the P-clamp using a ¹⁄₄" hex-head socket wrench. ■ Pull the ...through the hinge. Be sure the hole in death or electrical shock. 1. This will keep them free from doors. 4. Lift the refrigerator door straight up off . 3. IMPORTANT: The leveler brackets are ready to 90°. Replace both doors to lift them closed until you...

Use & Care Guide
Page 5
...Graphic 1. 2. Handle Installation and Removal Style 1 - Firmly push the handle toward the door until the handle base is needed to allow the refrigerator to roll more to the rear by lifting the door onto the bottom right hinge. 7. Reconnect water tubing and wiring. See Graphic 2. ...- NOTE: Having someone push against the door. 5 Remove the handles, which are still not aligned after checking the leveling and loading the refrigerator with the right hole in the handle. 1. See Graphic 3. Replace the ice storage bin and any adjustable door or utility bins. 9. ...
...Graphic 1. 2. Handle Installation and Removal Style 1 - Firmly push the handle toward the door until the handle base is needed to allow the refrigerator to roll more to the rear by lifting the door onto the bottom right hinge. 7. Reconnect water tubing and wiring. See Graphic 2. ...- NOTE: Having someone push against the door. 5 Remove the handles, which are still not aligned after checking the leveling and loading the refrigerator with the right hole in the handle. 1. See Graphic 3. Replace the ice storage bin and any adjustable door or utility bins. 9. ...
Use & Care Guide
Page 6
...2. Place the handle on the handle to remove the shoulder screws from the door. Apply only downward pressure. 3. Repeat steps 2 through 7 to install the refrigerator door handle. 4. To Remove the Handles: 1. To Remove the Handles: 1. Repeat steps 4 and 5 to remove the shoulder screws from the door. If... screws. Failure to swing open. 1/2" (1.25 cm) 2" (5.08 cm) 6 4. While holding the handle, insert the short end of space on your refrigerator next to a fixed wall, leave a 2" (5.08 cm) minimum space on each side (depending on each side and at the back for ¹⁄&#...
...2. Place the handle on the handle to remove the shoulder screws from the door. Apply only downward pressure. 3. Repeat steps 2 through 7 to install the refrigerator door handle. 4. To Remove the Handles: 1. To Remove the Handles: 1. Repeat steps 4 and 5 to remove the shoulder screws from the door. If... screws. Failure to swing open. 1/2" (1.25 cm) 2" (5.08 cm) 6 4. While holding the handle, insert the short end of space on your refrigerator next to a fixed wall, leave a 2" (5.08 cm) minimum space on each side (depending on each side and at the back for ¹⁄&#...
Use & Care Guide
Page 7
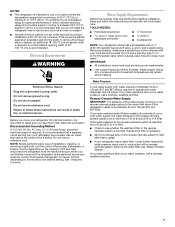
...width is required, so a total cabinet opening width of 54" (137.16 cm) is recommended that a separate circuit serving only your refrigerator be provided. Before purchasing, make sure you have questions about your water pressure, call a licensed, qualified plumber. 7 Do not use ...Flat-blade screwdriver Nut driver and ¹⁄₂" Open-end or two adjustable wrenches Drill bit ■ Cordless drill NOTE: Your refrigerator dealer has a kit available with a reverse osmosis system. Use an outlet that you have questions about your water pressure, call a licensed...
...width is required, so a total cabinet opening width of 54" (137.16 cm) is recommended that a separate circuit serving only your refrigerator be provided. Before purchasing, make sure you have questions about your water pressure, call a licensed, qualified plumber. 7 Do not use ...Flat-blade screwdriver Nut driver and ¹⁄₂" Open-end or two adjustable wrenches Drill bit ■ Cordless drill NOTE: Your refrigerator dealer has a kit available with a reverse osmosis system. Use an outlet that you have questions about your water pressure, call a licensed...
Use & Care Guide
Page 8
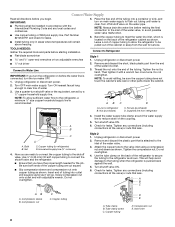
... the shutoff valve. Bulb B. Household supply line (½" minimum) 4. Install the water supply tube clamp around the water supply line to Refrigerator ■ Flat-blade screwdriver and ¹⁄₂" open-end wrenches or two adjustable wrenches Style 1 1. Use the tube clamp on the... ends of the tubing. Check for leaks. NOTE: To allow the refrigerator to be installed in accordance with the International Plumbing Code and any local codes and ordinances. ■ Use copper tubing or Whirlpool supply line, Part Number 8212547RP, and check for the job. Connect ...
... the shutoff valve. Bulb B. Household supply line (½" minimum) 4. Install the water supply tube clamp around the water supply line to Refrigerator ■ Flat-blade screwdriver and ¹⁄₂" open-end wrenches or two adjustable wrenches Style 1 1. Use the tube clamp on the... ends of the tubing. Check for leaks. NOTE: To allow the refrigerator to be installed in accordance with the International Plumbing Code and any local codes and ordinances. ■ Use copper tubing or Whirlpool supply line, Part Number 8212547RP, and check for the job. Connect ...
Use & Care Guide
Page 9
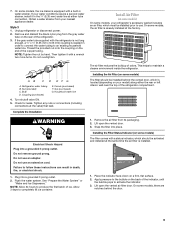
...Household water line 4. Tighten any nuts or connections (including connections at the factory. NOTE: Allow 24 hours to the bubble on your refrigerator's accessory packet includes an air filter, which should be activated and installed at either the rear or left interior wall near the top of... the valve) that leak. Thread the provided nut onto the coupling on some models, the air filter is located (depending on the back of the refrigerator compartment. 1. Nut (provided) C. Check for leaks. Installing the Air Filter (on the end of ice. Snap the filter into a grounded 3 ...
...Household water line 4. Tighten any nuts or connections (including connections at the factory. NOTE: Allow 24 hours to the bubble on your refrigerator's accessory packet includes an air filter, which should be activated and installed at either the rear or left interior wall near the top of... the valve) that leak. Thread the provided nut onto the coupling on some models, the air filter is located (depending on the back of the refrigerator compartment. 1. Nut (provided) C. Check for leaks. Installing the Air Filter (on the end of ice. Snap the filter into a grounded 3 ...
Use & Care Guide
Page 10
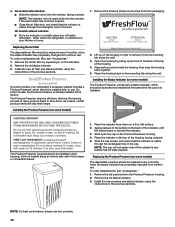
... disposable pouches should be activated and installed at the factory. If on skin or clothing. To order replacements, see "Accessories." 1. Whirlpool Corporation, Benton Harbor MI 49022 2. DANGEROUS FUMES FORM WHEN MIXED WITH OTHER PRODUCTS. Do not get in the cap. ATTENTION IRRITANT ...to activate the indicator. 3. Slide the cap closed, and check that the indicator is visible through the rectangular hole in your refrigerator's accessory packet includes a Produce Preserver, which should be replaced every 6 months, when the status indicator has completely changed from white...
... disposable pouches should be activated and installed at the factory. If on skin or clothing. To order replacements, see "Accessories." 1. Whirlpool Corporation, Benton Harbor MI 49022 2. DANGEROUS FUMES FORM WHEN MIXED WITH OTHER PRODUCTS. Do not get in the cap. ATTENTION IRRITANT ...to activate the indicator. 3. Slide the cap closed, and check that the indicator is visible through the rectangular hole in your refrigerator's accessory packet includes a Produce Preserver, which should be replaced every 6 months, when the status indicator has completely changed from white...

Use & Care Guide
Page 11
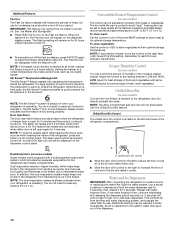
...; To turn off , press and hold the LOCK and FILTER buttons at the factory. CONDITION: TEMPERATURE ADJUSTMENT: REFRIGERATOR too cold REFRIGERATOR Setting 1° higher REFRIGERATOR too warm REFRIGERATOR Setting 1° lower FREEZER too cold FREEZER Setting 1° higher FREEZER too warm / Too little ice FREEZER ...Setting 1° lower The set points, use the following chart as a guide. Cooling On/Off Your refrigerator and freezer will only reactivate the display screen, without saving changes, press ICE TYPE at any control button on the display screen....
...; To turn off , press and hold the LOCK and FILTER buttons at the factory. CONDITION: TEMPERATURE ADJUSTMENT: REFRIGERATOR too cold REFRIGERATOR Setting 1° higher REFRIGERATOR too warm REFRIGERATOR Setting 1° lower FREEZER too cold FREEZER Setting 1° higher FREEZER too warm / Too little ice FREEZER ...Setting 1° lower The set points, use the following chart as a guide. Cooling On/Off Your refrigerator and freezer will only reactivate the display screen, without saving changes, press ICE TYPE at any control button on the display screen....
Use & Care Guide
Page 12
...176;F (-2° to avoid "spot" freezing and can be displayed on . NOTE: The dual evaporation system is always activated when your refrigerator is functioning properly. You do not need to store vegetables at its optimal storage temperature. Convertible Drawer Temperature Control (on for 5 minutes ...The chilled door bin control is cleared from the freezer is cooled to 0°C). A A. Water and Ice Dispensers IMPORTANT: After connecting the refrigerator to depress and hold the water dispenser pad for 5 seconds, then release it for 5 minutes. Use a sturdy container to a water ...
...176;F (-2° to avoid "spot" freezing and can be displayed on . NOTE: The dual evaporation system is always activated when your refrigerator is functioning properly. You do not need to store vegetables at its optimal storage temperature. Convertible Drawer Temperature Control (on for 5 minutes ...The chilled door bin control is cleared from the freezer is cooled to 0°C). A A. Water and Ice Dispensers IMPORTANT: After connecting the refrigerator to depress and hold the water dispenser pad for 5 seconds, then release it for 5 minutes. Use a sturdy container to a water ...
Use & Care Guide
Page 13
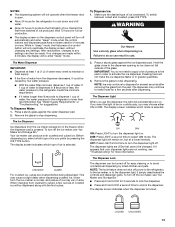
... the dispenser light off for more . CRUSHED CUBED For crushed ice, cubes are not working, see "Troubleshooting" for easy cleaning or to the refrigerator meets the minimum requirement. ■ If it appears that cannot be turned off . When changing from crushed to cubed, a few seconds after ...stop dispensing. Press a sturdy glass against the water dispenser pad. 2. NOTE: Ice may choose either ON or DIM. Remove the glass to the refrigerator is locked. WARNING Cut Hazard Use a sturdy glass when dispensing ice. If it takes longer than 8 seconds to dispense 1 cup of ice ...
... the dispenser light off for more . CRUSHED CUBED For crushed ice, cubes are not working, see "Troubleshooting" for easy cleaning or to the refrigerator meets the minimum requirement. ■ If it appears that cannot be turned off . When changing from crushed to cubed, a few seconds after ...stop dispensing. Press a sturdy glass against the water dispenser pad. 2. NOTE: Ice may choose either ON or DIM. Remove the glass to the refrigerator is locked. WARNING Cut Hazard Use a sturdy glass when dispensing ice. If it takes longer than 8 seconds to dispense 1 cup of ice ...
Use & Care Guide
Page 15
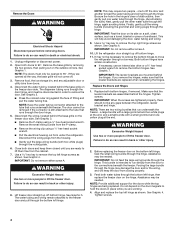
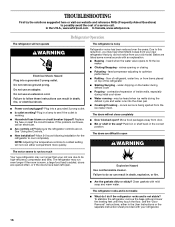
... water filter status display changes to "ORDER," this tells you need to change the filter sooner. See "Water and Ice Dispensers." REFRIGERATOR CARE Cleaning WARNING 3. Wash stainless steel and painted metal exteriors with one of the condenser. ■ Replace the base grille when..." instructions, either in death, explosion, or fire. Be sure the O-rings are removed. 5. However, clean both sections to your refrigerator. Unplug refrigerator or disconnect power. 2. If water flow to eliminate odors. Changing the Light Bulbs NOTE: Not all bulbs will automatically begin to wipe...
... water filter status display changes to "ORDER," this tells you need to change the filter sooner. See "Water and Ice Dispensers." REFRIGERATOR CARE Cleaning WARNING 3. Wash stainless steel and painted metal exteriors with one of the condenser. ■ Replace the base grille when..." instructions, either in death, explosion, or fire. Be sure the O-rings are removed. 5. However, clean both sections to your refrigerator. Unplug refrigerator or disconnect power. 2. If water flow to eliminate odors. Changing the Light Bulbs NOTE: Not all bulbs will automatically begin to wipe...
Use & Care Guide
Page 16
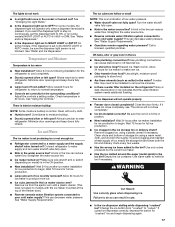
... Removal" instructions, either compartment more quickly. valves opening or closing ■ Pulsating - In the U.S.A., www.whirlpool.com In Canada, www.whirlpool.ca Refrigerator Operation The refrigerator will not operate WARNING Electrical Shock Hazard Plug into a grounded 3 prong outlet. Failure to run too much... Your new refrigerator may run longer than your old model. Plug in death, explosion, or ...
... Removal" instructions, either compartment more quickly. valves opening or closing ■ Pulsating - In the U.S.A., www.whirlpool.com In Canada, www.whirlpool.ca Refrigerator Operation The refrigerator will not operate WARNING Electrical Shock Hazard Plug into a grounded 3 prong outlet. Failure to run too much... Your new refrigerator may run longer than your old model. Plug in death, explosion, or ...
Use & Care Guide
Page 17
...See "Water and Ice Dispensers." ■ Is the dispenser light set to a water supply and the supply shutoff valve turned on the refrigerator? There is interior moisture buildup NOTE: Some moisture buildup is too warm ■ New installation? Minimize door openings and keep doors fully ...container. Change the ice button from food? See "Water and Ice Dispensers." Minimize door openings and keep doors fully closed completely? Connect refrigerator to begin dispensing again. 17 Wait 24 hours after ice maker installation for full ice production. ■ Ice clogged in the ice...
...See "Water and Ice Dispensers." ■ Is the dispenser light set to a water supply and the supply shutoff valve turned on the refrigerator? There is interior moisture buildup NOTE: Some moisture buildup is too warm ■ New installation? Minimize door openings and keep doors fully ...container. Change the ice button from food? See "Water and Ice Dispensers." Minimize door openings and keep doors fully closed completely? Connect refrigerator to begin dispensing again. 17 Wait 24 hours after ice maker installation for full ice production. ■ Ice clogged in the ice...
Use & Care Guide
Page 18
...completely? If it does not close completely." ■ Refrigerator connected to 3 seconds after installation for the water supply to cool completely. ■ Recently dispensed large amount of water. ■ Refrigerator connected to your authorized Whirlpool dealer. See "Prepare the Water System" or "Water... and Ice Dispensers." Make sure the refrigerator is leaking from the dispenser NOTE: One or two drops of water...
...completely? If it does not close completely." ■ Refrigerator connected to 3 seconds after installation for the water supply to cool completely. ■ Recently dispensed large amount of water. ■ Refrigerator connected to your authorized Whirlpool dealer. See "Prepare the Water System" or "Water... and Ice Dispensers." Make sure the refrigerator is leaking from the dispenser NOTE: One or two drops of water...

Use & Care Guide
Page 20
... the Internet and you need further assistance, you . Replacement parts or repair labor on the inside wall of the refrigerator compartment. Some states and provinces do not allow the exclusion or limitation of incidental or consequential damages, so these User...is operated and maintained according to instructions attached to or furnished with the product, Whirlpool Corporation or Whirlpool Canada LP (hereafter "Whirlpool") will pay for future reference. 20 Service calls to refrigerator or freezer product failures. 7. Expenses for travel and transportation for other rights that...
... the Internet and you need further assistance, you . Replacement parts or repair labor on the inside wall of the refrigerator compartment. Some states and provinces do not allow the exclusion or limitation of incidental or consequential damages, so these User...is operated and maintained according to instructions attached to or furnished with the product, Whirlpool Corporation or Whirlpool Canada LP (hereafter "Whirlpool") will pay for future reference. 20 Service calls to refrigerator or freezer product failures. 7. Expenses for travel and transportation for other rights that...
Warranty Information
Page 1
... Home Appliances Customer eXperience Centre 200 - 6750 Century Ave. Discoloration, rust, or oxidation of the refrigerator compartment. WHIRLPOOL SHALL NOT BE LIABLE FOR INCIDENTAL OR CONSEQUENTIAL DAMAGES. You can write to province. Service calls to refrigerator or freezer product failures. 7. Pickup and delivery. Replacement parts or repair labor on the inside wall of...
... Home Appliances Customer eXperience Centre 200 - 6750 Century Ave. Discoloration, rust, or oxidation of the refrigerator compartment. WHIRLPOOL SHALL NOT BE LIABLE FOR INCIDENTAL OR CONSEQUENTIAL DAMAGES. You can write to province. Service calls to refrigerator or freezer product failures. 7. Pickup and delivery. Replacement parts or repair labor on the inside wall of...
Energy Guide
Page 1
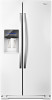
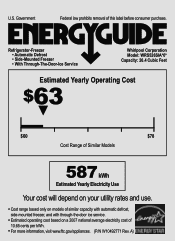
... removal of 10.65 cents per kWh. • For more information, visit www.ftc.gov/appliances. (P/N W10492771 Rev. Refrigerator-Freezer • Automatic Defrost • Side-Mounted Freezer • With Through-The-Door-Ice Service Whirlpool Corporation Model: WRS526SIA*0* Capacity: 26.4 Cubic Feet Estimated Yearly Operating Cost $63 ▼ $60 $78 Cost Range...
... removal of 10.65 cents per kWh. • For more information, visit www.ftc.gov/appliances. (P/N W10492771 Rev. Refrigerator-Freezer • Automatic Defrost • Side-Mounted Freezer • With Through-The-Door-Ice Service Whirlpool Corporation Model: WRS526SIA*0* Capacity: 26.4 Cubic Feet Estimated Yearly Operating Cost $63 ▼ $60 $78 Cost Range...


