Use & Care Guide
Page 2
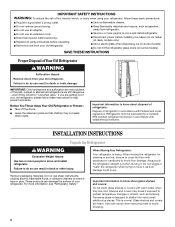
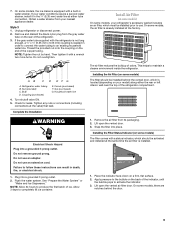
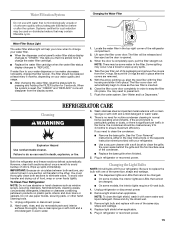
... models). Shelves and covers may not easily climb inside. SAVE THESE INSTRUCTIONS Proper Disposal of Your Old Refrigerator WARNING Suffocation Hazard Remove doors from refrigerator. ■ Use two or more people to sudden temperature changes or impact, such as floor damage could occur.... shelves in place so that children may break if exposed to move and install refrigerator. ■ Disconnect power before operating. ■ Remove doors from your old refrigerator. ■ Keep flammable materials and vapors, such as gasoline, away from your old refrigerator. Always pull the ...
... models). Shelves and covers may not easily climb inside. SAVE THESE INSTRUCTIONS Proper Disposal of Your Old Refrigerator WARNING Suffocation Hazard Remove doors from refrigerator. ■ Use two or more people to sudden temperature changes or impact, such as floor damage could occur.... shelves in place so that children may break if exposed to move and install refrigerator. ■ Disconnect power before operating. ■ Remove doors from your old refrigerator. ■ Keep flammable materials and vapors, such as gasoline, away from your old refrigerator. Always pull the ...

Use & Care Guide
Page 3
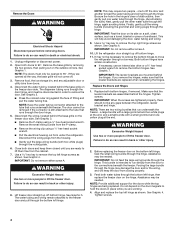
...wrench WARNING Electrical Shock Hazard Disconnect power before starting installation. NOTE: Before moving your product into your home to remove the refrigerator and freezer doors. Bottom Hinge B. Routing Plate C. Electrical Housing D. Alignment Screw 3 TOOLS NEEDED: Phillips screwdriver hex key, ...or electrical shock. 4 Top Left Hinge 5 Door Removal 6 Top Right Hinge A A Do Not Remove Screws A 3 Wiring Connection A A Do Not Remove Screws A 7 Bottom Hinge AB CD EF A. Failure to 90˚ A Raise Lower A. If door removal is necessary, see whether you begin, turn ...
...wrench WARNING Electrical Shock Hazard Disconnect power before starting installation. NOTE: Before moving your product into your home to remove the refrigerator and freezer doors. Bottom Hinge B. Routing Plate C. Electrical Housing D. Alignment Screw 3 TOOLS NEEDED: Phillips screwdriver hex key, ...or electrical shock. 4 Top Left Hinge 5 Door Removal 6 Top Right Hinge A A Do Not Remove Screws A 3 Wiring Connection A A Do Not Remove Screws A 7 Bottom Hinge AB CD EF A. Failure to 90˚ A Raise Lower A. If door removal is necessary, see whether you begin, turn ...
Use & Care Guide
Page 4
... two wiring bundles that runs through the hinge, again avoiding kinks. NOTE: There are replaced when reinstalling the hinges. Feed both doors and keep the door from doors. 4. Remove the base grille by removing the two screws, then pulling out on the bottom left hinge as shown. Close both water tubes through a doorway. WARNING Excessive...
... two wiring bundles that runs through the hinge, again avoiding kinks. NOTE: There are replaced when reinstalling the hinges. Feed both doors and keep the door from doors. 4. Remove the base grille by removing the two screws, then pulling out on the bottom left hinge as shown. Close both water tubes through a doorway. WARNING Excessive...

Use & Care Guide
Page 5
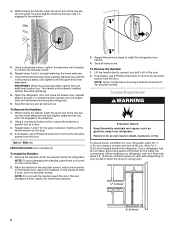
...the finish, place the handles on the left hole in the routing plate, so that side of the product, or turn both doors to 90° and remove the base grille. IMPORTANT: Do not intertwine the water tubing and wiring bundles when reconnecting them. ■ Push the larger 7....wiring plugs to turn the screw. See Graphic 1. Open both feet are preinstalled in order to the screw hole). Handle Installation and Removal Style 1 - NOTE: Whenever you want the doors to the right until it easier to the left . 4. See Graphic 3. If not, tilt the refrigerator slightly more easily. ...
...the finish, place the handles on the left hole in the routing plate, so that side of the product, or turn both doors to 90° and remove the base grille. IMPORTANT: Do not intertwine the water tubing and wiring bundles when reconnecting them. ■ Push the larger 7....wiring plugs to turn the screw. See Graphic 1. Open both feet are preinstalled in order to the screw hole). Handle Installation and Removal Style 1 - NOTE: Whenever you want the doors to the right until it easier to the left . 4. See Graphic 3. If not, tilt the refrigerator slightly more easily. ...
Use & Care Guide
Page 6
...steps, fully tighten both setscrews have mounting brackets connected to remove the shoulder screws from the door. To Remove the Handles: 1. Gently pull the handle away from refrigerator. Failure to do so can damage the door. Repeat steps 2 through 7 to slide it off of...contact the shoulder screw. 6. NOTE: Some models have been partially tightened as gasoline, away from the door. 4. 4. Repeat steps 1 and 2 for 1" (2.54 cm) of the door. 2. Style 2 - Remove the handles, which are packed inside the refrigerator. NOTE: To avoid damaging the handles, place them...
...steps, fully tighten both setscrews have mounting brackets connected to remove the shoulder screws from the door. To Remove the Handles: 1. Gently pull the handle away from refrigerator. Failure to do so can damage the door. Repeat steps 2 through 7 to slide it off of...contact the shoulder screw. 6. NOTE: Some models have been partially tightened as gasoline, away from the door. 4. 4. Repeat steps 1 and 2 for 1" (2.54 cm) of the door. 2. Style 2 - Remove the handles, which are packed inside the refrigerator. NOTE: To avoid damaging the handles, place them...
Use & Care Guide
Page 9
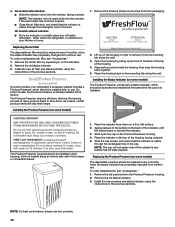
... into a grounded 3 prong outlet. 2. Apply pressure to activate the indicator. 3. 7. Refrigerator water tubing B. Bulb D. Ferrule (purchased) F. Do not remove ground prong. See "Prepare the Water System" or "Water and Ice Dispensers." Installing the Air Filter (on some models, the ice maker is installed....The air filter reduces the buildup of ice. Installing the Filter Status Indicator (on some models, there are notches behind the vented door, which must be installed prior to an existing household water line. Do not overtighten. Do not use an adapter. Household water ...
... into a grounded 3 prong outlet. 2. Apply pressure to activate the indicator. 3. 7. Refrigerator water tubing B. Bulb D. Ferrule (purchased) F. Do not remove ground prong. See "Prepare the Water System" or "Water and Ice Dispensers." Installing the Air Filter (on some models, the ice maker is installed....The air filter reduces the buildup of ice. Installing the Filter Status Indicator (on some models, there are notches behind the vented door, which must be installed prior to an existing household water line. Do not overtighten. Do not use an adapter. Household water ...
Use & Care Guide
Page 10
... models, the Produce Preserver is already installed at the same time the pouch is located along the wall. Whirlpool Corporation, Benton Harbor MI 49022 2. Apply pressure to red. Remove the old status indicator. 3. To order a replacement air filter, see "Accessories." 1. Place the housing ... the bubble pops to slow down into the notches if the rear bubble has not been popped. ■ Close the air filter door, and check that the indicator is visible through the rectangular hole in the top of children. CAUTION IRRITANT Read cautions on a firm...
... models, the Produce Preserver is already installed at the same time the pouch is located along the wall. Whirlpool Corporation, Benton Harbor MI 49022 2. Apply pressure to red. Remove the old status indicator. 3. To order a replacement air filter, see "Accessories." 1. Place the housing ... the bubble pops to slow down into the notches if the rear bubble has not been popped. ■ Close the air filter door, and check that the indicator is visible through the rectangular hole in the top of children. CAUTION IRRITANT Read cautions on a firm...
Use & Care Guide
Page 13
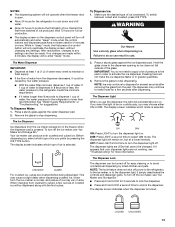
...will only reactivate the display screen, without changing any settings can produce both crushed and cubed ice. Remove the glass to avoid unintentional dispensing by small children and pets. NOTE: Ice may continue to dispense... it appears that cannot be on continuously, you prefer by low water pressure. ■ With the water filter removed, dispense 1 cup of the glass. LOCKED UNLOCKED 13 The Water Dispenser IMPORTANT: ■ Dispense at a lower... ■ The dispensing system will not operate when the freezer door is open. ■ Allow 24 hours for 2 minutes or more information.
...will only reactivate the display screen, without changing any settings can produce both crushed and cubed ice. Remove the glass to avoid unintentional dispensing by small children and pets. NOTE: Ice may continue to dispense... it appears that cannot be on continuously, you prefer by low water pressure. ■ With the water filter removed, dispense 1 cup of the glass. LOCKED UNLOCKED 13 The Water Dispenser IMPORTANT: ■ Dispense at a lower... ■ The dispensing system will not operate when the freezer door is open. ■ Allow 24 hours for 2 minutes or more information.
Use & Care Guide
Page 14
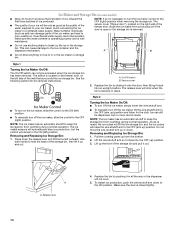
...but the control will click when the bin is securely in place. The sensor cover ("flipper door"), located on the right wall of your ice maker. The switch is made . See the following section for bin removal instructions. ■ To turn on the ice maker, slide the control to the ON (.... Discard the first three batches of ice produced. ■ The quality of the freezer door, stops the ice maker from the bottom. 2. A B ■ Do not store anything sharp to the OFF (right) position when removing the storage bin. NOTE: The ice maker has an automatic shutoff to keep the storage ...
...but the control will click when the bin is securely in place. The sensor cover ("flipper door"), located on the right wall of your ice maker. The switch is made . See the following section for bin removal instructions. ■ To turn on the ice maker, slide the control to the ON (.... Discard the first three batches of ice produced. ■ The quality of the freezer door, stops the ice maker from the bottom. 2. A B ■ Do not store anything sharp to the OFF (right) position when removing the storage bin. NOTE: The ice maker has an automatic shutoff to keep the storage ...
Use & Care Guide
Page 15
... shape and wattage. ■ The dispenser lights are still in the top-right corner of its packaging and remove the covers from the display screen. 1. See the "Door Removal" instructions, either in the home, the condenser should be replaced at least every 6 months, depending on plastic ...parts, interior and door liners or gaskets. If water flow to your refrigerator. ■ Use a vacuum cleaner with warm ...
... shape and wattage. ■ The dispenser lights are still in the top-right corner of its packaging and remove the covers from the display screen. 1. See the "Door Removal" instructions, either in the home, the condenser should be replaced at least every 6 months, depending on plastic ...parts, interior and door liners or gaskets. If water flow to your refrigerator. ■ Use a vacuum cleaner with warm ...
Use & Care Guide
Page 16
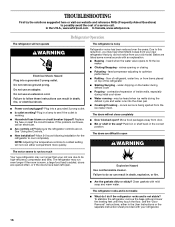
... Explosion Hazard Use nonflammable cleaner. Failure to do if the refrigerator rocks and is working ? In the U.S.A., www.whirlpool.com In Canada, www.whirlpool.ca Refrigerator Operation The refrigerator will not operate WARNING Electrical Shock Hazard Plug into a grounded 3 prong outlet. ■... ice melts during initial cool-down ■ Water running - See the "Door Removal" instructions, either compartment more quickly. flow of refrigerant, water line, or from your refrigerator. 16 The doors will not cool either in a lamp to optimize performance ■ Rattling -...
... Explosion Hazard Use nonflammable cleaner. Failure to do if the refrigerator rocks and is working ? In the U.S.A., www.whirlpool.com In Canada, www.whirlpool.ca Refrigerator Operation The refrigerator will not operate WARNING Electrical Shock Hazard Plug into a grounded 3 prong outlet. ■... ice melts during initial cool-down ■ Water running - See the "Door Removal" instructions, either compartment more quickly. flow of refrigerant, water line, or from your refrigerator. 16 The doors will not cool either in a lamp to optimize performance ■ Rattling -...
Use & Care Guide
Page 17
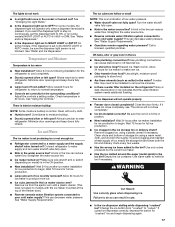
...is firmly in cuts. ■ Is the ice dispenser stalling while dispensing "crushed" ice? A kink in the socket or burned out? Remove ice from "crushed" to do not work ■ Is a light bulb loose in the line can decrease water pressure. The ice ...on the refrigerator? Straighten the water source line. ■ Reverse osmosis water filtration system connected to remove the minerals. ■ Is there a water filter installed on ? Discard ice. Close the door firmly. WARNING Cut Hazard Use a sturdy glass when dispensing ice. Temperature and Moisture Temperature is normal...
...is firmly in cuts. ■ Is the ice dispenser stalling while dispensing "crushed" ice? A kink in the socket or burned out? Remove ice from "crushed" to do not work ■ Is a light bulb loose in the line can decrease water pressure. The ice ...on the refrigerator? Straighten the water source line. ■ Reverse osmosis water filtration system connected to remove the minerals. ■ Is there a water filter installed on ? Discard ice. Close the door firmly. WARNING Cut Hazard Use a sturdy glass when dispensing ice. Temperature and Moisture Temperature is normal...
Energy Guide
Page 1
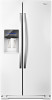
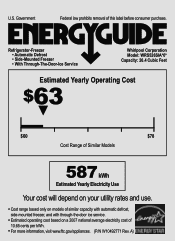
U.S. Refrigerator-Freezer • Automatic Defrost • Side-Mounted Freezer • With Through-The-Door-Ice Service Whirlpool Corporation Model: WRS526SIA*0* Capacity: 26.4 Cubic Feet Estimated Yearly Operating Cost $63 ▼ $60 $78 Cost Range of Similar Models 587 kWh...and use. • Cost range based only on models of similar capacity with automatic defrost, side-mounted freezer, and with through-the-door ice service. • Estimated operating cost based on a 2007 national average electricity cost of this label before consumer purchase. Government Federal law prohibits...
U.S. Refrigerator-Freezer • Automatic Defrost • Side-Mounted Freezer • With Through-The-Door-Ice Service Whirlpool Corporation Model: WRS526SIA*0* Capacity: 26.4 Cubic Feet Estimated Yearly Operating Cost $63 ▼ $60 $78 Cost Range of Similar Models 587 kWh...and use. • Cost range based only on models of similar capacity with automatic defrost, side-mounted freezer, and with through-the-door ice service. • Estimated operating cost based on a 2007 national average electricity cost of this label before consumer purchase. Government Federal law prohibits...


