Specification Sheet
Page 1
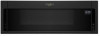
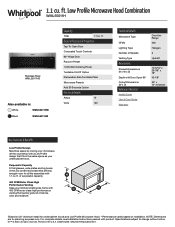
... Fit tall glasses, wide plates and big bowls in this low profile microwave that quickly gets rid of Speeds Venting Type Dimensions Product Dimensions (H x W x D) Depth with Door Open 90° Cutout Dimensions (W x D) Reference Material Install Guide Use & Care Guide Warranty Over-theRange 400 Halogen 3 Updraft 10-5/16" x 29... Specifications subject to change without notice. ®/™ © 2020. ft. Printed in : White WML55011HW Black WML55011HB Capacity Total 1.1 cu. For complete details, see Installation Instructions packed with 1.1 cu. WML55011HSpecSheetV01.
... Fit tall glasses, wide plates and big bowls in this low profile microwave that quickly gets rid of Speeds Venting Type Dimensions Product Dimensions (H x W x D) Depth with Door Open 90° Cutout Dimensions (W x D) Reference Material Install Guide Use & Care Guide Warranty Over-theRange 400 Halogen 3 Updraft 10-5/16" x 29... Specifications subject to change without notice. ®/™ © 2020. ft. Printed in : White WML55011HW Black WML55011HB Capacity Total 1.1 cu. For complete details, see Installation Instructions packed with 1.1 cu. WML55011HSpecSheetV01.

Installation Instructions
Page 1
... COMBINATION INSTALLATION INSTRUCTIONS This product is the safety alert symbol. Table of Contents MICROWAVE HOOD COMBINATION SAFETY 1 INSTALLATION REQUIREMENTS 2 Tools and Parts 2 Location Requirements 2 Product Dimensions 3 Electrical Requirements 3 INSTALLATION INSTRUCTIONS 4 Wall Venting Installation Only 4 Install Damper Assembly (for wall venting only 4 Roof Venting Installation Only 4 Install Damper Assembly (for further notes...
... COMBINATION INSTALLATION INSTRUCTIONS This product is the safety alert symbol. Table of Contents MICROWAVE HOOD COMBINATION SAFETY 1 INSTALLATION REQUIREMENTS 2 Tools and Parts 2 Location Requirements 2 Product Dimensions 3 Electrical Requirements 3 INSTALLATION INSTRUCTIONS 4 Wall Venting Installation Only 4 Install Damper Assembly (for wall venting only 4 Roof Venting Installation Only 4 Install Damper Assembly (for further notes...

Installation Instructions
Page 2
... needs to use appropriate fasteners. INSTALLATION REQUIREMENTS Tools and Parts Tools needed Gather the required tools and parts before starting installation. See the "Installation Dimensions" illustration. ■■ Minimum one 2" x 4" (5.1 cm x 10.16 cm) wood wall stud and minimum 3/8" (9.5 mm) thickness...fully. Special Requirements For Wall Venting Installation Only: ■■ Cutout must provide: ■■ Minimum installation dimensions. Damper assembly (for wall or ro venting) J. Washers (2) D. 3/16" (4.8 mm) toggle nuts (2) E. 1/4" x 2" (0.6 cm x 5.1 cm)...
... needs to use appropriate fasteners. INSTALLATION REQUIREMENTS Tools and Parts Tools needed Gather the required tools and parts before starting installation. See the "Installation Dimensions" illustration. ■■ Minimum one 2" x 4" (5.1 cm x 10.16 cm) wood wall stud and minimum 3/8" (9.5 mm) thickness...fully. Special Requirements For Wall Venting Installation Only: ■■ Cutout must provide: ■■ Minimum installation dimensions. Damper assembly (for wall or ro venting) J. Washers (2) D. 3/16" (4.8 mm) toggle nuts (2) E. 1/4" x 2" (0.6 cm x 5.1 cm)...

Installation Instructions
Page 3
... deeper than 15" (38.1 cm), use the bump out mounting kit replacing the mounting plate from Whirlpool. 12" DEEPER 14" 14" DEEPER 15" mounting plate Bump out mounting bracket Product Dimensions *Overall depth of range/cooktop below. SAVE THESE INSTRUCTIONS 10 " 26.2cm 10 " 26.2cm 45...not use of the grounding plug can result in a risk of electric shock by providing an escape wire for 60" (152.4 cm) installation height exact dimensions may vary depending on type of product will vary slightly depending on door design. A B Electrical Requirements WARNING 60" ( 152.4 cm) min. 30...
... deeper than 15" (38.1 cm), use the bump out mounting kit replacing the mounting plate from Whirlpool. 12" DEEPER 14" 14" DEEPER 15" mounting plate Bump out mounting bracket Product Dimensions *Overall depth of range/cooktop below. SAVE THESE INSTRUCTIONS 10 " 26.2cm 10 " 26.2cm 45...not use of the grounding plug can result in a risk of electric shock by providing an escape wire for 60" (152.4 cm) installation height exact dimensions may vary depending on type of product will vary slightly depending on door design. A B Electrical Requirements WARNING 60" ( 152.4 cm) min. 30...

Installation Instructions
Page 7
... the top of the tiles rather than the drywall). Place mounting plate against the bottom of "D", "E" and "G". Centerline 4. Make sure the 103⁄4" (27.3 cm) dimension from Whirlpool. 7 These are for lag screws E. D G E t NOTE: If upper cabinet is maintained. NOTE: If replacing a range hood that the holes cut the holes of upper...
... the top of the tiles rather than the drywall). Place mounting plate against the bottom of "D", "E" and "G". Centerline 4. Make sure the 103⁄4" (27.3 cm) dimension from Whirlpool. 7 These are for lag screws E. D G E t NOTE: If upper cabinet is maintained. NOTE: If replacing a range hood that the holes cut the holes of upper...


