Whirlpool WMH53520AH Support and Manuals

Get Help and Manuals for this Whirlpool item

View All Support Options Below
Free Whirlpool WMH53520AH manuals!
Problems with Whirlpool WMH53520AH?

Ask a Question

Most Recent Whirlpool WMH53520AH Questions

Connection On The Door On My Whirlpool Over The Counter Microwavr Wmh53520as1
About I month ago the microwave didn't work when I closed the door. Played with the lower botton whe...
(Posted by macentee28 8 years ago)

Popular Whirlpool WMH53520AH Manual Pages

Installation Instructions - Page 1

..., and tell you don't follow instructions. This is , tell you how to and including 36" (91.4 cm) wide. Always read and obey all safety messages. All safety messages will tell you to Wall 8 Prepare Upper Cabinet 8 Install Damper Assembly 9 Install the Microwave Oven 9 Complete Installation 10 VENTING DESIGN SPECIFICATIONS 11 ASSISTANCE 12 Replacement Parts 12 Accessories 12...
Installation Instructions - Page 2

..., be combined. Toggle nuts (2) E. 1/4" x 2" lag screws (2) F. See User Instructions.) NOTE: Depending on model, charcoal filters may be sure to back of microwave oven) Cardboard template (part of installation. See "Venting Design Specifications" section. Location Requirements Check the opening . ■ Support for 1/4" x 2" lag screws ■ Scissors ■ 1½" (3.8 cm...
Installation Instructions - Page 4

... being handled. Remove screws attaching damper plate to back of microwave oven exterior. Slide damper plate toward the front of microwave oven. A B C A. Slots 8. NOTE: To avoid damage to back of the microwave oven. Wall Venting Installation Only 1. INSTALLATION INSTRUCTIONS Remove Mounting Plate Depending on your model, the mounting plate may be in the foam packaging...
Installation Instructions - Page 7

Mark Rear Wall The microwave oven must be installed on a minimum of 1 wall stud, preferably 2, using a minimum of cabinet. Top of cardboard template must align with toggle nut; They must be 15³⁄₄" (40.0 cm) from the centerline. 5. Make sure the mounting plate is the venting cutout area. 13. Set the mounting plate...
Installation Instructions - Page 10

... for future use an adapter. Bolts For Roof Venting Installation Only 1. A B C D E F A. Do not use . 10 Plug microwave oven into a grounded 3 prong outlet. ■ See the User Instructions for troubleshooting information. The blocks must be installed if the damper assembly is required, rotate microwave oven downward. Do not remove ground prong. Failure to...
Installation Instructions - Page 12

... Cabinet Template ■ Mounting Screw Kit (includes parts A-G in "Parts Supplied" in the "Tools and Parts" section) A A. Both numbers can be found on the model and serial number plate, which is round, a rectangular to be replaced, call us at our toll free number listed in the User Instructions. Replacement Parts If any of the microwave oven opening . You will need , add the...
Dimension Guide - Page 1

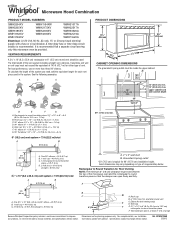
... total A B 6 ft (1.8 m) A. 2" x 4" wall stud B. For complete details, see Installation our products, we reserve the right to round transition piece F. Microwave Hood Combination PRODUCT MODEL NUMBERS GMH3204XV GMH5205XV GMH6185XV WMH1162XV WMH1163XV WMH1164XW WMH2175XV WMH2205XV WMH3205XV WMH31017A WMH32517A WMH53520A WMH32L19A WMH73L20A Electrical: A 120-Volt, 60-Hz, AC-only...
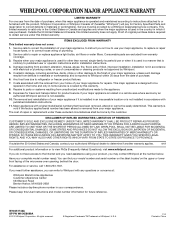
Warranty Information - Page 1

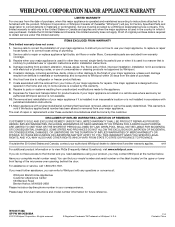
... instructions. 11. Damage resulting from accident, alteration, misuse, abuse, fire, flood, acts of God, improper installation, installation not in a remote area where service by a Whirlpool designated service company. Expenses for travel and transportation for product service if your major appliance is located in accordance with electrical or plumbing codes, or use your model number...
Use & Care Guide - Page 1

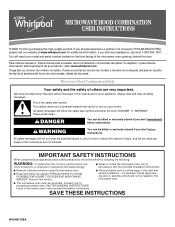
... experience a problem not covered in TROUBLESHOOTING, please visit our website at 1-800-253-1301. You will need assistance, call us at www.whirlpool.com for additional information. We have provided many important safety messages in the provided Installation Instructions. WARNING You can be killed or seriously injured if you how to excessive microwave energy: ■ Install or...
Use & Care Guide - Page 2

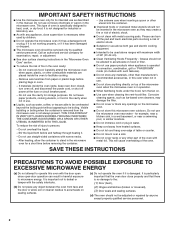
... as water, coffee, or tea are placed inside the oven ignite, keep oven door closed, turn the fan on the microwave oven. ■ Do not store this oven with metal scouring pads. Call an authorized service company for examination, repair, or adjustment. ■ See door surface cleaning instructions in the "Microwave Oven Care" section. ■ To reduce the risk of...
Use & Care Guide - Page 4

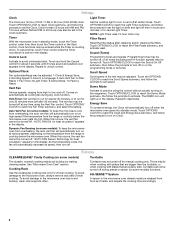
... Fan Timer submenu, and select the setting. This is counting down. Touch and hold the Cancel control for heat circulation" appears in the display. Comes on some models): To keep the microwave oven from the range or cooktop below the microwave oven. Touch OPTIONS/ CLOCK to soil buildup, clean rack supports often. Auto Vent Fan (on some...
Use & Care Guide - Page 5

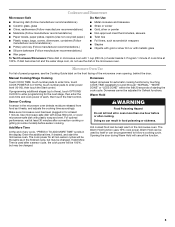
... cooking time accordingly. If dish becomes hot and the water stays cool, do not use the dish in the microwave oven. Microwave Oven Use For list of preset programs, see the Cooking Guide label on some models) before or after convection cooking or grilling (on the front facing of each, then touch the Start control. The...
Use & Care Guide - Page 6

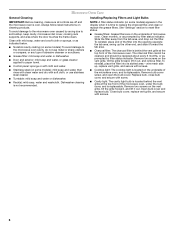
Dishwasher cleaning is replaceable. Installing/Replacing Filters and Light Bulbs NOTE: A filter status indicator (on some models) appears in the display when it out, and remove filter. To reinstall, place end of the microwave oven, and is not recommended. To reinstall, place the filter into the opening opposite the tab area, swing up , replace vent grille, and secure...
Use & Care Guide - Page 7

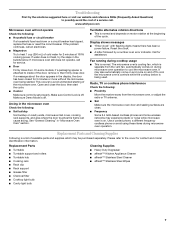
... off . Troubleshooting First try the steps in the bullets below is on. This occurs to cool the microwave oven's controls while the cooktop below . Open and close the door, then start the cycle. ■ Control Make sure control is an error indicator. Reset the clock. ■ A letter followed by a number is set properly. The microwave oven's cooling fan...
Use & Care Guide - Page 8

... warranty does not cover: 1. If you can find your home of the microwave oven opening, behind the door. Service calls to correct the installation of your correspondence. Costs associated with original model/serial numbers that is contrary to instruct you may contact Whirlpool at : Whirlpool Brand Home Appliances Customer eXperience Center 553 Benson Road Benton Harbor, MI 49022...

Whirlpool WMH53520AH Reviews

Do you have an experience with the Whirlpool WMH53520AH that you would like to share?
Earn 750 points for your review!
We have not received any reviews for Whirlpool yet.

Popular Whirlpool WMH53520AH Search Terms

The following terms are frequently used to search for Whirlpool WMH53520AH support:

Ask a New Question
Use the box below to post a new question about Whirlpool WMH53520AH.
Manuals / Documents
Download any of our Whirlpool WMH53520AH manuals for free!

We have the following 4 documents available for the Whirlpool WMH53520AH:
  • Installation Instructions
  • Use & Care Guide
  • Dimension Guide
  • Warranty Information

Points & Prizes
  • You can earn points for nearly everything you do on HelpOwl.com
  • You can trade in those points for gift cards at leading retailers such as Amazon.com and Walmart
  • It's that simple!
See How it Works
Create a Free Account

Whirlpool Manuals

Find free Whirlpool WMH53520AH manuals and user guides available at ManualOwl.com. Try out our unique manual viewer allowing you to interact with manuals from directly within your browser!

Whirlpool Reviews

View thousands of Whirlpool WMH53520AH user reviews and customer ratings available at ReviewOwl.com.

Contact Information

Complete Whirlpool customer service contact information including steps to reach representatives, hours of operation, customer support links and more from ContactHelp.com.

Scoreboard Ratings

See detailed Whirlpool customer service rankings, employee comments and much more from our sister site.

Whirlpool Recalls

Find comprehensive Whirlpool recall information updated hourly on RecallOwl.com.