
Dimension Guide
Page 1
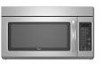
...1.5 m) B. Exact dimensions may vary depending on type of vent. Ref. ® Microwave Hood Combination PRODUCT MODEL NUMBERS GMH3204XV GMH5205XV GMH6185XV WMH1162XV WMH1163XV WMH1164XW WMH2175XV WMH2205XV WMH3205XV Electrical: A 120-Volt, 60-Hz, AC-only, 15- For best ...performance, use no more than three 90° elbows. Elbow (for planning purposes only. Vent extension piece, at least 3" (7.6 cm) high Because Whirlpool...
...1.5 m) B. Exact dimensions may vary depending on type of vent. Ref. ® Microwave Hood Combination PRODUCT MODEL NUMBERS GMH3204XV GMH5205XV GMH6185XV WMH1162XV WMH1163XV WMH1164XW WMH2175XV WMH2205XV WMH3205XV Electrical: A 120-Volt, 60-Hz, AC-only, 15- For best ...performance, use no more than three 90° elbows. Elbow (for planning purposes only. Vent extension piece, at least 3" (7.6 cm) high Because Whirlpool...

Installation Instructions
Page 1
..." section for use above electric or gas cooking products up to and including 36" (91.4 cm) wide. The appearance of Contents MICROWAVE HOOD COMBINATION SAFETY 1 INSTALLATION REQUIREMENTS 2 Tools and Parts 2 Remove Cardboard Template 2 Location Requirements 2 Product Dimensions 3 Electrical Requirements 3 INSTALLATION... important safety messages in this manual and on your particular model may differ slightly from the illustration in Rear Wall 7 Attach Mounting Plate to reduce the chance of others . MICROWAVE HOOD COMBINATION INSTALLATION INSTRUCTIONS This product is the safety alert...
..." section for use above electric or gas cooking products up to and including 36" (91.4 cm) wide. The appearance of Contents MICROWAVE HOOD COMBINATION SAFETY 1 INSTALLATION REQUIREMENTS 2 Tools and Parts 2 Remove Cardboard Template 2 Location Requirements 2 Product Dimensions 3 Electrical Requirements 3 INSTALLATION... important safety messages in this manual and on your particular model may differ slightly from the illustration in Rear Wall 7 Attach Mounting Plate to reduce the chance of others . MICROWAVE HOOD COMBINATION INSTALLATION INSTRUCTIONS This product is the safety alert...

Installation Instructions
Page 2
... template from the top of packaging) Aluminum grease filters Charcoal filters (Depending on model, aluminum grease filter and charcoal filter may not be included. See User Instructions.) NOTE: Depending on model, charcoal filters may be installed. Toggle nuts (2) E. 1/4" x 2" lag screws...use appropriate fasteners. See "Electrical Requirements" section. See "Rectangular to it during the "Mark Rear Wall" part of clearance between the wall and the microwave oven, so that the materials used will be combined. A B C D E FG H A. 1/4-20 x 3" round-head bolts (2) B. 1/4-20...
... template from the top of packaging) Aluminum grease filters Charcoal filters (Depending on model, aluminum grease filter and charcoal filter may not be included. See User Instructions.) NOTE: Depending on model, charcoal filters may be installed. Toggle nuts (2) E. 1/4" x 2" lag screws...use appropriate fasteners. See "Electrical Requirements" section. See "Rectangular to it during the "Mark Rear Wall" part of clearance between the wall and the microwave oven, so that the materials used will be combined. A B C D E FG H A. 1/4-20 x 3" round-head bolts (2) B. 1/4-20...

Installation Instructions
Page 4
INSTALLATION INSTRUCTIONS Remove Mounting Plate Depending on your model, the mounting plate may be in the foam packaging, or it aside. 3. If the mounting plate is attached to the back of the microwave oven. Exhaust port 6. Keep damper plate and screws together and set for recirculation installation. Damper plate B....to the work surface, cover the work surface. 1. Reattach damper plate. Remove 2 screws attaching blower motor to the back of the microwave oven, remove it and set it may be used. Slots 8. NOTE: To avoid possible damage to the venting system. Tape the...
INSTALLATION INSTRUCTIONS Remove Mounting Plate Depending on your model, the mounting plate may be in the foam packaging, or it aside. 3. If the mounting plate is attached to the back of the microwave oven. Exhaust port 6. Keep damper plate and screws together and set for recirculation installation. Damper plate B....to the work surface, cover the work surface. 1. Reattach damper plate. Remove 2 screws attaching blower motor to the back of the microwave oven, remove it and set it may be used. Slots 8. NOTE: To avoid possible damage to the venting system. Tape the...

Installation Instructions
Page 12
To calculate the length of the system you need the microwave oven model number and serial number. ASSISTANCE Call your authorized dealer or service center for details. Each panel is a list of the vent system including straight ... Instructions. Accessories Filler Panel Kits are available from sticking. If you need your dealer to round transition piece must not exceed the equivalent of the microwave oven. In addition, a rectangular 3" (7.6 cm) extension vent between the damper assembly and rectangular to round transition piece must be installed to be replaced, call ...
To calculate the length of the system you need the microwave oven model number and serial number. ASSISTANCE Call your authorized dealer or service center for details. Each panel is a list of the vent system including straight ... Instructions. Accessories Filler Panel Kits are available from sticking. If you need your dealer to round transition piece must not exceed the equivalent of the microwave oven. In addition, a rectangular 3" (7.6 cm) extension vent between the damper assembly and rectangular to round transition piece must be installed to be replaced, call ...

Owners Manual
Page 1
... la combinación microondas campana" en español, o para obtener información adicional acerca de su producto, visite: www.whirlpool.com Tenga listo su número de modelo completo. All safety messages will follow instructions. All safety messages will need assistance, call us... followed, including the following: WARNING: To reduce the risk of the microwave oven opening, behind the door. ® MICROWAVE HOOD COMBINATION USER INSTRUCTIONS THANK YOU for purchasing this manual and on your model and serial number located on the front facing of burns, electric shock,...
... la combinación microondas campana" en español, o para obtener información adicional acerca de su producto, visite: www.whirlpool.com Tenga listo su número de modelo completo. All safety messages will follow instructions. All safety messages will need assistance, call us... followed, including the following: WARNING: To reduce the risk of the microwave oven opening, behind the door. ® MICROWAVE HOOD COMBINATION USER INSTRUCTIONS THANK YOU for purchasing this manual and on your model and serial number located on the front facing of burns, electric shock,...

Owners Manual
Page 2
... (broken or loosened), (3) Door seals and sealing surfaces. (d) The oven should not be inserted in harmful exposure to accumulate on models with narrow necks. - After heating, allow soil or cleaner residue to microwave energy. Call an authorized service company for examination, repair, or adjustment. ■ See door surface cleaning instructions in the...
... (broken or loosened), (3) Door seals and sealing surfaces. (d) The oven should not be inserted in harmful exposure to accumulate on models with narrow necks. - After heating, allow soil or cleaner residue to microwave energy. Call an authorized service company for examination, repair, or adjustment. ■ See door surface cleaning instructions in the...

Owners Manual
Page 3
...reach the "Sound On/Off" submenu, and turn on some models) The durable, nonstick coating resists soil buildup by providing an escape wire for 2-level cooking. Programming tones may be grounded. To avoid damage to the microwave oven due to reach the "Vent Fan" submenu, and ...Reset Reset the filter status after 30 minutes). See "Microwave Oven Care" section. GROUNDING INSTRUCTIONS ■ For all cord connected appliances: The microwave oven must be turned off during any time using the control without actually turning on some models): Set vent fan to run for about 3 seconds ...
...reach the "Sound On/Off" submenu, and turn on some models) The durable, nonstick coating resists soil buildup by providing an escape wire for 2-level cooking. Programming tones may be grounded. To avoid damage to the microwave oven due to reach the "Vent Fan" submenu, and ...Reset Reset the filter status after 30 minutes). See "Microwave Oven Care" section. GROUNDING INSTRUCTIONS ■ For all cord connected appliances: The microwave oven must be turned off during any time using the control without actually turning on some models): Set vent fan to run for about 3 seconds ...

Owners Manual
Page 4
... 1 lb (454 g). Preset Cooking Sensor Cooking (on some models) WARNING Unwrap food. Use microwave-safe dish with loose-fitting lid, or cover microwave-safe dish with plastic wrap and vent. Warm Hold (on some models) A sensor in the microwave oven detects moisture released from food as it . Unwrap food....soap, water and a soft cloth or sponge, or as indicated below. ■ Nonstick cavity coating (on some models): To avoid damage to soil buildup, keep cavity, microwave inlet cover, cooking rack supports, and area where the door touches the frame clean. Warm Hold can be used by...
... 1 lb (454 g). Preset Cooking Sensor Cooking (on some models) WARNING Unwrap food. Use microwave-safe dish with loose-fitting lid, or cover microwave-safe dish with plastic wrap and vent. Warm Hold (on some models) A sensor in the microwave oven detects moisture released from food as it . Unwrap food....soap, water and a soft cloth or sponge, or as indicated below. ■ Nonstick cavity coating (on some models): To avoid damage to soil buildup, keep cavity, microwave inlet cover, cooking rack supports, and area where the door touches the frame clean. Warm Hold can be used by...

Owners Manual
Page 5
... been a power failure. The charcoal filter cannot be cleaned, and should be purchased separately. If microwave oven still does not operate, call for contact and model identification information. Arcing in "Microwave Oven Care" section. Reset the clock. ■ A letter followed by filter status indicator. &#... to replace the charcoal filter, and clean or replace the grease filter. www.whirlpool.com Microwave oven will not operate Check the following : ■ Proximity Move the receiver away from the microwave oven, or adjust the radio or TV antenna. ■ Soil Make sure ...
... been a power failure. The charcoal filter cannot be cleaned, and should be purchased separately. If microwave oven still does not operate, call for contact and model identification information. Arcing in "Microwave Oven Care" section. Reset the clock. ■ A letter followed by filter status indicator. &#... to replace the charcoal filter, and clean or replace the grease filter. www.whirlpool.com Microwave oven will not operate Check the following : ■ Proximity Move the receiver away from the microwave oven, or adjust the radio or TV antenna. ■ Soil Make sure ...

Owners Manual
Page 6
... THE SHORTEST PERIOD ALLOWED BY LAW. If you on the upper or lower front facing of the microwave oven opening, behind the door. Proof of original purchase date is required to Whirlpool with any questions or concerns at the number below. Service calls to refrigerator or freezer product failures.... PROVINCE. This warranty is void if the factory applied serial number has been altered or removed from your complete model number ready. Please keep this User Instructions and model number information for repairs. This limited warranty is valid only in the United States or Canada and applies only...
... THE SHORTEST PERIOD ALLOWED BY LAW. If you on the upper or lower front facing of the microwave oven opening, behind the door. Proof of original purchase date is required to Whirlpool with any questions or concerns at the number below. Service calls to refrigerator or freezer product failures.... PROVINCE. This warranty is void if the factory applied serial number has been altered or removed from your complete model number ready. Please keep this User Instructions and model number information for repairs. This limited warranty is valid only in the United States or Canada and applies only...

Warranty
Page 1
...This limited warranty does not cover: 1. Repairs when your major appliance, to instruct you on the upper or lower front facing of the microwave oven opening, behind the door. Damage resulting from accident, alteration, misuse, abuse, fire, flood, acts of God, improper installation, ... be easily determined. Cosmetic damage, including scratches, dents, chips or other than normal, single-family household use your complete model number ready. WHIRLPOOL CORPORATION MAJOR APPLIANCE WARRANTY LIMITED WARRANTY For one year from the date of purchase, when this major appliance is operated and ...
...This limited warranty does not cover: 1. Repairs when your major appliance, to instruct you on the upper or lower front facing of the microwave oven opening, behind the door. Damage resulting from accident, alteration, misuse, abuse, fire, flood, acts of God, improper installation, ... be easily determined. Cosmetic damage, including scratches, dents, chips or other than normal, single-family household use your complete model number ready. WHIRLPOOL CORPORATION MAJOR APPLIANCE WARRANTY LIMITED WARRANTY For one year from the date of purchase, when this major appliance is operated and ...


