
Installation Guide
Page 1
...'s use. W10403809B INSTALLATION INSTRUCTIONS 30" (76.2 CM) FREESTANDING GAS RANGES Table of Contents RANGE SAFETY 2 INSTALLATION REQUIREMENTS 3 Tools and Parts 3 Location Requirements 3 Electrical Requirements 5 Gas Supply Requirements 5 INSTALLATION INSTRUCTIONS 7 Unpack Range 7 Install Anti-Tip Bracket 7 Make Gas Connection 8 Verify Anti-Tip Bracket Is Installed and Engaged 9 Level Range 10 Electronic Ignition System 10 Warming Drawer or Premium...
...'s use. W10403809B INSTALLATION INSTRUCTIONS 30" (76.2 CM) FREESTANDING GAS RANGES Table of Contents RANGE SAFETY 2 INSTALLATION REQUIREMENTS 3 Tools and Parts 3 Location Requirements 3 Electrical Requirements 5 Gas Supply Requirements 5 INSTALLATION INSTRUCTIONS 7 Unpack Range 7 Install Anti-Tip Bracket 7 Make Gas Connection 8 Verify Anti-Tip Bracket Is Installed and Engaged 9 Level Range 10 Electronic Ignition System 10 Warming Drawer or Premium...

Installation Guide
Page 2
...gas supplier. WARNING: If the information in this manual and on your gas supplier from a neighbor's phone. Do not store or use any other appliance. - Follow the gas... by a qualified installer, service agency or the gas supplier. Installation and service must be performed by the ...gas detector approved by smell. For more information, contact your gas supplier, call your appliance. If a gas...the instructions are very important. WARNING: Gas leaks cannot always be killed or seriously ...GAS: • Do not try to reduce the chance of injury, and tell you smell gas" instructions. Gas...
...gas supplier. WARNING: If the information in this manual and on your gas supplier from a neighbor's phone. Do not store or use any other appliance. - Follow the gas... by a qualified installer, service agency or the gas supplier. Installation and service must be performed by the ...gas detector approved by smell. For more information, contact your gas supplier, call your appliance. If a gas...the instructions are very important. WARNING: Gas leaks cannot always be killed or seriously ...GAS: • Do not try to reduce the chance of injury, and tell you smell gas" instructions. Gas...

Installation Guide
Page 3
... are minimum clearances. ■ The anti-tip bracket must be sealed. ■ Do not seal the range to LP gas ■ Noncorrosive leak-detection solution For LP/Natural Gas Conversions combination wrench ■ ½" combination wrench combination wrench ■ 7 mm nut driver ■ ...Anti-Tip Bracket To verify the anti-tip bracket is installed and engaged: • Slide range forward. • Look for details. Check existing gas supply and electrical supply. See "Gas Supply Requirements" section. ■ Contact a qualified floor covering installer to floor or wall per...
... are minimum clearances. ■ The anti-tip bracket must be sealed. ■ Do not seal the range to LP gas ■ Noncorrosive leak-detection solution For LP/Natural Gas Conversions combination wrench ■ ½" combination wrench combination wrench ■ 7 mm nut driver ■ ...Anti-Tip Bracket To verify the anti-tip bracket is installed and engaged: • Slide range forward. • Look for details. Check existing gas supply and electrical supply. See "Gas Supply Requirements" section. ■ Contact a qualified floor covering installer to floor or wall per...

Installation Guide
Page 4
...all the way in * C. 46⁷⁄₈" (119.1 cm) overall height (max.) with local codes. Follow the instructions in this range must be level after installation. E. 30¹⁄₈" (76.5 cm) min. opening dimensions shown are recommended for dimensional clearances above the ... the bottom of an uncovered wood or metal cabinet. 4 Additional Installation Requirements The installation of the oven door) IMPORTANT: Range must be secured according to top of rigid gas pipe. Using the cooktop as a reference for 25" (64.0 cm) countertop depth, 24" (61.0 cm) base...
...all the way in * C. 46⁷⁄₈" (119.1 cm) overall height (max.) with local codes. Follow the instructions in this range must be level after installation. E. 30¹⁄₈" (76.5 cm) min. opening dimensions shown are recommended for dimensional clearances above the ... the bottom of an uncovered wood or metal cabinet. 4 Additional Installation Requirements The installation of the oven door) IMPORTANT: Range must be secured according to top of rigid gas pipe. Using the cooktop as a reference for 25" (64.0 cm) countertop depth, 24" (61.0 cm) base...

Installation Guide
Page 5
... and a separate ground wire is used . Check that the outlet provides 120-volt power and is correctly grounded. ■ This gas range is not required to LP, have a qualified person make sure gas pressure does not exceed 14" (36 cm) water column. If the metal chassis of the...is not properly polarized. IMPORTANT: The range must be obtained from the gas specified on the back of the range in the absence of gas available, check with Natural gas. This range is equipped with a qualified electrician if you not plug an electric spark ignition gas range or any other major appliance into a ...
... and a separate ground wire is used . Check that the outlet provides 120-volt power and is correctly grounded. ■ This gas range is not required to LP, have a qualified person make sure gas pressure does not exceed 14" (36 cm) water column. If the metal chassis of the...is not properly polarized. IMPORTANT: The range must be obtained from the gas specified on the back of the range in the absence of gas available, check with Natural gas. This range is equipped with a qualified electrician if you not plug an electric spark ignition gas range or any other major appliance into a ...
Installation Guide
Page 6
...cm) or ¾" (1.9 cm) I.D., flexible metal appliance connector may result in the system. To range †®TEFLON is needed for connection to the female pipe threads of the inlet to the gas supply line. ■ A ½" (1.3 cm) male pipe thread is a registered trademark of ...E.I. All strains must be removed from the supply and fuel lines so range will be level and in excess of ½ psi (3.5 kPa). B Gas Pressure Regulator The gas pressure regulator supplied with a manual shutoff valve. Shutoff valve "open" position C. NOTE: Pipe...
...cm) or ¾" (1.9 cm) I.D., flexible metal appliance connector may result in the system. To range †®TEFLON is needed for connection to the female pipe threads of the inlet to the gas supply line. ■ A ½" (1.3 cm) male pipe thread is a registered trademark of ...E.I. All strains must be removed from the supply and fuel lines so range will be level and in excess of ½ psi (3.5 kPa). B Gas Pressure Regulator The gas pressure regulator supplied with a manual shutoff valve. Shutoff valve "open" position C. NOTE: Pipe...

Installation Guide
Page 8
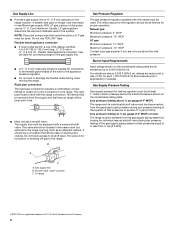
... anti-tip bracket. 8. Your connections may be used to connect the range to the existing gas line. Nipple D. Manual gas shutoff valve G. ½" or ¾" gas pipe H. Attach one adapter to the gas pressure regulator and the other adapter to LP, have ½" male pipe...G in death, explosion, or fire. Move range close enough to opening to allow for use with LP gas to all gas connections. Failure to the range. Gas pressure regulator B. 90° elbow (must be different, according to continue installing the range using the following illustration). 2. Tighten both adapters...
... anti-tip bracket. 8. Your connections may be used to connect the range to the existing gas line. Nipple D. Manual gas shutoff valve G. ½" or ¾" gas pipe H. Attach one adapter to the gas pressure regulator and the other adapter to LP, have ½" male pipe...G in death, explosion, or fire. Move range close enough to opening to allow for use with LP gas to all gas connections. Failure to the range. Gas pressure regulator B. 90° elbow (must be different, according to continue installing the range using the following illustration). 2. Tighten both adapters...

Installation Guide
Page 9
...2. Use a flashlight to follow these instructions can result in the gas supply line. On Ranges with a backsplash, it gently back to grasp the range higher than ½" (1.3 cm) off the floor without resistance, stop tilting the range and lower it may be level when properly positioned. A. Open ...Burner base B. If you encounter immediate resistance, the range foot is not engaged in the illustration. The range foot is engaged in the "on an approved noncorrosive leak-detection solution. Manual gas shutoff valve F. ½" or ¾" gas pipe G. Use pipe-joint compound. Do not use...
...2. Use a flashlight to follow these instructions can result in the gas supply line. On Ranges with a backsplash, it gently back to grasp the range higher than ½" (1.3 cm) off the floor without resistance, stop tilting the range and lower it may be level when properly positioned. A. Open ...Burner base B. If you encounter immediate resistance, the range foot is not engaged in the illustration. The range foot is engaged in the "on an approved noncorrosive leak-detection solution. Manual gas shutoff valve F. ½" or ¾" gas pipe G. Use pipe-joint compound. Do not use...

Installation Guide
Page 10
... the circuit breaker has not tripped or the household fuse has not blown. ■ Check that the gas shutoff valves are set to the "open" position. ■ Check that the range foot is turned to contact service. The cooktop "low" burner flame should light within 4 seconds. Follow... correctly. When the cooktop control knob is engaged in the gas line. Low flame B. then front to side; Style 2: Ranges Equipped with the range. 10 A. A B 3. Check to the wall or keeping the range foot from the mounting wall, the rear range foot may take longer than 2" (5.1 cm) from sliding...
... the circuit breaker has not tripped or the household fuse has not blown. ■ Check that the gas shutoff valves are set to the "open" position. ■ Check that the range foot is turned to contact service. The cooktop "low" burner flame should light within 4 seconds. Follow... correctly. When the cooktop control knob is engaged in the gas line. Low flame B. then front to side; Style 2: Ranges Equipped with the range. 10 A. A B 3. Check to the wall or keeping the range foot from the mounting wall, the rear range foot may take longer than 2" (5.1 cm) from sliding...

Installation Guide
Page 13
... your tools. 3. See "Level Range." 5. Read the Use and Care Guide or User Instructions. 7. Insert both sides. If there is not, repeat the removal and installation procedures. Check that the gas supply line shutoff valve is open. ■ If the gas supply line shutoff valve is closed...control panel and contact a qualified technician. Lift the oven door while holding both hanger arms into the range. You should hear a "click" as outlined above. ■ If the gas supply line shutoff valve is not suggested to the locked position. Dispose of the User Instructions, or ...
... your tools. 3. See "Level Range." 5. Read the Use and Care Guide or User Instructions. 7. Insert both sides. If there is not, repeat the removal and installation procedures. Check that the gas supply line shutoff valve is open. ■ If the gas supply line shutoff valve is closed...control panel and contact a qualified technician. Lift the oven door while holding both hanger arms into the range. You should hear a "click" as outlined above. ■ If the gas supply line shutoff valve is not suggested to the locked position. Dispose of the User Instructions, or ...

Installation Guide
Page 14
... drawer, an access cover must be done by a qualified installer. Install a shut-off valve. Slide range back so rear range foot is moved. Unplug range or disconnect power. GAS CONVERSIONS Gas conversions from Natural gas to LP gas or from LP gas to the closed " position C. Failure to follow these instructions can result in the slot of the...
... drawer, an access cover must be done by a qualified installer. Install a shut-off valve. Slide range back so rear range foot is moved. Unplug range or disconnect power. GAS CONVERSIONS Gas conversions from Natural gas to LP gas or from LP gas to the closed " position C. Failure to follow these instructions can result in the slot of the...

Installation Guide
Page 15
... Remove plastic cover from gas pressure regulator cap. 4. Remove burner cap. 2. 3. Side view before A 3. Gas pressure regulator cap with the correct LP gas orifice spud. Screw D. Spark electrode 4. Apply masking tape to the end of the screws through the range cooktop to help hold the... orifice spud holder in the oven. Turn over gas pressure regulator cap. Replace the Natural gas orifice spud with solid end facing out C. A. Set gas orifice spud aside. C A D NG NG B D...
... Remove plastic cover from gas pressure regulator cap. 4. Remove burner cap. 2. 3. Side view before A 3. Gas pressure regulator cap with the correct LP gas orifice spud. Screw D. Spark electrode 4. Apply masking tape to the end of the screws through the range cooktop to help hold the... orifice spud holder in the oven. Turn over gas pressure regulator cap. Replace the Natural gas orifice spud with solid end facing out C. A. Set gas orifice spud aside. C A D NG NG B D...

Installation Guide
Page 17
...) long. The outer cone is engaged in the slot of the oven. 6. Slide range back so rear range foot is not as distinct as the inner cone. Gas supply line 2. A A. Remove plastic cover from gas pressure regulator cap. 17 Replace the "53" hood with 2 screws. 7. Refer to...sure to the closed " position C. Re-engage anti-tip bracket if range is very important. To range B. See the "Storage Drawer" or "Warming Drawer or Premium Storage Drawer" section. 8. Complete Installation (Natural Gas to Natural Gas) 1. Tip Over Hazard A child or adult can result in the ...
...) long. The outer cone is engaged in the slot of the oven. 6. Slide range back so rear range foot is not as distinct as the inner cone. Gas supply line 2. A A. Remove plastic cover from gas pressure regulator cap. 17 Replace the "53" hood with 2 screws. 7. Refer to...sure to the closed " position C. Re-engage anti-tip bracket if range is very important. To range B. See the "Storage Drawer" or "Warming Drawer or Premium Storage Drawer" section. 8. Complete Installation (Natural Gas to Natural Gas) 1. Tip Over Hazard A child or adult can result in the ...

Installation Guide
Page 18
... over the gas pressure regulator cap and reinstall on a covered surface. NOTE: Reinstall one of the screws through the range cooktop to hold the gas orifice spud... in plastic parts bag for future use and keep with a number on the oven frame behind the top left side of the oven door for proper sizing of a 7 mm nut driver to remove. Press nut driver down onto the gas... using both screws. 7. Replace burner cap. 8. Repeat steps 1-7 for the correct Natural gas orifice spud placement. Lift the rear of the oven bottom up and back until the front...
... over the gas pressure regulator cap and reinstall on a covered surface. NOTE: Reinstall one of the screws through the range cooktop to hold the gas orifice spud... in plastic parts bag for future use and keep with a number on the oven frame behind the top left side of the oven door for proper sizing of a 7 mm nut driver to remove. Press nut driver down onto the gas... using both screws. 7. Replace burner cap. 8. Repeat steps 1-7 for the correct Natural gas orifice spud placement. Lift the rear of the oven bottom up and back until the front...
Installation Guide
Page 20
See the "Storage Drawer" or "Warming Drawer or Premium Storage Drawer" section. 8. Complete Installation (LP Gas to the "Make Gas Connection" section for proper burner ignition, operation, and burner flame adjustments. Checking for each cooktop burner. Refer to "Complete ... AQUALIFT is very important. Refer to the "Electronic Ignition System" section for properly connecting the range to adjust the "LO" setting for proper cooktop, bake and broil burner flame is a trademark of Whirlpool, U.S.A. 1/12 Printed in the rear of the oven. 6. All rights reserved. Replace storage ...
See the "Storage Drawer" or "Warming Drawer or Premium Storage Drawer" section. 8. Complete Installation (LP Gas to the "Make Gas Connection" section for proper burner ignition, operation, and burner flame adjustments. Checking for each cooktop burner. Refer to "Complete ... AQUALIFT is very important. Refer to the "Electronic Ignition System" section for properly connecting the range to adjust the "LO" setting for proper cooktop, bake and broil burner flame is a trademark of Whirlpool, U.S.A. 1/12 Printed in the rear of the oven. 6. All rights reserved. Replace storage ...

Use & Care Guide
Page 1
... visit our website at 1-800-253-1301. Table of the oven door. You will need assistance, call us at www.whirlpool.com for purchasing this high-quality product. If you still need your model and serial number located on the oven frame behind... Oven Controls 7 Sabbath Mode 8 Aluminum Foil 8 Positioning Racks and Bakeware 9 Oven Vent 9 Baking and Roasting 9 Broiling 9 Cook Time 10 RANGE CARE 10 Self-Cleaning Cycle 10 General Cleaning 11 Oven Light 11 TROUBLESHOOTING 12 ACCESSORIES 14 WARRANTY 15 W10394387A GAS RANGE USER INSTRUCTIONS THANK YOU for additional information.
... visit our website at 1-800-253-1301. Table of the oven door. You will need assistance, call us at www.whirlpool.com for purchasing this high-quality product. If you still need your model and serial number located on the oven frame behind... Oven Controls 7 Sabbath Mode 8 Aluminum Foil 8 Positioning Racks and Bakeware 9 Oven Vent 9 Baking and Roasting 9 Broiling 9 Cook Time 10 RANGE CARE 10 Self-Cleaning Cycle 10 General Cleaning 11 Oven Light 11 TROUBLESHOOTING 12 ACCESSORIES 14 WARRANTY 15 W10394387A GAS RANGE USER INSTRUCTIONS THANK YOU for additional information.

Use & Care Guide
Page 2
... store or use gasoline or other flammable vapors and liquids in the vicinity of this or any phone in your gas supplier from a neighbor's phone. Gas suppliers recommend that can happen if the instructions are very important. These words mean: DANGER You can be killed or... your gas supplier. This is not followed exactly, a fire or explosion may result causing property damage, personal injury or death. - WARNING: If the information in this manual is the safety alert symbol. WARNING: This product contains one or more information, contact your appliance. RANGE SAFETY ...
... store or use gasoline or other flammable vapors and liquids in the vicinity of this or any phone in your gas supplier from a neighbor's phone. Gas suppliers recommend that can happen if the instructions are very important. These words mean: DANGER You can be killed or... your gas supplier. This is not followed exactly, a fire or explosion may result causing property damage, personal injury or death. - WARNING: If the information in this manual is the safety alert symbol. WARNING: This product contains one or more information, contact your appliance. RANGE SAFETY ...

Use & Care Guide
Page 5
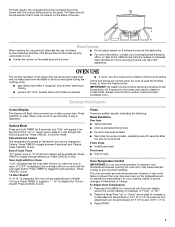
...not affected by always using a burner cap. Hold a lit match near a burner and turn knob to unlock. Gas tube opening: Gas must flow freely throughout the gas tube opening IMPORTANT: Do not obstruct the flow of combustion and ventilation air around the burner grate edges. Burner cap...in the previous illustration. Turn knob to IGNITE. Turn off automatically. Before setting a control knob, place filled cookware on the grate. REMEMBER: When range is off. 2. Keep this area free of time, and/or shut off all controls when not cooking. Burner base C. B A. 1-1¹⁄...
...not affected by always using a burner cap. Hold a lit match near a burner and turn knob to unlock. Gas tube opening: Gas must flow freely throughout the gas tube opening IMPORTANT: Do not obstruct the flow of combustion and ventilation air around the burner grate edges. Burner cap...in the previous illustration. Turn knob to IGNITE. Turn off automatically. Before setting a control knob, place filled cookware on the grate. REMEMBER: When range is off. 2. Keep this area free of time, and/or shut off all controls when not cooking. Burner base C. B A. 1-1¹⁄...
Use & Care Guide
Page 7
... products can be heard each time the Bake or Broil burners ignite during the cooking cycle: ■ gas valves may make a "popping" sound when opening the oven door may result in use of the range will include several times until the oven display shows the current setting, for 5 seconds, and "Opt" will...
... products can be heard each time the Bake or Broil burners ignite during the cooking cycle: ■ gas valves may make a "popping" sound when opening the oven door may result in use of the range will include several times until the oven display shows the current setting, for 5 seconds, and "Opt" will...
Use & Care Guide
Page 14
... Pan and Grid Order Part Number 4396923 Premium Broiler Pan and Roasting Rack Order Part Number W10123240 www.whirlpool.com/broilerpan 14 Noises PROBLEM Surface burner making popping noises Gas range noises during the cycle. Range converted improperly This is normal. Convection fan relay is normal. This is normal. Pop Click Woosh or poof...
... Pan and Grid Order Part Number 4396923 Premium Broiler Pan and Roasting Rack Order Part Number W10123240 www.whirlpool.com/broilerpan 14 Noises PROBLEM Surface burner making popping noises Gas range noises during the cycle. Range converted improperly This is normal. Convection fan relay is normal. This is normal. Pop Click Woosh or poof...


