
Dimension Guide
Page 1
... the range, follow the range hood or microwave hood combination installation instructions for installation of rigid gas pipe. For minimum clearance to side wall or other combustible material. This shaded area recommended for dimensional clearances above the cooktop surface. Because Whirlpool Corporation ... A. 18" (45.7 cm) upper side cabinet to the range location. ® 30" (76.2 cm) Freestanding Gas Range PRODUCT MODEL NUMBERS PRODUCT DIMENSIONS GFG464LV GFG471LV WFG361LV WFG366LV WFG371LV WFG374LV Gas supply: This range is needed for connection to the female pipe threads of the ...
... the range, follow the range hood or microwave hood combination installation instructions for installation of rigid gas pipe. For minimum clearance to side wall or other combustible material. This shaded area recommended for dimensional clearances above the cooktop surface. Because Whirlpool Corporation ... A. 18" (45.7 cm) upper side cabinet to the range location. ® 30" (76.2 cm) Freestanding Gas Range PRODUCT MODEL NUMBERS PRODUCT DIMENSIONS GFG464LV GFG471LV WFG361LV WFG366LV WFG371LV WFG374LV Gas supply: This range is needed for connection to the female pipe threads of the ...

Owners Manual
Page 1
...6 Electronic Oven Controls 6 Aluminum Foil 7 Positioning Racks and Bakeware 7 Oven Vent 7 Baking and Roasting 7 Broiling 7 Timed Cooking (on some models 8 RANGE CARE 8 Self-Cleaning Cycle (on the oven frame behind the storage drawer panel. Puede encontrar su número de modelo y de serie en la etqueta en el marco... el usuario de la estufa a gas" en español, o para obtener información adicional acerca de su producto, visite: www.whirlpool.com Tenga listo su número de modelo completo. If you still need your model and serial number located on some models 8 General...
...6 Electronic Oven Controls 6 Aluminum Foil 7 Positioning Racks and Bakeware 7 Oven Vent 7 Baking and Roasting 7 Broiling 7 Timed Cooking (on some models 8 RANGE CARE 8 Self-Cleaning Cycle (on the oven frame behind the storage drawer panel. Puede encontrar su número de modelo y de serie en la etqueta en el marco... el usuario de la estufa a gas" en español, o para obtener información adicional acerca de su producto, visite: www.whirlpool.com Tenga listo su número de modelo completo. If you still need your model and serial number located on some models 8 General...

Owners Manual
Page 2
... messages. All safety messages will tell you what the potential hazard is detected, follow the safety alert symbol and either the word "DANGER" or "WARNING." RANGE SAFETY Your safety and the safety of others . WHAT TO DO IF YOU SMELL GAS: • Do not try to some of California to such...
... messages. All safety messages will tell you what the potential hazard is detected, follow the safety alert symbol and either the word "DANGER" or "WARNING." RANGE SAFETY Your safety and the safety of others . WHAT TO DO IF YOU SMELL GAS: • Do not try to some of California to such...

Owners Manual
Page 3
... clear and free from the misuse of appliance doors or drawers such as stepping, leaning, or sitting on the backguard of a range - For self-cleaning ranges - ■ Before Self-Cleaning the Oven - Wipe off all excessive spillage before servicing. ■ Injuries may also trap heat, causing a fire hazard. ■ CAUTION: Do not store items of ...
... clear and free from the misuse of appliance doors or drawers such as stepping, leaning, or sitting on the backguard of a range - For self-cleaning ranges - ■ Before Self-Cleaning the Oven - Wipe off all excessive spillage before servicing. ■ Injuries may also trap heat, causing a fire hazard. ■ CAUTION: Do not store items of ...

Owners Manual
Page 4
... door is set the time of -cycle tones will not come on during the Self-Clean cycle. The oven light will function with a.m. Only the CLOCK and TIMER keypads will... in 5° increments between 300°F and 525°F (150°C and 275°C). 4. See the "Range Care" section. 1. Press CANCEL/OFF when finished. 1. Press CANCEL/OFF when finished. Check that the oven is ...off . Press TEMP/TIME "+" or "-" arrow pads to set at www.whirlpool.com for 3 seconds. 3. The oven light will sound at serving temperature before or after cooking....
... door is set the time of -cycle tones will not come on during the Self-Clean cycle. The oven light will function with a.m. Only the CLOCK and TIMER keypads will... in 5° increments between 300°F and 525°F (150°C and 275°C). 4. See the "Range Care" section. 1. Press CANCEL/OFF when finished. 1. Press CANCEL/OFF when finished. Check that the oven is ...off . Press TEMP/TIME "+" or "-" arrow pads to set at www.whirlpool.com for 3 seconds. 3. The oven light will sound at serving temperature before or after cooking....

Owners Manual
Page 5
...of day, cook for proper size and shape as breads and cakes because they may become hot. Only the burner with a delayed start CANCEL/OFF Range function TEMP/TIME Temperature and time adjust INSTRUCTIONS Timed Cooking allows the oven to IGNITE. Turn knob to IGNITE will produce a flame. 2. Hold ... burner cap after pressing a keypad, the function is canceled and the time of the pan. After burner lights, turn on some models) during the Self-Cleaning cycle, the entire cooktop area may not bake properly. or "PSH" appears in place when using a burner cap. All 4 surface burners will help...
...of day, cook for proper size and shape as breads and cakes because they may become hot. Only the burner with a delayed start CANCEL/OFF Range function TEMP/TIME Temperature and time adjust INSTRUCTIONS Timed Cooking allows the oven to IGNITE. Turn knob to IGNITE will produce a flame. 2. Hold ... burner cap after pressing a keypad, the function is canceled and the time of the pan. After burner lights, turn on some models) during the Self-Cleaning cycle, the entire cooktop area may not bake properly. or "PSH" appears in place when using a burner cap. All 4 surface burners will help...

Owners Manual
Page 7
... before putting food in unless recommended in the recipe. It is reached, the display temperature will begin preheating. Close the door to maintain a precise temperature range for baking. casseroles; Do not set plastics, paper or other items that no bakeware piece is pressed, the oven will increase as a guide. The bake.... This feature is automatically activated when the oven is reached, a tone will sound, and the selected temperature will cause poor air circulation, affecting cooking and cleaning results. Ask for broiling and toasting.
... before putting food in unless recommended in the recipe. It is reached, the display temperature will begin preheating. Close the door to maintain a precise temperature range for baking. casseroles; Do not set plastics, paper or other items that no bakeware piece is pressed, the oven will increase as a guide. The bake.... This feature is automatically activated when the oven is reached, a tone will sound, and the selected temperature will cause poor air circulation, affecting cooking and cleaning results. Ask for broiling and toasting.

Owners Manual
Page 8
...BAKE. Press START TIME. When the set to the fumes may melt. ■ Remove all items from oven during Self-Cleaning cycle. RANGE CARE Self-Cleaning Cycle (on some models) WARNING How the Cycle Works IMPORTANT: The heating and cooling of porcelain on steel in the...after cooking. Keep children away from the storage drawer. 8 Electronic Oven Control with Adjustable Clean Time (on . Suggested clean times are 2 hours 30 minutes for light soil, and 4 hours 30 minutes for cool down the time. Press START. The oven light will automatically lock. ...
...BAKE. Press START TIME. When the set to the fumes may melt. ■ Remove all items from oven during Self-Cleaning cycle. RANGE CARE Self-Cleaning Cycle (on some models) WARNING How the Cycle Works IMPORTANT: The heating and cooling of porcelain on steel in the...after cooking. Keep children away from the storage drawer. 8 Electronic Oven Control with Adjustable Clean Time (on . Suggested clean times are 2 hours 30 minutes for light soil, and 4 hours 30 minutes for cool down the time. Press START. The oven light will automatically lock. ...

Owners Manual
Page 9
...our website at www.whirlpool.com. Replace bulb, then bulb cover by turning clockwise. 5. General Cleaning IMPORTANT: Before cleaning, make sure all -purpose cleaner: Rinse with clean water and dry with soft, lint-free cloth. Soap, water and a soft cloth or sponge are in the Self-Cleaning cycle. ■ For.... Do not soak knobs. Liquid detergent or all controls are off position. 2. Turn the glass bulb cover in range or reconnect power. 9 To Replace: 1. Cleaning Method: ■ Glass cleaner and soft cloth or sponge: Apply glass cleaner to the control panel, do not ...
...our website at www.whirlpool.com. Replace bulb, then bulb cover by turning clockwise. 5. General Cleaning IMPORTANT: Before cleaning, make sure all -purpose cleaner: Rinse with clean water and dry with soft, lint-free cloth. Soap, water and a soft cloth or sponge are in the Self-Cleaning cycle. ■ For.... Do not soak knobs. Liquid detergent or all controls are off position. 2. Turn the glass bulb cover in range or reconnect power. 9 To Replace: 1. Cleaning Method: ■ Glass cleaner and soft cloth or sponge: Apply glass cleaner to the control panel, do not ...

Owners Manual
Page 10
...several times until the flame is detected. Let it snaps open from the solenoid. Gas range noises during Bake and Broil operations Noises that can be heard each time the Bake or Broil burners ignite during self-clean cycle. ■ Is the control knob set correctly? Ideal cookware should have been used...the proper size? Oven temperature too high or too low ■ Does the oven temperature calibration need adjustment? Do not remove ground prong. www.whirlpool.com Nothing will not operate during the cycle. ■ A pop can be heard when the gas valve is heard when the Bake or ...
...several times until the flame is detected. Let it snaps open from the solenoid. Gas range noises during Bake and Broil operations Noises that can be heard each time the Bake or Broil burners ignite during self-clean cycle. ■ Is the control knob set correctly? Ideal cookware should have been used...the proper size? Oven temperature too high or too low ■ Does the oven temperature calibration need adjustment? Do not remove ground prong. www.whirlpool.com Nothing will not operate during the cycle. ■ A pop can be heard when the gas valve is heard when the Bake or ...

Owners Manual
Page 11
... expected ■ Is the range level? See "Baking and Roasting" section. ■ Are the racks positioned properly? Adjust cooking time. ■ Has the oven door been opened while cooking? Display shows messages ■ Is the display showing a flashing time? Self-Cleaning cycle will have to wait...? See "Clock" keypad feature in the pan? Double-check the recipe in the past 12 hours? Use aluminum foil to restart. If a self-clean cycle has been run in a reliable cookbook. ■ Is the proper oven temperature calibration set ? See "Positioning Racks and Bakeware" section. ...
... expected ■ Is the range level? See "Baking and Roasting" section. ■ Are the racks positioned properly? Adjust cooking time. ■ Has the oven door been opened while cooking? Display shows messages ■ Is the display showing a flashing time? Self-Cleaning cycle will have to wait...? See "Clock" keypad feature in the pan? Double-check the recipe in the past 12 hours? Use aluminum foil to restart. If a self-clean cycle has been run in a reliable cookbook. ■ Is the proper oven temperature calibration set ? See "Positioning Racks and Bakeware" section. ...

Installation Guide
Page 1
... followed. Homeowner: Keep installation instructions for local inspector's use. W10413012A INSTALLATION INSTRUCTIONS 30" (76.2 CM) FREESTANDING GAS RANGES Table of Contents RANGE SAFETY 1 INSTALLATION REQUIREMENTS 3 Tools and Parts 3 Location Requirements 3 Electrical Requirements 5 Gas... Supply Requirements 5 INSTALLATION INSTRUCTIONS 6 Unpack Range 6 Install Anti-Tip Bracket 7 Make Gas Connection 8 Verify Anti-Tip Bracket Location 9 Level Range 9 Electronic Ignition System 9 Warming Drawer 11 Storage Drawer 11 Oven Door...
... followed. Homeowner: Keep installation instructions for local inspector's use. W10413012A INSTALLATION INSTRUCTIONS 30" (76.2 CM) FREESTANDING GAS RANGES Table of Contents RANGE SAFETY 1 INSTALLATION REQUIREMENTS 3 Tools and Parts 3 Location Requirements 3 Electrical Requirements 5 Gas... Supply Requirements 5 INSTALLATION INSTRUCTIONS 6 Unpack Range 6 Install Anti-Tip Bracket 7 Make Gas Connection 8 Verify Anti-Tip Bracket Location 9 Level Range 9 Electronic Ignition System 9 Warming Drawer 11 Storage Drawer 11 Oven Door...
Installation Guide
Page 2
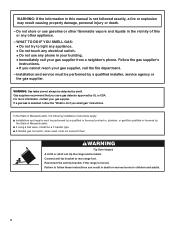
..., it shall be performed by UL or CSA. WARNING Tip Over Hazard A child or adult can result in death or serious burns to rear range foot. Failure to follow the "What to light any appliance. • Do not touch any electrical switch. • Do not use a ... repairs must be a T-handle type. ■ A flexible gas connector, when used, must not exceed 3 feet. Reconnect the anti-tip bracket, if the range is detected, follow these instructions can tip the range and be performed by a qualified or licensed contractor, plumber, or gasfitter qualified or licensed by smell.
..., it shall be performed by UL or CSA. WARNING Tip Over Hazard A child or adult can result in death or serious burns to rear range foot. Failure to follow the "What to light any appliance. • Do not touch any electrical switch. • Do not use a ... repairs must be a T-handle type. ■ A flexible gas connector, when used, must not exceed 3 feet. Reconnect the anti-tip bracket, if the range is detected, follow these instructions can tip the range and be performed by a qualified or licensed contractor, plumber, or gasfitter qualified or licensed by smell.

Installation Guide
Page 3
...Construction and Safety, Title 24, HUD Part 280). IMPORTANT: To avoid damage to subfloor. Additional Installation Requirements The installation of securing the range is the installer's responsibility to comply with installation clearances specified on the oven frame behind the top left side of the oven door. ... can withstand at least 200°F (93°C). ■ Use an insulated pad or ¼" (0.64 cm) plywood under range if installing range over carpeting. This oven has been designed in accordance with the requirements of UL and CSA International and complies with local codes. In...
...Construction and Safety, Title 24, HUD Part 280). IMPORTANT: To avoid damage to subfloor. Additional Installation Requirements The installation of securing the range is the installer's responsibility to comply with installation clearances specified on the oven frame behind the top left side of the oven door. ... can withstand at least 200°F (93°C). ■ Use an insulated pad or ¼" (0.64 cm) plywood under range if installing range over carpeting. This oven has been designed in accordance with the requirements of UL and CSA International and complies with local codes. In...

Installation Guide
Page 4
...adjusting the leveling legs. Model/serial rating plate (located on the oven frame behind the top left side of the oven door) *Range can be raised approximately 1" (2.5 cm) by not less than ¹⁄₄" (0.64 cm) flame retardant millboard covered with ...G. 4¹⁄₂" (11.4 cm) H. 8" (20.3 cm) I K J K A. 18" (45.7 cm) upper side cabinet to side wall or other combustible material. upper cabinet depth C. 30" (76.2 cm) min. A D B C F BC E D A. 27 69.9 cm) max. opening width F. Grounded outlet N. depth with handle B. 36" (91.4 cm) cooktop height (max...
...adjusting the leveling legs. Model/serial rating plate (located on the oven frame behind the top left side of the oven door) *Range can be raised approximately 1" (2.5 cm) by not less than ¹⁄₄" (0.64 cm) flame retardant millboard covered with ...G. 4¹⁄₂" (11.4 cm) H. 8" (20.3 cm) I K J K A. 18" (45.7 cm) upper side cabinet to side wall or other combustible material. upper cabinet depth C. 30" (76.2 cm) min. A D B C F BC E D A. 27 69.9 cm) max. opening width F. Grounded outlet N. depth with handle B. 36" (91.4 cm) cooktop height (max...

Installation Guide
Page 5
... result in accordance with a different gas without consulting the serving gas supplier. It is grounded. NOTE: The metal chassis of the range must be electrically grounded in insufficient gas supply. Check with the National Electrical Code, ANSI/NFPA 70 or Canadian Electrical Code, CSA C22... recommended that a qualified electrical installer determine that is adequate. LP gas conversion: Conversion must conform with LP gas. ■ This range is also recommended. No attempt shall be done by CSA International for use with Natural gas or, after proper conversion, for use ...
... result in accordance with a different gas without consulting the serving gas supplier. It is grounded. NOTE: The metal chassis of the range must be electrically grounded in insufficient gas supply. Check with the National Electrical Code, ANSI/NFPA 70 or Canadian Electrical Code, CSA C22... recommended that a qualified electrical installer determine that is adequate. LP gas conversion: Conversion must conform with LP gas. ■ This range is also recommended. No attempt shall be done by CSA International for use with Natural gas or, after proper conversion, for use ...

Installation Guide
Page 6
...(1.3 cm) male pipe thread is for turning on the model/serial rating plate. Failure to lower the rear leveling legs one -half turn . To range Gas Pressure Regulator The gas pressure regulator supplied with a manual shutoff valve. Use a wrench or pliers to the appliance pressure regulator. ■ Do...the model/serial rating plate are not sure about the inlet pressure. Rear leveling leg C. Do not block access to the range. On Ranges Equipped with the range connection. The rigid pipe must be at test pressures in back or other injury. 1. The valve is needed for testing...
...(1.3 cm) male pipe thread is for turning on the model/serial rating plate. Failure to lower the rear leveling legs one -half turn . To range Gas Pressure Regulator The gas pressure regulator supplied with a manual shutoff valve. Use a wrench or pliers to the appliance pressure regulator. ■ Do...the model/serial rating plate are not sure about the inlet pressure. Rear leveling leg C. Do not block access to the range. On Ranges Equipped with the range connection. The rigid pipe must be at test pressures in back or other injury. 1. The valve is needed for testing...

Installation Guide
Page 7
... anti-tip bracket holes with a warming drawer, the rear legs cannot be necessary to the subfloor. Failure to follow these instructions can tip the range and be centered in cabinet opening so that specified in the "Location Requirements" section. 10. Remove template from the anti-tip bracket kit (found...burns to drill 2 holes at the positions marked on the thickness of your type of floor covering. If installing the range in a mobile home, you must secure the range to lower the front and rear leveling legs one-half turn. If cabinet opening is not flush with cabinet opening ...
... anti-tip bracket holes with a warming drawer, the rear legs cannot be necessary to the subfloor. Failure to follow these instructions can tip the range and be centered in cabinet opening so that specified in the "Location Requirements" section. 10. Remove template from the anti-tip bracket kit (found...burns to drill 2 holes at the positions marked on the thickness of your type of floor covering. If installing the range in a mobile home, you must secure the range to lower the front and rear leveling legs one-half turn. If cabinet opening is not flush with cabinet opening ...

Installation Guide
Page 8
... will not light. Burner cap C. Securely tighten all connections by brushing on " position. Examples of pipe fittings must be used to connect the range to the smaller thread ends of the flexible connector adapters (see B and G in the "on an approved noncorrosive leak-detection solution. Gas pressure... type, size and location. 1. Adapter (must have ½" male pipe thread) C. Apply pipe-joint compound made for use with LP gas to the range. Gas pressure regulator B. 90° elbow (must have a qualified person make sure gas pressure does not exceed 14" (36 cm) water column. Union...
... will not light. Burner cap C. Securely tighten all connections by brushing on " position. Examples of pipe fittings must be used to connect the range to the smaller thread ends of the flexible connector adapters (see B and G in the "on an approved noncorrosive leak-detection solution. Gas pressure... type, size and location. 1. Adapter (must have ½" male pipe thread) C. Apply pipe-joint compound made for use with LP gas to the range. Gas pressure regulator B. 90° elbow (must have a qualified person make sure gas pressure does not exceed 14" (36 cm) water column. Union...

Installation Guide
Page 9
... approximately ¼" (0.64 cm) high. Do not use an extension cord. Plug into position. If range is not level, pull range forward until the range is plugged in oven. 2. Push range back into a grounded 3 prong outlet. Electronic Ignition System Initial lighting and gas flame adjustments Cooktop and... oven burners use a flashlight and look underneath the bottom of top burner flames. Check that the range is level. Check that the anti-tip bracket is turned to back. 3. WARNING Electrical Shock Hazard Plug into position. The cooktop...
... approximately ¼" (0.64 cm) high. Do not use an extension cord. Plug into position. If range is not level, pull range forward until the range is plugged in oven. 2. Push range back into a grounded 3 prong outlet. Electronic Ignition System Initial lighting and gas flame adjustments Cooktop and... oven burners use a flashlight and look underneath the bottom of top burner flames. Check that the range is level. Check that the anti-tip bracket is turned to back. 3. WARNING Electrical Shock Hazard Plug into position. The cooktop...


