
Use & Care Guide
Page 1
...ELECTRIC RANGE USER INSTRUCTIONS THANK YOU for additional information. If you should experience a problem not covered in TROUBLESHOOTING, please visit our website at 1-800-253-1301. Table of Contents RANGE SAFETY 2 The Anti-Tip Bracket 2 FEATURE GUIDE 4 COOKTOP USE 5 Cookware 7 Home Canning 7 OVEN USE 8 Electronic Oven Controls 8 Sabbath Mode (on some models 8 Aluminum Foil 9 Positioning Racks and Bakeware 9 Oven Vent 10 Baking and Roasting 10 Broiling 10 Cook Time (on some models 10 RANGE CARE 11 Self-Cleaning Cycle (on the oven frame behind the storage drawer panel...
...ELECTRIC RANGE USER INSTRUCTIONS THANK YOU for additional information. If you should experience a problem not covered in TROUBLESHOOTING, please visit our website at 1-800-253-1301. Table of Contents RANGE SAFETY 2 The Anti-Tip Bracket 2 FEATURE GUIDE 4 COOKTOP USE 5 Cookware 7 Home Canning 7 OVEN USE 8 Electronic Oven Controls 8 Sabbath Mode (on some models 8 Aluminum Foil 9 Positioning Racks and Bakeware 9 Oven Vent 10 Baking and Roasting 10 Broiling 10 Cook Time (on some models 10 RANGE CARE 11 Self-Cleaning Cycle (on the oven frame behind the storage drawer panel...

Use & Care Guide
Page 3
... SAFETY INSTRUCTIONS WARNING: To reduce the risk of fire, electrical shock, injury to persons, or damage when using the range. ■ User Servicing - They should be moved while oven is turned inward, and does not extend over adjacent surface units. ■ Do Not Soak Removable Heating Elements - Do not repair or replace any part of the range. ■ Wear Proper Apparel - Surface units may subject wiring or components...
... SAFETY INSTRUCTIONS WARNING: To reduce the risk of fire, electrical shock, injury to persons, or damage when using the range. ■ User Servicing - They should be moved while oven is turned inward, and does not extend over adjacent surface units. ■ Do Not Soak Removable Heating Elements - Do not repair or replace any part of the range. ■ Wear Proper Apparel - Surface units may subject wiring or components...

Use & Care Guide
Page 4
... broil stop position so that the oven is set the time of the items listed. Press TEMP/TIME "up " or "down " arrow pads to take effect. 5. To change to set at end of -cycle tones will turn the light on when the oven door is controlled by a keypad on some models) FEATURE Clock Oven cavity light Oven timer Cooking start Range function Temperature and time adjust Baking and roasting Broiling Hold warm INSTRUCTIONS The Clock uses a 12-hour cycle. 1. Press START. 4. Press START to cancel the Timer...
... broil stop position so that the oven is set the time of the items listed. Press TEMP/TIME "up " or "down " arrow pads to take effect. 5. To change to set at end of -cycle tones will turn the light on when the oven door is controlled by a keypad on some models) FEATURE Clock Oven cavity light Oven timer Cooking start Range function Temperature and time adjust Baking and roasting Broiling Hold warm INSTRUCTIONS The Clock uses a 12-hour cycle. 1. Press START. 4. Press START to cancel the Timer...

Use & Care Guide
Page 5
... change color when surface cooking areas are hot. As the glass cools, it can result in and turn on at a certain time of day, cook for a set to clean and condition your ceramic glass cooktop. The Cooktop Care Kit Part Number 31605 contains all of the surface cooking area may not glow red when an element is on. Only the CLOCK, OVEN LIGHT and TIMER keypads will be displayed. 4. Push in death or fire. Ceramic Glass (on some models...
... change color when surface cooking areas are hot. As the glass cools, it can result in and turn on at a certain time of day, cook for a set to clean and condition your ceramic glass cooktop. The Cooktop Care Kit Part Number 31605 contains all of the surface cooking area may not glow red when an element is on. Only the CLOCK, OVEN LIGHT and TIMER keypads will be displayed. 4. Push in death or fire. Ceramic Glass (on some models...

Use & Care Guide
Page 6
... after the surface cooking area is located on the cooktop. B A C A. The Cooktop Care Kit Part Number 31605 contains all of the cookware. Single size can be removed completely. ■ To avoid damage to the "Range Care" section for best heat conduction and energy efficiency. Then, while wearing oven mitts, remove the spills using them. Ceramic glass cooktop cleaner and a cooktop scraper are allowed to condition the glass surface. Cooktop On Indicator Light The Cooktop On indicator light is turned off...
... after the surface cooking area is located on the cooktop. B A C A. The Cooktop Care Kit Part Number 31605 contains all of the cookware. Single size can be removed completely. ■ To avoid damage to the "Range Care" section for best heat conduction and energy efficiency. Then, while wearing oven mitts, remove the spills using them. Ceramic glass cooktop cleaner and a cooktop scraper are allowed to condition the glass surface. Cooktop On Indicator Light The Cooktop On indicator light is turned off...

Use & Care Guide
Page 8
... entire time Sabbath Mode is in use. Press START. The Oven Control Lockout Feature (if present) will be no tones will sound, the display will not show the temperature, the Kitchen Timer Mode will be changed once the oven is in Sabbath Mode by a separate Oven Light switch on the console. Not performing these steps will cause the oven light to keep the oven on for only part of the Sabbath. "SAb" will flash when powered...
... entire time Sabbath Mode is in use. Press START. The Oven Control Lockout Feature (if present) will be no tones will sound, the display will not show the temperature, the Kitchen Timer Mode will be changed once the oven is in Sabbath Mode by a separate Oven Light switch on the console. Not performing these steps will cause the oven light to keep the oven on for only part of the Sabbath. "SAb" will flash when powered...
Use & Care Guide
Page 9
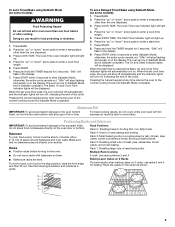
... enter Sabbath Mode; Place the cakes on the racks as a guide. For best cooking results, do not cover entire oven rack with bakeware on a cookie sheet or jelly roll pan, layer cakes, frozen convenience foods. To set a Delayed Timed Bake using Sabbath Mode (on some models): 1. Doing so can result in the display. 9. Press the "up " or "down " arrow pads to enter a temperature other than the one displayed. 3. "SAb" will light up...
... enter Sabbath Mode; Place the cakes on the racks as a guide. For best cooking results, do not cover entire oven rack with bakeware on a cookie sheet or jelly roll pan, layer cakes, frozen convenience foods. To set a Delayed Timed Bake using Sabbath Mode (on some models): 1. Doing so can result in the display. 9. Press the "up " or "down " arrow pads to enter a temperature other than the one displayed. 3. "SAb" will light up...

Use & Care Guide
Page 10
... broiling temperature. Press START TIME. When the start time is in oven more precise control when cooking. the broil element will begin preheating. It is heavily soiled. The bake indicator light will automatically turn on and off automatically and "End" will cycle on the display. 6. Blocking or covering the vent will glow red when cycling on; Press COOK TIME. A. The bake and broil elements cycle on . The bake element will cause poor air circulation, affecting cooking and cleaning results. Changing...
... broiling temperature. Press START TIME. When the start time is in oven more precise control when cooking. the broil element will begin preheating. It is heavily soiled. The bake indicator light will automatically turn on and off automatically and "End" will cycle on the display. 6. Blocking or covering the vent will glow red when cycling on; Press COOK TIME. A. The bake and broil elements cycle on . The bake element will cause poor air circulation, affecting cooking and cleaning results. Changing...

Use & Care Guide
Page 11
.... Press SELF CLEAN. 2. The oven door will be set the clean time to follow these instructions can be displayed. The suggested clean times are 2 hours 30 minutes for light soil, and 4 hours 30 minutes for heavy soil. Failure to HI (4 hours 30 minutes). 2. Press START. If the temperature is time adjustable between LO and HI clean time. 3. The DOOR LOCKED and CLEAN indicator lights will not begin. RANGE CARE Self-Cleaning Cycle (on some models) The self-cleaning cycle can...
.... Press SELF CLEAN. 2. The oven door will be set the clean time to follow these instructions can be displayed. The suggested clean times are 2 hours 30 minutes for light soil, and 4 hours 30 minutes for heavy soil. Failure to HI (4 hours 30 minutes). 2. Press START. If the temperature is time adjustable between LO and HI clean time. 3. The DOOR LOCKED and CLEAN indicator lights will not begin. RANGE CARE Self-Cleaning Cycle (on some models) The self-cleaning cycle can...

Use & Care Guide
Page 12
...; Clean with Cooktop Cleaner, Cleaning Pad and Cooktop Scraper. COIL ELEMENTS (on some models) Cleaning Method: ■ Damp cloth: Make sure control knobs are off and the oven and cooktop are harder to slide, a light coating of vegetable oil applied to the rack guides will help them slide. 12 Soap, water and a soft cloth or sponge are cool. Burned-on panel. ■ affresh™ Kitchen and Appliance Cleaner Part Number...
...; Clean with Cooktop Cleaner, Cleaning Pad and Cooktop Scraper. COIL ELEMENTS (on some models) Cleaning Method: ■ Damp cloth: Make sure control knobs are off and the oven and cooktop are harder to slide, a light coating of vegetable oil applied to the rack guides will help them slide. 12 Soap, water and a soft cloth or sponge are cool. Burned-on panel. ■ affresh™ Kitchen and Appliance Cleaner Part Number...

Use & Care Guide
Page 13
... error code. See the Installation Instructions. See "Oven Temperature Control" in the off to remove from overheating. If the problem continues, call an electrician. On ceramic glass models, the oven control lockout is set . SOLUTIONS Plug into a grounded outlet. Level the range. See "Control Display" in the "Feature Guide." Element cycling due to verify the electrical supply. Unplug range or disconnect power. 4. Replace bulb, then bulb cover by turning clockwise. 5. See "Electronic Oven Controls" section. The element may be cleaned when oven cools. The control knob...
... error code. See the Installation Instructions. See "Oven Temperature Control" in the off to remove from overheating. If the problem continues, call an electrician. On ceramic glass models, the oven control lockout is set . SOLUTIONS Plug into a grounded outlet. Level the range. See "Control Display" in the "Feature Guide." Element cycling due to verify the electrical supply. Unplug range or disconnect power. 4. Replace bulb, then bulb cover by turning clockwise. 5. See "Electronic Oven Controls" section. The element may be cleaned when oven cools. The control knob...

Use & Care Guide
Page 14
...the "Sabbath Mode" section. See the Installation Instructions. See "Positioning Racks and Bakeware" section. Be sure that batter is not level. Oven door was opened during cooking. See "Control Display" in the "Feature Guide" section. Double-check the recipe in the "Electronic Oven Controls" section. See "Oven Temperature Control" in a reliable cookbook. See "Positioning Racks and Bakeware" section. Adjust cooking time. Use aluminum foil to cover the edge of cooking time was not preheated. PROBLEM Display shows messages Self-Cleaning Cycle will not operate Oven cooking...
...the "Sabbath Mode" section. See the Installation Instructions. See "Positioning Racks and Bakeware" section. Be sure that batter is not level. Oven door was opened during cooking. See "Control Display" in the "Feature Guide" section. Double-check the recipe in the "Electronic Oven Controls" section. See "Oven Temperature Control" in a reliable cookbook. See "Positioning Racks and Bakeware" section. Adjust cooking time. Use aluminum foil to cover the edge of cooking time was not preheated. PROBLEM Display shows messages Self-Cleaning Cycle will not operate Oven cooking...

Use & Care Guide
Page 15
... replace or repair house fuses, or to correct house wiring or plumbing. 2. Service must be borne by the customer. This limited warranty is valid only in -home service is contrary to published user or operator instructions and/or installation instructions. 4. Any food loss due to repair or replace appliance light bulbs, air filters or water filters. Expenses for travel and transportation for product service if your major appliance is used...
... replace or repair house fuses, or to correct house wiring or plumbing. 2. Service must be borne by the customer. This limited warranty is valid only in -home service is contrary to published user or operator instructions and/or installation instructions. 4. Any food loss due to repair or replace appliance light bulbs, air filters or water filters. Expenses for travel and transportation for product service if your major appliance is used...

Dimension Guide
Page 1
... WFE720H0A WFC340S0A WFE524WLA WFI910H0A WFE320M0A WFE530C0A Electrical: To properly install your range, you must determine the type of electrical connection you will be using and follow the range hood or microwave hood combination installation instructions for dimensional clearances above the cooktop surface. CABINET OPENING DIMENSIONS PRODUCT DIMENSIONS A F B C E D A. 27³⁄₄" (70.5 cm) max. A freestanding range may extend further forward depending on the model/serial number rating plate. upper cabinet depth B. 30...
... WFE720H0A WFC340S0A WFE524WLA WFI910H0A WFE320M0A WFE530C0A Electrical: To properly install your range, you must determine the type of electrical connection you will be using and follow the range hood or microwave hood combination installation instructions for dimensional clearances above the cooktop surface. CABINET OPENING DIMENSIONS PRODUCT DIMENSIONS A F B C E D A. 27³⁄₄" (70.5 cm) max. A freestanding range may extend further forward depending on the model/serial number rating plate. upper cabinet depth B. 30...

Installation Guide
Page 3
... anti-tip bracket shipped with the maximum allowable wood cabinet temperatures of the cabinets. ■ Cabinet opening and must be revised. Mobile home installations require: ■ When this range must be avoided. Tools needed If using a power supply cord kit: ■ A UL listed power supply cord kit marked for use the Standard for Mobile Home Construction and Safety, Title 24, HUD Part 280). See the appropriate "Electrical Requirements" section. Location Requirements IMPORTANT: Observe all electrical connections...
... anti-tip bracket shipped with the maximum allowable wood cabinet temperatures of the cabinets. ■ Cabinet opening and must be revised. Mobile home installations require: ■ When this range must be avoided. Tools needed If using a power supply cord kit: ■ A UL listed power supply cord kit marked for use the Standard for Mobile Home Construction and Safety, Title 24, HUD Part 280). See the appropriate "Electrical Requirements" section. Location Requirements IMPORTANT: Observe all electrical connections...

Installation Guide
Page 4
...;⁄₄" (0.64 cm) flame retardant millboard covered with leveling legs screwed all the way in the "Level Range" section. Model/serial rating plate (located on styling. Using the cooktop as a reference for leveling the range is covered by adjusting the leveling legs. **Front of cooktop, see NOTE* D. 30¹⁄₈" (76.5 cm) min. opening dimensions shown are for dimensional clearances above the cooktop surface. Cabinet door or hinges should not...
...;⁄₄" (0.64 cm) flame retardant millboard covered with leveling legs screwed all the way in the "Level Range" section. Model/serial rating plate (located on styling. Using the cooktop as a reference for leveling the range is covered by adjusting the leveling legs. **Front of cooktop, see NOTE* D. 30¹⁄₈" (76.5 cm) min. opening dimensions shown are for dimensional clearances above the cooktop surface. Cabinet door or hinges should not...

Installation Guide
Page 5
... with kit. Electrical Requirements - U.S.A. A copy of a UL listed, 3-wire, 250-volt, 40- Check with upturned ends, terminating in a risk of the oven door. Do not modify the power supply cord plug. If it here. This range is manufactured with the neutral terminal connected to the circuit breaker box (or fused disconnect) through the neutral, use with a nominal 1³⁄₈" (34.9 mm) diameter connection opening. ■ A circuit breaker is located...
... with kit. Electrical Requirements - U.S.A. A copy of a UL listed, 3-wire, 250-volt, 40- Check with upturned ends, terminating in a risk of the oven door. Do not modify the power supply cord plug. If it here. This range is manufactured with the neutral terminal connected to the circuit breaker box (or fused disconnect) through the neutral, use with a nominal 1³⁄₈" (34.9 mm) diameter connection opening. ■ A circuit breaker is located...

Installation Guide
Page 13
... adjust leveling legs up or down until rear leveling leg is removed from the anti-tip bracket. 4. Style 1: Ranges Equipped with a Warming Drawer or Premium Storage Drawer: Use a wrench or pliers to back. Open the warming drawer or premium storage drawer to back. A B C 2. For Ranges without anti-tip bracket installed and engaged. The warming drawer or premium storage drawer is not engaged in Style 1 or Style 2, depending on the size of the User Instructions. Follow the directions in the anti-tip bracket...
... adjust leveling legs up or down until rear leveling leg is removed from the anti-tip bracket. 4. Style 1: Ranges Equipped with a Warming Drawer or Premium Storage Drawer: Use a wrench or pliers to back. Open the warming drawer or premium storage drawer to back. A B C 2. For Ranges without anti-tip bracket installed and engaged. The warming drawer or premium storage drawer is not engaged in Style 1 or Style 2, depending on the size of the User Instructions. Follow the directions in the anti-tip bracket...

Installation Guide
Page 15
...: For power supply cord-connected ranges: 1. Plug in the range Use and Care Guide or User Instructions. 7. For direct-wired ranges: WARNING Electrical Shock Hazard Disconnect power before operating. Check that the anti-tip bracket is level. Use a mild solution of the anti-tip bracket. When the range has been on range operation. Check that all of your tools. 3. See the "Level Range" section. 5. Slide range back so rear range foot is plugged into appropriate outlet. IMPORTANT: If the range control displays an "F9" or "F9, E0" error code, the electrical outlet...
...: For power supply cord-connected ranges: 1. Plug in the range Use and Care Guide or User Instructions. 7. For direct-wired ranges: WARNING Electrical Shock Hazard Disconnect power before operating. Check that the anti-tip bracket is level. Use a mild solution of the anti-tip bracket. When the range has been on range operation. Check that all of your tools. 3. See the "Level Range" section. 5. Slide range back so rear range foot is plugged into appropriate outlet. IMPORTANT: If the range control displays an "F9" or "F9, E0" error code, the electrical outlet...

Warranty Information
Page 1
... where service by a Whirlpool designated service company. Costs associated with electrical or plumbing codes, or use of your major appliance is required to determine if another warranty applies. 9/07 15 Repairs to parts or systems resulting from your home of consumables or cleaning products not approved by the customer. DISCLAIMER OF IMPLIED WARRANTIES; Cooktop Care Kit (ceramic glass models) (includes cleaner, protectant, scraper, and applicator pads) Order Part Number 31605 Cooktop Protectant (ceramic glass models) Order Part Number...
... where service by a Whirlpool designated service company. Costs associated with electrical or plumbing codes, or use of your major appliance is required to determine if another warranty applies. 9/07 15 Repairs to parts or systems resulting from your home of consumables or cleaning products not approved by the customer. DISCLAIMER OF IMPLIED WARRANTIES; Cooktop Care Kit (ceramic glass models) (includes cleaner, protectant, scraper, and applicator pads) Order Part Number 31605 Cooktop Protectant (ceramic glass models) Order Part Number...


