

Installation Instructions
Page 2
... children and adults. 2 These words mean: DANGER You can be killed or seriously injured if you don't immediately follow these instructions can result in this manual and on your appliance. This is moved. All safety messages will follow instructions. Reconnect the anti-tip bracket, if the range is the safety alert...
... children and adults. 2 These words mean: DANGER You can be killed or seriously injured if you don't immediately follow these instructions can result in this manual and on your appliance. This is moved. All safety messages will follow instructions. Reconnect the anti-tip bracket, if the range is the safety alert...

Installation Instructions
Page 6
... wrench or pliers to adjust the rear legs from the back of floor covering. Front leveling leg C. Do not remove the shipping base at this manual. 2. Connect anti-tip bracket to move and install range. Place template on the floor in cabinet opening so that specified in the "Location Requirements" section...
... wrench or pliers to adjust the rear legs from the back of floor covering. Front leveling leg C. Do not remove the shipping base at this manual. 2. Connect anti-tip bracket to move and install range. Place template on the floor in cabinet opening so that specified in the "Location Requirements" section...
Owners Manual
Page 2
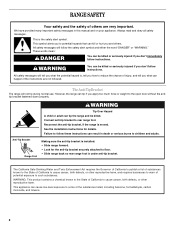
... installation instructions for the anti-tip bracket securely attached to rear range foot. This symbol alerts you don't follow these instructions can result in this manual and on your appliance. WARNING You can be killed or seriously injured if you to cause cancer, birth defects, or other reproductive harm. WARNING: This...
... installation instructions for the anti-tip bracket securely attached to rear range foot. This symbol alerts you don't follow these instructions can result in this manual and on your appliance. WARNING You can be killed or seriously injured if you to cause cancer, birth defects, or other reproductive harm. WARNING: This...

Owners Manual
Page 3
.... ■ Do Not Leave Children Alone - Improper installation of these openings, oven doors, and windows of the range unless specifically recommended in the manual. SAVE THESE INSTRUCTIONS 3 Children should not be left alone or unattended in area where the range is properly installed and grounded by a qualified technician...color. Care should be positioned so that may be careful to line surface unit drip bowls or oven bottoms, except as suggested in Manual. ■ Before Self-Cleaning the Oven - Moist or damp potholders on any part of the oven. ■ Clean Only Parts Listed ...
.... ■ Do Not Leave Children Alone - Improper installation of these openings, oven doors, and windows of the range unless specifically recommended in the manual. SAVE THESE INSTRUCTIONS 3 Children should not be left alone or unattended in area where the range is properly installed and grounded by a qualified technician...color. Care should be positioned so that may be careful to line surface unit drip bowls or oven bottoms, except as suggested in Manual. ■ Before Self-Cleaning the Oven - Moist or damp potholders on any part of the oven. ■ Clean Only Parts Listed ...

Owners Manual
Page 4
... 2. If the TIMER is closed, press the oven light switch to signal the end of the cycle. 6. FEATURE GUIDE This manual covers several models. Remove all of the range. Add 10 oz (295 mL) of day, including a.m. Push START. 5..... 3. The oven light will be controlled by a keypad on the oven control panel or a manual switch located on and off . 5. Refer to cancel the Timer. Check that the oven is off . 2. Press TIMER... models) TO LOCK HOLD 3 SEC Oven control lockout 1. The oven light will sound at www.whirlpool.com for 5 seconds. Press START. 4.
... 2. If the TIMER is closed, press the oven light switch to signal the end of the cycle. 6. FEATURE GUIDE This manual covers several models. Remove all of the range. Add 10 oz (295 mL) of day, including a.m. Push START. 5..... 3. The oven light will be controlled by a keypad on the oven control panel or a manual switch located on and off . 5. Refer to cancel the Timer. Check that the oven is off . 2. Press TIMER... models) TO LOCK HOLD 3 SEC Oven control lockout 1. The oven light will sound at www.whirlpool.com for 5 seconds. Press START. 4.


