

Dimension Guide
Page 1
... in * D. 29⁷⁄₈" (75.9 cm) width E. 25" (63.5 cm) depth F. Because Whirlpool Corporation policy includes a continuous commitment to improve our products, we reserve the right to change materials and specifications without notice. when bottom of cooktop, see Installation Instructions packed with ranges. or 50-amp power supply cord (pigtail). A C B D E F A. 13...
... in * D. 29⁷⁄₈" (75.9 cm) width E. 25" (63.5 cm) depth F. Because Whirlpool Corporation policy includes a continuous commitment to improve our products, we reserve the right to change materials and specifications without notice. when bottom of cooktop, see Installation Instructions packed with ranges. or 50-amp power supply cord (pigtail). A C B D E F A. 13...

Installation Instructions
Page 1
INSTALLATION INSTRUCTIONS 30" (76 CM) FREESTANDING ELECTRIC RANGES Table of Contents RANGE SAFETY 2 INSTALLATION REQUIREMENTS 3 Tools and Parts 3 Location Requirements 3 Electrical Requirements - Only 7 Verify Anti-Tip Bracket Location 12 Level Range 12 Storage Drawer 12 Complete Installation 13 Moving the Range 14 ANTI-TIP BRACKET TEMPLATE 15 IMPORTANT: Save for local electrical inspector's use. U.S.A. Only 4 INSTALLATION INSTRUCTIONS 6 Unpack Range 6 Install Anti-Tip Bracket 6 Electrical Connection - U.S.A. W10252706B
INSTALLATION INSTRUCTIONS 30" (76 CM) FREESTANDING ELECTRIC RANGES Table of Contents RANGE SAFETY 2 INSTALLATION REQUIREMENTS 3 Tools and Parts 3 Location Requirements 3 Electrical Requirements - Only 7 Verify Anti-Tip Bracket Location 12 Level Range 12 Storage Drawer 12 Complete Installation 13 Moving the Range 14 ANTI-TIP BRACKET TEMPLATE 15 IMPORTANT: Save for local electrical inspector's use. U.S.A. Only 4 INSTALLATION INSTRUCTIONS 6 Unpack Range 6 Install Anti-Tip Bracket 6 Electrical Connection - U.S.A. W10252706B

Installation Instructions
Page 3
...tip bracket kit Anti-tip bracket must be rated at 250 volts minimum, 40 amps or 50 amps that the materials used . Mobile home installations require: ■ When this range must end in a mobile home, it conforms to terminal block) ■ 3 - See "Electrical Connection" section....the floor during transit. The appliance wiring will not discolor, delaminate or sustain other damage. Read and follow the instructions provided with installation clearances specified on the left side frame behind the storage drawer panel. ■ The range should be secured to subfloor. Longer screws...
...tip bracket kit Anti-tip bracket must be rated at 250 volts minimum, 40 amps or 50 amps that the materials used . Mobile home installations require: ■ When this range must end in a mobile home, it conforms to terminal block) ■ 3 - See "Electrical Connection" section....the floor during transit. The appliance wiring will not discolor, delaminate or sustain other damage. Read and follow the instructions provided with installation clearances specified on the left side frame behind the storage drawer panel. ■ The range should be secured to subfloor. Longer screws...

Installation Instructions
Page 4
... ordinances. opening width E. Model/serial rating plate (located on the left side frame behind storage drawer panel) *Range can be installed next to top of electric shock. opening width C. U.S.A. Do not modify the power supply cord plug. upper cabinet depth B. 30...: National Fire Protection Association One Batterymarch Park Quincy, MA 02269. A copy of wood or metal cabinet is recommended that a qualified electrical installer determine that the electrical connection and wire size are in a risk of cooktop, see NOTE*. A freestanding range may be obtained from floor...
... ordinances. opening width E. Model/serial rating plate (located on the left side frame behind storage drawer panel) *Range can be installed next to top of electric shock. opening width C. U.S.A. Do not modify the power supply cord plug. upper cabinet depth B. 30...: National Fire Protection Association One Batterymarch Park Quincy, MA 02269. A copy of wood or metal cabinet is recommended that a qualified electrical installer determine that the electrical connection and wire size are in a risk of cooktop, see NOTE*. A freestanding range may be obtained from floor...

Installation Instructions
Page 5
... where local codes prohibit grounding through the neutral conductor is used . When a 4-wire receptacle of NEMA Type 14-50R is prohibited for new branch-circuit installations (1996 NEC); or 50-amp, range power supply cord (pigtail) must be used , a matching UL listed, 4-wire, 250-volt, 40- This ...amps and investigated for use with ranges. or 50-amp power supply cord (pigtail) (see following Range Rating chart). Electrical Connection To properly install your range, you must determine the type of electrical connection you will be using and follow the instructions provided for it here. ■...
... where local codes prohibit grounding through the neutral conductor is used . When a 4-wire receptacle of NEMA Type 14-50R is prohibited for new branch-circuit installations (1996 NEC); or 50-amp, range power supply cord (pigtail) must be used , a matching UL listed, 4-wire, 250-volt, 40- This ...amps and investigated for use with ranges. or 50-amp power supply cord (pigtail) (see following Range Rating chart). Electrical Connection To properly install your range, you must determine the type of electrical connection you will be using and follow the instructions provided for it here. ■...

Installation Instructions
Page 6
...front and rear leveling legs one -half turn . Rear leveling leg B. See the "Storage Drawer" section. Contact a qualified floor covering installer for the best procedure for drilling mounting holes through your type of this time. Before moving range, slide range onto shipping base, cardboard...wrench or pliers to adjust the rear legs from range. 2. Front leveling leg C. Wrench or pliers 6 On Ranges Equipped with overhang. A D C Install Anti-Tip Bracket WARNING Tip Over Hazard A child or adult can tip the range and be accessed by removing the warming drawer. A A. Reconnect the...
...front and rear leveling legs one -half turn . Rear leveling leg B. See the "Storage Drawer" section. Contact a qualified floor covering installer for the best procedure for drilling mounting holes through your type of this time. Before moving range, slide range onto shipping base, cardboard...wrench or pliers to adjust the rear legs from range. 2. Front leveling leg C. Wrench or pliers 6 On Ranges Equipped with overhang. A D C Install Anti-Tip Bracket WARNING Tip Over Hazard A child or adult can tip the range and be accessed by removing the warming drawer. A A. Reconnect the...

Installation Instructions
Page 8
... 3-wire connection: Power supply cord Style 2: Direct wire strain relief ■ Remove the knockout as needed for : ■ New branch-circuit installations (1996 NEC) ■ Mobile homes ■ Recreational vehicles ■ In an area where local codes prohibit grounding through the neutral 1. A.... 8 Add strain relief. Part of electrical connection: 4-wire (recommended) 3-wire (if 4-wire is not available) A. Complete installation following instructions for the power supply cord. ■ Assemble a UL listed strain relief in the opening . UL listed strain relief...
... 3-wire connection: Power supply cord Style 2: Direct wire strain relief ■ Remove the knockout as needed for : ■ New branch-circuit installations (1996 NEC) ■ Mobile homes ■ Recreational vehicles ■ In an area where local codes prohibit grounding through the neutral 1. A.... 8 Add strain relief. Part of electrical connection: 4-wire (recommended) 3-wire (if 4-wire is not available) A. Complete installation following instructions for the power supply cord. ■ Assemble a UL listed strain relief in the opening . UL listed strain relief...

Installation Instructions
Page 10
...E. Use a hex or Phillips screwdriver to connect the bare (green) ground wire to easily attach the wiring terminal block. 3. Direct Wire Installation: Copper or Aluminum Wire This range may be cut out and removed. Allow enough slack to easily attach wiring to the terminal block - ... Depending on bottom of electrical supply (4-wire or 3-wire connection). 4-wire Connection: Direct Wire Use this method for: ■ New branch-circuit installations (1996 NEC) ■ Mobile homes ■ Recreational vehicles ■ In an area where local codes prohibit grounding through the neutral 1. Strip ...
...E. Use a hex or Phillips screwdriver to connect the bare (green) ground wire to easily attach the wiring terminal block. 3. Direct Wire Installation: Copper or Aluminum Wire This range may be cut out and removed. Allow enough slack to easily attach wiring to the terminal block - ... Depending on bottom of electrical supply (4-wire or 3-wire connection). 4-wire Connection: Direct Wire Use this method for: ■ New branch-circuit installations (1996 NEC) ■ Mobile homes ■ Recreational vehicles ■ In an area where local codes prohibit grounding through the neutral 1. Strip ...

Installation Instructions
Page 12
... to view the rear foot from the anti-tip bracket. It will be necessary to floor. ■ Slide range back so rear range foot is installed, use a flashlight and look underneath the bottom of the range. ■ Look for the other side of the storage drawer and remove. 12 Insert a flat...
... to view the rear foot from the anti-tip bracket. It will be necessary to floor. ■ Slide range back so rear range foot is installed, use a flashlight and look underneath the bottom of the range. ■ Look for the other side of the storage drawer and remove. 12 Insert a flat...

Installation Instructions
Page 13
A A. Engage drawer glide. 4. Complete Installation 1. Check that you are now installed. Check that all of the storage drawer to remove waxy residue caused by shipping material. See "Level Range." 5. Read "Range Use" in its fully forward ...
A A. Engage drawer glide. 4. Complete Installation 1. Check that you are now installed. Check that all of the storage drawer to remove waxy residue caused by shipping material. See "Level Range." 5. Read "Range Use" in its fully forward ...

Installation Instructions
Page 14
... damaging the floor covering. Failure to floor. ■ Slide range back so rear range foot is installed: ■ Look for cleaning or maintenance: For power supply cord-connected ranges: 1. Check that anti-tip bracket is installed: ■ Look for the anti-tip bracket securely attached to follow these instructions can result in...
... damaging the floor covering. Failure to floor. ■ Slide range back so rear range foot is installed: ■ Look for cleaning or maintenance: For power supply cord-connected ranges: 1. Check that anti-tip bracket is installed: ■ Look for the anti-tip bracket securely attached to follow these instructions can result in...
Owners Manual
Page 2
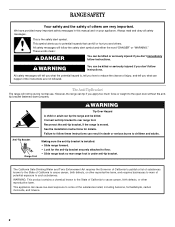
...WARNING You can cause low-level exposure to potential hazards that can be killed or seriously injured if you what the potential hazard is installed: • Slide range forward. • Look for details. This appliance can be killed or seriously injured if you what can ...to the State of potential exposure to floor. • Slide range back so rear range foot is under anti-tip bracket. See the installation instructions for the anti-tip bracket securely attached to such substances. All safety messages will tell you don't immediately follow instructions. These words...
...WARNING You can cause low-level exposure to potential hazards that can be killed or seriously injured if you what the potential hazard is installed: • Slide range forward. • Look for details. This appliance can be killed or seriously injured if you what can ...to the State of potential exposure to floor. • Slide range back so rear range foot is under anti-tip bracket. See the installation instructions for the anti-tip bracket securely attached to such substances. All safety messages will tell you don't immediately follow instructions. These words...

Owners Manual
Page 3
...surface units. ■ Do Not Soak Removable Heating Elements - The range is cool. Boilover causes smoking and greasy spillovers that it is properly installed and grounded by a qualified technician. ■ Never Use the Range for range-top service without breaking due to the sudden change in a ... the following: ■ WARNING: TO REDUCE THE RISK OF TIPPING OF THE RANGE, THE RANGE MUST BE SECURED BY PROPERLY INSTALLED ANTI-TIP DEVICES. Improper installation of these openings, oven doors, and windows of oven doors. Interior surfaces of an oven become hot enough to cause burns....
...surface units. ■ Do Not Soak Removable Heating Elements - The range is cool. Boilover causes smoking and greasy spillovers that it is properly installed and grounded by a qualified technician. ■ Never Use the Range for range-top service without breaking due to the sudden change in a ... the following: ■ WARNING: TO REDUCE THE RISK OF TIPPING OF THE RANGE, THE RANGE MUST BE SECURED BY PROPERLY INSTALLED ANTI-TIP DEVICES. Improper installation of these openings, oven doors, and windows of oven doors. Interior surfaces of an oven become hot enough to cause burns....

Owners Manual
Page 10
...visit our website and reference FAQs (Frequently Asked Questions) to possibly avoid the cost of vegetable oil applied to clear the display. www.whirlpool.com Nothing will help them slide. Plug into place. If the problem continues, call for service. Cooktop will not operate ■ ...more than ½" (1.3 cm) outside the cooking area. See "Cooktop Use" section. ■ Is the range level? Level the range. See the Installation Instructions. See "Timed Cooking" section. ■ On some models, reset the clock, if needed. See the control lock keypad feature in the "Electronic...
...visit our website and reference FAQs (Frequently Asked Questions) to possibly avoid the cost of vegetable oil applied to clear the display. www.whirlpool.com Nothing will help them slide. Plug into place. If the problem continues, call for service. Cooktop will not operate ■ ...more than ½" (1.3 cm) outside the cooking area. See "Cooktop Use" section. ■ Is the range level? Level the range. See the Installation Instructions. See "Timed Cooking" section. ■ On some models, reset the clock, if needed. See the control lock keypad feature in the "Electronic...

Owners Manual
Page 12
.... Expenses for travel and transportation for future reference. Consumable parts are excluded from warranty coverage. 3. Service must be borne by Whirlpool. 5. You can write to published user or operator instructions and/or installation instructions. 4. IMPLIED WARRANTIES, INCLUDING WARRANTIES OF MERCHANTABILITY OR FITNESS FOR A PARTICULAR PURPOSE, ARE LIMITED TO ONE YEAR OR THE...
.... Expenses for travel and transportation for future reference. Consumable parts are excluded from warranty coverage. 3. Service must be borne by Whirlpool. 5. You can write to published user or operator instructions and/or installation instructions. 4. IMPLIED WARRANTIES, INCLUDING WARRANTIES OF MERCHANTABILITY OR FITNESS FOR A PARTICULAR PURPOSE, ARE LIMITED TO ONE YEAR OR THE...

Warranty
Page 1
... from your major appliance, to replace or repair house fuses, or to instruct you may contact Whirlpool at the address below . Service calls to correct the installation of your major appliance, to correct house wiring or plumbing. 2. SOME STATES AND PROVINCES DO ... model number ready. Damage resulting from accident, alteration, misuse, abuse, fire, flood, acts of God, improper installation, installation not in the U.S.A., visit www.whirlpool.com. Repairs to parts or systems resulting from unauthorized modifications made to use of consumables or cleaning products not approved...
... from your major appliance, to replace or repair house fuses, or to instruct you may contact Whirlpool at the address below . Service calls to correct the installation of your major appliance, to correct house wiring or plumbing. 2. SOME STATES AND PROVINCES DO ... model number ready. Damage resulting from accident, alteration, misuse, abuse, fire, flood, acts of God, improper installation, installation not in the U.S.A., visit www.whirlpool.com. Repairs to parts or systems resulting from unauthorized modifications made to use of consumables or cleaning products not approved...


