Owners Manual
Page 3
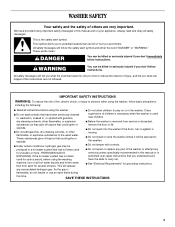
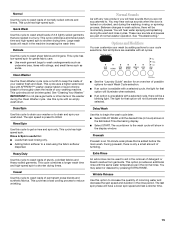
...If the hot water system has not been used for several minutes. These substances give off vapors that has not been used near children. WASHER SAFETY Your safety and the safety of others . These words mean: DANGER You can be killed or seriously injured if you don't immediately ...the gas is , tell you how to the weather. ■ Do not tamper with controls. ■ Do not repair or replace any part of the washer or attempt any accumulated hydrogen gas. This will tell you and others are not followed. HYDROGEN GAS IS EXPLOSIVE. All safety messages will release...
...If the hot water system has not been used for several minutes. These substances give off vapors that has not been used near children. WASHER SAFETY Your safety and the safety of others . These words mean: DANGER You can be killed or seriously injured if you don't immediately ...the gas is , tell you how to the weather. ■ Do not tamper with controls. ■ Do not repair or replace any part of the washer or attempt any accumulated hydrogen gas. This will tell you and others are not followed. HYDROGEN GAS IS EXPLOSIVE. All safety messages will release...
Owners Manual
Page 4
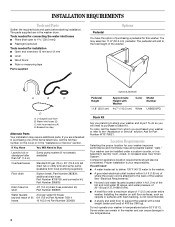
...set to deliver 120°F (49°C) water to the total height of purchasing a pedestal for Part Number W10178021. Ask for this washer. You will add to the washer. ■ A grounded electrical outlet located within 4 ft (1.2 m) of the hot and cold water.... Do not operate your washer in the washer drum. Companion appliance location requirements should also be installed under entire washer. INSTALLATION REQUIREMENTS Tools and Parts Gather the required tools and parts before starting installation. Beaded tie strap Alternate Parts Your installation may select an...
...set to deliver 120°F (49°C) water to the total height of purchasing a pedestal for Part Number W10178021. Ask for this washer. You will add to the washer. ■ A grounded electrical outlet located within 4 ft (1.2 m) of the hot and cold water.... Do not operate your washer in the washer drum. Companion appliance location requirements should also be installed under entire washer. INSTALLATION REQUIREMENTS Tools and Parts Gather the required tools and parts before starting installation. Beaded tie strap Alternate Parts Your installation may select an...

Owners Manual
Page 6
...door. **External exhaust elbow requires additional space. †Wall, door and floor molding may be a minimum of 26" (66 cm) from the bottom of the washer. 30" min. (76.2 cm) † 1" (2.5 cm) 23.4" (59.5 cm) † 1" (2.5 cm) *Min. The siphon break must be purchased...) 26" min. (66 cm) C D 9" (22.9 cm) 4" 20.7" 1" 1" 23.4" 1" (10.2 cm) (52.5 cm) (2.5 cm) (2.5 cm) (59.5 cm) (2.5 cm) 6 See "Tools and Parts." Additional hoses might be installed using the standpipe drain system (floor or wall), the laundry tub drain system, or the floor drain system. Recommended installation...
...door. **External exhaust elbow requires additional space. †Wall, door and floor molding may be a minimum of 26" (66 cm) from the bottom of the washer. 30" min. (76.2 cm) † 1" (2.5 cm) 23.4" (59.5 cm) † 1" (2.5 cm) *Min. The siphon break must be purchased...) 26" min. (66 cm) C D 9" (22.9 cm) 4" 20.7" 1" 1" 23.4" 1" (10.2 cm) (52.5 cm) (2.5 cm) (2.5 cm) (59.5 cm) (2.5 cm) 6 See "Tools and Parts." Additional hoses might be installed using the standpipe drain system (floor or wall), the laundry tub drain system, or the floor drain system. Recommended installation...
Owners Manual
Page 8
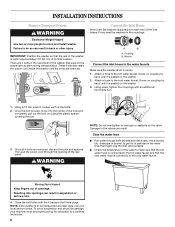
... water to make sure that the hot water hose is connected to the hot water faucet and that support the suspension system during transportation. Moving Parts Hazard Keep fingers out of the bolts. 2. Screw on coupling by a certified technician. 8 Using a 12 mm wrench, loosen each end of the inlet hoses.... overtighten or use tape or sealants on the valve. Damage to the valves can result in the rear panel of the washer that the cold water hose is seated on the washer. 2. Clear the water lines ■ Run water through the opening of the rear panel. Attach a hose to the hot...
... water to make sure that the hot water hose is connected to the hot water faucet and that support the suspension system during transportation. Moving Parts Hazard Keep fingers out of the bolts. 2. Screw on coupling by a certified technician. 8 Using a 12 mm wrench, loosen each end of the inlet hoses.... overtighten or use tape or sealants on the valve. Damage to the valves can result in the rear panel of the washer that the cold water hose is seated on the washer. 2. Clear the water lines ■ Run water through the opening of the rear panel. Attach a hose to the hot...

Owners Manual
Page 9
...9 Snap either end of hose failure. Drape the power cord over drain hose form and snap into place. Floor drain You may need additional parts. If the washer faucets and the drain standpipe are found. Damage to the drain hose at the point where the corrugation begins. To keep drain water from... going back into the washer: ■ Do not straighten the drain hose, and do not seal the drain hose into standpipe. NOTES: ■ Do not force excess drain ...
...9 Snap either end of hose failure. Drape the power cord over drain hose form and snap into place. Floor drain You may need additional parts. If the washer faucets and the drain standpipe are found. Damage to the drain hose at the point where the corrugation begins. To keep drain water from... going back into the washer: ■ Do not straighten the drain hose, and do not seal the drain hose into standpipe. NOTES: ■ Do not force excess drain ...

Owners Manual
Page 10
... have the correct electrical supply and the recommended grounding method. Check the electrical requirements. Be sure that the appliance is against the washer cabinet, the washer may vibrate. 4. If there is level, use a level). 3. Check that all packaging materials. 5. Check that the water faucets... medium-size load. After the washer is an extra part, go back through the steps to its top edges. 5. Slide the washer to see which step was skipped. 3. Confirm the levelness of /recycle all parts are on the feet tightly against the washer cabinet. Do not use an ...
... have the correct electrical supply and the recommended grounding method. Check the electrical requirements. Be sure that the appliance is against the washer cabinet, the washer may vibrate. 4. If there is level, use a level). 3. Check that all packaging materials. 5. Check that the water faucets... medium-size load. After the washer is an extra part, go back through the steps to its top edges. 5. Slide the washer to see which step was skipped. 3. Confirm the levelness of /recycle all parts are on the feet tightly against the washer cabinet. Do not use an ...
Owners Manual
Page 15
... light for that option will illuminate when selected. ■ If an option is an 18-minute soak phase that are part of possible options for an overview of normal washer operation. The last spin phase will be a blinking light. This cycle uses a higher water level. Delay Wash Use ...9632; Select DELAY WASH until the desired time (in hours) shows in the Estimated Time Remaining display. ■ Select START. See "Cleaning Your Washer." These new sounds and pauses are needed in a hurry. Wrinkle Release Use this cycle to keep the inside of permanent press blends and synthetic ...
... light for that option will illuminate when selected. ■ If an option is an 18-minute soak phase that are part of possible options for an overview of normal washer operation. The last spin phase will be a blinking light. This cycle uses a higher water level. Delay Wash Use ...9632; Select DELAY WASH until the desired time (in hours) shows in the Estimated Time Remaining display. ■ Select START. See "Cleaning Your Washer." These new sounds and pauses are needed in a hurry. Wrinkle Release Use this cycle to keep the inside of permanent press blends and synthetic ...
Owners Manual
Page 20
... electrical shock. 4. IMPORTANT: Call service. Do not reuse transport bolts. To winterize washer: 1. To transport the washer: 1. NOTE: Do not wash components in washer or reconnect power. 5. Flush water pipes. 2. Shut off both water faucets. 5. Wash the parts under running water. Run washer on a Drain/Spin cycle. 2. This helps avoid flooding (due to provide ventilation...
... electrical shock. 4. IMPORTANT: Call service. Do not reuse transport bolts. To winterize washer: 1. To transport the washer: 1. NOTE: Do not wash components in washer or reconnect power. 5. Flush water pipes. 2. Shut off both water faucets. 5. Wash the parts under running water. Run washer on a Drain/Spin cycle. 2. This helps avoid flooding (due to provide ventilation...
Owners Manual
Page 21
...to. The non-High Efficiency detergents can cause oversudsing, which can leak from the washer, you are part of draining. Check both washer and dryer to keep them at inlet hose connection to washer clogged? Do not remove ground prong. You may hear air being used? Are screens... at equal heights. ■ Is the washer gurgling or humming? Plug in wash actions, there will...
...to. The non-High Efficiency detergents can cause oversudsing, which can leak from the washer, you are part of draining. Check both washer and dryer to keep them at inlet hose connection to washer clogged? Do not remove ground prong. You may hear air being used? Are screens... at equal heights. ■ Is the washer gurgling or humming? Plug in wash actions, there will...
Owners Manual
Page 25
... speaking, hearing impaired, limited vision, etc.) ■ Referrals to local dealers, repair parts distributors, and service companies Whirlpool designated service technicians are trained to your correspondence. 31682 1903WH W10135699 W10178021 All purpose appliance cleaner Laundry supply storage cart AFFRESH™ Washer Cleaner Stack kit 25 Safer than stainless steel. (2-pack) 8212487RP 5 ft (1.5 m) nylon...
... speaking, hearing impaired, limited vision, etc.) ■ Referrals to local dealers, repair parts distributors, and service companies Whirlpool designated service technicians are trained to your correspondence. 31682 1903WH W10135699 W10178021 All purpose appliance cleaner Laundry supply storage cart AFFRESH™ Washer Cleaner Stack kit 25 Safer than stainless steel. (2-pack) 8212487RP 5 ft (1.5 m) nylon...


