User Instructions
Page 2
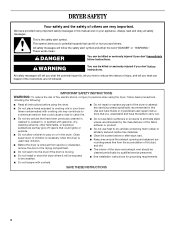
...compartment. IMPORTANT SAFETY INSTRUCTIONS WARNING: To reduce the risk of the dryer or attempt any part of fire, electric shock, or injury to eliminate static unless recommended by qualified service personnel. s Before the dryer is the safety alert symbol. s Do not use fabric softeners... or products to persons when using the dryer. s See installation instructions for grounding...
...compartment. IMPORTANT SAFETY INSTRUCTIONS WARNING: To reduce the risk of the dryer or attempt any part of fire, electric shock, or injury to eliminate static unless recommended by qualified service personnel. s Before the dryer is the safety alert symbol. s Do not use fabric softeners... or products to persons when using the dryer. s See installation instructions for grounding...
User Instructions
Page 3
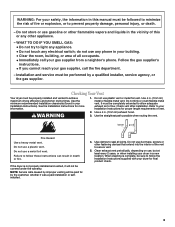
.... • Clear the room, building, or area of all joints. Do not use a metal foil vent. If the dryer is complete, be followed to minimize the risk of vent. 2. Do not use any electrical switch; See the Installation Instructions for proper length requirements of fire or explosion, or to follow the Installation...
.... • Clear the room, building, or area of all joints. Do not use a metal foil vent. If the dryer is complete, be followed to minimize the risk of vent. 2. Do not use any electrical switch; See the Installation Instructions for proper length requirements of fire or explosion, or to follow the Installation...
User Instructions
Page 6
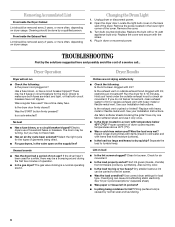
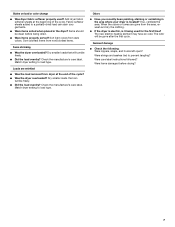
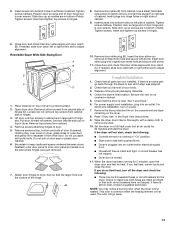
...that hold moisture (cottons). Is the dryer door firmly closed? s Has an air dry cycle been selected? Clean lint screen. Dryer Operation Dryer will not run s Check the following : Is the lint screen clogged with lint? Electric dryers use it a gas dryer? Is the exhaust vent or outside ...exhaust hood to make sure both circuit breakers have heat. Overdrying can be removed every 2 years, or more often, depending on dryer usage. Unusual sounds s Has the dryer had a period of a ...
...that hold moisture (cottons). Is the dryer door firmly closed? s Has an air dry cycle been selected? Clean lint screen. Dryer Operation Dryer will not run s Check the following : Is the lint screen clogged with lint? Electric dryers use it a gas dryer? Is the exhaust vent or outside ...exhaust hood to make sure both circuit breakers have heat. Overdrying can be removed every 2 years, or more often, depending on dryer usage. Unusual sounds s Has the dryer had a period of a ...
User Instructions
Page 7
.... Items should be gone after the first cycle. Odors s Have you recently been painting, staining or varnishing in the dryer? s Were items properly sorted? s If the dryer is electric, is located? Were strings and sashes tied to load type. s Did the load overdry? Stains on load or color...cycle. Dry smaller loads that can stain your dryer is it being dried. s Did the load overdry? Loads are gone from dark colors. s Was the dryer overloaded? Match dryer setting to a partially-dried load can tumble freely. The new electric heating element may have an odor. Were ...
.... Items should be gone after the first cycle. Odors s Have you recently been painting, staining or varnishing in the dryer? s Were items properly sorted? s If the dryer is electric, is located? Were strings and sashes tied to load type. s Did the load overdry? Stains on load or color...cycle. Dry smaller loads that can stain your dryer is it being dried. s Did the load overdry? Loads are gone from dark colors. s Was the dryer overloaded? Match dryer setting to a partially-dried load can tumble freely. The new electric heating element may have an odor. Were ...
Installation Instructions
Page 1
...We have provided many important safety messages in this manual and on your appliance. 29" (73.7 CM) ELECTRIC DRYER INSTALLATION INSTRUCTIONS INSTRUCCIONES DE INSTALACIÓN PARA LA SECADORA ELÉCTRICA DE 29" (73,7 CM) Table of Contents / &#...205;ndice DRYER SAFETY 1 INSTALLATION INSTRUCTIONS 2 Tools and Parts 2 Location Requirements 2 Electrical Requirements 4 Electrical Connection 5 Venting Requirements 10 Plan Vent System 11 Install Vent System 12 Install Leveling Legs 12 Connect Vent 12 Level Dryer 12 Reverse Door Swing (Optional 12 Complete...
...We have provided many important safety messages in this manual and on your appliance. 29" (73.7 CM) ELECTRIC DRYER INSTALLATION INSTRUCTIONS INSTRUCCIONES DE INSTALACIÓN PARA LA SECADORA ELÉCTRICA DE 29" (73,7 CM) Table of Contents / &#...205;ndice DRYER SAFETY 1 INSTALLATION INSTRUCTIONS 2 Tools and Parts 2 Location Requirements 2 Electrical Requirements 4 Electrical Connection 5 Venting Requirements 10 Plan Vent System 11 Install Vent System 12 Install Leveling Legs 12 Connect Vent 12 Level Dryer 12 Reverse Door Swing (Optional 12 Complete...
Installation Instructions
Page 2
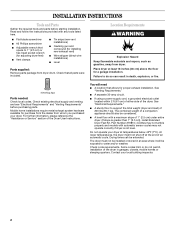
...) of 200 lbs (90.7 kg). s A separate 30-amp circuit. See "Electrical Requirements." s A level floor with a maximum slope of a companion appliance should also be exposed to 1" (2.5 cm) or hex-head socket wrench (for adjusting dryer feet) s Vent clamps s Tin snips (new vent installations) s Caulking gun and...the "Assistance or Service" section of an automatic cycle. s If using a power supply cord, a grounded electrical outlet located within 2 ft (61 cm) of either side of the dryer in an area where it will need s A location that all parts were included. Read and follow the ...
...) of 200 lbs (90.7 kg). s A separate 30-amp circuit. See "Electrical Requirements." s A level floor with a maximum slope of a companion appliance should also be exposed to 1" (2.5 cm) or hex-head socket wrench (for adjusting dryer feet) s Vent clamps s Tin snips (new vent installations) s Caulking gun and...the "Assistance or Service" section of an automatic cycle. s If using a power supply cord, a grounded electrical outlet located within 2 ft (61 cm) of either side of the dryer in an area where it will need s A location that all parts were included. Read and follow the ...
Installation Instructions
Page 4
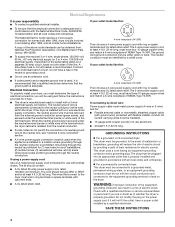
... circuit, fused on the power supply cord: if it is recommended that a qualified electrician determine that the electrical connection is prohibited for homes built after 1996, dryer circuits involved in the neutral or grounding circuit. When the neutral ground wire is secured under the neutral terminal...70-latest edition and all local codes and ordinances. s 10-gauge solid copper wire (do not permit the connection of electric shock. s For a permanently connected dryer: This dryer must be used , it will not fit the outlet, have a fuse in remodeling after 1996, and all local codes...
... circuit, fused on the power supply cord: if it is recommended that a qualified electrician determine that the electrical connection is prohibited for homes built after 1996, dryer circuits involved in the neutral or grounding circuit. When the neutral ground wire is secured under the neutral terminal...70-latest edition and all local codes and ordinances. s 10-gauge solid copper wire (do not permit the connection of electric shock. s For a permanently connected dryer: This dryer must be used , it will not fit the outlet, have a fuse in remodeling after 1996, and all local codes...

Installation Instructions
Page 6
... (1.9 cm) UL listed strain relief (UL marking on the power supply cord is inside the terminal block opening C. Electrical Connection Options If your type of electrical connection: 4-wire (recommended) 3-wire (if 4-wire is required for mobile homes and where local codes do not permit ...12.7 cm) 3-wire receptacle (NEMA type 10-30R) A fused disconnect or circuit breaker box* A UL listed, 120/240-volt minimum, 30-amp, dryer power supply cord* 4-wire connection: Direct Wire 3-wire connection: Power supply cord 3-wire direct 3¹⁄₂" (8.9 cm) A fused disconnect or circuit...
... (1.9 cm) UL listed strain relief (UL marking on the power supply cord is inside the terminal block opening C. Electrical Connection Options If your type of electrical connection: 4-wire (recommended) 3-wire (if 4-wire is required for mobile homes and where local codes do not permit ...12.7 cm) 3-wire receptacle (NEMA type 10-30R) A fused disconnect or circuit breaker box* A UL listed, 120/240-volt minimum, 30-amp, dryer power supply cord* 4-wire connection: Direct Wire 3-wire connection: Power supply cord 3-wire direct 3¹⁄₂" (8.9 cm) A fused disconnect or circuit...

Installation Instructions
Page 7
... silver-colored terminal block screw C. Strip insulation back 1" (2.5 cm). Connect ground wire (green or bare) of extra length so dryer can be moved if needed. Squeeze hooked ends together. Tighten screws. 5. Insert tab of terminal block cover into a hook shape....as shown. 1. Neutral wire (white or center wire) D. ¾" (1.9 cm) UL listed strain relief E. Direct wire cable must have completed your electrical connections. Cut 1¹⁄₂" (3.8 cm) from external ground conductor screw. A B C D A. Neutral ground wire F. Tighten strain relief screws. ...
... silver-colored terminal block screw C. Strip insulation back 1" (2.5 cm). Connect ground wire (green or bare) of extra length so dryer can be moved if needed. Squeeze hooked ends together. Tighten screws. 5. Insert tab of terminal block cover into a hook shape....as shown. 1. Neutral wire (white or center wire) D. ¾" (1.9 cm) UL listed strain relief E. Direct wire cable must have completed your electrical connections. Cut 1¹⁄₂" (3.8 cm) from external ground conductor screw. A B C D A. Neutral ground wire F. Tighten strain relief screws. ...

Installation Instructions
Page 8
...wire) E 1.9 cm) UL listed strain relief 3. You have completed your electrical connections. Tighten screw. Center silver-colored terminal block screw C. Ground wire (green or bare) of extra length so dryer can be moved if needed. Tighten strain relief screws. 6. Direct wire cable... must have completed your electrical connections. Neutral prong D. Ring terminals G. Tighten screw. Connect the other power ...
...wire) E 1.9 cm) UL listed strain relief 3. You have completed your electrical connections. Tighten screw. Center silver-colored terminal block screw C. Ground wire (green or bare) of extra length so dryer can be moved if needed. Tighten strain relief screws. 6. Direct wire cable... must have completed your electrical connections. Neutral prong D. Ring terminals G. Tighten screw. Connect the other power ...

Installation Instructions
Page 9
...strain relief screw. 5. Secure cover with hold -down screw. 6. Insert tab of terminal block cover into slot of dryer rear panel. Tighten screw. Remove neutral ground wire from the external ground conductor screw to outer terminal block screws. Connect ...Neutral wire (white or center wire) E. ¾" (1.9 cm) UL listed strain relief F. Tighten strain relief screws. 5. You have completed your electrical connections. Neutral ground wire C. Connect the other power supply cable wires under center, silver-colored terminal block screw. 1. A BC A E D A....
...strain relief screw. 5. Secure cover with hold -down screw. 6. Insert tab of terminal block cover into slot of dryer rear panel. Tighten screw. Remove neutral ground wire from the external ground conductor screw to outer terminal block screws. Connect ...Neutral wire (white or center wire) E. ¾" (1.9 cm) UL listed strain relief F. Tighten strain relief screws. 5. You have completed your electrical connections. Neutral ground wire C. Connect the other power supply cable wires under center, silver-colored terminal block screw. 1. A BC A E D A....
Installation Instructions
Page 13
...screws in bottom of cabinet. 9. Use a small, flat-blade screwdriver to keep cardboard spacer centered between doors. Insert plugs into an outlet and/or electrical supply is on a full heat cycle (not an air cycle) for 20 minutes and start , check the following : s There may notice a...screws from inner door. Remove top screws from cabinet. Do not pry apart with door catch (B). Complete Installation 1. Dispose of hinges (D). Set the dryer on . s Start button has been pushed firmly. Check to adjust alignment. This odor is common when the heating element is closed. 11. Slide...
...screws in bottom of cabinet. 9. Use a small, flat-blade screwdriver to keep cardboard spacer centered between doors. Insert plugs into an outlet and/or electrical supply is on a full heat cycle (not an air cycle) for 20 minutes and start , check the following : s There may notice a...screws from inner door. Remove top screws from cabinet. Do not pry apart with door catch (B). Complete Installation 1. Dispose of hinges (D). Set the dryer on . s Start button has been pushed firmly. Check to adjust alignment. This odor is common when the heating element is closed. 11. Slide...


