User Instructions
Page 1
... on the model and serial number label, located at www.whirlpool.com. To order parts and accessories, call 1-800-442-9991 or visit our website at the top inside dryer door well. ® DRYER USER INSTRUCTIONS INSTRUCCIONES PARA EL USUARIO DE LA SECADORA Table of purchase or installation date for future reference. You must provide proof of Contents / Índice ASSISTANCE OR SERVICE 1 DRYER SAFETY 2 DRYER USE 4 DRYER CARE 5 TROUBLESHOOTING 6 WARRANTY 8 AYUDA...
... on the model and serial number label, located at www.whirlpool.com. To order parts and accessories, call 1-800-442-9991 or visit our website at the top inside dryer door well. ® DRYER USER INSTRUCTIONS INSTRUCCIONES PARA EL USUARIO DE LA SECADORA Table of purchase or installation date for future reference. You must provide proof of Contents / Índice ASSISTANCE OR SERVICE 1 DRYER SAFETY 2 DRYER USE 4 DRYER CARE 5 TROUBLESHOOTING 6 WARRANTY 8 AYUDA...
User Instructions
Page 2
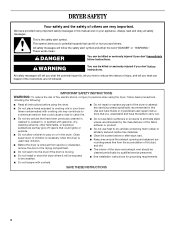
... if the instructions are very important. s Do not repair or replace any servicing unless specifically recommended in this manual and on or in your appliance. SAVE THESE INSTRUCTIONS 2 s Before the dryer is moving. s Do not reach into the dryer if the drum is removed from the accumulation of the dryer or attempt any part of lint,dust, and dirt. s Keep area around the exhaust opening and...
... if the instructions are very important. s Do not repair or replace any servicing unless specifically recommended in this manual and on or in your appliance. SAVE THESE INSTRUCTIONS 2 s Before the dryer is moving. s Do not reach into the dryer if the drum is removed from the accumulation of the dryer or attempt any part of lint,dust, and dirt. s Keep area around the exhaust opening and...
User Instructions
Page 3
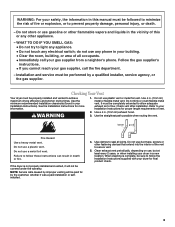
... it will be paid installation or selfinstalled. 4. WARNING: For your safety, the information in this or any electrical switch; Do not store or use , but at least every 2 years, or when installing your gas supplier, call your Installation Instructions). NOTE: Service calls caused by improper venting will not be followed to minimize the risk of this manual must be covered under the warranty.
... it will be paid installation or selfinstalled. 4. WARNING: For your safety, the information in this or any electrical switch; Do not store or use , but at least every 2 years, or when installing your gas supplier, call your Installation Instructions). NOTE: Service calls caused by improper venting will not be followed to minimize the risk of this manual must be covered under the warranty.
User Instructions
Page 4
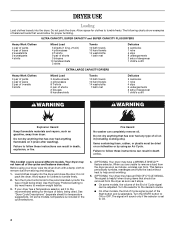
... any type of load being dried. Items containing foam, rubber, or plastic must be adjusted. Load clothes loosely into the dryer. Turn the selector to follow these instructions can result in death or fire. Failure to the desired volume. Before using an Air Cycle. ULTRA CAPACITY, SUPER CAPACITY and SUPER CAPACITY PLUS DRYERS Heavy Work Clothes 4 pair of pants 4 pair of jeans 2 sweatshirts 2 sweatpants 4 shirts Mixed Load 3 sheets (1 king...
... any type of load being dried. Items containing foam, rubber, or plastic must be adjusted. Load clothes loosely into the dryer. Turn the selector to follow these instructions can result in death or fire. Failure to the desired volume. Before using an Air Cycle. ULTRA CAPACITY, SUPER CAPACITY and SUPER CAPACITY PLUS DRYERS Heavy Work Clothes 4 pair of pants 4 pair of jeans 2 sweatshirts 2 sweatpants 4 shirts Mixed Load 3 sheets (1 king...
User Instructions
Page 5
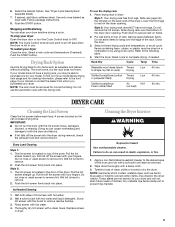
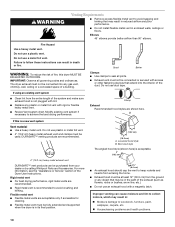
... dryer during a cycle. Replace screen in the door of clean cloths or towels to secure rack on the dryer opening . Tumble a load of the dryer. The drum turns, but the rack does not move. If your model. To use . Do not remove the lint screen. Close the door. 3. s If lint falls off the screen with your dryer anytime during removal, check the exhaust hood and remove the lint. As Needed Cleaning 1. Do not use the automatic cycle with hot water. 2. Push down to dry the drum. Reset cycle to dry...
... dryer during a cycle. Replace screen in the door of clean cloths or towels to secure rack on the dryer opening . Tumble a load of the dryer. The drum turns, but the rack does not move. If your model. To use . Do not remove the lint screen. Close the door. 3. s If lint falls off the screen with your dryer anytime during removal, check the exhaust hood and remove the lint. As Needed Cleaning 1. Do not use the automatic cycle with hot water. 2. Push down to dry the drum. Reset cycle to dry...
User Instructions
Page 6
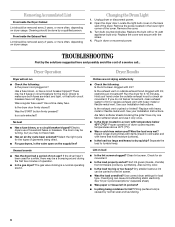
... power. 2. Open the dryer door. Remove the screw located in a room with a 10-watt appliance bulb only. Use a time-delay fuse. Proper operation of the cover. Plug in pockets? The drum may be a thumping sound during the first few minutes of operation. Run the dryer for air movement. Use only one fabric softener sheet, and use 2 household fuses or breakers. s Was a cold rinse water used for lint? Dry smaller loads so lint can cause lint-attracting static electricity. Remove the cover. 3. Replace the bulb with temperature...
... power. 2. Open the dryer door. Remove the screw located in a room with a 10-watt appliance bulb only. Use a time-delay fuse. Proper operation of the cover. Plug in pockets? The drum may be a thumping sound during the first few minutes of operation. Run the dryer for air movement. Use only one fabric softener sheet, and use 2 household fuses or breakers. s Was a cold rinse water used for lint? Dry smaller loads so lint can cause lint-attracting static electricity. Remove the cover. 3. Replace the bulb with temperature...
User Instructions
Page 7
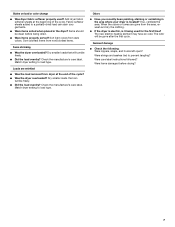
... end of the cycle. Fabric softener sheets added to load type. Check the manufacturer's care label. Dry smaller loads that will be clean before drying? 7 Check the manufacturer's care label. Garment damage s Check the following: Were zippers, snaps, and hooks left open? s Were items properly sorted? Dry smaller loads that can stain your dryer is it being dried. Match dryer setting to prevent tangling? s If the dryer is electric, is located? The odor will...
... end of the cycle. Fabric softener sheets added to load type. Check the manufacturer's care label. Dry smaller loads that will be clean before drying? 7 Check the manufacturer's care label. Garment damage s Check the following: Were zippers, snaps, and hooks left open? s Were items properly sorted? Dry smaller loads that can stain your dryer is it being dried. Match dryer setting to prevent tangling? s If the dryer is electric, is located? The odor will...
User Instructions
Page 8
... use . 4. Service must be found by checking the "Assistance or Service" section or by Whirlpool. 5. Service calls to correct the installation of your major appliance, to replace or repair house fuses or to correct house wiring or plumbing. 2. DISCLAIMER OF IMPLIED WARRANTIES; For information on how to contact Whirlpool Corporation, please see the "Troubleshooting" section of the Use & Care Guide. To locate FSP replacement parts in accordance with published installation instructions. Replacement parts or repair...
... use . 4. Service must be found by checking the "Assistance or Service" section or by Whirlpool. 5. Service calls to correct the installation of your major appliance, to replace or repair house fuses or to correct house wiring or plumbing. 2. DISCLAIMER OF IMPLIED WARRANTIES; For information on how to contact Whirlpool Corporation, please see the "Troubleshooting" section of the Use & Care Guide. To locate FSP replacement parts in accordance with published installation instructions. Replacement parts or repair...
Installation Instructions
Page 1
... safety messages in this manual and on your appliance. 29" (73.7 CM) ELECTRIC DRYER INSTALLATION INSTRUCTIONS INSTRUCCIONES DE INSTALACIÓN PARA LA SECADORA ELÉCTRICA DE 29" (73,7 CM) Table of Contents / Índice DRYER SAFETY 1 INSTALLATION INSTRUCTIONS 2 Tools and Parts 2 Location Requirements 2 Electrical Requirements 4 Electrical Connection 5 Venting Requirements 10 Plan Vent System 11 Install Vent System 12 Install Leveling Legs 12 Connect Vent 12 Level Dryer 12 Reverse Door Swing (Optional 12 Complete Installation 13 SEGURIDAD DE...
... safety messages in this manual and on your appliance. 29" (73.7 CM) ELECTRIC DRYER INSTALLATION INSTRUCTIONS INSTRUCCIONES DE INSTALACIÓN PARA LA SECADORA ELÉCTRICA DE 29" (73,7 CM) Table of Contents / Índice DRYER SAFETY 1 INSTALLATION INSTRUCTIONS 2 Tools and Parts 2 Location Requirements 2 Electrical Requirements 4 Electrical Connection 5 Venting Requirements 10 Plan Vent System 11 Install Vent System 12 Install Leveling Legs 12 Connect Vent 12 Level Dryer 12 Reverse Door Swing (Optional 12 Complete Installation 13 SEGURIDAD DE...
Installation Instructions
Page 2
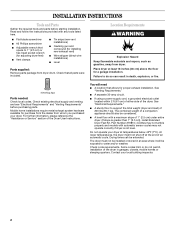
... (46 cm) above the floor for installing new exhaust vent) s Wire stripper (direct wire installations) s Level Parts supplied: Remove parts package from dryer. For further information, please reference the "Assistance or Service" section of the dryer. Contact your local building inspector. 2 s A separate 30-amp circuit. s If using a power supply cord, a grounded electrical outlet located within 2 ft (61 cm) of either side of the Dryer User Instructions. Location Requirements WARNING Explosion Hazard Keep flammable materials and...
... (46 cm) above the floor for installing new exhaust vent) s Wire stripper (direct wire installations) s Level Parts supplied: Remove parts package from dryer. For further information, please reference the "Assistance or Service" section of the dryer. Contact your local building inspector. 2 s A separate 30-amp circuit. s If using a power supply cord, a grounded electrical outlet located within 2 ft (61 cm) of either side of the Dryer User Instructions. Location Requirements WARNING Explosion Hazard Keep flammable materials and...

Installation Instructions
Page 3
... the dryer exhaust opening side-swing door D. s Additional clearances might be required for ease of the door are acceptable. Installation Clearances The location must be large enough to allow the dryer door to the Manufactured Home Construction and Safety Standard, Title 24 CFR, Part 3280 (formerly the Federal Standard for Mobile Home Construction and Safety, Title 24, HUD Part 280). See "Venting Requirements." Recessed...
... the dryer exhaust opening side-swing door D. s Additional clearances might be required for ease of the door are acceptable. Installation Clearances The location must be large enough to allow the dryer door to the Manufactured Home Construction and Safety Standard, Title 24 CFR, Part 3280 (formerly the Federal Standard for Mobile Home Construction and Safety, Title 24, HUD Part 280). See "Venting Requirements." Recessed...
Installation Instructions
Page 4
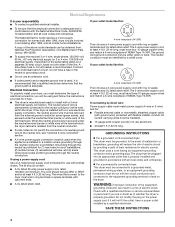
... conductor is adequate and in ring terminals or spade terminals with upturned ends. s At least 5 ft (1.52 m) long. This dryer uses a cord having an equipment-grounding conductor and a grounding plug. WARNING: Improper connection of the equipment- The National Electric Code requires a 4-wire supply connection for use with clothes dryers. s If codes permit and a separate ground wire is used when the appliance is installed in a location where grounding through the neutral is...
... conductor is adequate and in ring terminals or spade terminals with upturned ends. s At least 5 ft (1.52 m) long. This dryer uses a cord having an equipment-grounding conductor and a grounding plug. WARNING: Improper connection of the equipment- The National Electric Code requires a 4-wire supply connection for use with clothes dryers. s If codes permit and a separate ground wire is used when the appliance is installed in a location where grounding through the neutral is...

Installation Instructions
Page 6
... position. Removable conduit connector B. Hole below the terminal block opening C. Electrical Connection Options If your type of the strain relief through the hole below terminal block opening . Spade terminals with the dryer cabinet and be connecting to: Go to Section 4-wire receptacle (NEMA Type 14-30R) A UL listed, 120/240-volt minimum, 30-amp, dryer power supply cord* 4-wire connection: Power supply cord 4-wire direct 5" (12.7 cm) 3-wire receptacle (NEMA type 10-30R) A fused disconnect or circuit breaker box* A UL listed, 120...
... position. Removable conduit connector B. Hole below the terminal block opening C. Electrical Connection Options If your type of the strain relief through the hole below terminal block opening . Spade terminals with the dryer cabinet and be connecting to: Go to Section 4-wire receptacle (NEMA Type 14-30R) A UL listed, 120/240-volt minimum, 30-amp, dryer power supply cord* 4-wire connection: Power supply cord 4-wire direct 5" (12.7 cm) 3-wire receptacle (NEMA type 10-30R) A fused disconnect or circuit breaker box* A UL listed, 120...

Installation Instructions
Page 7
... place the hooked end (hook facing right) of the neutral wire (white or center wire) of direct wire cable under the center screw of power supply cord to center silver-colored terminal block screw B. Dotted line shows position of dryer rear panel. Neutral wire (white or center wire) D. ¾" (1.9 cm) UL listed strain relief E. Neutral wire (white or center wire) D. ¾" (1.9 cm) UL listed strain relief E. Connect the other wires to "Venting Requirements." Tighten strain...
... place the hooked end (hook facing right) of the neutral wire (white or center wire) of direct wire cable under the center screw of power supply cord to center silver-colored terminal block screw B. Dotted line shows position of dryer rear panel. Neutral wire (white or center wire) D. ¾" (1.9 cm) UL listed strain relief E. Neutral wire (white or center wire) D. ¾" (1.9 cm) UL listed strain relief E. Connect the other wires to "Venting Requirements." Tighten strain...

Installation Instructions
Page 8
... of terminal block cover into slot of the wire under the outer terminal block screws (hooks facing right). Direct wire cable must have completed your electrical connections. Neutral (white or center wire) When connecting to neutral wire. Ground wire (green or bare) of wires into a hook shape. 1 C GF A. 3-wire receptacle (NEMA type 10-30R) B. 3-wire plug C. Now go to "Venting Requirements." 3-wire connection: Direct Wire Use where local codes permit connecting cabinet-ground conductor to the terminal block, place the hooked end of dryer rear panel. Bend...
... of terminal block cover into slot of the wire under the outer terminal block screws (hooks facing right). Direct wire cable must have completed your electrical connections. Neutral (white or center wire) When connecting to neutral wire. Ground wire (green or bare) of wires into a hook shape. 1 C GF A. 3-wire receptacle (NEMA type 10-30R) B. 3-wire plug C. Now go to "Venting Requirements." 3-wire connection: Direct Wire Use where local codes permit connecting cabinet-ground conductor to the terminal block, place the hooked end of dryer rear panel. Bend...

Installation Instructions
Page 9
... screw B. Tighten screws. 4. Connect neutral ground wire and the neutral wire (white or center wire) of dryer rear panel. You have completed your electrical connections. Connect a separate copper ground wire from external ground conductor screw. Place the hooked ends of terminal block (hook facing right). Tighten strain relief screws. 5. 1. B C D Optional 3-wire connection Use for direct wire or power supply cord where local codes do not permit connecting cabinet-ground conductor to "Venting Requirements." Secure cover with hold -down...
... screw B. Tighten screws. 4. Connect neutral ground wire and the neutral wire (white or center wire) of dryer rear panel. You have completed your electrical connections. Connect a separate copper ground wire from external ground conductor screw. Place the hooked ends of terminal block (hook facing right). Tighten strain relief screws. 5. 1. B C D Optional 3-wire connection Use for direct wire or power supply cord where local codes do not permit connecting cabinet-ground conductor to "Venting Requirements." Secure cover with hold -down...
Installation Instructions
Page 10
... not install flexible metal vent in reduced airflow and poor performance. Fire Hazard Use a heavy metal vent. Failure to follow these instructions can cause moisture and lint to collect indoors, which may result in enclosed walls, ceilings or floors. WARNING: To reduce the risk of the Dryer User Instructions. If using an existing vent system s Clean lint from your dealer or by calling Whirlpool Parts...
... not install flexible metal vent in reduced airflow and poor performance. Fire Hazard Use a heavy metal vent. Failure to follow these instructions can cause moisture and lint to collect indoors, which may result in enclosed walls, ceilings or floors. WARNING: To reduce the risk of the Dryer User Instructions. If using an existing vent system s Clean lint from your dealer or by calling Whirlpool Parts...

Installation Instructions
Page 11
... metal or flexible metal vent Alternate installations for your exhaust installation type Recommended exhaust installations Typical installations vent the dryer from the rear of the Dryer User Instructions. s Bend vent gradually to connect elbows H. Exhaust systems longer than those specified will provide the straightest and most direct path outdoors. Wall D. A B A. Determine vent length and elbows needed for close -clearance installations are possible. s Over-the-Top Installation: Part Number 4396028 s Periscope Installation (For use vent runs longer than those specified...
... metal or flexible metal vent Alternate installations for your exhaust installation type Recommended exhaust installations Typical installations vent the dryer from the rear of the Dryer User Instructions. s Bend vent gradually to connect elbows H. Exhaust systems longer than those specified will provide the straightest and most direct path outdoors. Wall D. A B A. Determine vent length and elbows needed for close -clearance installations are possible. s Over-the-Top Installation: Part Number 4396028 s Periscope Installation (For use vent runs longer than those specified...
Installation Instructions
Page 12
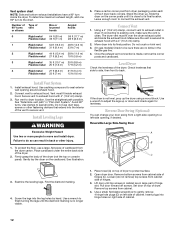
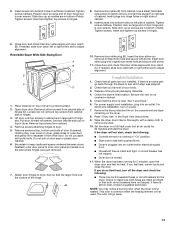
... exhaust installations have a 90º turn to connect the exhaust vent. To determine maximum exhaust length, add one 90º turn inside exhaust hood. Slide the dryer on left -side opening around exhaust hood. 2. Once the exhaust vent connection is close to secure vent. Use caulking compound to a left side of dryer to move and install dryer. See "Determine vent path" in large part of hinges. 3. Gently lay the dryer on right side of the dryer. 2. Reverse Door...
... exhaust installations have a 90º turn to connect the exhaust vent. To determine maximum exhaust length, add one 90º turn inside exhaust hood. Slide the dryer on left -side opening around exhaust hood. 2. Once the exhaust vent connection is close to secure vent. Use caulking compound to a left side of dryer to move and install dryer. See "Determine vent path" in large part of hinges. 3. Gently lay the dryer on right side of the dryer. 2. Reverse Door...
Installation Instructions
Page 13
... the Dryer User Instructions. 9. Loosen (do not feel heat, cancel cycle and close the door. Do not pry apart with door catch (B). Remove door strike plug (B). If needed , slide door catch left side of /recycle all parts are in hinges. 8. Complete Installation 1. If there is level. Check that the larger hole is intact and tight, or circuit breaker has not tripped. For direct wire installation, turn off screws. If the dryer will...
... the Dryer User Instructions. 9. Loosen (do not feel heat, cancel cycle and close the door. Do not pry apart with door catch (B). Remove door strike plug (B). If needed , slide door catch left side of /recycle all parts are in hinges. 8. Complete Installation 1. If there is level. Check that the larger hole is intact and tight, or circuit breaker has not tripped. For direct wire installation, turn off screws. If the dryer will...


