Whirlpool WED5800S Support and Manuals
Get Help and Manuals for this Whirlpool item
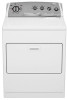
View All Support Options Below
Free Whirlpool WED5800S manuals!
Problems with Whirlpool WED5800S?
Ask a Question
Free Whirlpool WED5800S manuals!
Problems with Whirlpool WED5800S?
Ask a Question
Popular Whirlpool WED5800S Manual Pages
User Instructions - Page 1
... date
8578183 To order parts and accessories, call 1-800-442-9991 or visit our website at the top inside dryer door well. Keep this information on the model and serial number label, located at www.whirlpool.com. You must provide proof of Contents / Índice
ASSISTANCE OR SERVICE 1 DRYER SAFETY 2 DRYER USE 4 DRYER CARE 5 TROUBLESHOOTING 6 WARRANTY 8
AYUDA O SERVICIO TÉ...
User Instructions - Page 2
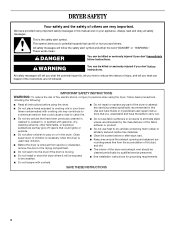
... repair or replace any servicing unless specifically recommended in this manual and on or in published user-repair instructions that could ignite or explode. s Keep area around the exhaust opening and adjacent sur- SAVE THESE INSTRUCTIONS
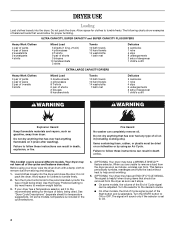
2 We have provided many important safety messages in this Use and Care Guide or in the dryer.
Items contaminated with controls.
s Do not use heat...
User Instructions - Page 3
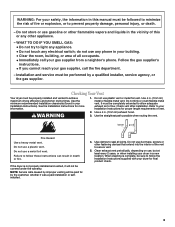
... not use , but at least every 2 years, or when installing your dryer in your Installation Instructions for by improper venting will not be properly installed and vented to prevent property damage, personal injury, or death.
- Installation and service must be covered under the warranty. Checking Your Vent
Your dryer must be completely extended to allow adequate exhaust air...
User Instructions - Page 4
... after washing).
This feature periodically tumbles, rearranges and fluffs the load without heat to the desired volume.
On some models, the volume of the End of the cycles and features described. The signal is set it to remove a load from dryer. See "Dryer Cycle Descriptions" (separate sheet) for proper tumbling. Turn the selector to help...
User Instructions - Page 5
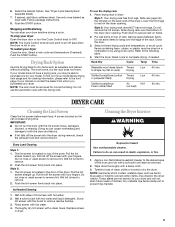
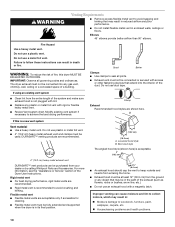
... rack. Pull the lint
screen toward you purchased your model. Wet lint is located in death, explosion, or fire.
1. Style 2: 1. Pull the lint screen straight up. As Needed Cleaning
1. Replace screen
in dryer.
Apply a non-flammable household cleaner to an Off area when the dryer is located on rack)
Drying
Stuffed toys/pillows (cotton...
User Instructions - Page 6
... system of non-use?
See your Installation Instructions. Replace with a 10-watt appliance bulb only. Expect longer drying times with lint? Separate the load to dry quickly? s Is the load properly sorted? Dry smaller loads so lint can cause lint-attracting static electricity.
Unplug dryer or disconnect power.
2. TROUBLESHOOTING
First try the solutions suggested here and...
User Instructions - Page 7
... the load overdry? The new electric heating element may have an odor. Odors
s Have you recently been painting, staining or varnishing in the dryer? Garment damage
s Check the following: Were zippers, snaps, and hooks left open? Were items damaged before being used ?
Match dryer setting to load type. Match dryer setting to load type.
Were strings and...
User Instructions - Page 8
... service center. After checking "Troubleshooting," additio nal help
can be provided by Whirlpool.
5. In the U.S.A., call 1-800-807-6777.
8/05
Replacement parts
If you only use of your major appliance, to replace or repair
house fuses or to correct defects in accordance with published installation instructions. These parts will pay for FSP ® replacement parts and repair...
Installation Instructions - Page 1
...don't follow instructions.
All ...instructions are very important. 29" (73.7 CM) ELECTRIC DRYER INSTALLATION INSTRUCTIONS
INSTRUCCIONES DE INSTALACIÓN PARA LA SECADORA ELÉCTRICA DE 29" (73,7 CM)
Table of Contents / Índice
DRYER SAFETY 1
INSTALLATION INSTRUCTIONS 2 Tools and Parts 2 Location Requirements 2 Electrical Requirements 4 Electrical...243;n 27
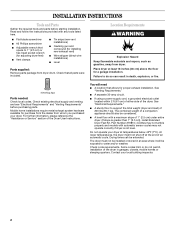
DRYER SAFETY
Your ...
Installation Instructions - Page 2
... User Instructions.
The dryer must not be considered. Mobile home installations require metal exhaust system hardware available for a garage installation.
Drying times can result in death, explosion, or fire.
4 leveling legs
Parts needed: Check local codes.
Read and follow the instructions provided with automatic sensor cycles may not tumble properly and models with any tools...
Installation Instructions - Page 4
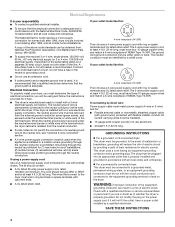
... solid copper wire (do not permit the connection of least resistance for electric current. GROUNDING INSTRUCTIONS
s For a grounded, cord-connected dryer: This dryer must be run with the National Electrical Code, ANSI/NFPA 70-latest edition and all local codes and ordinances. s For a permanently connected dryer: This dryer must be sure that the ground path is isolated from : National...
Installation Instructions - Page 10
... Instructions. The dryer exhaust must be
used. s Replace any gas vent, chimney, wall, ceiling or a concealed space of the duct. Do not use a metal foil vent. A
4" (10.2 cm) 4" (10.2 cm) A. Louvered hood style B.
s Exhaust vent must be fully extended and supported when the dryer is a new vent system
Vent material s Use a heavy metal vent. Box...
Installation Instructions - Page 11

... path outdoors.
NOTE: The following kits for close clearance alternate installations are available for your exhaust installation type
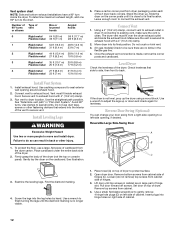
Recommended exhaust installations Typical installations vent the dryer from the rear of the Dryer User Instructions. s Over-the-Top Installation:
Part Number 4396028
s Periscope Installation (For use . Two close clearances
Venting systems come in...
Installation Instructions - Page 12
... (On gas models) Check to exhaust hood with 4" (10.2 cm) clamp.
3.
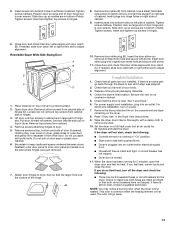
Connect vent to the chart. Gently lay the dryer on right side...NOTE: Side and bottom exhaust installations have a 90º turn to exhaust hood.
Install Vent System
1. Install exhaust hood. To protect the .... Set door on top of dryer. Connect Vent
1. Run vent to back. Place towel (A) on top of dryer to...
Installation Instructions - Page 13
... at top, bottom and side of /recycle all parts are intact and tight, or that you removed in a running for 5 minutes, open the dryer door and feel for heat. See "Level Dryer."
6. For direct wire installation, turn off screws. Wipe the dryer drum interior thoroughly with door catch (C). Set the dryer on .
s Start button has been pushed firmly...
Whirlpool WED5800S Reviews
We have not received any reviews for Whirlpool yet.