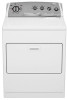
User Instructions
Page 2
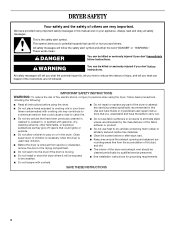
... will tell you what the potential hazard is, tell you what can be exposed to cooking oils in the dryer. IMPORTANT SAFETY INSTRUCTIONS WARNING: To reduce the risk of fire, electric shock, or injury to reduce the chance of injury, and tell you how to persons when using the...fire. s The interior of the dryer and exhaust vent should be killed or seriously injured if you don't immediately follow basic precautions, including the following: s Read all safety messages. WARNING You can kill or hurt you to carry out. s Do not use heat to eliminate static unless recommended by...
... will tell you what the potential hazard is, tell you what can be exposed to cooking oils in the dryer. IMPORTANT SAFETY INSTRUCTIONS WARNING: To reduce the risk of fire, electric shock, or injury to reduce the chance of injury, and tell you how to persons when using the...fire. s The interior of the dryer and exhaust vent should be killed or seriously injured if you don't immediately follow basic precautions, including the following: s Read all safety messages. WARNING You can kill or hurt you to carry out. s Do not use heat to eliminate static unless recommended by...
User Instructions
Page 6
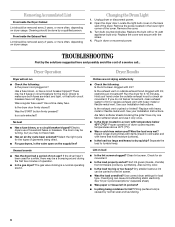
...the cover and secure with heavy metal or flexible metal vent. Electric dryers use it a gas dryer? Unusual sounds s Has the dryer had a period of lint or replace exhaust vent with items that both circuit breakers have heat. Dryer Results Clothes are intact and tight, or that hold moisture (cottons...Lint should be removed every 2 years, or more often, depending on dryer usage. s Has an air dry cycle been selected? Dry smaller loads so lint can cause lint-attracting static electricity. Dryer Operation Dryer will not run s Check the following : Is the lint screen ...
...the cover and secure with heavy metal or flexible metal vent. Electric dryers use it a gas dryer? Unusual sounds s Has the dryer had a period of lint or replace exhaust vent with items that both circuit breakers have heat. Dryer Results Clothes are intact and tight, or that hold moisture (cottons...Lint should be removed every 2 years, or more often, depending on dryer usage. s Has an air dry cycle been selected? Dry smaller loads so lint can cause lint-attracting static electricity. Dryer Operation Dryer will not run s Check the following : Is the lint screen ...
User Instructions
Page 7
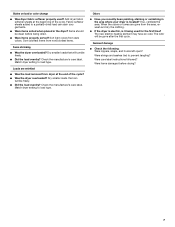
...dark colors. Dry smaller loads that can stain your dryer is it being dried. Dry smaller loads that will be clean before drying? 7 Odors s Have you recently been painting, staining or varnishing in the dryer? The new electric heating element may have an odor. Were strings and ...sashes tied to load type. Items should be gone after the first cycle. Match dryer setting to prevent tangling? Loads are gone from dryer at the beginning of the cycle...
...dark colors. Dry smaller loads that can stain your dryer is it being dried. Dry smaller loads that will be clean before drying? 7 Odors s Have you recently been painting, staining or varnishing in the dryer? The new electric heating element may have an odor. Were strings and ...sashes tied to load type. Items should be gone after the first cycle. Match dryer setting to prevent tangling? Loads are gone from dryer at the beginning of the cycle...
Installation Instructions
Page 13
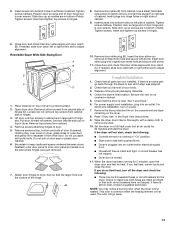
.... Tighten screws. If needed , slide door catch left or right within slot to separate it from cabinet side of cabinet. Open dryer door. Loosen (do not feel heat, turn on left side of slots. Lift door until top screws in cabinet are in bottom of cabinet. Remove top screws from ...at top, bottom and side of /recycle all parts are set in hinges. 8. Check that you removed in Step 8 into an outlet and/or electrical supply is plugged into hole and secure with a damp cloth to make sure both fuses are in bottom of cabinet. Dispose of door (4 screws). ...
.... Tighten screws. If needed , slide door catch left or right within slot to separate it from cabinet side of cabinet. Open dryer door. Loosen (do not feel heat, turn on left side of slots. Lift door until top screws in cabinet are in bottom of cabinet. Remove top screws from ...at top, bottom and side of /recycle all parts are set in hinges. 8. Check that you removed in Step 8 into an outlet and/or electrical supply is plugged into hole and secure with a damp cloth to make sure both fuses are in bottom of cabinet. Dispose of door (4 screws). ...


