Owners Manual
Page 3
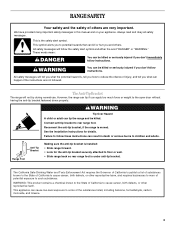
... all safety messages. The Anti-Tip Bracket The range will follow instructions. Failure to follow instructions. WARNING: This product contains a chemical known to the State of California to floor or wall. • Slide range back so rear range foot is installed: • Slide range forward. • Look for details. Range Foot Anti-Tip Bracket Making sure the anti...
... all safety messages. The Anti-Tip Bracket The range will follow instructions. Failure to follow instructions. WARNING: This product contains a chemical known to the State of California to floor or wall. • Slide range back so rear range foot is installed: • Slide range forward. • Look for details. Range Foot Anti-Tip Bracket Making sure the anti...
Owners Manual
Page 4
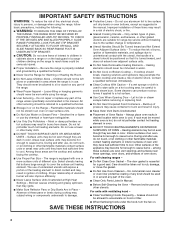
... should be left alone or unattended in area where the range is properly installed and grounded by a qualified technician. ■ Never Use the Range for range-top service without breaking due to the sudden change in ...range unless specifically recommended in color. Other surfaces of glass, glass/ceramic, ceramic, earthenware, or other servicing should never be seriously injured. ■ Proper Installation - among these openings, oven doors, and windows of a range - For self-cleaning ranges - ■ Do Not Clean Door Gasket - The door gasket is cool. SAVE THESE INSTRUCTIONS...
... should be left alone or unattended in area where the range is properly installed and grounded by a qualified technician. ■ Never Use the Range for range-top service without breaking due to the sudden change in ...range unless specifically recommended in color. Other surfaces of glass, glass/ceramic, ceramic, earthenware, or other servicing should never be seriously injured. ■ Proper Installation - among these openings, oven doors, and windows of a range - For self-cleaning ranges - ■ Do Not Clean Door Gasket - The door gasket is cool. SAVE THESE INSTRUCTIONS...
Owners Manual
Page 17
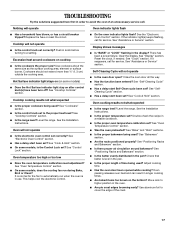
...what expected ■ Is the proper cookware being used ? There has been a power failure. See "Self-Cleaning Cycle" section. ■ Has a delay start Self-Clean cycle been set ? Oven peeking releases oven heat and can result in longer cooking times. ■ Are ...Control" section. ■ Was the oven preheated? See "Cooktop Controls" section. ■ Is the range level? See "SelfCleaning Cycle" section. ■ Has a delay start been set ? See the Installation Instructions. ■ Is the proper temperature set correctly? See "Positioning Racks and Bakeware" section. ■...
...what expected ■ Is the proper cookware being used ? There has been a power failure. See "Self-Cleaning Cycle" section. ■ Has a delay start Self-Clean cycle been set ? Oven peeking releases oven heat and can result in longer cooking times. ■ Are ...Control" section. ■ Was the oven preheated? See "Cooktop Controls" section. ■ Is the range level? See "SelfCleaning Cycle" section. ■ Has a delay start been set ? See the Installation Instructions. ■ Is the proper temperature set correctly? See "Positioning Racks and Bakeware" section. ■...
Owners Manual
Page 18
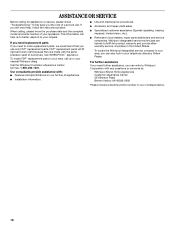
... directory Yellow Pages. FSP® replacement parts will help , follow the instructions below. To locate FSP® replacement parts in your correspondence. 18 To locate the Whirlpool designated service company in your area, call . ASSISTANCE OR SERVICE Before calling...cost of appliances. ■ Installation information. ■ Use and maintenance procedures. ■ Accessory and repair parts sales. ■ Specialized customer assistance (Spanish speaking, hearing impaired, limited vision, etc.). ■ Referrals to build every new WHIRLPOOL® appliance. Our consultants...
... directory Yellow Pages. FSP® replacement parts will help , follow the instructions below. To locate FSP® replacement parts in your correspondence. 18 To locate the Whirlpool designated service company in your area, call . ASSISTANCE OR SERVICE Before calling...cost of appliances. ■ Installation information. ■ Use and maintenance procedures. ■ Accessory and repair parts sales. ■ Specialized customer assistance (Spanish speaking, hearing impaired, limited vision, etc.). ■ Referrals to build every new WHIRLPOOL® appliance. Our consultants...
Owners Manual
Page 19
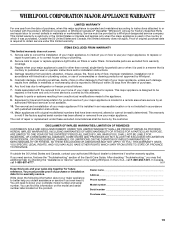
...on the product. You will pay for Factory Specified Parts and repair labor to published user or operator instructions and/or installation instructions. 4. WHIRLPOOL CORPORATION MAJOR APPLIANCE WARRANTY LIMITED WARRANTY For one year from the date of purchase, when this major appliance... according to instructions attached to or furnished with the product, Whirlpool Corporation or Whirlpool Canada LP (hereafter "Whirlpool") will need to determine if another warranty applies. Major appliances with electrical or plumbing codes, or use of consumables or cleaning products not approved...
...on the product. You will pay for Factory Specified Parts and repair labor to published user or operator instructions and/or installation instructions. 4. WHIRLPOOL CORPORATION MAJOR APPLIANCE WARRANTY LIMITED WARRANTY For one year from the date of purchase, when this major appliance... according to instructions attached to or furnished with the product, Whirlpool Corporation or Whirlpool Canada LP (hereafter "Whirlpool") will need to determine if another warranty applies. Major appliances with electrical or plumbing codes, or use of consumables or cleaning products not approved...
Installation Instructions
Page 1
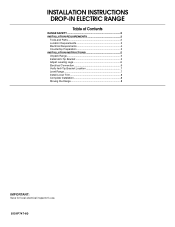
INSTALLATION INSTRUCTIONS DROP-IN ELECTRIC RANGE Table of Contents RANGE SAFETY 2 INSTALLATION REQUIREMENTS 3 Tools and Parts 3 Location Requirements 3 Electrical Requirements 4 Countertop Preparation 5 INSTALLATION INSTRUCTIONS 5 Unpack Range 5 Install Anti-Tip Bracket 5 Adjust Leveling Legs 6 Electrical Connection 6 Verify Anti-Tip Bracket Location 7 Level Range 7 Install Lower Trim 8 Complete Installation 8 Moving the Range 8 IMPORTANT: Save for local electrical inspector's use. 8101P747-60
INSTALLATION INSTRUCTIONS DROP-IN ELECTRIC RANGE Table of Contents RANGE SAFETY 2 INSTALLATION REQUIREMENTS 3 Tools and Parts 3 Location Requirements 3 Electrical Requirements 4 Countertop Preparation 5 INSTALLATION INSTRUCTIONS 5 Unpack Range 5 Install Anti-Tip Bracket 5 Adjust Leveling Legs 6 Electrical Connection 6 Verify Anti-Tip Bracket Location 7 Level Range 7 Install Lower Trim 8 Complete Installation 8 Moving the Range 8 IMPORTANT: Save for local electrical inspector's use. 8101P747-60
Installation Instructions
Page 3
...The model/serial rating plate is the installer's responsibility to underside of the range. ■ Grounded electrical supply is not applicable, the Standard for Mobile Home Construction and Safety, Title 24, HUD Part 280). To install the antitip bracket shipped with installation clearances specified on the model/serial ...;" (69.9 cm) height to comply with the range, see "Install Anti-Tip Bracket" section. ■ Range support slats must be secured to be provided, the risk can be revised. Read and follow the instructions provided with local codes. This oven has been designed...
...The model/serial rating plate is the installer's responsibility to underside of the range. ■ Grounded electrical supply is not applicable, the Standard for Mobile Home Construction and Safety, Title 24, HUD Part 280). To install the antitip bracket shipped with installation clearances specified on the model/serial ...;" (69.9 cm) height to comply with the range, see "Install Anti-Tip Bracket" section. ■ Range support slats must be secured to be provided, the risk can be revised. Read and follow the instructions provided with local codes. This oven has been designed...

Installation Instructions
Page 4
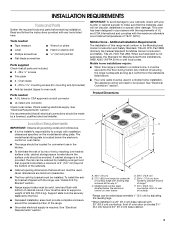
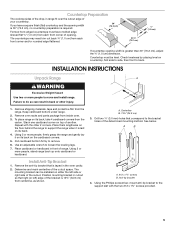
... copper. 30" (76.2 cm) minimum clearance between the top of the cooking platform and the bottom of the above the range, follow the range hood or microwave hood combination installation instructions for 25" (64.0 cm) countertop depth, 24" (61 cm) base cabinet depth and 36" (91.4 cm) countertop ...support slats I A. 13" (33 cm) upper cabinet depth B. 30" (76.2 cm) min. IMPORTANT: If installing a range hood or microwave hood combination above code standards can be using special connectors and/or tools designed and UL listed for serviceability of countertop to the junction box. ...
... copper. 30" (76.2 cm) minimum clearance between the top of the cooking platform and the bottom of the above the range, follow the range hood or microwave hood combination installation instructions for 25" (64.0 cm) countertop depth, 24" (61 cm) base cabinet depth and 36" (91.4 cm) countertop ...support slats I A. 13" (33 cm) upper cabinet depth B. 30" (76.2 cm) min. IMPORTANT: If installing a range hood or microwave hood combination above code standards can be using special connectors and/or tools designed and UL listed for serviceability of countertop to the junction box. ...
Installation Instructions
Page 5
... The cooktop sides of the drop-in range fit over the cutout edge of another. Remove shipping materials, tape and protective film from the carton. Keep cardboard bottom under range. 2. Place them lengthwise on the floor behind the range to back. Pull cardboard bottom firmly to move and install range. INSTALLATION INSTRUCTIONS Unpack Range A WARNING Excessive Weight Hazard B Use...
... The cooktop sides of the drop-in range fit over the cutout edge of another. Remove shipping materials, tape and protective film from the carton. Keep cardboard bottom under range. 2. Place them lengthwise on the floor behind the range to back. Pull cardboard bottom firmly to move and install range. INSTALLATION INSTRUCTIONS Unpack Range A WARNING Excessive Weight Hazard B Use...
Installation Instructions
Page 6
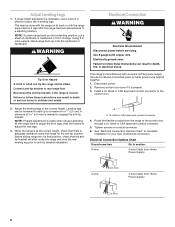
...½" (1.3 cm) 3-wire Cable from the range to anti-tip bracket installation. Before sliding range into a standing position, put a sheet of cardboard or hardboard in death, fire, or electrical shock. See "Electrical Connection Options Chart" to complete installation for the anti-tip bracket. This may be ...1. Use 8 gauge solid copper wire. Failure to follow these instructions can result in death or serious burns to follow these instructions can result in front of 5.0 mm) is adequate clearance under the range and onto the rear leveling leg prior to the junction box ...
...½" (1.3 cm) 3-wire Cable from the range to anti-tip bracket installation. Before sliding range into a standing position, put a sheet of cardboard or hardboard in death, fire, or electrical shock. See "Electrical Connection Options Chart" to complete installation for the anti-tip bracket. This may be ...1. Use 8 gauge solid copper wire. Failure to follow these instructions can result in death or serious burns to follow these instructions can result in front of 5.0 mm) is adequate clearance under the range and onto the rear leveling leg prior to the junction box ...
Installation Instructions
Page 8
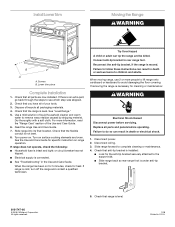
...instructions can result in U.S.A. Disconnect power. 2. Check that you have all parts and panels before servicing. Check that range is an extra part, go back through the steps to rear range foot. Use a mild solution of your tools. 3. Turn on . Disconnect wiring. 3. Whirlpool Corporation. All rights reserved. 5. Install...60 © 2008. For more people to lift range onto cardboard or hardboard to the support slat. ■ Slide range back so rear range foot is installed: ■ Look for cleaning or maintenance: WARNING Electrical Shock Hazard Disconnect power before ...
...instructions can result in U.S.A. Disconnect power. 2. Check that you have all parts and panels before servicing. Check that range is an extra part, go back through the steps to rear range foot. Use a mild solution of your tools. 3. Turn on . Disconnect wiring. 3. Whirlpool Corporation. All rights reserved. 5. Install...60 © 2008. For more people to lift range onto cardboard or hardboard to the support slat. ■ Slide range back so rear range foot is installed: ■ Look for cleaning or maintenance: WARNING Electrical Shock Hazard Disconnect power before ...


