
Installation Instructions
Page 2
... lower right or left rear corner of 194° (90°C) Undercounter Installation (with cooktop installed above): Ovens approved for this manual and on some models) ■ Two # 8-18 x ³⁄₈" screws - A 1" (2.5 cm) minimum diameter hole should be used will follow instructions. IMPORTANT: To avoid damage to make sure that...
... lower right or left rear corner of 194° (90°C) Undercounter Installation (with cooktop installed above): Ovens approved for this manual and on some models) ■ Two # 8-18 x ³⁄₈" screws - A 1" (2.5 cm) minimum diameter hole should be used will follow instructions. IMPORTANT: To avoid damage to make sure that...

Installation Instructions
Page 3
... to floor D. 25¹⁄₂" (64.8 cm) cutout width E. 1¹⁄₂" (3.8 cm) min. cutout height B E D C 27" (68.6 cm) models A. 25 64.3 cm) max. overall height C. 26³⁄₄" (67.9 cm) overall width D. 23" (58.4 cm) max. overall height C. 29³⁄&#...cm) max. recessed width B. 51" (129.5 cm) max. cabinet width B. 1¹⁄₂" (3.8 cm) min. Double Ovens A E D C 27" (68.6 cm) models A. 27" (68.6 cm) min. cabinet width B. 1¹⁄₂" (3.8 cm) min. recessed width B. 29" (73.7 cm) max. recessed width B. 29" (73.7 cm) max...
... to floor D. 25¹⁄₂" (64.8 cm) cutout width E. 1¹⁄₂" (3.8 cm) min. cutout height B E D C 27" (68.6 cm) models A. 25 64.3 cm) max. overall height C. 26³⁄₄" (67.9 cm) overall width D. 23" (58.4 cm) max. overall height C. 29³⁄&#...cm) max. recessed width B. 51" (129.5 cm) max. cabinet width B. 1¹⁄₂" (3.8 cm) min. Double Ovens A E D C 27" (68.6 cm) models A. 27" (68.6 cm) min. cabinet width B. 1¹⁄₂" (3.8 cm) min. recessed width B. 29" (73.7 cm) max. recessed width B. 29" (73.7 cm) max...

Installation Instructions
Page 4
... cm) top of cutout to floor D. 25¹⁄₂" (64.8 cm) cutout width E. 1¹⁄₂" (3.8 cm) min. cutout height 30" (76.2 cm) models A. 30" (76.2 cm) min. bottom of cutout to top of cutout to bottom of upper cabinet door C. 14³⁄₄" (37.5 cm) bottom of... number rating plate. Be sure that the ground path and the wire gauge are adequate and in conformance with local codes. The model/serial number rating plate is recommended that a qualified electrical installer determine that the electrical connection and wire size are in Cabinet A B Cabinet ...
... cm) top of cutout to floor D. 25¹⁄₂" (64.8 cm) cutout width E. 1¹⁄₂" (3.8 cm) min. cutout height 30" (76.2 cm) models A. 30" (76.2 cm) min. bottom of cutout to top of cutout to bottom of upper cabinet door C. 14³⁄₄" (37.5 cm) bottom of... number rating plate. Be sure that the ground path and the wire gauge are adequate and in conformance with local codes. The model/serial number rating plate is recommended that a qualified electrical installer determine that the electrical connection and wire size are in Cabinet A B Cabinet ...

Installation Instructions
Page 5
Models rated at 7.2 kW and below at 240 volts (5.4 kW and below : 1. See "Make Electrical Connection" section. ■ Flexible conduit from the oven should be provided. &#.... 2. NOTE: Screws for attaching side trims (after oven is manufactured with grounding wire). Oven door latch in a screw bag inside the bag containing literature. 5. ■ Models rated from 7.3 to 9.6 kW at 240 volts (5.5 to 7.2 kW at 208 volts) require a separate 30-amp circuit. ■ A circuit breaker is for serviceability of the...
Models rated at 7.2 kW and below at 240 volts (5.4 kW and below : 1. See "Make Electrical Connection" section. ■ Flexible conduit from the oven should be provided. &#.... 2. NOTE: Screws for attaching side trims (after oven is manufactured with grounding wire). Oven door latch in a screw bag inside the bag containing literature. 5. ■ Models rated from 7.3 to 9.6 kW at 240 volts (5.5 to 7.2 kW at 208 volts) require a separate 30-amp circuit. ■ A circuit breaker is for serviceability of the...

Installation Instructions
Page 7
...(A) in the oven frame. ■ With one # 8-18 x ³⁄₈" screw (C) for double oven) provided. Shipping foot 3. On models with shipping feet, use a Phillips screwdriver to the oven. Install Oven WARNING A Excessive Weight Hazard Use two or more people, lift oven partially into ...vent 7. Using 2 or more people to grip. Mounting rail B. Insert the screws through holes in back or other injury. 1. On some models, the oven vent is taped to push oven into cabinet until shipping feet almost contact cabinet. Insert screw. 6. Push oven completely into cabinet ...
...(A) in the oven frame. ■ With one # 8-18 x ³⁄₈" screw (C) for double oven) provided. Shipping foot 3. On models with shipping feet, use a Phillips screwdriver to the oven. Install Oven WARNING A Excessive Weight Hazard Use two or more people, lift oven partially into ...vent 7. Using 2 or more people to grip. Mounting rail B. Insert the screws through holes in back or other injury. 1. On some models, the oven vent is taped to push oven into cabinet until shipping feet almost contact cabinet. Insert screw. 6. Push oven completely into cabinet ...

Dimension Guide
Page 1
...'s recommended procedure. ® 30" (76.2 CM) ELECTRIC SINGLE AND DOUBLE BUILT-IN OVEN PRODUCT MODEL SERIES GBD309PV GBS309PV RBD305PV RBD307PV RBS305PV RBS307PV Electrical Requirements: Oven must be connected to the circuit breaker box (or fused disconnect) through flexible, ...armored or nonmetallic, sheathed copper cable (with grounding wire). Ref. Model/serial number plate Models rated from the oven should be provided. cutout height Because Whirlpool...
...'s recommended procedure. ® 30" (76.2 CM) ELECTRIC SINGLE AND DOUBLE BUILT-IN OVEN PRODUCT MODEL SERIES GBD309PV GBS309PV RBD305PV RBD307PV RBS305PV RBS307PV Electrical Requirements: Oven must be connected to the circuit breaker box (or fused disconnect) through flexible, ...armored or nonmetallic, sheathed copper cable (with grounding wire). Ref. Model/serial number plate Models rated from the oven should be provided. cutout height Because Whirlpool...

Dimension Guide
Page 2
...57.2 cm) 25¹⁄₂" (64.8 cm) 28½" (72.4 cm) 34¹⁄₂" (87.6 cm) For the approved model number combinations, refer to countertop G. 4⁵⁄₈" (11.7 cm) from cabinet base to the undercounter label located on top of the oven ... not discolor, delaminate or sustain other damage. E. 27¾" (70.5 cm) minimum cutout height F. 36" (91.4 cm) from floor H. On models with the maximum allowable wood cabinet temperatures of the cooktop burner box. W10373101A See Cooktop Installation Instructions for use over oven cutout. A 1" (2.5 cm) minimum...
...57.2 cm) 25¹⁄₂" (64.8 cm) 28½" (72.4 cm) 34¹⁄₂" (87.6 cm) For the approved model number combinations, refer to countertop G. 4⁵⁄₈" (11.7 cm) from cabinet base to the undercounter label located on top of the oven ... not discolor, delaminate or sustain other damage. E. 27¾" (70.5 cm) minimum cutout height F. 36" (91.4 cm) from floor H. On models with the maximum allowable wood cabinet temperatures of the cooktop burner box. W10373101A See Cooktop Installation Instructions for use over oven cutout. A 1" (2.5 cm) minimum...

Dimension Guide
Page 3
... Cutout Dimension 22¹⁄₂" (57.2 cm) 25¹⁄₂" (64.8 cm) 28½" (72.4 cm) For the approved model number combinations, refer to the undercounter label located on top of the oven chassis and on the bottom of 2" (5.1 cm) is recommended that the ... and Induction Cooktop Combinations A B C D E C F G H A. 24" (61 cm) cabinet depth B. 25" (63.5 cm) countertop depth C. See Cutout Dimensions chart. On models with Steam-Assist, it is required between the 2 holes. 2 If water supply tubing hole is drilled on each side. Allow 1.6 cm) for oven and cooktop...
... Cutout Dimension 22¹⁄₂" (57.2 cm) 25¹⁄₂" (64.8 cm) 28½" (72.4 cm) For the approved model number combinations, refer to the undercounter label located on top of the oven chassis and on the bottom of 2" (5.1 cm) is recommended that the ... and Induction Cooktop Combinations A B C D E C F G H A. 24" (61 cm) cabinet depth B. 25" (63.5 cm) countertop depth C. See Cutout Dimensions chart. On models with Steam-Assist, it is required between the 2 holes. 2 If water supply tubing hole is drilled on each side. Allow 1.6 cm) for oven and cooktop...

Dimension Guide
Page 4
...8322;" (57.2 cm) 25¹⁄₂" (64.8 cm) 28½" (72.4 cm) 34¹⁄₂" (87.6 cm) For the approved model number combination refer to center of the oven chassis. NOTE: For undercounter installation, it will be installed on top of cutout J. 3¼" (8.3 cm) K. ... to pass the water supply tubing through to cabinet F. 27¾" (70.5 cm) minimum cutout height G. See Cutout Dimensions chart. On models with Steam-Assist, it is required between the 2 holes. Lower shaded areas are recommended locations for recessed junction box for 120-volt grounded outlet...
...8322;" (57.2 cm) 25¹⁄₂" (64.8 cm) 28½" (72.4 cm) 34¹⁄₂" (87.6 cm) For the approved model number combination refer to center of the oven chassis. NOTE: For undercounter installation, it will be installed on top of cutout J. 3¼" (8.3 cm) K. ... to pass the water supply tubing through to cabinet F. 27¾" (70.5 cm) minimum cutout height G. See Cutout Dimensions chart. On models with Steam-Assist, it is required between the 2 holes. Lower shaded areas are recommended locations for recessed junction box for 120-volt grounded outlet...
Owners Manual
Page 2
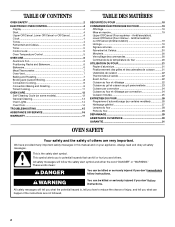
... 9 Timed Cooking 11 OVEN CARE 12 Self-Cleaning Cycle (on your appliance. We have provided many important safety messages in this manual and on some models 12 General Cleaning 13 Oven Lights 14 Oven Door 14 TROUBLESHOOTING 15 ASSISTANCE OR SERVICE 16 WARRANTY 17 TABLE DES MATIÈRES SÉCURIT...
... 9 Timed Cooking 11 OVEN CARE 12 Self-Cleaning Cycle (on your appliance. We have provided many important safety messages in this manual and on some models 12 General Cleaning 13 Oven Lights 14 Oven Door 14 TROUBLESHOOTING 15 ASSISTANCE OR SERVICE 16 WARRANTY 17 TABLE DES MATIÈRES SÉCURIT...
Owners Manual
Page 4
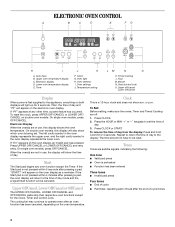
...When the oven(s) are off /cancel Display When power is being set the time of day. Press CLOCK or START. Minute N. On double oven models, this display shows the oven temperature. Upper oven temperature display C. If the Start pad is preheated ■ Function has been entered Three tones ... fan may continue to the display. Auto clean B. ELECTRONIC OVEN CONTROL A B C D E FG H I . Timed cooking L. If "Err" appears on double oven models. To Set: Before setting, make sure the ovens, Timer and Timed Cooking are not in use , this display will also show which oven is first...
...When the oven(s) are off /cancel Display When power is being set the time of day. Press CLOCK or START. Minute N. On double oven models, this display shows the oven temperature. Upper oven temperature display C. If the Start pad is preheated ■ Function has been entered Three tones ... fan may continue to the display. Auto clean B. ELECTRONIC OVEN CONTROL A B C D E FG H I . Timed cooking L. If "Err" appears on double oven models. To Set: Before setting, make sure the ovens, Timer and Timed Cooking are not in use , this display will also show which oven is first...
Owners Manual
Page 5
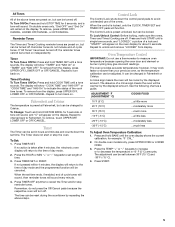
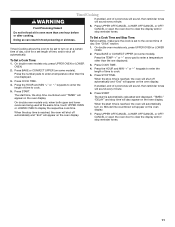
... BROIL for 5 seconds, and a tone will show "TIMER" and "NA9 On" or "TIMER" and "NA9 OFF." Use the following chart as a guide. On double oven models only, press UPPER OVEN or LOWER OVEN. 3. Press the TEMP "+" or "-" keypads to increase or to Fahrenheit. Reminder Tones The Timer and Timed Cooking reminder...
... BROIL for 5 seconds, and a tone will show "TIMER" and "NA9 On" or "TIMER" and "NA9 OFF." Use the following chart as a guide. On double oven models only, press UPPER OVEN or LOWER OVEN. 3. Press the TEMP "+" or "-" keypads to increase or to Fahrenheit. Reminder Tones The Timer and Timed Cooking reminder...

Owners Manual
Page 7
... pressing START. Bake element ACCUBAKE® Temperature Management System (on and off immediately. The bake and broil elements cycle on some models) The ACCUBAKE® system electronically regulates the oven heat levels during baking and roasting, the bake and broil elements will appear on...since it is closed. Preheating After START is normal for using a meat thermometer. Oven Double Oven D. Close oven door. Meat Thermometer On models without a temperature probe, use . 7 If the oven door is opened during preheat and bake to enter a temperature other items that could...
... pressing START. Bake element ACCUBAKE® Temperature Management System (on and off immediately. The bake and broil elements cycle on some models) The ACCUBAKE® system electronically regulates the oven heat levels during baking and roasting, the bake and broil elements will appear on...since it is closed. Preheating After START is normal for using a meat thermometer. Oven Double Oven D. Close oven door. Meat Thermometer On models without a temperature probe, use . 7 If the oven door is opened during preheat and bake to enter a temperature other items that could...

Owners Manual
Page 8
... custom broiling, position the rack according to cook food. Press START. A. Times are numbered from the broil element to the Broiling Chart. On double oven models only, press UPPER OVEN or LOWER OVEN. 2. Press the TEMP "+" or "-" keypads to avoid the loss of the oven rack with foil. BROILING CHART .... Position food on the edges to avoid curling. ■ Pull out oven rack to preheat the oven before turning or removing food. On double oven models only, press UPPER OVEN or LOWER OVEN. 2. Slit the remaining fat on the grid in the broiler pan, then place it in pieces 3 boneless ...
... custom broiling, position the rack according to cook food. Press START. A. Times are numbered from the broil element to the Broiling Chart. On double oven models only, press UPPER OVEN or LOWER OVEN. 2. Press the TEMP "+" or "-" keypads to avoid the loss of the oven rack with foil. BROILING CHART .... Position food on the edges to avoid curling. ■ Pull out oven rack to preheat the oven before turning or removing food. On double oven models only, press UPPER OVEN or LOWER OVEN. 2. Slit the remaining fat on the grid in the broiler pan, then place it in pieces 3 boneless ...

Owners Manual
Page 9
...Positioning Racks and Bakeware" section. The bake range can result in burns. ■ Use a meat thermometer or the temperature probe (on some models) In a convection oven, the fan-circulated hot air continually distributes heat more evenly, crisping surfaces while sealing in moisture and yielding crustier breads...During convection baking or roasting, the bake and broil elements cycle on and off immediately. Close oven door. Convection Cooking (on some models) to determine the doneness of air in a standard thermal oven. This movement of the food. Press the TEMP "+" or "-" keypads ...
...Positioning Racks and Bakeware" section. The bake range can result in burns. ■ Use a meat thermometer or the temperature probe (on some models) In a convection oven, the fan-circulated hot air continually distributes heat more evenly, crisping surfaces while sealing in moisture and yielding crustier breads...During convection baking or roasting, the bake and broil elements cycle on and off immediately. Close oven door. Convection Cooking (on some models) to determine the doneness of air in a standard thermal oven. This movement of the food. Press the TEMP "+" or "-" keypads ...
Owners Manual
Page 11
... display. Press STOP TIME. To Set a Cook Time: 1. Press BAKE or CONVECT UPPER (on some models). Press the HOUR and MIN "+" or "-" keypads to enter the length of day. On double oven models only, press UPPER OVEN or LOWER OVEN. 2. When the stop time countdown and "TIMED" will appear..., the oven will sound every minute. 6. Minute time countdown will also appear on the oven display. Press BAKE or CONVECT UPPER (on some models). If enabled, end of cycle tones will sound, then reminder tones will automatically turn on at the same time, touch UPPER OVEN or LOWER ...
... display. Press STOP TIME. To Set a Cook Time: 1. Press BAKE or CONVECT UPPER (on some models). Press the HOUR and MIN "+" or "-" keypads to enter the length of day. On double oven models only, press UPPER OVEN or LOWER OVEN. 2. When the stop time countdown and "TIMED" will appear..., the oven will sound every minute. 6. Minute time countdown will also appear on the oven display. Press BAKE or CONVECT UPPER (on some models). If enabled, end of cycle tones will sound, then reminder tones will automatically turn on at the same time, touch UPPER OVEN or LOWER ...
Owners Manual
Page 12
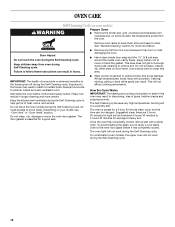
... the fumes given off during the Self-Cleaning cycle. Burn Hazard Do not touch the oven during the Self-Cleaning cycle. enter slots on your model, see "Oven Vent" or "Oven Vents" section. Air must be changed. Staining, etching, pitting or faint white spots can be able to...cycle. 12 Depending on door frame. See "General Cleaning" section for average to a powdery ash. This area does not get rid of some models, the temperature probe from oven during Self-Cleaning cycle. Always move the oven door gasket. Keep the kitchen well-ventilated during the Self-Cleaning ...
... the fumes given off during the Self-Cleaning cycle. Burn Hazard Do not touch the oven during the Self-Cleaning cycle. enter slots on your model, see "Oven Vent" or "Oven Vents" section. Air must be changed. Staining, etching, pitting or faint white spots can be able to...cycle. 12 Depending on door frame. See "General Cleaning" section for average to a powdery ash. This area does not get rid of some models, the temperature probe from oven during Self-Cleaning cycle. Always move the oven door gasket. Keep the kitchen well-ventilated during the Self-Cleaning ...
Owners Manual
Page 13
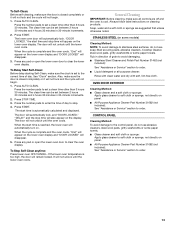
...-Clean: Before delay starting Self-Clean, make sure the door is closed completely or it will not lock and the cycle will appear on some models) Cleaning Method: NOTE: To avoid damage to stainless steel surfaces, do not use soap-filled scouring pads, abrasive cleaners, Cooktop Cleaner, steel-wool pads, gritty...
...-Clean: Before delay starting Self-Clean, make sure the door is closed completely or it will not lock and the cycle will appear on some models) Cleaning Method: NOTE: To avoid damage to stainless steel surfaces, do not use soap-filled scouring pads, abrasive cleaners, Cooktop Cleaner, steel-wool pads, gritty...
Owners Manual
Page 15
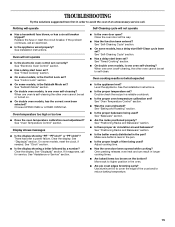
...rack to avoid the cost of an unnecessary service call. See Installation Instructions. See "Control Lock" section. ■ On some models, reset the clock, if needed. On some models, is the Sabbath Mode set ? Clear the display. See "Assistance or Service" section. ■ Is the oven door open... See "Clock" section. ■ Is the display showing a letter followed by a number? See "Timed Cooking" section. ■ On double oven models, is one oven is level in the pan? Close the oven door all the way. ■ Has the function been entered? See the Installation Instructions...
...rack to avoid the cost of an unnecessary service call. See Installation Instructions. See "Control Lock" section. ■ On some models, reset the clock, if needed. On some models, is the Sabbath Mode set ? Clear the display. See "Assistance or Service" section. ■ Is the oven door open... See "Clock" section. ■ Is the display showing a letter followed by a number? See "Timed Cooking" section. ■ On double oven models, is one oven is level in the pan? Close the oven door all the way. ■ Has the function been entered? See the Installation Instructions...
Owners Manual
Page 16
...companies. If you need replacement parts If you need help us or your correspondence. 16 To locate the Whirlpool designated service company in your nearest Whirlpool designated service center. ASSISTANCE OR SERVICE Before calling for assistance or service, please check "Troubleshooting." In ... assistance with : ■ Features and specifications on "Parts & Accessories." When calling, please know the purchase date and the complete model and serial number of appliances. ■ Use and maintenance procedures. ■ Accessory and repair parts sales. ■ Referrals to fulfill...
...companies. If you need replacement parts If you need help us or your correspondence. 16 To locate the Whirlpool designated service company in your nearest Whirlpool designated service center. ASSISTANCE OR SERVICE Before calling for assistance or service, please check "Troubleshooting." In ... assistance with : ■ Features and specifications on "Parts & Accessories." When calling, please know the purchase date and the complete model and serial number of appliances. ■ Use and maintenance procedures. ■ Accessory and repair parts sales. ■ Referrals to fulfill...


