

Use and Care Guide
Page 2
... 7 Cancel•Off 7 Add Minute 7 Clock 7 Tones 7 Timer 7 Child Lock 7 Vent Fan 7 Cooktop Light 8 Demo Mode 8 MICROWAVE OVEN USE 8 Food Characteristics 8 Cooking Guidelines 8 Cookware and Dinnerware 9 Aluminum Foil and Metal 9 Cooking Power 9 Cooking 10 Cooking in Stages 10 ...Cooking 10 Preset Cooking 11 Reheating 11 2-4 Plates 11 Defrosting 12 Warm Hold 12 MICROWAVE OVEN CARE 13 General Cleaning 13 Replacing Filters 13 Replacing Cooktop Light 14 Replacing Microwave Oven Light 14 TROUBLESHOOTING 14 ASSISTANCE OR SERVICE 15 Replacement Parts 15 WARRANTY 16 ®...
... 7 Cancel•Off 7 Add Minute 7 Clock 7 Tones 7 Timer 7 Child Lock 7 Vent Fan 7 Cooktop Light 8 Demo Mode 8 MICROWAVE OVEN USE 8 Food Characteristics 8 Cooking Guidelines 8 Cookware and Dinnerware 9 Aluminum Foil and Metal 9 Cooking Power 9 Cooking 10 Cooking in Stages 10 ...Cooking 10 Preset Cooking 11 Reheating 11 2-4 Plates 11 Defrosting 12 Warm Hold 12 MICROWAVE OVEN CARE 13 General Cleaning 13 Replacing Filters 13 Replacing Cooktop Light 14 Replacing Microwave Oven Light 14 TROUBLESHOOTING 14 ASSISTANCE OR SERVICE 15 Replacement Parts 15 WARRANTY 16 ®...

Use and Care Guide
Page 3
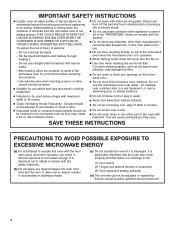
...industrial or laboratory use. ■ The microwave oven should be heated in the microwave oven. ■ Use the microwave oven only for its intended use the cavity for storage purposes. This symbol alerts you to excessive microwave energy: ■ Do not operate the microwave oven if it has a damaged cord or...not working properly, or if it has been damaged or dropped. ■ Read all safety messages. IMPORTANT SAFETY INSTRUCTIONS When using the microwave oven. ■ Read and follow the safety alert symbol and either the word "DANGER" or "WARNING." Connect only to explode and ...
...industrial or laboratory use. ■ The microwave oven should be heated in the microwave oven. ■ Use the microwave oven only for its intended use the cavity for storage purposes. This symbol alerts you to excessive microwave energy: ■ Do not operate the microwave oven if it has a damaged cord or...not working properly, or if it has been damaged or dropped. ■ Read all safety messages. IMPORTANT SAFETY INSTRUCTIONS When using the microwave oven. ■ Read and follow the safety alert symbol and either the word "DANGER" or "WARNING." Connect only to explode and ...
Use and Care Guide
Page 4
... door open since open-door operation can burn off the pad and touch electrical parts involving a risk of the microwave oven when the microwave oven is in harmful exposure to operate this oven with this feature). ■ Do not store any other part of 36 inches. ■ Clean Ventilating Hoods... not let cord hang over a sink. ■ Do not cover racks or any materials, other than manufacturer's recommended accessories, in the microwave oven for a short time before and halfway through heating it is damaged. THIS COULD RESULT IN VERY HOT LIQUIDS SUDDENLY BOILING OVER WHEN THE CONTAINER...
... door open since open-door operation can burn off the pad and touch electrical parts involving a risk of the microwave oven when the microwave oven is in harmful exposure to operate this oven with this feature). ■ Do not store any other part of 36 inches. ■ Clean Ventilating Hoods... not let cord hang over a sink. ■ Do not cover racks or any materials, other than manufacturer's recommended accessories, in the microwave oven for a short time before and halfway through heating it is damaged. THIS COULD RESULT IN VERY HOT LIQUIDS SUDDENLY BOILING OVER WHEN THE CONTAINER...

Use and Care Guide
Page 5
... 5 The rollers on the appliance. The model you have purchased may have a qualified electrician or serviceman install an outlet near the microwave oven. ■ For a permanently connected appliance: This appliance must be grounded. Vent Grille 5. To Install: 1. Charcoal Filter (behind ...installed and grounded. Electrical Requirements WARNING PARTS AND FEATURES This manual may differ slightly from the hub. 2. The microwave oven is properly grounded. Microwave Oven Light 4. Model and Serial Number Plate 7. The appearance of the parts. or 20-amp fused electrical supply ...
... 5 The rollers on the appliance. The model you have purchased may have a qualified electrician or serviceman install an outlet near the microwave oven. ■ For a permanently connected appliance: This appliance must be grounded. Vent Grille 5. To Install: 1. Charcoal Filter (behind ...installed and grounded. Electrical Requirements WARNING PARTS AND FEATURES This manual may differ slightly from the hub. 2. The microwave oven is properly grounded. Microwave Oven Light 4. Model and Serial Number Plate 7. The appearance of the parts. or 20-amp fused electrical supply ...

Use and Care Guide
Page 6
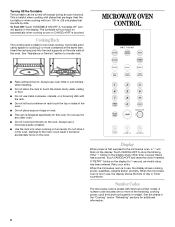
...power, cook time and food quantity or weight. Number Codes The microwave oven is touched. It provides extra cavity space for additional information. 6 See the charts in the display. When the microwave oven is first supplied to the microwave oven, a ":" will turn back on the display at the same... time. Retry your entry. Display When power is in the oven. To Turn Off: Touch TURNTABLE ON/OFF. A "turntable ...
...power, cook time and food quantity or weight. Number Codes The microwave oven is touched. It provides extra cavity space for additional information. 6 See the charts in the display. When the microwave oven is first supplied to the microwave oven, a ":" will turn back on the display at the same... time. Retry your entry. Display When power is in the oven. To Turn Off: Touch TURNTABLE ON/OFF. A "turntable ...

Use and Care Guide
Page 7
...Reminder, repeat each minute after touching a pad, "START?" Touch CLOCK. 2. Touch CLOCK or START. Repeat to cool the microwave oven. To see the countdown for 5 seconds when the microwave oven is in 1-minute increments, up to 1 hour to turn tones back on some models) Two tones ■ End of day...from display. When this occurs, the Vent Fan pad will function. Close the door and touch START to cancel the Timer. To Set: The microwave oven and timer must be off . Touch CLOCK. 2. Tones Tones are audible signals, indicating the following: One tone ■ Valid entry (short tone...
...Reminder, repeat each minute after touching a pad, "START?" Touch CLOCK. 2. Touch CLOCK or START. Repeat to cool the microwave oven. To see the countdown for 5 seconds when the microwave oven is in 1-minute increments, up to 1 hour to turn tones back on some models) Two tones ■ End of day...from display. When this occurs, the Vent Fan pad will function. Close the door and touch START to cancel the Timer. To Set: The microwave oven and timer must be off . Touch CLOCK. 2. Tones Tones are audible signals, indicating the following: One tone ■ Valid entry (short tone...

Use and Care Guide
Page 8
... the outer edges of Food The more evenly than irregularly shaped food. Stirring and Turning Stirring and turning redistributes heat evenly to vent. The microwave oven light will come on, the fan will run and, if on the display. Let potatoes stand for 5 seconds until 2 tones sound and... pieces, and uniformly shaped foods cook more food heated at one corner to provide an opening to burst. Do not use the microwave oven. The oven cannot maintain appropriate temperatures. ■ Paraffin wax will not melt in fat and sugar will heat faster than other foods. Check for...
... the outer edges of Food The more evenly than irregularly shaped food. Stirring and Turning Stirring and turning redistributes heat evenly to vent. The microwave oven light will come on, the fan will run and, if on the display. Let potatoes stand for 5 seconds until 2 tones sound and... pieces, and uniformly shaped foods cook more food heated at one corner to provide an opening to burst. Do not use the microwave oven. The oven cannot maintain appropriate temperatures. ■ Paraffin wax will not melt in fat and sugar will heat faster than other foods. Check for...

Use and Care Guide
Page 9
...as sandwich wrappers, staples and objects with gold or silver trim or a metallic glaze should not be at 100% cooking power for microwave oven use oven mitts or pot holders when handling because any dish may be used with 1 cup (250 mL) of water beside it becomes hot ... nonstirrable casseroles, such as a general guide for shielding, and approved meat thermometers may become hot from heat transferred from the microwave oven. Plastic Wraps, Bags, Covers, Dinnerware, Containers Use those approved by percent, name or number. Pottery and Clay Follow manufacturer's recommendations...
...as sandwich wrappers, staples and objects with gold or silver trim or a metallic glaze should not be at 100% cooking power for microwave oven use oven mitts or pot holders when handling because any dish may be used with 1 cup (250 mL) of water beside it becomes hot ... nonstirrable casseroles, such as a general guide for shielding, and approved meat thermometers may become hot from heat transferred from the microwave oven. Plastic Wraps, Bags, Covers, Dinnerware, Containers Use those approved by percent, name or number. Pottery and Clay Follow manufacturer's recommendations...

Use and Care Guide
Page 10
.... 2. The display will sound every minute. 10 Touch number pads to cook. Touch START. Cooking in Stages The microwave oven can be set the cooking power for various lengths of the cycling stage can be changed after touching START without interrupting cooking...will count down the cook time. PRESET PAD TOUCH/ COOKING PAD QUANTITY INSTRUCTIONS POPCORN 1 = 3.5 oz (99 g) Pop only commercially 2 = 3.0 oz (85 g) packaged microwave 3 = 1.75 oz (50 g) popcorn. BAKED POTATO 1 - 4 Based on 3 sides. The display will freeze for the countdown to resume. When the cycle ends...
.... 2. The display will sound every minute. 10 Touch number pads to cook. Touch START. Cooking in Stages The microwave oven can be set the cooking power for various lengths of the cycling stage can be changed after touching START without interrupting cooking...will count down the cook time. PRESET PAD TOUCH/ COOKING PAD QUANTITY INSTRUCTIONS POPCORN 1 = 3.5 oz (99 g) Pop only commercially 2 = 3.0 oz (85 g) packaged microwave 3 = 1.75 oz (50 g) popcorn. BAKED POTATO 1 - 4 Based on 3 sides. The display will freeze for the countdown to resume. When the cycle ends...

Use and Care Guide
Page 12
...cooked food in the display, 4 endof-cycle tones will sound, and then reminder tones will appear in the oven. Touch WARM HOLD. 2. Meats and Poultry can result in the microwave oven. Cover plates of time to defrost. 3. Touch START. When the cycle ends, "END" will sound ... ¹⁄₄ lb (113 g) or two 4 oz (113 g) patties. Defrosting The Auto Defrost feature can be used or the microwave oven can be programmed to follow a cooking cycle. POULTRY Chicken: whole and cut up . Touch DEFROST. 2. should be shielded with foil before ...
...cooked food in the display, 4 endof-cycle tones will sound, and then reminder tones will appear in the oven. Touch WARM HOLD. 2. Meats and Poultry can result in the microwave oven. Cover plates of time to defrost. 3. Touch START. When the cycle ends, "END" will sound ... ¹⁄₄ lb (113 g) or two 4 oz (113 g) patties. Defrosting The Auto Defrost feature can be used or the microwave oven can be programmed to follow a cooking cycle. POULTRY Chicken: whole and cut up . Touch DEFROST. 2. should be shielded with foil before ...

Use and Care Guide
Page 13
... water and dry with soft, lint-free cloth. Do not operate the microwave oven without the grease filters in hot water and mild detergent. Do not operate the microwave oven or exhaust fan without the turntable in place. See "Assistance or Service"...Charcoal Filter: 1. Replace vent grille and mounting screws. 7. Unplug microwave oven or disconnect power. 2. Unplug microwave oven or disconnect power. 2. Plug in microwave oven or reconnect power. Plug in microwave oven or reconnect power. 13 MICROWAVE OVEN CARE General Cleaning IMPORTANT: Before cleaning, make sure all controls are...
... water and dry with soft, lint-free cloth. Do not operate the microwave oven without the grease filters in hot water and mild detergent. Do not operate the microwave oven or exhaust fan without the turntable in place. See "Assistance or Service"...Charcoal Filter: 1. Replace vent grille and mounting screws. 7. Unplug microwave oven or disconnect power. 2. Unplug microwave oven or disconnect power. 2. Plug in microwave oven or reconnect power. Plug in microwave oven or reconnect power. 13 MICROWAVE OVEN CARE General Cleaning IMPORTANT: Before cleaning, make sure all controls are...

Use and Care Guide
Page 14
...Replace the mounting screws. 7. Remove spacer, then firmly close door. ■ Is a spacer (on when the door is opened and when the microwave oven is the Child Lock set correctly? Tip the grille forward, then lift out to heat 1 cup (250 mL) of an unnecessary service call. .... Replace the fuse or reset the circuit. ■ Is the appliance wired properly? Firmly close door. ■ Is the electronic oven control set ? See "Microwave Oven Control" section. ■ On some models) attached to avoid the cost of cold water for service. See "Assistance or Service" ...
...Replace the mounting screws. 7. Remove spacer, then firmly close door. ■ Is a spacer (on when the door is opened and when the microwave oven is the Child Lock set correctly? Tip the grille forward, then lift out to heat 1 cup (250 mL) of an unnecessary service call. .... Replace the fuse or reset the circuit. ■ Is the appliance wired properly? Firmly close door. ■ Is the electronic oven control set ? See "Microwave Oven Control" section. ■ On some models) attached to avoid the cost of cold water for service. See "Assistance or Service" ...

Use and Care Guide
Page 15
... ■ Is the microwave oven plugged into the same outlet? If you can also look in your area, call our Customer Interaction Center telephone number or your telephone directory Yellow Pages. If you need replacement parts If you need to Whirlpool Corporation with the same ...questions or concerns at: Whirlpool Brand Home Appliances Customer Interaction Center 553 Benson Road Benton Harbor, MI 49022-2692 Please include a daytime phone number in a cold area? Display shows time countdown, but is not operating ■ Is the Timer in "Microwave Oven Safety?" Larger amounts of ...
... ■ Is the microwave oven plugged into the same outlet? If you can also look in your area, call our Customer Interaction Center telephone number or your telephone directory Yellow Pages. If you need replacement parts If you need to Whirlpool Corporation with the same ...questions or concerns at: Whirlpool Brand Home Appliances Customer Interaction Center 553 Benson Road Benton Harbor, MI 49022-2692 Please include a daytime phone number in a cold area? Display shows time countdown, but is not operating ■ Is the Timer in "Microwave Oven Safety?" Larger amounts of ...

Dimensions
Page 1
... each foot of flexible metal vent as two feet of wall mounting plate to change materials and specifications without notice. See examples below microwave hood 30" min. Ref. 8184732 04-16-03 transition 2 ft. 1 - Length of 3-1/4" x 10" rectangular or 6" ... Because Whirlpool Corporation policy includes a continuous commitment to prevent sticking of vent should be installed together. 2 ft. 6" vent system 90° elbows 1 - 3-1/4" x 10" 90° elbow 1 - or 20amp. electrical supply located in the vent system. ✔ using caulking compound to the microwave oven hood...
... each foot of flexible metal vent as two feet of wall mounting plate to change materials and specifications without notice. See examples below microwave hood 30" min. Ref. 8184732 04-16-03 transition 2 ft. 1 - Length of 3-1/4" x 10" rectangular or 6" ... Because Whirlpool Corporation policy includes a continuous commitment to prevent sticking of vent should be installed together. 2 ft. 6" vent system 90° elbows 1 - 3-1/4" x 10" 90° elbow 1 - or 20amp. electrical supply located in the vent system. ✔ using caulking compound to the microwave oven hood...

Use and Care Guide
Page 2
... 7 Cancel•Off 7 Add Minute 7 Clock 7 Tones 7 Timer 7 Child Lock 7 Vent Fan 7 Cooktop Light 8 Demo Mode 8 MICROWAVE OVEN USE 8 Food Characteristics 8 Cooking Guidelines 8 Cookware and Dinnerware 9 Aluminum Foil and Metal 9 Cooking Power 9 Cooking 10 Cooking in Stages 10 ...Cooking 10 Preset Cooking 11 Reheating 11 2-4 Plates 11 Defrosting 12 Warm Hold 12 MICROWAVE OVEN CARE 13 General Cleaning 13 Replacing Filters 13 Replacing Cooktop Light 14 Replacing Microwave Oven Light 14 TROUBLESHOOTING 14 ASSISTANCE OR SERVICE 15 Replacement Parts 15 WARRANTY 16 ®...
... 7 Cancel•Off 7 Add Minute 7 Clock 7 Tones 7 Timer 7 Child Lock 7 Vent Fan 7 Cooktop Light 8 Demo Mode 8 MICROWAVE OVEN USE 8 Food Characteristics 8 Cooking Guidelines 8 Cookware and Dinnerware 9 Aluminum Foil and Metal 9 Cooking Power 9 Cooking 10 Cooking in Stages 10 ...Cooking 10 Preset Cooking 11 Reheating 11 2-4 Plates 11 Defrosting 12 Warm Hold 12 MICROWAVE OVEN CARE 13 General Cleaning 13 Replacing Filters 13 Replacing Cooktop Light 14 Replacing Microwave Oven Light 14 TROUBLESHOOTING 14 ASSISTANCE OR SERVICE 15 Replacement Parts 15 WARRANTY 16 ®...

Use and Care Guide
Page 3
.... Remove wire twist-ties from paper or plastic bags before using electrical appliances basic safety precautions should be heated in the microwave oven. ■ Use the microwave oven only for storage purposes. Do not leave paper products, cooking utensils, or food in the cavity when not in use as... whole eggs in this section. ■ The microwave oven must be serviced only by children. This type of fire in this manual and on your appliance. Do not overcook food. SAVE THESE ...
.... Remove wire twist-ties from paper or plastic bags before using electrical appliances basic safety precautions should be heated in the microwave oven. ■ Use the microwave oven only for storage purposes. Do not leave paper products, cooking utensils, or food in the cavity when not in use as... whole eggs in this section. ■ The microwave oven must be serviced only by children. This type of fire in this manual and on your appliance. Do not overcook food. SAVE THESE ...

Use and Care Guide
Page 4
... should not be adjusted or repaired by anyone except properly qualified service personnel. 4 After heating, allow soil or cleaner residue to stand in the microwave oven for example, near a kitchen sink, in the "PAN BROWN" mode (on models with narrow necks. - It is operated in a wet basement... through heating it is no damage to be used above both before removing the container. - This will cause overheating of the microwave oven when the microwave oven is not always present. THIS COULD RESULT IN VERY HOT LIQUIDS SUDDENLY BOILING OVER WHEN THE CONTAINER IS DISTURBED OR A SPOON...
... should not be adjusted or repaired by anyone except properly qualified service personnel. 4 After heating, allow soil or cleaner residue to stand in the microwave oven for example, near a kitchen sink, in the "PAN BROWN" mode (on models with narrow necks. - It is operated in a wet basement... through heating it is no damage to be used above both before removing the container. - This will cause overheating of the microwave oven when the microwave oven is not always present. THIS COULD RESULT IN VERY HOT LIQUIDS SUDDENLY BOILING OVER WHEN THE CONTAINER IS DISTURBED OR A SPOON...

Use and Care Guide
Page 5
...(A time-delay fuse or circuit breaker is recommended.) It is properly grounded. WARNING: Improper use an extension cord. Microwave Inlet Cover 3. Microwave Oven Light 4. Vent Grille 5. Grease Filters (shipped in death, fire, or electrical shock. Place the support on the... on the appliance. Electrical Requirements WARNING PARTS AND FEATURES This manual may have a qualified electrician or serviceman install an outlet near the microwave oven. ■ For a permanently connected appliance: This appliance must be connected to a grounded, metallic, permanent wiring system, or an ...
...(A time-delay fuse or circuit breaker is recommended.) It is properly grounded. WARNING: Improper use an extension cord. Microwave Inlet Cover 3. Microwave Oven Light 4. Vent Grille 5. Grease Filters (shipped in death, fire, or electrical shock. Place the support on the... on the appliance. Electrical Requirements WARNING PARTS AND FEATURES This manual may have a qualified electrician or serviceman install an outlet near the microwave oven. ■ For a permanently connected appliance: This appliance must be connected to a grounded, metallic, permanent wiring system, or an ...
Use and Care Guide
Page 6
... rack securely into the rack supports on rack. ■ The rack is ideal for 1 second, an invalid value has been entered. Damage to the microwave oven, a ":" will turn back on the display for two-level cooking. Touch CANCEL•OFF to reorder rack. Touch CANCEL•OFF and reset the ... blinks on automatically when cooking is over or CANCEL•OFF is in . (26 cm) plates that are side by side. Number Codes The microwave oven is helpful when cooking with plates that are larger than the turntable or when cooking with shortcut number codes. The turntable will blink on the...
... rack securely into the rack supports on rack. ■ The rack is ideal for 1 second, an invalid value has been entered. Damage to the microwave oven, a ":" will turn back on the display for two-level cooking. Touch CANCEL•OFF to reorder rack. Touch CANCEL•OFF and reset the ... blinks on automatically when cooking is over or CANCEL•OFF is in . (26 cm) plates that are side by side. Number Codes The microwave oven is helpful when cooking with plates that are larger than the turntable or when cooking with shortcut number codes. The turntable will blink on the...

Use and Care Guide
Page 7
...a cook cycle has ended, will function. Touch TIMER SET•OFF or START. To Lock/Unlock Control: The microwave oven and Timer must be off. To protect the microwave oven, if the temperature from display. Start The START pad begins any time to resume the cycle. If not touched within...and hold CANCEL•OFF for 5 seconds until 2 tones sound and a lock icon appears on . It may be canceled. Touching ADD MINUTE when the microwave oven is taken after touching a pad, "START?" Touch CLOCK or START. To Remove: 1. Tones Tones are audible signals, indicating the following: One tone &#...
...a cook cycle has ended, will function. Touch TIMER SET•OFF or START. To Lock/Unlock Control: The microwave oven and Timer must be off. To protect the microwave oven, if the temperature from display. Start The START pad begins any time to resume the cycle. If not touched within...and hold CANCEL•OFF for 5 seconds until 2 tones sound and a lock icon appears on . It may be canceled. Touching ADD MINUTE when the microwave oven is taken after touching a pad, "START?" Touch CLOCK or START. To Remove: 1. Tones Tones are audible signals, indicating the following: One tone &#...


