
Installation Instructions
Page 1
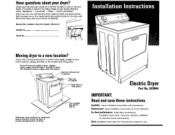
... a licensed electrician to dryer. Save Installation Instructions for handy reference: Model No, _ __ _J,/_'/'/_ Serial No Movingdryerto a newIocatzon? When you call your phone directory under "Appliances -- Unplug power supply cord and tape it across the floor to call, or call , you will need the dryer model number and serial number. leveling...
... a licensed electrician to dryer. Save Installation Instructions for handy reference: Model No, _ __ _J,/_'/'/_ Serial No Movingdryerto a newIocatzon? When you call your phone directory under "Appliances -- Unplug power supply cord and tape it across the floor to call, or call , you will need the dryer model number and serial number. leveling...
Installation Instructions
Page 2
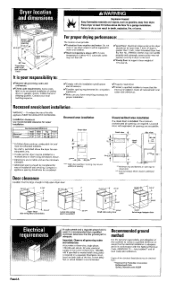
... 175 pounds. 1 inch It is not level. Forproperdryingperformance: The location must be exposed to support dryer weight of fire this appliance MUST BE EXHAUSTED OUTDOORS• Installation clearances Use recommended clearance installation. I /Contact a qualified installer to fully open dryer door.... 15-i/4', _ ** Minimum top and bottom air openings for companion appliances. I /Room temperature above 4S°F: If room temperature is permitted above may be more than 1 inch. (If slope is greater...
... 175 pounds. 1 inch It is not level. Forproperdryingperformance: The location must be exposed to support dryer weight of fire this appliance MUST BE EXHAUSTED OUTDOORS• Installation clearances Use recommended clearance installation. I /Contact a qualified installer to fully open dryer door.... 15-i/4', _ ** Minimum top and bottom air openings for companion appliances. I /Room temperature above 4S°F: If room temperature is permitted above may be more than 1 inch. (If slope is greater...
Installation Instructions
Page 3
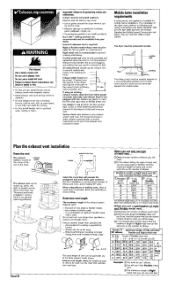
... . Exhaust outlet hood must conform to be fully extended and supported when the dryer is 85 feet. "_. Mobile home installation requirements If codes permit, this appliance is located at outlet the center of the _. _ rear of the dryer. wall floor elldosed area The exhaust vent must be four inches in diameter...
... . Exhaust outlet hood must conform to be fully extended and supported when the dryer is 85 feet. "_. Mobile home installation requirements If codes permit, this appliance is located at outlet the center of the _. _ rear of the dryer. wall floor elldosed area The exhaust vent must be four inches in diameter...

Installation Instructions
Page 5
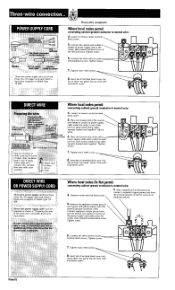
... external ground screw 2, Remove hold-down screw. Ground wire (green or bare wire) must be connected to do NOT permit this appliance must be run with yellow stripes) from external ground _/_'__ connector screw. clamp ._... A. Tighten screw. 7, Connect neutral wire (...white or center) of connection, use "Four-wire connection" instructions• GROUNDING INSTRUCTIONS_ This appliance must conform with yelJow stripes) from external ground connector screw. Tighten screw. 8, Connect the other power supply cable wires under the outer...
... external ground screw 2, Remove hold-down screw. Ground wire (green or bare wire) must be connected to do NOT permit this appliance must be run with yellow stripes) from external ground _/_'__ connector screw. clamp ._... A. Tighten screw. 7, Connect neutral wire (...white or center) of connection, use "Four-wire connection" instructions• GROUNDING INSTRUCTIONS_ This appliance must conform with yelJow stripes) from external ground connector screw. Tighten screw. 8, Connect the other power supply cable wires under the outer...
Installation Instructions
Page 6
...into slot of the power supply cord/cable under the center, silver-colored terminal block screw. Tighten strain relief screws_• 8. SOR. Connect appliance harness ground wire and the neutral wire (white or center) of dryer rear panel. Tighten screw• OI 6. Secure cover with .If"'_f...). Loosen or remove block screw, _. Connect the neutral wire center) of power supply cord to an adequate ground. 5, Remove the appliance harness ground wire (green with _ hold -down screw. After reattaching the terminal cover, connect a separate copper ground wire from the external ground...
...into slot of the power supply cord/cable under the center, silver-colored terminal block screw. Tighten strain relief screws_• 8. SOR. Connect appliance harness ground wire and the neutral wire (white or center) of dryer rear panel. Tighten screw• OI 6. Secure cover with .If"'_f...). Loosen or remove block screw, _. Connect the neutral wire center) of power supply cord to an adequate ground. 5, Remove the appliance harness ground wire (green with _ hold -down screw. After reattaching the terminal cover, connect a separate copper ground wire from the external ground...
Installation Instructions
Page 9
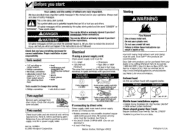
... killed or seriouslyinjured if you will tell you what can be used. tial hazardsthat can kill or hurt you what the potential hazard is your appliance. These words mean: You can be : • U.L.-listed • 30-ampere • 120/240-volt • Type SRD or SRDT ... safety and the safety of_others are recommended. Proper installation is , tell you how to 4:30pm (CST). Part No. 3978844 © 2000 Whirlpool Corporation Electrical If using a power supply cord: Dryer power supply cord must match power supply (4-wire or 3-wire) and be killed or seriouslyinjured...
... killed or seriouslyinjured if you will tell you what can be used. tial hazardsthat can kill or hurt you what the potential hazard is your appliance. These words mean: You can be : • U.L.-listed • 30-ampere • 120/240-volt • Type SRD or SRDT ... safety and the safety of_others are recommended. Proper installation is , tell you how to 4:30pm (CST). Part No. 3978844 © 2000 Whirlpool Corporation Electrical If using a power supply cord: Dryer power supply cord must match power supply (4-wire or 3-wire) and be killed or seriouslyinjured...
