
Use & Care Guide
Page 2
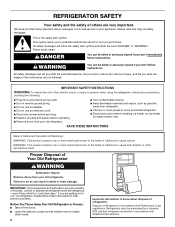
... extension cord. ■ Disconnect power before servicing. ■ Replace all safety messages. IMPORTANT: Child entrapment and suffocation are not followed. Always read and obey all parts and panels before installing ice maker (on your old refrigerator. All safety messages will sit for "just a few days." This is , tell you to reduce...
... extension cord. ■ Disconnect power before servicing. ■ Replace all safety messages. IMPORTANT: Child entrapment and suffocation are not followed. Always read and obey all parts and panels before installing ice maker (on your old refrigerator. All safety messages will sit for "just a few days." This is , tell you to reduce...
Use & Care Guide
Page 4
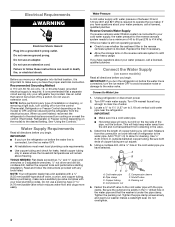
... water line is solidly in the ¹⁄₄" drilled hole in the valve. 4. If the ice maker is required. Gather the required tools and parts before the water line is blocked. NOTE: Before performing any tools listed. Connect to the water valve. Compression nut 6.
... water line is solidly in the ¹⁄₄" drilled hole in the valve. 4. If the ice maker is required. Gather the required tools and parts before the water line is blocked. NOTE: Before performing any tools listed. Connect to the water valve. Compression nut 6.

Use & Care Guide
Page 5
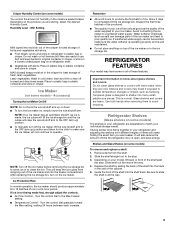
... tube to kit instructions. If your nearest appliance dealer. NOTE: Provide support between the freezer and refrigerator doors while the hinges are working. 3. Remove the parts for the top hinge as it will help avoid damage to the valve inlet using a compression nut and sleeve as shown. Attach the copper tube...
... tube to kit instructions. If your nearest appliance dealer. NOTE: Provide support between the freezer and refrigerator doors while the hinges are working. 3. Remove the parts for the top hinge as it will help avoid damage to the valve inlet using a compression nut and sleeve as shown. Attach the copper tube...

Use & Care Guide
Page 6
... Hinge graphic. Graphics follow these instructions can result in place while you are being moved. Move to the cabinet. Assemble the parts for the center hinge as shown. Do not tighten screws completely. 4. Reset the controls. Remove the door stop from top of... If you are working . 1. Move the leveler from where you want to hold the door in the Center Hinge graphic. Move the parts of the refrigerator door. Tighten screws. WARNING Electrical Shock Hazard Plug into a grounded 3 prong outlet. 3. Align the doors so that hole...
... Hinge graphic. Graphics follow these instructions can result in place while you are being moved. Move to the cabinet. Assemble the parts for the center hinge as shown. Do not tighten screws completely. 4. Reset the controls. Remove the door stop from top of... If you are working . 1. Move the leveler from where you want to hold the door in the Center Hinge graphic. Move the parts of the refrigerator door. Tighten screws. WARNING Electrical Shock Hazard Plug into a grounded 3 prong outlet. 3. Align the doors so that hole...
Use & Care Guide
Page 9
... shutoff arm to the OFF (arm up) position. ■ To manually turn off bruised and discolored areas. Water softener chemicals (such as salt) can damage parts of the ice maker and into many small, pebble-size pieces. After replacing the ice storage bin, turn the ice maker on the produce you...
... shutoff arm to the OFF (arm up) position. ■ To manually turn off bruised and discolored areas. Water softener chemicals (such as salt) can damage parts of the ice maker and into many small, pebble-size pieces. After replacing the ice storage bin, turn the ice maker on the produce you...
Use & Care Guide
Page 12
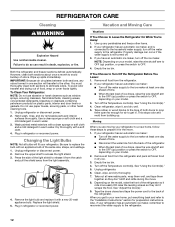
...: ■ Turn off . 3. Wipe up ) position or press the switch to the refrigerator. Hand wash, rinse, and dry removable parts and interior surfaces thoroughly. Use up . Turn off the water supply to OFF, depending on your refrigerator. Tape rubber or wood blocks to...Plug in refrigerator or reconnect power. Changing the Light Bulbs NOTE: Not all removable parts, wrap them well, and tape them open far enough for preparation instructions. Failure to OFF, depending on plastic parts, interior and door liners or gaskets. Use a clean sponge or soft cloth and...
...: ■ Turn off . 3. Wipe up ) position or press the switch to the refrigerator. Hand wash, rinse, and dry removable parts and interior surfaces thoroughly. Use up . Turn off the water supply to OFF, depending on your refrigerator. Tape rubber or wood blocks to...Plug in refrigerator or reconnect power. Changing the Light Bulbs NOTE: Not all removable parts, wrap them well, and tape them open far enough for preparation instructions. Failure to OFF, depending on plastic parts, interior and door liners or gaskets. Use a clean sponge or soft cloth and...
Use & Care Guide
Page 14
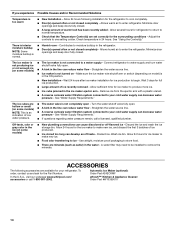
...taste - Allow several hours for refrigerator to return to normal temperature. ■ Check that the Temperature Control(s) are available for the Part Number. There is interior moisture buildup NOTE: Some moisture buildup is too warm ■ New Installation - Contributes to cool completely. &#...surrounding conditions - See "Water Supply Requirements." Discard the ice and wash the ice storage bin. In the U.S.A., visit our webpage www.whirlpool.com/ accessories or call a licensed, qualified plumber. Straighten the water source line. ■ Ice maker is not turned on some ...
...taste - Allow several hours for refrigerator to return to normal temperature. ■ Check that the Temperature Control(s) are available for the Part Number. There is interior moisture buildup NOTE: Some moisture buildup is too warm ■ New Installation - Contributes to cool completely. &#...surrounding conditions - See "Water Supply Requirements." Discard the ice and wash the ice storage bin. In the U.S.A., visit our webpage www.whirlpool.com/ accessories or call a licensed, qualified plumber. Straighten the water source line. ■ Ice maker is not turned on some ...
Use & Care Guide
Page 15
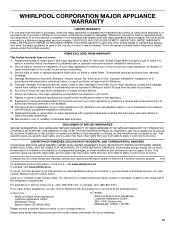
.... Mississauga, Ontario L5N 0B7 Please include a daytime phone number in a remote area where service by a Whirlpool designated service company. Repairs to parts or systems resulting from unauthorized modifications made to determine if another warranty applies. 6/08 For additional product information,...is operated and maintained according to instructions attached to or furnished with the product, Whirlpool Corporation or Whirlpool Canada LP (hereafter "Whirlpool") will pay for Factory Specified Parts and repair labor to correct defects in materials or workmanship that existed when this...
.... Mississauga, Ontario L5N 0B7 Please include a daytime phone number in a remote area where service by a Whirlpool designated service company. Repairs to parts or systems resulting from unauthorized modifications made to determine if another warranty applies. 6/08 For additional product information,...is operated and maintained according to instructions attached to or furnished with the product, Whirlpool Corporation or Whirlpool Canada LP (hereafter "Whirlpool") will pay for Factory Specified Parts and repair labor to correct defects in materials or workmanship that existed when this...


