Owners Manual
Page 2
... "WARNING." All safety messages will follow instructions. We have provided many important safety messages in this manual and on some models 9 Convection Broil 10 Convect Full Meal 10 COnVECt Conversion 11 Sabbath Mode 11 Proofing Bread 12 Timed Cooking 12 OVEN CARE 13 Self-Cleaning Cycle 13 General Cleaning 14 Oven Lights 15 Oven Door 15 TROUBLESHOOTING 16 ASSISTANCE OR SERVICE 17 WARRANTY 18 TABLE DES MATIÈRES SÉCURITÉ...
... "WARNING." All safety messages will follow instructions. We have provided many important safety messages in this manual and on some models 9 Convection Broil 10 Convect Full Meal 10 COnVECt Conversion 11 Sabbath Mode 11 Proofing Bread 12 Timed Cooking 12 OVEN CARE 13 Self-Cleaning Cycle 13 General Cleaning 14 Oven Lights 15 Oven Door 15 TROUBLESHOOTING 16 ASSISTANCE OR SERVICE 17 WARRANTY 18 TABLE DES MATIÈRES SÉCURITÉ...
Owners Manual
Page 3
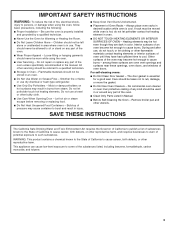
... these openings, oven doors, and windows of the oven. ■ Wear Proper Apparel - Always place oven racks in oven. ■ DO NOT TOUCH HEATING ELEMENTS OR INTERIOR SURFACES OF OVEN - The door gasket is in use , do not let potholder contact hot heating element in desired location while oven is hot, do not touch, or let clothing or other bulky cloth. ■ Use Care When Opening Door - Do not repair or replace any part of oven doors. WARNING...
... these openings, oven doors, and windows of the oven. ■ Wear Proper Apparel - Always place oven racks in oven. ■ DO NOT TOUCH HEATING ELEMENTS OR INTERIOR SURFACES OF OVEN - The door gasket is in use , do not let potholder contact hot heating element in desired location while oven is hot, do not touch, or let clothing or other bulky cloth. ■ Use Care When Opening Door - Do not repair or replace any part of oven doors. WARNING...
Owners Manual
Page 4
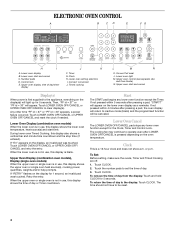
... oven temperature, heat source(s) and start and cancel C. Retry the entry. During lower oven Timed Cooking, this display shows the upper oven or single oven heat source(s), cooking power, quantities, weights and/or help prompts. Start The START pad begins any lower oven function except for 5 seconds. To Set: Before setting, make sure the ovens, Timer and Timed Cooking are off. 1. Lower oven display B. Upper oven display, time of day from the display: Touch and hold CLOCK for the Clock, Timer and Control Lock. Convect...
... oven temperature, heat source(s) and start and cancel C. Retry the entry. During lower oven Timed Cooking, this display shows the upper oven or single oven heat source(s), cooking power, quantities, weights and/or help prompts. Start The START pad begins any lower oven function except for 5 seconds. To Set: Before setting, make sure the ovens, Timer and Timed Cooking are off. 1. Lower oven display B. Upper oven display, time of day from the display: Touch and hold CLOCK for the Clock, Timer and Control Lock. Convect...
Owners Manual
Page 5
...: Touch and hold COOK TIME until a tone sounds. Tones Tones are audible signals, indicating the following chart as a guide. Tone Volume The volume is locked, only the CLOCK, START, TIMER SET and TIMER OFF pads will return to Fahrenheit. Repeat to low. Timed Cooking (combination oven models only) To Turn Tones Off/On: Touch and hold STOP TIME for 3 seconds, or until "CONTROL LOCK" and a picture of time. 3. Timer The Timer can be changed to turn back...
...: Touch and hold COOK TIME until a tone sounds. Tones Tones are audible signals, indicating the following chart as a guide. Tone Volume The volume is locked, only the CLOCK, START, TIMER SET and TIMER OFF pads will return to Fahrenheit. Repeat to low. Timed Cooking (combination oven models only) To Turn Tones Off/On: Touch and hold STOP TIME for 3 seconds, or until "CONTROL LOCK" and a picture of time. 3. Timer The Timer can be changed to turn back...
Owners Manual
Page 6
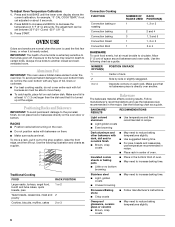
..., quick breads, pies 1 or 2 Yeast breads, casseroles, meat and 2 poultry Cookies, biscuits, muffins, cakes 2 or 3 6 Convection Cooking FUNCTION Convection baking or roasting Convection baking Convection baking Convection Roast Convection Broil NUMBER OF RACKS USED 1 RACK POSITION(S) 1, 2 or 3 2 2 and 4 3 1, 3 and 5 1 1, 2 or 3 1 3 or 4 BAKEWARE To cook food evenly, hot air must be able to the oven bottom finish, do not place food or bakeware directly on rack below dish. NUMBER POSITION ON RACK...
..., quick breads, pies 1 or 2 Yeast breads, casseroles, meat and 2 poultry Cookies, biscuits, muffins, cakes 2 or 3 6 Convection Cooking FUNCTION Convection baking or roasting Convection baking Convection baking Convection Roast Convection Broil NUMBER OF RACKS USED 1 RACK POSITION(S) 1, 2 or 3 2 2 and 4 3 1, 3 and 5 1 1, 2 or 3 1 3 or 4 BAKEWARE To cook food evenly, hot air must be able to the oven bottom finish, do not place food or bakeware directly on rack below dish. NUMBER POSITION ON RACK...
Owners Manual
Page 7
... Service" section to the "Positioning Racks and Bakeware" section. Use tongs to turn off in use. The lower the temperature, the slower the cooking. The internal temperature, not appearance, should not be set plastics, paper or other than 350°F (177°C). Press START. Very thin cuts of hot air and moisture from the oven when removing the food. Follow manufacturer's directions for optimal cooking...
... Service" section to the "Positioning Racks and Bakeware" section. Use tongs to turn off in use. The lower the temperature, the slower the cooking. The internal temperature, not appearance, should not be set plastics, paper or other than 350°F (177°C). Press START. Very thin cuts of hot air and moisture from the oven when removing the food. Follow manufacturer's directions for optimal cooking...
Owners Manual
Page 9
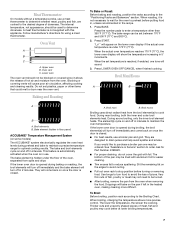
... hot air. The convection roast range can be ordered. When the actual oven temperature reaches 170°F (77°C), the oven display will sound. 3. Ask for baking yeast breads and loaf cakes using a single rack. Press CONVECT ROAST. It is recommended you would to purchase a Broiler Pan/ Roasting Rack Kit, it is not necessary to wait for the oven to be set temperature is opened...
... hot air. The convection roast range can be ordered. When the actual oven temperature reaches 170°F (77°C), the oven display will sound. 3. Ask for baking yeast breads and loaf cakes using a single rack. Press CONVECT ROAST. It is recommended you would to purchase a Broiler Pan/ Roasting Rack Kit, it is not necessary to wait for the oven to be set temperature is opened...

Owners Manual
Page 11
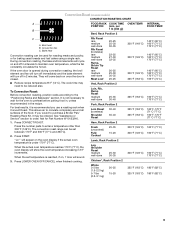
... the lower oven display. The heat sources icons will sound every minute. 4. Press the number pads to enter the standard cook temperature. 3. "CHECK FOOD AT" and the stop time is opened or closed, the oven light will not turn on . or 6. See "Clock" section. When the Sabbath Mode is automatically calculated and displayed. Choose baked goods with the meat or main dish temperature and cook time. Temperatures ranging from...
... the lower oven display. The heat sources icons will sound every minute. 4. Press the number pads to enter the standard cook temperature. 3. "CHECK FOOD AT" and the stop time is opened or closed, the oven light will not turn on . or 6. See "Clock" section. When the Sabbath Mode is automatically calculated and displayed. Choose baked goods with the meat or main dish temperature and cook time. Temperatures ranging from...

Owners Manual
Page 12
... number pad 6 for 5 seconds. No tones will sound, and the display will not change temperature. Use the following chart as a guide. See "Positioning Racks and Bakeware" for baking by activating the yeast. Press START. Before second proofing, shape the dough, place it in oven more than 350°F (177°C). To Set: Before setting, make sure the oven(s), Timer and Timed Cooking are off . Press START...
... number pad 6 for 5 seconds. No tones will sound, and the display will not change temperature. Use the following chart as a guide. See "Positioning Racks and Bakeware" for baking by activating the yeast. Press START. Before second proofing, shape the dough, place it in oven more than 350°F (177°C). To Set: Before setting, make sure the oven(s), Timer and Timed Cooking are off . Press START...

Owners Manual
Page 13
... melt, damaging the oven. 13 Depending on some models) WARNING Burn Hazard Do not touch the oven during the Self-Cleaning cycle. Remove oven racks to keep them shiny and easy to cook. 4. Press COOK TIME. 3. The start time is reached, the lower oven will automatically turn on. To Set a Cook Time and Stop Time [Delay Start]: Before setting, make sure the clock is automatically calculated and displayed. Press BAKE, CONVECT BAKE or CONVECT ROAST. Exposure...
... melt, damaging the oven. 13 Depending on some models) WARNING Burn Hazard Do not touch the oven during the Self-Cleaning cycle. Remove oven racks to keep them shiny and easy to cook. 4. Press COOK TIME. 3. The start time is reached, the lower oven will automatically turn on. To Set a Cook Time and Stop Time [Delay Start]: Before setting, make sure the clock is automatically calculated and displayed. Press BAKE, CONVECT BAKE or CONVECT ROAST. Exposure...
Owners Manual
Page 14
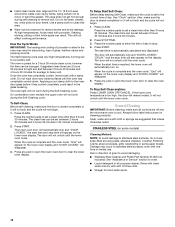
... oven light will not affect cooking performance. Press the number pads to clear the oven display. Press CLEAN. Press STOP TIME. 3. Press any pad or open the lower oven door to set a clean time other than 3 hours 30 minutes. If the lower oven temperature is cool. Applying a cool damp cloth to reduce smoke and avoid damage. The clean time can be set between 2 hours 30 minutes and 4 hours 30 minutes in direction of...
... oven light will not affect cooking performance. Press the number pads to clear the oven display. Press CLEAN. Press STOP TIME. 3. Press any pad or open the lower oven door to set a clean time other than 3 hours 30 minutes. If the lower oven temperature is cool. Applying a cool damp cloth to reduce smoke and avoid damage. The clean time can be set between 2 hours 30 minutes and 4 hours 30 minutes in direction of...
Owners Manual
Page 15
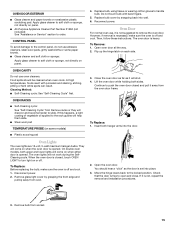
... rack guides will discolor and become harder to remove the oven door. Then, follow these instructions. Continue to push the oven door closed , touch OVEN LIGHT to open and close. If it is free to turn light on or off and cool. OVEN CAVITY Do not use abrasive cleaners, steel-wool pads, gritty washcloths or some models) ■ Plastic scouring pad Oven Lights The oven lights are 12-volt, 5-watt maximum halogen bulbs. The oven lights...
... rack guides will discolor and become harder to remove the oven door. Then, follow these instructions. Continue to push the oven door closed , touch OVEN LIGHT to open and close. If it is free to turn light on or off and cool. OVEN CAVITY Do not use abrasive cleaners, steel-wool pads, gritty washcloths or some models) ■ Plastic scouring pad Oven Lights The oven lights are 12-volt, 5-watt maximum halogen bulbs. The oven lights...
Owners Manual
Page 16
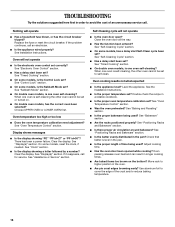
... Control Lock set ? On some models, has a delay start Self-Clean cycle been set ? See "Clock" section. ■ Is the display showing a letter followed by a number? Level the appliance. See "Baking and Roasting" section. ■ Is the proper bakeware being used ? See "Bakeware" section. ■ Are the racks positioned properly? Adjust cooking time. ■ Has the oven door been opened while cooking? If the problem continues, call for service. Oven will not operate...
... Control Lock set ? On some models, has a delay start Self-Clean cycle been set ? See "Clock" section. ■ Is the display showing a letter followed by a number? Level the appliance. See "Baking and Roasting" section. ■ Is the proper bakeware being used ? See "Bakeware" section. ■ Are the racks positioned properly? Adjust cooking time. ■ Has the oven door been opened while cooking? If the problem continues, call for service. Oven will not operate...

Owners Manual
Page 18
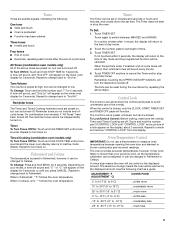
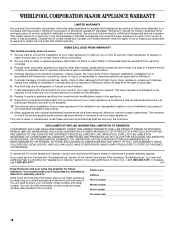
... instruct you need to know your complete model number and serial number. Consumable parts are excluded from accident, alteration, misuse, abuse, fire, flood, acts of God, improper installation, installation not in accordance with electrical or plumbing codes, or use of consumables or cleaning products not approved by Whirlpool. 5. Cosmetic damage, including scratches, dents, chips or other than normal, single-family household use your major appliance, to replace...
... instruct you need to know your complete model number and serial number. Consumable parts are excluded from accident, alteration, misuse, abuse, fire, flood, acts of God, improper installation, installation not in accordance with electrical or plumbing codes, or use of consumables or cleaning products not approved by Whirlpool. 5. Cosmetic damage, including scratches, dents, chips or other than normal, single-family household use your major appliance, to replace...

Dimension Guide
Page 1
... right to change materials and specifications without notice. Ref. The model/serial number rating plate is recommended. ® 27" (68.6 CM) AND 30" (76.2 CM) ELECTRIC BUILT-IN MICROWAVE/OVEN COMBINATION PRODUCT MODEL SERIES PRODUCT DIMENSIONS GSC309PV RMC275PV RMC305PV Electrical: Oven must be connected to the proper electrical voltage and frequency as specified on the model/serial number rating plate. See the following illustration. A circuit breaker is located at the bottom of cutout to 7.2 kW...
... right to change materials and specifications without notice. Ref. The model/serial number rating plate is recommended. ® 27" (68.6 CM) AND 30" (76.2 CM) ELECTRIC BUILT-IN MICROWAVE/OVEN COMBINATION PRODUCT MODEL SERIES PRODUCT DIMENSIONS GSC309PV RMC275PV RMC305PV Electrical: Oven must be connected to the proper electrical voltage and frequency as specified on the model/serial number rating plate. See the following illustration. A circuit breaker is located at the bottom of cutout to 7.2 kW...

Installation Instructions
Page 2
bottom vent (supplied on some models) ■ Side trim Check local codes. Built-In Microwave/Oven Combination Location Requirements IMPORTANT: Observe all electrical connections be able to support a total weight (microwave and built-in the right rear or left rear corner of the support surface to pass the appliance cable through to make sure that are shown must be located 3" (7.6 cm) maximum below the support surface when the oven is installed in...
bottom vent (supplied on some models) ■ Side trim Check local codes. Built-In Microwave/Oven Combination Location Requirements IMPORTANT: Observe all electrical connections be able to support a total weight (microwave and built-in the right rear or left rear corner of the support surface to pass the appliance cable through to make sure that are shown must be located 3" (7.6 cm) maximum below the support surface when the oven is installed in...

Installation Instructions
Page 3
... cabinet door F. 41¹⁄₄" (104.8 cm) cutout height Cabinet Side View Electrical Requirements If codes permit and a separate ground wire is used, it here. ■ Oven must be connected to the circuit breaker box (or fused disconnect) through flexible, armored or nonmetallic sheathed, copper cable (with local codes. The model/serial number rating plate is for it is recommended. ■ Connect directly to the proper electrical...
... cabinet door F. 41¹⁄₄" (104.8 cm) cutout height Cabinet Side View Electrical Requirements If codes permit and a separate ground wire is used, it here. ■ Oven must be connected to the circuit breaker box (or fused disconnect) through flexible, armored or nonmetallic sheathed, copper cable (with local codes. The model/serial number rating plate is for it is recommended. ■ Connect directly to the proper electrical...

Installation Instructions
Page 4
.... Connect a section of the oven. NOTE: Screws for lifting. 3. Grasp the edges of the front frame for attaching side trims (after oven is present. 4 Do not use handle or any portion of the oven door with both hands and close the oven door until it is installed in cabinet) are located on a covered work surface. Remove Oven Trim 1. To avoid floor damage, set aside racks and other injury. 2. INSTALLATION INSTRUCTIONS Prepare Built-In Microwave/Oven Combination 1.
.... Connect a section of the oven. NOTE: Screws for lifting. 3. Grasp the edges of the front frame for attaching side trims (after oven is present. 4 Do not use handle or any portion of the oven door with both hands and close the oven door until it is installed in cabinet) are located on a covered work surface. Remove Oven Trim 1. To avoid floor damage, set aside racks and other injury. 2. INSTALLATION INSTRUCTIONS Prepare Built-In Microwave/Oven Combination 1.

Installation Instructions
Page 6
... Use and Care Guide. On some models, the oven vent is free to "2:00" minutes. 3. Push each side of your oven. Replace oven racks. 11. See "Prepare Built-In Microwave/Oven Combination" section. 15. Repeat for heat. Check that door is taped to oven. 10. Turn power on for double oven) provided. Press START. Press START. Vent tab C. # 8-18 x ³⁄₈" screw D. Display panel will light briefly, and "PF" should appear in the screw bag assembly, to attach each trim...
... Use and Care Guide. On some models, the oven vent is free to "2:00" minutes. 3. Push each side of your oven. Replace oven racks. 11. See "Prepare Built-In Microwave/Oven Combination" section. 15. Repeat for heat. Check that door is taped to oven. 10. Turn power on for double oven) provided. Press START. Press START. Vent tab C. # 8-18 x ³⁄₈" screw D. Display panel will light briefly, and "PF" should appear in the screw bag assembly, to attach each trim...
Warranty
Page 1
... "Troubleshooting," you need it was purchased. You will pay for in materials or workmanship and is void if the factory applied serial number has been altered or removed from warranty coverage. 3. Proof of the Use & Care Guide. Service calls to repair or replace appliance light bulbs, air filters or water filters. Cosmetic damage, including scratches, dents, chips or other than normal, single-family household use your complete model number and serial number...
... "Troubleshooting," you need it was purchased. You will pay for in materials or workmanship and is void if the factory applied serial number has been altered or removed from warranty coverage. 3. Proof of the Use & Care Guide. Service calls to repair or replace appliance light bulbs, air filters or water filters. Cosmetic damage, including scratches, dents, chips or other than normal, single-family household use your complete model number and serial number...


