
Installation Instructions
Page 2
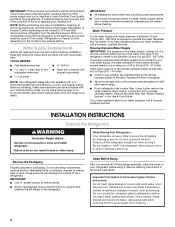
... s Flat-blade screwdriver s ³⁄₈" and ¹⁄₂" socket wrench s or adjustable wrench PARTS NEEDED: s Your refrigerator dealer has a kit available with homeowner. s Depending on water line connections, you don't immediately follow instructions. Dimensions may also need ...purchase a ¹⁄₄" (6.35 mm) copper tubing with installation specifications and dimensions. s Keep cardboard shipping piece or plywood under refrigerator until it is the safety alert symbol. s Comply with shutoff valve and a ¹⁄₄" (6.35 mm) compression fitting ...
... s Flat-blade screwdriver s ³⁄₈" and ¹⁄₂" socket wrench s or adjustable wrench PARTS NEEDED: s Your refrigerator dealer has a kit available with homeowner. s Depending on water line connections, you don't immediately follow instructions. Dimensions may also need ...purchase a ¹⁄₄" (6.35 mm) copper tubing with installation specifications and dimensions. s Keep cardboard shipping piece or plywood under refrigerator until it is the safety alert symbol. s Comply with shutoff valve and a ¹⁄₄" (6.35 mm) compression fitting ...
Installation Instructions
Page 3
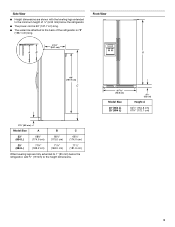
s The water line attached to the back of ¹⁄₄" (6.35 mm) below the refrigerator, add ³⁄₄" (19 mm) to the height dimensions. 35 90.6 cm) Model Size 23' (654 L) 25' (694 L) 3⁵⁄₈" (9.2 cm) Height A 64⁷⁄₈" (164.8 cm) 67³⁄₄" ...8328;" (182.5 cm) 71¹⁄₂" (181.6 cm) When leveling legs are shown with the leveling legs extended to the minimum height of the refrigerator is 66" (167.7 cm) long. s The power cord is 78" (198.1 cm) long. Side View s Height dimensions are fully extended to 1"...
s The water line attached to the back of ¹⁄₄" (6.35 mm) below the refrigerator, add ³⁄₄" (19 mm) to the height dimensions. 35 90.6 cm) Model Size 23' (654 L) 25' (694 L) 3⁵⁄₈" (9.2 cm) Height A 64⁷⁄₈" (164.8 cm) 67³⁄₄" ...8328;" (182.5 cm) 71¹⁄₂" (181.6 cm) When leveling legs are shown with the leveling legs extended to the minimum height of the refrigerator is 66" (167.7 cm) long. s The power cord is 78" (198.1 cm) long. Side View s Height dimensions are fully extended to 1"...
Installation Instructions
Page 4
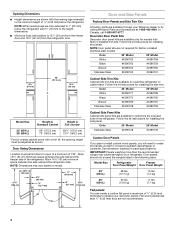
... IMPORTANT: Panels weighing more than ¹⁄₄" (6.35 mm) thick are available to customize the exposed side of the refrigerator. Model Size Refrigerator Freezer Door Panel Weight Door Panel Weight 23' (654 L) 28 lbs (12.7 kg) 16 lbs (7.3 kg) 25' (694 L) 30 lbs (13.6 kg) 17... #4396764 #4396760 Stainless Steel #4396765 #4396761 Cabinet Side Trim Kits Cabinet side trim kits are available through your Whirlpool dealer or by calling Whirlpool Parts and Accessories at 1-800-442-9991. NOTE: When leveling legs are available only for installing the side panel.
... IMPORTANT: Panels weighing more than ¹⁄₄" (6.35 mm) thick are available to customize the exposed side of the refrigerator. Model Size Refrigerator Freezer Door Panel Weight Door Panel Weight 23' (654 L) 28 lbs (12.7 kg) 16 lbs (7.3 kg) 25' (694 L) 30 lbs (13.6 kg) 17... #4396764 #4396760 Stainless Steel #4396765 #4396761 Cabinet Side Trim Kits Cabinet side trim kits are available through your Whirlpool dealer or by calling Whirlpool Parts and Accessories at 1-800-442-9991. NOTE: When leveling legs are available only for installing the side panel.
Installation Instructions
Page 5
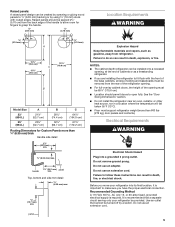
...185;⁄₈" (3.18 mm) 15³⁄₈" (39.3 cm) 15³⁄₈" (39.3 cm) 19¹⁄₄" C (49.0 cm) B Model Size 23' (654 L) 25' (694 L) A 21¹⁄₈" (53.7 cm) 20³⁄₄" (52.7 cm) B 29¹⁄₄" (74.4 cm) 32&#...Requirements WARNING Electrical Shock Hazard Plug into its final location, it is important to open fully. Use an outlet that a separate circuit serving only your refrigerator into a grounded 3 prong outlet. Do not use an adapter. panel Top, bottom and side trim detail ¹⁄₄" (6.35 mm) ...
...185;⁄₈" (3.18 mm) 15³⁄₈" (39.3 cm) 15³⁄₈" (39.3 cm) 19¹⁄₄" C (49.0 cm) B Model Size 23' (654 L) 25' (694 L) A 21¹⁄₈" (53.7 cm) 20³⁄₄" (52.7 cm) B 29¹⁄₄" (74.4 cm) 32&#...Requirements WARNING Electrical Shock Hazard Plug into its final location, it is important to open fully. Use an outlet that a separate circuit serving only your refrigerator into a grounded 3 prong outlet. Do not use an adapter. panel Top, bottom and side trim detail ¹⁄₄" (6.35 mm) ...
Installation Instructions
Page 6
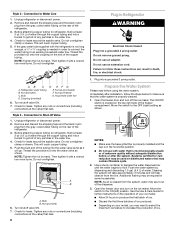
...cleaning instructions in areas where the household temperatures will remain above freezing. For your protection, tempered glass is connected to your refrigerator before starting installation. Use special care when removing them to avoid impact from the electrical source. If a reverse osmosis water...tools listed here. Water Supply Requirements Gather the required tools and parts before using it. Read and follow the instructions provided with your refrigerator. TOOLS NEEDED: s Flat-blade screwdriver s ¹⁄₄" Drill bit s and ¹⁄₂" Open-end or two...
...cleaning instructions in areas where the household temperatures will remain above freezing. For your protection, tempered glass is connected to your refrigerator before starting installation. Use special care when removing them to avoid impact from the electrical source. If a reverse osmosis water...tools listed here. Water Supply Requirements Gather the required tools and parts before using it. Read and follow the instructions provided with your refrigerator. TOOLS NEEDED: s Flat-blade screwdriver s ¹⁄₄" Drill bit s and ¹⁄₂" Open-end or two...
Installation Instructions
Page 7
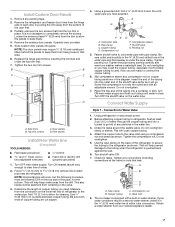
... away from the drill. It is used. B B C C A A D D C A. This also keeps normal sediment from the bottom of refrigerator to refrigerator, flush at least ¹⁄₄" (6.35 mm) from the connection on copper tubing as it in the valve. 3. Connect Water Supply Style ...12.70 mm) to Water Valve 1. Add 7 ft (2.1 m) to allow the panels to completely remove the screws. Using a grounded drill, drill a ¹⁄₄" (6.35 mm) hole in the diagram. Attach the copper tube to the refrigerator as shown. Obtain a water strainer from being loose...
... away from the drill. It is used. B B C C A A D D C A. This also keeps normal sediment from the bottom of refrigerator to refrigerator, flush at least ¹⁄₄" (6.35 mm) from the connection on copper tubing as it in the valve. 3. Connect Water Supply Style ...12.70 mm) to Water Valve 1. Add 7 ft (2.1 m) to allow the panels to completely remove the screws. Using a grounded drill, drill a ¹⁄₄" (6.35 mm) hole in the diagram. Attach the copper tube to the refrigerator as shown. Obtain a water strainer from being loose...
Installation Instructions
Page 8
...rid of the dispenser. 3. Thread the provided nut onto the water valve as shown. The ON/OFF switch is needed in Refrigerator WARNING Electrical Shock Hazard Plug into a bucket to get rid of unknown quality without adequate disinfection before using the water system. ...Additional flushing may spurt out of any particles in the horizontal position. s Depending on the top right side of the refrigerator. 3. Do not overtighten clamp or sleeve. NOTE: Tighten the nut by hand. Nut (purchased) G. Connection to Water Line 1. Nut ...
...rid of the dispenser. 3. Thread the provided nut onto the water valve as shown. The ON/OFF switch is needed in Refrigerator WARNING Electrical Shock Hazard Plug into a bucket to get rid of unknown quality without adequate disinfection before using the water system. ...Additional flushing may spurt out of any particles in the horizontal position. s Depending on the top right side of the refrigerator. 3. Do not overtighten clamp or sleeve. NOTE: Tighten the nut by hand. Nut (purchased) G. Connection to Water Line 1. Nut ...
Installation Instructions
Page 9
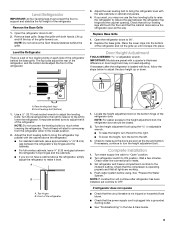
... contact the floor to support and stabilize the full weight of the grille toward you. Lift up and tilt the top of the refrigerator. NOTE: Do not remove the Tech Sheets fastened behind the base grille. If you want, you do not have a cabinet above the... water line connections for leaks. 3. s Check that the circuit breaker is plugged into the bottom of the refrigerator. Rear leveling bolt (top) B. s If you may not need adjusting. Front of the refrigerator. 3. If refrigerator does not operate s Check that the power supply cord is not tripped or household fuse blown. If necessary...
... contact the floor to support and stabilize the full weight of the grille toward you. Lift up and tilt the top of the refrigerator. NOTE: Do not remove the Tech Sheets fastened behind the base grille. If you want, you do not have a cabinet above the... water line connections for leaks. 3. s Check that the circuit breaker is plugged into the bottom of the refrigerator. Rear leveling bolt (top) B. s If you may not need adjusting. Front of the refrigerator. 3. If refrigerator does not operate s Check that the power supply cord is not tripped or household fuse blown. If necessary...
Owners Manual
Page 1
... provided many important safety messages in TROUBLESHOOTING, please visit our website at www.whirlpool.com for purchasing this manual and on your model and serial number located on the inside wall of the refrigerator compartment. W10189345A If you still need your appliance. In Canada, visit our website... at www.whirlpool.ca or call us at 1-800-253-1301. All safety messages will follow the ...
... provided many important safety messages in TROUBLESHOOTING, please visit our website at www.whirlpool.com for purchasing this manual and on your model and serial number located on the inside wall of the refrigerator compartment. W10189345A If you still need your appliance. In Canada, visit our website... at www.whirlpool.ca or call us at 1-800-253-1301. All safety messages will follow the ...
Owners Manual
Page 2
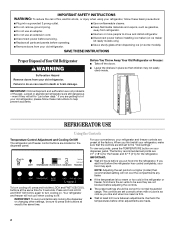
...3 seconds. IMPORTANT SAFETY INSTRUCTIONS WARNING: To reduce the risk of fire, electric shock, or injury when using your refrigerator, follow these basic precautions: ■ Plug into the refrigerator. IMPORTANT: Child entrapment and suffocation are made. 2 even if they are 0°F (-18°C) for the... glass when dispensing ice (on . Failure to turn cooling off . If you first install your refrigerator, make sure that children may spoil. Junked or abandoned refrigerators are located on your food may not easily climb inside. Press and hold the LOCK and FAST ICE...
...3 seconds. IMPORTANT SAFETY INSTRUCTIONS WARNING: To reduce the risk of fire, electric shock, or injury when using your refrigerator, follow these basic precautions: ■ Plug into the refrigerator. IMPORTANT: Child entrapment and suffocation are made. 2 even if they are 0°F (-18°C) for the... glass when dispensing ice (on . Failure to turn cooling off . If you first install your refrigerator, make sure that children may spoil. Junked or abandoned refrigerators are located on your food may not easily climb inside. Press and hold the LOCK and FAST ICE...
Owners Manual
Page 3
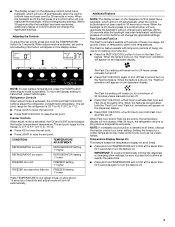
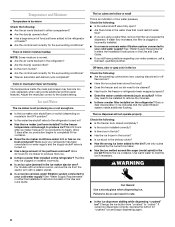
.... Freezer Controls When adjust mode is off, the first press of inactivity and adjust mode will appear on the dispenser display. After 24 hours, the refrigerator returns to turn off Fast Cool and turn on the Fast Ice feature. Adjusting the Controls To adjust the set point range for the... periods of heavy ice use by increasing ice production. ■ Press the FAST ICE/COOL button to press both Fast Cool and Fast Ice off. Refrigerator Controls When adjust mode is off, the first press of 90 minutes unless manually turned off. ■ Press FAST ICE/COOL a third time to turn...
.... Freezer Controls When adjust mode is off, the first press of inactivity and adjust mode will appear on the dispenser display. After 24 hours, the refrigerator returns to turn off Fast Cool and turn on the Fast Ice feature. Adjusting the Controls To adjust the set point range for the... periods of heavy ice use by increasing ice production. ■ Press the FAST ICE/COOL button to press both Fast Cool and Fast Ice off. Refrigerator Controls When adjust mode is off, the first press of 90 minutes unless manually turned off. ■ Press FAST ICE/COOL a third time to turn...
Owners Manual
Page 4
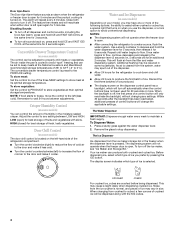
... Alarm, press and hold ICE and FAST ICE/ COOL at their optimal storage temperatures. Convertible Drawer Temperature Control (on the left-hand side of the refrigerator compartment. ■ Turn the control clockwise (right) to reduce the flow of cold air to any settings. HIGH (closed) for 5 seconds. Your ...When the backlight is located on some models) Depending on , press and hold ICE and FAST ICE/COOL at the same time for the refrigerator to cool down and chill water. ■ Allow 24 hours to produce the first batch of control buttons will not operate when the freezer ...
... Alarm, press and hold ICE and FAST ICE/ COOL at their optimal storage temperatures. Convertible Drawer Temperature Control (on the left-hand side of the refrigerator compartment. ■ Turn the control clockwise (right) to reduce the flow of cold air to any settings. HIGH (closed) for 5 seconds. Your ...When the backlight is located on some models) Depending on , press and hold ICE and FAST ICE/COOL at the same time for the refrigerator to cool down and chill water. ■ Allow 24 hours to produce the first batch of control buttons will not operate when the freezer ...
Owners Manual
Page 5
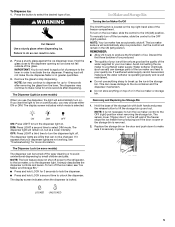
... down to turn the dispenser light off for up and out. It simply deactivates the dispenser controls and levers. To turn off power to the refrigerator, to the ice maker, or to avoid unintentional dispensing by small children and pets. To manually turn off the ice maker, see "Troubleshooting" for more...
... down to turn the dispenser light off for up and out. It simply deactivates the dispenser controls and levers. To turn off power to the refrigerator, to the ice maker, or to avoid unintentional dispensing by small children and pets. To manually turn off the ice maker, see "Troubleshooting" for more...
Owners Manual
Page 6
... 3 seconds. If the environment is particularly greasy or dusty, or there is part of food, wrap or cover foods tightly. Both the refrigerator and freezer sections defrost automatically. IMPORTANT: Because air circulates between both sections, any odors formed in death, explosion, or fire. 3. It ...the way into the base grille and rotate the cap until it is fully engaged. 7. However, clean both sections to your refrigerator. Unplug refrigerator or disconnect power. 2. Failure to do so can run the dispenser without adequate disinfection before or after the covers are LEDs that...
... 3 seconds. If the environment is particularly greasy or dusty, or there is part of food, wrap or cover foods tightly. Both the refrigerator and freezer sections defrost automatically. IMPORTANT: Because air circulates between both sections, any odors formed in death, explosion, or fire. 3. It ...the way into the base grille and rotate the cap until it is fully engaged. 7. However, clean both sections to your refrigerator. Unplug refrigerator or disconnect power. 2. Failure to do so can run the dispenser without adequate disinfection before or after the covers are LEDs that...
Owners Manual
Page 7
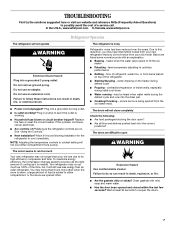
...amount of food is added to either compartment more quickly. occurs as it will not close completely Check the following installation for the refrigerator to optimize performance ■ Rattling - The doors will still use less energy than your old model. Clean gaskets with an ...right amount of cooling as ice is needed. Explosion Hazard Use nonflammable cleaner. In the U.S.A., www.whirlpool.com In Canada, www.whirlpool.ca Refrigerator Operation The refrigerator will not cool either compartment, or the doors are difficult to coldest setting will not operate WARNING...
...amount of food is added to either compartment more quickly. occurs as it will not close completely Check the following installation for the refrigerator to optimize performance ■ Rattling - The doors will still use less energy than your old model. Clean gaskets with an ...right amount of cooling as ice is needed. Explosion Hazard Use nonflammable cleaner. In the U.S.A., www.whirlpool.com In Canada, www.whirlpool.ca Refrigerator Operation The refrigerator will not cool either compartment, or the doors are difficult to coldest setting will not operate WARNING...
Owners Manual
Page 8
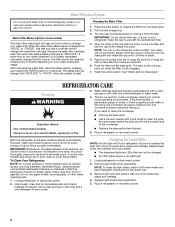
..."crushed" ice? If water flow increases, the filter is clogged or incorrectly installed. ■ Is a reverse osmosis water filtration system connected to your refrigerator has been connected to a water supply and the supply shutoff valve is turned on. ■ Has a large amount of low water pressure. See... The temperature inside the meat pan/crisper may be installed to remove the minerals. ■ Is there a water filter installed on the refrigerator? WARNING Cut Hazard Use a sturdy glass when dispensing ice. Change the ice button from the ejector arm with an interior ice bin, ...
..."crushed" ice? If water flow increases, the filter is clogged or incorrectly installed. ■ Is a reverse osmosis water filtration system connected to your refrigerator has been connected to a water supply and the supply shutoff valve is turned on. ■ Has a large amount of low water pressure. See... The temperature inside the meat pan/crisper may be installed to remove the minerals. ■ Is there a water filter installed on the refrigerator? WARNING Cut Hazard Use a sturdy glass when dispensing ice. Change the ice button from the ejector arm with an interior ice bin, ...

Owners Manual
Page 9
...installation or changing filters? The first glass of water recently dispensed? Water is leaking from the dispenser is used. ■ Is the refrigerator connected to the home determines the flow from the dispenser. ■ Is there a water filter installed on , incorrectly installed or clogged...; Is a reverse osmosis water filtration system connected to your authorized Whirlpool dealer. The dispenser water is held in either the Installation Instructions or the Use and Care Guide. Allow 24 hours for the refrigerator to reset before using again. See "Water Supply Requirements" in ...
...installation or changing filters? The first glass of water recently dispensed? Water is leaking from the dispenser is used. ■ Is the refrigerator connected to the home determines the flow from the dispenser. ■ Is there a water filter installed on , incorrectly installed or clogged...; Is a reverse osmosis water filtration system connected to your authorized Whirlpool dealer. The dispenser water is held in either the Installation Instructions or the Use and Care Guide. Allow 24 hours for the refrigerator to reset before using again. See "Water Supply Requirements" in ...
Owners Manual
Page 12
...to determine if another warranty applies. 9/07 For additional product information, in the U.S.A., visit www.whirlpool.com In Canada, visit www.whirlpool.ca If you on the inside wall of the refrigerator compartment. Any food loss due to repair or replace appliance light bulbs, air filters or water ...filters. This major appliance is designed to correct house wiring or plumbing. 2. You can write to Whirlpool with any questions or concerns at the...
...to determine if another warranty applies. 9/07 For additional product information, in the U.S.A., visit www.whirlpool.com In Canada, visit www.whirlpool.ca If you on the inside wall of the refrigerator compartment. Any food loss due to repair or replace appliance light bulbs, air filters or water ...filters. This major appliance is designed to correct house wiring or plumbing. 2. You can write to Whirlpool with any questions or concerns at the...

