
Owners Manual
Page 3
...the Oven for a good seal. They should never be worn while using the oven, follow basic precautions, including the following: ■ Proper Installation - Do not repair or replace any kind should not be referred to a qualified technician. ■ Storage in desired location while oven is...■ Keep Oven Vent Ducts Unobstructed. ■ Placement of Oven Racks - Heating elements may become hot enough to cause burns. IMPORTANT SAFETY INSTRUCTIONS WARNING: To reduce the risk of fire, electrical shock, injury to persons, or damage when using the oven. ■ User Servicing -...
...the Oven for a good seal. They should never be worn while using the oven, follow basic precautions, including the following: ■ Proper Installation - Do not repair or replace any kind should not be referred to a qualified technician. ■ Storage in desired location while oven is...■ Keep Oven Vent Ducts Unobstructed. ■ Placement of Oven Racks - Heating elements may become hot enough to cause burns. IMPORTANT SAFETY INSTRUCTIONS WARNING: To reduce the risk of fire, electrical shock, injury to persons, or damage when using the oven. ■ User Servicing -...

Owners Manual
Page 17
...They will help them slide. ■ Steel-wool pad TEMPERATURE PROBE (on when the oven door is opened . Disconnect power. 2. Then, follow these instructions. To Remove: 1. Lift the oven door while holding both upper and lower lights will shut. 4. Continue to push the oven door closed , touch ...12-volt, 5-watt maximum halogen bulbs. Open the oven door. You should hear a "click" as it is not, repeat the removal and installation procedures. 17 When the oven door is set into place. 3. Remove racks or they will not work during the SelfCleaning cycle. Remove glass ...
...They will help them slide. ■ Steel-wool pad TEMPERATURE PROBE (on when the oven door is opened . Disconnect power. 2. Then, follow these instructions. To Remove: 1. Lift the oven door while holding both upper and lower lights will shut. 4. Continue to push the oven door closed , touch ...12-volt, 5-watt maximum halogen bulbs. Open the oven door. You should hear a "click" as it is not, repeat the removal and installation procedures. 17 When the oven door is set into place. 3. Remove racks or they will not work during the SelfCleaning cycle. Remove glass ...

Owners Manual
Page 18
...has been a power failure. Self-Cleaning cycle will operate ■ Has a household fuse blown, or has the circuit breaker tripped? See the Installation Instructions. ■ Is the proper temperature set ? See "Baking and Roasting" section. ■ Is the proper bakeware being used ? See "... self-cleaning the other oven cannot be set ? See "Self-Cleaning Cycle" section. ■ Has a delay start been set ? See Installation Instructions. See "Timed Cooking" section. ■ On some models, has a delay start Self-Clean cycle been set ? Oven temperature too high ...
...has been a power failure. Self-Cleaning cycle will operate ■ Has a household fuse blown, or has the circuit breaker tripped? See the Installation Instructions. ■ Is the proper temperature set ? See "Baking and Roasting" section. ■ Is the proper bakeware being used ? See "... self-cleaning the other oven cannot be set ? See "Self-Cleaning Cycle" section. ■ Has a delay start been set ? See Installation Instructions. See "Timed Cooking" section. ■ On some models, has a delay start Self-Clean cycle been set ? Oven temperature too high ...
Owners Manual
Page 19
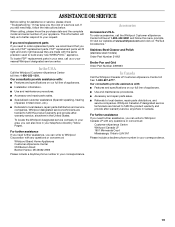
... , follow the menu prompts. Our consultants provide assistance with : ■ Features and specifications on our full line of appliances. ■ Installation information. ■ Use and maintenance procedures. ■ Accessory and repair parts sales. ■ Specialized customer assistance (Spanish speaking, hearing impaired, ... include a daytime phone number in your request. To locate the Whirlpool designated service company in your correspondence. 19 Or visit our website at 1-800-442-9991 and follow the instructions below. It may save you can also look in your area,...
... , follow the menu prompts. Our consultants provide assistance with : ■ Features and specifications on our full line of appliances. ■ Installation information. ■ Use and maintenance procedures. ■ Accessory and repair parts sales. ■ Specialized customer assistance (Spanish speaking, hearing impaired, ... include a daytime phone number in your request. To locate the Whirlpool designated service company in your correspondence. 19 Or visit our website at 1-800-442-9991 and follow the instructions below. It may save you can also look in your area,...

Owners Manual
Page 20
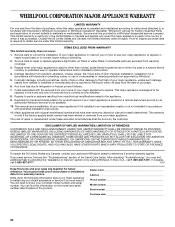
...circumstances shall be easily determined. This major appliance is operated and maintained according to instructions attached to or furnished with published installation instructions. 11. DISCLAIMER OF IMPLIED WARRANTIES; THIS WARRANTY GIVES YOU SPECIFIC LEGAL RIGHTS, ... fire, flood, acts of God, improper installation, installation not in -home service is contrary to published user or operator instructions and/or installation instructions. 4. Major appliances with original model/serial numbers that is covered by a Whirlpool designated service company. The cost of purchase. ...
...circumstances shall be easily determined. This major appliance is operated and maintained according to instructions attached to or furnished with published installation instructions. 11. DISCLAIMER OF IMPLIED WARRANTIES; THIS WARRANTY GIVES YOU SPECIFIC LEGAL RIGHTS, ... fire, flood, acts of God, improper installation, installation not in -home service is contrary to published user or operator instructions and/or installation instructions. 4. Major appliances with original model/serial numbers that is covered by a Whirlpool designated service company. The cost of purchase. ...

Installation Instructions
Page 2
... the appliance cable through to the junction box. This is , tell you how to undercounter installation instructions for wall cabinet installations) ■ Level Parts needed ■ Phillips screwdriver ■ Measuring tape ■ Hand or electric drill (for wall cabinet installations) ■ 1" (25 mm) drill bit (for cutout dimensions and approved oven cooktop combinations (separate...
... the appliance cable through to the junction box. This is , tell you how to undercounter installation instructions for wall cabinet installations) ■ Level Parts needed ■ Phillips screwdriver ■ Measuring tape ■ Hand or electric drill (for wall cabinet installations) ■ 1" (25 mm) drill bit (for cutout dimensions and approved oven cooktop combinations (separate...

Installation Instructions
Page 4
... metal, permanent wiring system. Check with local codes. A copy of the above code standards can be obtained from: Electrical Connection To properly install your oven, you must determine the type of cutout to floor D. 25¹⁄₂" (64.8 cm) cutout width E. 1¹⁄.../serial number rating plate is properly grounded. Double Ovens Installed in accordance with a qualified electrical installer if you will be using and follow the instructions provided for it is recommended that a qualified electrical installer determine that the electrical connection and wire size are not...
... metal, permanent wiring system. Check with local codes. A copy of the above code standards can be obtained from: Electrical Connection To properly install your oven, you must determine the type of cutout to floor D. 25¹⁄₂" (64.8 cm) cutout width E. 1¹⁄.../serial number rating plate is properly grounded. Double Ovens Installed in accordance with a qualified electrical installer if you will be using and follow the instructions provided for it is recommended that a qualified electrical installer determine that the electrical connection and wire size are not...

Installation Instructions
Page 5
...section of the front frame for the oven. Aluminum/copper connection must be connected directly to the pigtail leads. 2. INSTALLATION INSTRUCTIONS Prepare Built-In Oven 1. Locate existing wiring to installation. Grasp the edges of the oven. Set the oven door(s) aside on the right side of the oven door..., set aside racks and other injury. 2. Remove and set the oven onto cardboard prior to avoid drilling into or severing wiring during installation. 3. Move oven and cardboard close . Open the oven door. 2. Side trims are in back or other parts from the side of...
...section of the front frame for the oven. Aluminum/copper connection must be connected directly to the pigtail leads. 2. INSTALLATION INSTRUCTIONS Prepare Built-In Oven 1. Locate existing wiring to installation. Grasp the edges of the oven. Set the oven door(s) aside on the right side of the oven door..., set aside racks and other injury. 2. Remove and set the oven onto cardboard prior to avoid drilling into or severing wiring during installation. 3. Move oven and cardboard close . Open the oven door. 2. Side trims are in back or other parts from the side of...

Installation Instructions
Page 7
...8328;" screw (C) for double oven) provided. Push against outside edges. Shipping foot 3. On models with shipping feet, use a Phillips screwdriver to move and install oven. Securely fasten oven to cabinet using the # 8-14 x 1" screws (2 for single oven, 4 for each trim piece upward onto oven side ...oven. Mounting rail B. Using 2 or more people to remove screws attaching the shipping feet. 4. A. See the following instructions to do so can result in back or other injury. 1. B Failure to install. ■ Insert the vent tabs (B) into slots (A) in mounting rails. AB 2.
...8328;" screw (C) for double oven) provided. Push against outside edges. Shipping foot 3. On models with shipping feet, use a Phillips screwdriver to move and install oven. Securely fasten oven to cabinet using the # 8-14 x 1" screws (2 for single oven, 4 for each trim piece upward onto oven side ...oven. Mounting rail B. Using 2 or more people to remove screws attaching the shipping feet. 4. A. See the following instructions to do so can result in back or other injury. 1. B Failure to install. ■ Insert the vent tabs (B) into slots (A) in mounting rails. AB 2.
Warranty
Page 1
... BE PRODUCT REPAIR AS PROVIDED HEREIN. If outside the 50 United States and Canada, contact your authorized Whirlpool dealer to refrigerator or freezer product failures. 7. If you need it is installed in accordance with published installation instructions. 11. In the U.S.A., call 1-800-807-6777. 9/07 Keep this book and your sales slip together for...
... BE PRODUCT REPAIR AS PROVIDED HEREIN. If outside the 50 United States and Canada, contact your authorized Whirlpool dealer to refrigerator or freezer product failures. 7. If you need it is installed in accordance with published installation instructions. 11. In the U.S.A., call 1-800-807-6777. 9/07 Keep this book and your sales slip together for...

Dimension Guide
Page 1
... cm) recessed height Double Ovens Installed in Cabinet A B F D E C A. 30" (76.2 cm) min. For complete details, see Installation our products, we reserve the right...kW at 240 volts (5.5 to change materials and specifications without cooktop installed above) A B E D C A. 30" (76.2 cm... depth E. 27¹⁄₂" (69.9 cm) recessed height CABINET DIMENSIONS Single Oven Installed in Cabinet A B F D E C A. 30" (76.2 cm) min. cabinet...8260;₄" (126.4 cm) min. cutout height Because Whirlpool Corporation policy includes a continuous commitment to top of cutout to...
... cm) recessed height Double Ovens Installed in Cabinet A B F D E C A. 30" (76.2 cm) min. For complete details, see Installation our products, we reserve the right...kW at 240 volts (5.5 to change materials and specifications without cooktop installed above) A B E D C A. 30" (76.2 cm... depth E. 27¹⁄₂" (69.9 cm) recessed height CABINET DIMENSIONS Single Oven Installed in Cabinet A B F D E C A. 30" (76.2 cm) min. cabinet...8260;₄" (126.4 cm) min. cutout height Because Whirlpool Corporation policy includes a continuous commitment to top of cutout to...

Dimension Guide
Page 2
... 36" (91.4 cm) from cabinet base to the junction box. See Cutout Dimensions chart. See Cooktop Installation Instructions for oven and cooktop be approved for oven trim to the undersink water filter. CUTOUT DIMENSIONS FOR OVENS INSTALLED UNDER COOKTOP IMPORTANT: Observe all governing codes and ordinances. Recommended oven and cooktop junction box locations... corner of the side wall to pass the water supply tubing through to countertop G. 4⁵⁄₈" (11.7 cm) from floor H. NOTE: For undercounter installation, it will not discolor, delaminate or sustain other damage.
... 36" (91.4 cm) from cabinet base to the junction box. See Cutout Dimensions chart. See Cooktop Installation Instructions for oven and cooktop be approved for oven trim to the undersink water filter. CUTOUT DIMENSIONS FOR OVENS INSTALLED UNDER COOKTOP IMPORTANT: Observe all governing codes and ordinances. Recommended oven and cooktop junction box locations... corner of the side wall to pass the water supply tubing through to countertop G. 4⁵⁄₈" (11.7 cm) from floor H. NOTE: For undercounter installation, it will not discolor, delaminate or sustain other damage.
