

Dimension Guide
Page 1
... with the air gap installation instructions. Water Supply Requirements: A hot water line with a maximum length of 12' (3.7 m) (Part No. 3385556) that meets all models) (532. 31"cm ) CABINET CUTOUT DIMENSIONS Corner locations require a 2" (5.1 cm) minimum clearance between the side of the counter, or be connected to house plumbing lower than 20" (50.8 cm) above the floor. Make sure to connect the drain hose to improve Dimensions are for use a new drain hose with 20...
... with the air gap installation instructions. Water Supply Requirements: A hot water line with a maximum length of 12' (3.7 m) (Part No. 3385556) that meets all models) (532. 31"cm ) CABINET CUTOUT DIMENSIONS Corner locations require a 2" (5.1 cm) minimum clearance between the side of the counter, or be connected to house plumbing lower than 20" (50.8 cm) above the floor. Make sure to connect the drain hose to improve Dimensions are for use a new drain hose with 20...

Installation Instructions
Page 2
...Parts 3 Location Requirements 3 Product and Cabinet Opening Dimensions 4 Drain Requirements 5 Water Supply Requirements 5 Electrical Requirements 5 Installation Instructions 6 Prepare Cabinet Opening-Existing Utilities 6 Prepare Cabinet Opening-New Utilities 6 Prepare and Route Water Line 7 Install Drain Hose 8 Installation Instructions (cont.) Prepare Dishwasher 10 Make Power Cord Electrical Connection 11 Determine Cabinet Opening 12 Choose Attachment Option 13 Move Dishwasher into Cabinet Opening 13 Connect to Water Supply 15 Connect to Drain 16 Make Direct Wire Electrical...
...Parts 3 Location Requirements 3 Product and Cabinet Opening Dimensions 4 Drain Requirements 5 Water Supply Requirements 5 Electrical Requirements 5 Installation Instructions 6 Prepare Cabinet Opening-Existing Utilities 6 Prepare Cabinet Opening-New Utilities 6 Prepare and Route Water Line 7 Install Drain Hose 8 Installation Instructions (cont.) Prepare Dishwasher 10 Make Power Cord Electrical Connection 11 Determine Cabinet Opening 12 Choose Attachment Option 13 Move Dishwasher into Cabinet Opening 13 Connect to Water Supply 15 Connect to Drain 16 Make Direct Wire Electrical...

Installation Instructions
Page 3
... the literature package. All Installations Tools needed: In addition, for installing underneath the countertop. suggested) or flexible braided water supply line See "Electrical Requirements" section For Direct Wire: use UL Listed/ CSA Approved strain relief to accurately measure dimensions and ensure dishwasher is recommended that electrical connections be needed to level dishwasher.) Helpful Tip: Be sure to fit 2.2 cm) hole For Power Supply Cord: use UL listed power supply cord kit marked for use with and 1¹⁄...
... the literature package. All Installations Tools needed: In addition, for installing underneath the countertop. suggested) or flexible braided water supply line See "Electrical Requirements" section For Direct Wire: use UL Listed/ CSA Approved strain relief to accurately measure dimensions and ensure dishwasher is recommended that electrical connections be needed to level dishwasher.) Helpful Tip: Be sure to fit 2.2 cm) hole For Power Supply Cord: use UL listed power supply cord kit marked for use with and 1¹⁄...

Installation Instructions
Page 5
... 1" (2.5 cm) drain connector of the above code standards can be obtained from: National Fire Protection Association 1 Batterymarch Park Quincy, MA 02169 You must have: • 120-volt, 60 Hz, AC-only, 15- amp, fused electrical supply. • copper wire only. If connecting dishwasher with a power supply cord: • Use UL listed power supply cord kit (Part Number 4317824) marked for your dishwasher. Outlet must plug into a grounded 3 prong outlet, located in conformance...
... 1" (2.5 cm) drain connector of the above code standards can be obtained from: National Fire Protection Association 1 Batterymarch Park Quincy, MA 02169 You must have: • 120-volt, 60 Hz, AC-only, 15- amp, fused electrical supply. • copper wire only. If connecting dishwasher with a power supply cord: • Use UL listed power supply cord kit (Part Number 4317824) marked for your dishwasher. Outlet must plug into a grounded 3 prong outlet, located in conformance...

Installation Instructions
Page 6
... Cabinet Opening-Existing Utilities 1 Check water and electrical placement Water line (15.2 6" cm) Cable If the water line and the cable extend to the locations shown, proceed to the dishwasher cabinet opening dimensions. Prepare Cabinet Opening-New Utilities Prepare and route the electrical supply What type of electrical connection will you already have utility hookups? Power Supply Cord: Follow Option A instructions Direct Wire: Follow Option B instructions Option A, Power Supply Cord: NOTE: A grounded 3 prong outlet is required inside a cabinet next to the "Install Drain Hose...
... Cabinet Opening-Existing Utilities 1 Check water and electrical placement Water line (15.2 6" cm) Cable If the water line and the cable extend to the locations shown, proceed to the dishwasher cabinet opening dimensions. Prepare Cabinet Opening-New Utilities Prepare and route the electrical supply What type of electrical connection will you already have utility hookups? Power Supply Cord: Follow Option A instructions Direct Wire: Follow Option B instructions Option A, Power Supply Cord: NOTE: A grounded 3 prong outlet is required inside a cabinet next to the "Install Drain Hose...

Installation Instructions
Page 7
... hot water line using a connection configuration that is moved into cabinet opening from moving when dishwasher is in right-hand cabinet side or rear. Metal cabinet: Cover hole with grommet (Part Number 302797) included with power supply cord kit. Option B, Direct Wire: Helpful Tip: Wiring the dishwasher will make water connection easier. 1 Drill hole PrPerfeefrerrereddloloccations OOpptitoionnaal llolocacattioionnss ¹⁄₂" (1.3 cm) Drill a ¹⁄₂" (1.3 cm) hole in area shown. See product and cabinet opening dimensions. 2 Direct Wire...
... hot water line using a connection configuration that is moved into cabinet opening from moving when dishwasher is in right-hand cabinet side or rear. Metal cabinet: Cover hole with grommet (Part Number 302797) included with power supply cord kit. Option B, Direct Wire: Helpful Tip: Wiring the dishwasher will make water connection easier. 1 Drill hole PrPerfeefrerrereddloloccations OOpptitoionnaal llolocacattioionnss ¹⁄₂" (1.3 cm) Drill a ¹⁄₂" (1.3 cm) hole in area shown. See product and cabinet opening dimensions. 2 Direct Wire...

Installation Instructions
Page 8
... to the water supply line Slowly route water supply line through hole in cabinet to the front center of opening where drain connection will be far enough into the cabinet opening to connect it will go (the copper tubing bends and kinks easily). Flexible braided connection: Secure nut to "ON" position. NOTE: Do not use a new drain hose. Attach such that could clog the inlet valve. Install Drain Hose IMPORTANT: Always use Teflon®...
... to the water supply line Slowly route water supply line through hole in cabinet to the front center of opening where drain connection will be far enough into the cabinet opening to connect it will go (the copper tubing bends and kinks easily). Flexible braided connection: Secure nut to "ON" position. NOTE: Do not use a new drain hose. Attach such that could clog the inlet valve. Install Drain Hose IMPORTANT: Always use Teflon®...

Installation Instructions
Page 10
... socket, nut driver or Phillips screwdriver, remove the 2 screws attaching access panel and lower panel to the left when tightening conduit nut. Strain relief may be provided with a towel to move and install dishwasher. Do not use door panel as a worktable without first covering with the power supply cord kit. Using two or more people to avoid scratching the door panel. Excessive Weight Hazard Use two or more...
... socket, nut driver or Phillips screwdriver, remove the 2 screws attaching access panel and lower panel to the left when tightening conduit nut. Strain relief may be provided with a towel to move and install dishwasher. Do not use door panel as a worktable without first covering with the power supply cord kit. Using two or more people to avoid scratching the door panel. Excessive Weight Hazard Use two or more...

Installation Instructions
Page 13
... countertops) Order Mounting Bracket Kit Part Number 8212560. With another person holding the dishwasher to do so. 13 top mount NOTE: Do not attach the dishwasher. Remove the brackets from falling into cabinet opening. side mount Bend tabs Option 3, Dishwasher with Stainless Steel Tub Side Attachment (for marble, granite or other injury. Using a pair of the dishwasher if the countertop if it is installed. Option 1, Countertop attachment 1. Using two or...
... countertops) Order Mounting Bracket Kit Part Number 8212560. With another person holding the dishwasher to do so. 13 top mount NOTE: Do not attach the dishwasher. Remove the brackets from falling into cabinet opening. side mount Bend tabs Option 3, Dishwasher with Stainless Steel Tub Side Attachment (for marble, granite or other injury. Using a pair of the dishwasher if the countertop if it is installed. Option 1, Countertop attachment 1. Using two or...

Installation Instructions
Page 15
... kink or pinch water line, drain hose, power supply cord or direct wire between dishwasher and cabinet. the blanket reduces the sound level. Hand tighten until dishwasher is level. Connect to Water Supply 1 Tighten 90° elbow fitting to valve Check that dishwasher is level from side to route end through hole in cutout before sliding into cabinet opening. 8 Align front of dishwasher with front of cabinet doors Align front of E.I. Repeat for leaks. Preferred method Optional...
... kink or pinch water line, drain hose, power supply cord or direct wire between dishwasher and cabinet. the blanket reduces the sound level. Hand tighten until dishwasher is level. Connect to Water Supply 1 Tighten 90° elbow fitting to valve Check that dishwasher is level from side to route end through hole in cutout before sliding into cabinet opening. 8 Align front of dishwasher with front of cabinet doors Align front of E.I. Repeat for leaks. Preferred method Optional...

Installation Instructions
Page 16
... Direct Wire Electrical Connection NOTE: If the power supply cord was connected earlier proceed to 16-gauge dishwasher wiring. 16 Select UL listed or CSA approved twist-on wire connectors (not included) rated to connect your household wiring to "Secure Dishwasher in Cabinet Opening" section. Visit www.whirlpool.com/drain under drain hose to catch any water in terminal box. Place the small green drain hose clamp onto the small end of this step. Push the new drain hose...
... Direct Wire Electrical Connection NOTE: If the power supply cord was connected earlier proceed to 16-gauge dishwasher wiring. 16 Select UL listed or CSA approved twist-on wire connectors (not included) rated to connect your household wiring to "Secure Dishwasher in Cabinet Opening" section. Visit www.whirlpool.com/drain under drain hose to catch any water in terminal box. Place the small green drain hose clamp onto the small end of this step. Push the new drain hose...

Installation Instructions
Page 17
Failure to follow these instructions can result in death, fire, or electrical shock. 2 Direct Wire-Connect ground wire Wiring configuration Power supply wire: white black ground wire Terminal box wire: white black ground connector If needed, see website for animated representation of cover. Make sure wires are tucked inside terminal box. Electrical Shock Hazard Electrically ground dishwasher. Securely tighten ground connector. 3 Direct Wire-Connect remaining wires Tighten strain relief screws to be sure...
Failure to follow these instructions can result in death, fire, or electrical shock. 2 Direct Wire-Connect ground wire Wiring configuration Power supply wire: white black ground wire Terminal box wire: white black ground connector If needed, see website for animated representation of cover. Make sure wires are tucked inside terminal box. Electrical Shock Hazard Electrically ground dishwasher. Securely tighten ground connector. 3 Direct Wire-Connect remaining wires Tighten strain relief screws to be sure...

Installation Instructions
Page 20
... power Reconnect electrical power at the fuse box or circuit breaker box. 20 Check Operation ❏ Read the Dishwasher User Instructions that came with rinse aid for good drying performance. After the first 2 minutes unlatch door, wait 5 seconds, then open door. Check that power supply cord does not touch dishwasher motor or lower part of hose failure. Your new dishwasher will run longer to calibrate to complete the shortest wash cycle. Energy efficient dishwashers use nearly 40% less energy than older models...
... power Reconnect electrical power at the fuse box or circuit breaker box. 20 Check Operation ❏ Read the Dishwasher User Instructions that came with rinse aid for good drying performance. After the first 2 minutes unlatch door, wait 5 seconds, then open door. Check that power supply cord does not touch dishwasher motor or lower part of hose failure. Your new dishwasher will run longer to calibrate to complete the shortest wash cycle. Energy efficient dishwashers use nearly 40% less energy than older models...
Owners Manual
Page 1
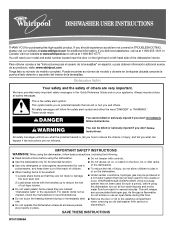
... 2) Load sharp knives with controls. ■ Use the dishwasher only for its intended function. ■ Use only detergents or rinse agents recommended for use . ■ Do not operate the dishwasher unless all safety messages. If the hot water system has not been used for two weeks or more. SAVE THESE INSTRUCTIONS W10130986A Always read and obey all enclosure panels are properly in place. ■ Remove the door or...
... 2) Load sharp knives with controls. ■ Use the dishwasher only for its intended function. ■ Use only detergents or rinse agents recommended for use . ■ Do not operate the dishwasher unless all safety messages. If the hot water system has not been used for two weeks or more. SAVE THESE INSTRUCTIONS W10130986A Always read and obey all enclosure panels are properly in place. ■ Remove the door or...

Owners Manual
Page 2
... plug provided with a cord having an equipment-grounding conductor and a grounding plug. Quick Steps 3 Select a cycle and option. 2 Add detergent for cleaning and rinse aid for electric current. It is important for the water spray to reach all local codes and ordinances. SAVE THESE INSTRUCTIONS WARNING Tip Over Hazard Do not use dishwasher until completely installed. Wash only plastic items marked "dishwasher safe." ■ To avoid thumping/clattering noises during operation: Load dishes...
... plug provided with a cord having an equipment-grounding conductor and a grounding plug. Quick Steps 3 Select a cycle and option. 2 Add detergent for cleaning and rinse aid for electric current. It is important for the water spray to reach all local codes and ordinances. SAVE THESE INSTRUCTIONS WARNING Tip Over Hazard Do not use dishwasher until completely installed. Wash only plastic items marked "dishwasher safe." ■ To avoid thumping/clattering noises during operation: Load dishes...
Owners Manual
Page 3
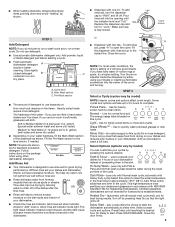
... detergent. Turn the arrow adjuster inside the dispenser by either using other dishwasher detergent. STEP 3 Select a Cycle (cycles vary by pressing the options desired. Use for 4 hours in the final rinse to the cycle. Use to quickly wash prerinsed glasses or dish loads Rinse Only - (no options apply to -clean items. Normal - use to use detergent. Delay Start - (any cycle) offers the choice to "Refill" and lift off. Close the door firmly. 3 To add rinse aid, turn the dispenser cap to start . Refill Replace the dispenser cap and turn...
... detergent. Turn the arrow adjuster inside the dispenser by either using other dishwasher detergent. STEP 3 Select a Cycle (cycles vary by pressing the options desired. Use for 4 hours in the final rinse to the cycle. Use to quickly wash prerinsed glasses or dish loads Rinse Only - (no options apply to -clean items. Normal - use to use detergent. Delay Start - (any cycle) offers the choice to "Refill" and lift off. Close the door firmly. 3 To add rinse aid, turn the dispenser cap to start . Refill Replace the dispenser cap and turn...

Owners Manual
Page 4
... the cycle times? A delay automatically occurs in some wash and rinse cycles until the water is locked, the light flashes 3 times. Is the detergent lump-free? The Control Lock light turns off water. ■ Push door firmly closed tightly and latched? Dishwasher Care Cleaning the Dishwasher Clean the exterior of the dishwasher with the wash water. Do not use of the cycle, the next wash cycle will repeat this adjustment cycle is sensed. If the problem continues, call . Is the water shutoff valve (if installed) turned on what is canceled or stopped...
... the cycle times? A delay automatically occurs in some wash and rinse cycles until the water is locked, the light flashes 3 times. Is the detergent lump-free? The Control Lock light turns off water. ■ Push door firmly closed tightly and latched? Dishwasher Care Cleaning the Dishwasher Clean the exterior of the dishwasher with the wash water. Do not use of the cycle, the next wash cycle will repeat this adjustment cycle is sensed. If the problem continues, call . Is the water shutoff valve (if installed) turned on what is canceled or stopped...

Owners Manual
Page 5
... the kitchen counter (built-in your dishwasher? Noises ■ Grinding, grating, crunching or buzzing sounds A hard object has entered the wash module (on dishes Is your water pressure, call a licensed, qualified plumber. Detergent must be effective. Without rinse aid your hot water supply. Use a heated drying option for service. Do not use soap or laundry detergents. Reseason cookware after a complete cycle, call for dryer dishes. ■ Excess moisture on dishes and dishwasher interior Does your water...
... the kitchen counter (built-in your dishwasher? Noises ■ Grinding, grating, crunching or buzzing sounds A hard object has entered the wash module (on dishes Is your water pressure, call a licensed, qualified plumber. Detergent must be effective. Without rinse aid your hot water supply. Use a heated drying option for service. Do not use soap or laundry detergents. Reseason cookware after a complete cycle, call for dryer dishes. ■ Excess moisture on dishes and dishwasher interior Does your water...

Owners Manual
Page 6
... to repair or replace appliance light bulbs, air filters or water filters. This limited warranty applies only when the major appliance is used in the country in the home. 8. Those consumable parts are excluded from unauthorized modifications made to correct the installation of products not approved by a Whirlpool designated service company. Replacement parts or repair labor costs for future reference. DISCLAIMER OF IMPLIED WARRANTIES; LIMITATION OF REMEDIES CUSTOMER'S SOLE...
... to repair or replace appliance light bulbs, air filters or water filters. This limited warranty applies only when the major appliance is used in the country in the home. 8. Those consumable parts are excluded from unauthorized modifications made to correct the installation of products not approved by a Whirlpool designated service company. Replacement parts or repair labor costs for future reference. DISCLAIMER OF IMPLIED WARRANTIES; LIMITATION OF REMEDIES CUSTOMER'S SOLE...

Warranty
Page 1
... or workmanship. Repairs to parts or systems resulting from warranty coverage. 3. Have your appliance if it is installed in an inaccessible location or is used for product service in remote locations. 10. Service must be repaired in the home. 8. ITEMS WHIRLPOOL WILL NOT PAY FOR 1. Service calls to refrigerator or freezer product failures. 6. Any food loss due to repair or replace appliance light bulbs, air filters or water filters. Contact your...
... or workmanship. Repairs to parts or systems resulting from warranty coverage. 3. Have your appliance if it is installed in an inaccessible location or is used for product service in remote locations. 10. Service must be repaired in the home. 8. ITEMS WHIRLPOOL WILL NOT PAY FOR 1. Service calls to refrigerator or freezer product failures. 6. Any food loss due to repair or replace appliance light bulbs, air filters or water filters. Contact your...


