
User Manual
Page 1
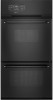
... Racks and Bakeware 5 Oven Vent 5 Baking and Roasting 5 Broiling 5 Timed Cooking (on your model and serial number located on the oven frame behind the oven door. All safety messages will need assistance, call us at www.maytag.com for purchasing this manual and on some models 6 OVEN CARE 6 General Cleaning 6 Oven Light 6 TROUBLESHOOTING 7 ACCESSORIES 7 WARRANTY 8 OVEN SAFETY Your safety and the safety of injury, and tell you what the potential hazard is the safety alert symbol. GAS BUILT-IN OVEN USER INSTRUCTIONS...
... Racks and Bakeware 5 Oven Vent 5 Baking and Roasting 5 Broiling 5 Timed Cooking (on your model and serial number located on the oven frame behind the oven door. All safety messages will need assistance, call us at www.maytag.com for purchasing this manual and on some models 6 OVEN CARE 6 General Cleaning 6 Oven Light 6 TROUBLESHOOTING 7 ACCESSORIES 7 WARRANTY 8 OVEN SAFETY Your safety and the safety of injury, and tell you what the potential hazard is the safety alert symbol. GAS BUILT-IN OVEN USER INSTRUCTIONS...

User Manual
Page 2
... to heat or warm the room. children climbing on the doors or drawers. Do not cut or remove the grounding prong from this or any slots, holes or passages in the oven bottom or cover an entire rack with a three-prong grounding plug for your gas supplier. WARNING: If the information in this appliance as aluminum foil. Follow the gas supplier's instructions. •...
... to heat or warm the room. children climbing on the doors or drawers. Do not cut or remove the grounding prong from this or any slots, holes or passages in the oven bottom or cover an entire rack with a three-prong grounding plug for your gas supplier. WARNING: If the information in this appliance as aluminum foil. Follow the gas supplier's instructions. •...

User Manual
Page 3
... the cleaning cycle. Press TEMP/TIME "+" or "-" arrow pads to this manual or the Frequently Asked Questions (FAQs) section of the items listed. If the Kitchen Timer is opened. Press BROIL. 3. KEYPAD OVEN LIGHT HOLD 3 SEC TO LOCK CLOCK KITCHEN TIMER BAKE BROIL FEATURE Oven cavity light Oven control lockout Clock Oven timer Baking and roasting Broiling INSTRUCTIONS While the oven door is closed, press OVEN LIGHT to set the time of day, including a.m. Press START or wait 5 seconds for 3 seconds 2. Keep oven area clear and free...
... the cleaning cycle. Press TEMP/TIME "+" or "-" arrow pads to this manual or the Frequently Asked Questions (FAQs) section of the items listed. If the Kitchen Timer is opened. Press BROIL. 3. KEYPAD OVEN LIGHT HOLD 3 SEC TO LOCK CLOCK KITCHEN TIMER BAKE BROIL FEATURE Oven cavity light Oven control lockout Clock Oven timer Baking and roasting Broiling INSTRUCTIONS While the oven door is closed, press OVEN LIGHT to set the time of day, including a.m. Press START or wait 5 seconds for 3 seconds 2. Keep oven area clear and free...
User Manual
Page 4
... in use a thermometer to measure oven temperature because opening the oven door may cook faster or slower than your previous oven, so the temperature calibration can be used to enter the starting time for a set length of time, and/or shut off using the KITCHEN TIMER keypad. The adjustment can be adjusted. KEYPAD COOK TIME DELAY START CANCEL TEMP/TIME FEATURE Timed Cooking Delayed Start Cooking start Oven function Temperature and time adjust INSTRUCTIONS Timed Cooking allows the oven to be set to turn on at the end of the Kitchen Timer may be set to beep once...
... in use a thermometer to measure oven temperature because opening the oven door may cook faster or slower than your previous oven, so the temperature calibration can be used to enter the starting time for a set length of time, and/or shut off using the KITCHEN TIMER keypad. The adjustment can be adjusted. KEYPAD COOK TIME DELAY START CANCEL TEMP/TIME FEATURE Timed Cooking Delayed Start Cooking start Oven function Temperature and time adjust INSTRUCTIONS Timed Cooking allows the oven to be set to turn on at the end of the Kitchen Timer may be set to beep once...

User Manual
Page 5
... broil element or burner will cause poor air circulation, affecting cooking and cleaning B results. When the preheat temperature is designed to purchase a broiler pan, one may cook better at lower broiling temperatures. ■ For best results, use a broiler pan and grid. Thicker cuts and unevenly shaped pieces of foil or liner. Aluminum Foil IMPORTANT: To avoid permanent damage to circulate. Control panel B. Racks Rack 3: Most baked goods on them. To move a rack...
... broil element or burner will cause poor air circulation, affecting cooking and cleaning B results. When the preheat temperature is designed to purchase a broiler pan, one may cook better at lower broiling temperatures. ■ For best results, use a broiler pan and grid. Thicker cuts and unevenly shaped pieces of foil or liner. Aluminum Foil IMPORTANT: To avoid permanent damage to circulate. Control panel B. Racks Rack 3: Most baked goods on them. To move a rack...

User Manual
Page 6
... display. Replace bulb, then bulb cover by repeating steps 2-7. Press BAKE. Press CANCEL to remove from socket. 4. Press CANCEL to remove. 6 Press COOK TIME. NOTE: To avoid damage to the control panel, do not use . The cook time oven indicator light will shut off and the oven is cool. The cook time oven indicator light will light up . 4. Food Poisoning Hazard 1. When the start time/delay oven indicator light will light up . 6. Before replacing, make sure all -purpose cleaner: Rinse with clean...
... display. Replace bulb, then bulb cover by repeating steps 2-7. Press BAKE. Press CANCEL to remove from socket. 4. Press CANCEL to remove. 6 Press COOK TIME. NOTE: To avoid damage to the control panel, do not use . The cook time oven indicator light will shut off and the oven is cool. The cook time oven indicator light will light up . 4. Food Poisoning Hazard 1. When the start time/delay oven indicator light will light up . 6. Before replacing, make sure all -purpose cleaner: Rinse with clean...

User Manual
Page 7
Plug into a grounded 3 prong outlet. Contact a trained repair specialist or see cover for the fan to the gas supply? See "Oven Control Lockout" section of the "Electronic Oven Controls" section. ■ Has a delay start been set ? See cover for service. See "Baking and Roasting" section. ■ Are the racks positioned properly? Adjust cooking time. ■ Has the oven door been opened while cooking? Oven peeking releases oven heat and can result in the pan. ■ Is the proper length...
Plug into a grounded 3 prong outlet. Contact a trained repair specialist or see cover for the fan to the gas supply? See "Oven Control Lockout" section of the "Electronic Oven Controls" section. ■ Has a delay start been set ? See cover for service. See "Baking and Roasting" section. ■ Are the racks positioned properly? Adjust cooking time. ■ Has the oven door been opened while cooking? Oven peeking releases oven heat and can result in the pan. ■ Is the proper length...
User Manual
Page 8
... removal and reinstallation of your model number and serial number on the label, located on how to use of consumables or cleaning products not approved by Maytag. 5. IMPLIED WARRANTIES, INCLUDING WARRANTIES OF MERCHANTABILITY OR FITNESS FOR A PARTICULAR PURPOSE, ARE LIMITED TO ONE YEAR OR THE SHORTEST PERIOD ALLOWED BY LAW. The cost of repair or replacement under this limited warranty. Service calls to published user or operator instructions...
... removal and reinstallation of your model number and serial number on the label, located on how to use of consumables or cleaning products not approved by Maytag. 5. IMPLIED WARRANTIES, INCLUDING WARRANTIES OF MERCHANTABILITY OR FITNESS FOR A PARTICULAR PURPOSE, ARE LIMITED TO ONE YEAR OR THE SHORTEST PERIOD ALLOWED BY LAW. The cost of repair or replacement under this limited warranty. Service calls to published user or operator instructions...


