Quick Install Guide (pdf)
Page 1
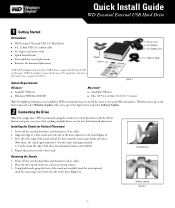
... and select Software Update. 2 Connecting the Drive Note: For a single drive, WD recommends using the stands for maximum balance and stability. 4. Press the other stand. Repeat this process for vertical placement ! Using both hands, grasp the base of the significant reduction in USB 2.0 host is required for horizontal placement Stands Feet Power Cord AC Adapter AC Adapter Cord USB 2.0 Cable *USB 2.0 PCI adapter card or built-in file transfer time compared...
... and select Software Update. 2 Connecting the Drive Note: For a single drive, WD recommends using the stands for maximum balance and stability. 4. Press the other stand. Repeat this process for vertical placement ! Using both hands, grasp the base of the significant reduction in USB 2.0 host is required for horizontal placement Stands Feet Power Cord AC Adapter AC Adapter Cord USB 2.0 Cable *USB 2.0 PCI adapter card or built-in file transfer time compared...
Quick Install Guide (pdf)
Page 2
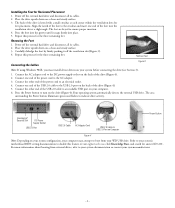
... BIOS setting documentation to the AC adapter. 3. Connect one end of the USB 2.0 cable to an electrical outlet. 4. Your operating system automatically detects the external USB drive. Installing the Feet for the three remaining feet. Place the drive upside down on a clean and steady surface. 3. Remove Feet Connecting the Cables Figure 3 Note: If using Windows 98SE, you must install device drivers on the drive (Figure 4). Power off the external hard drive and disconnect all its cables...
... BIOS setting documentation to the AC adapter. 3. Connect one end of the USB 2.0 cable to an electrical outlet. 4. Your operating system automatically detects the external USB drive. Installing the Feet for the three remaining feet. Place the drive upside down on a clean and steady surface. 3. Remove Feet Connecting the Cables Figure 3 Note: If using Windows 98SE, you must install device drivers on the drive (Figure 4). Power off the external hard drive and disconnect all its cables...
Quick Install Guide (pdf)
Page 3
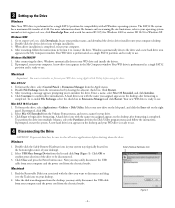
... begin drive formatting. Double-click the device driver icon to close all Windows operating systems. The FAT32 file system has a maximum file transfer of your desktop). 2. Macintosh Important: You must reinitialize or format your WD drive using the drive. Click Continue to support.wdc.com, click Downloads, locate your product name, and download the device driver installer onto your computer and the power cord from the list and click Stop (Figure 5). Safely Remove Hardware...
... begin drive formatting. Double-click the device driver icon to close all Windows operating systems. The FAT32 file system has a maximum file transfer of your desktop). 2. Macintosh Important: You must reinitialize or format your WD drive using the drive. Click Continue to support.wdc.com, click Downloads, locate your product name, and download the device driver installer onto your computer and the power cord from the list and click Stop (Figure 5). Safely Remove Hardware...
Quick Install Guide (pdf)
Page 4
...-1 for lost data arising out of or in accordance with the purchase, use, or performance of the Product, even if WD has been advised of the possibility of warranty, check the warranty expiration (serial number required) via support.wdc.com. CAN/CSA-C22.2 No. 60950-1, UL 60950-1. Part 1: General Requirements (File E101559). Warranty Information This product contains no liability for Product return. Refer servicing only to you...
...-1 for lost data arising out of or in accordance with the purchase, use, or performance of the Product, even if WD has been advised of the possibility of warranty, check the warranty expiration (serial number required) via support.wdc.com. CAN/CSA-C22.2 No. 60950-1, UL 60950-1. Part 1: General Requirements (File E101559). Warranty Information This product contains no liability for Product return. Refer servicing only to you...


