
User Manual
Page 3
...2 Battery installation 3 Battery charging 4 Installation options 5 Tabletop to wall mount installation 5 Wall mount to tabletop installation 6 Telephone base layout 7 Handset layout 8 Telephone settings 11 Ringer volume (telephone base).... 11 Ringer volume (handset 11 Ringer tone 11 LCD language 12 Clear voicemail 12 Key tone 13 Set date/time 13 CID time synchronization 14 Home area code 14 Dial mode 15 Website 15 Answering system settings........ 16 Answering system setup 16 Answer ON/OFF 16 Call screening 17 Number of rings 17 Remote access code 18 Message alert tone...
...2 Battery installation 3 Battery charging 4 Installation options 5 Tabletop to wall mount installation 5 Wall mount to tabletop installation 6 Telephone base layout 7 Handset layout 8 Telephone settings 11 Ringer volume (telephone base).... 11 Ringer volume (handset 11 Ringer tone 11 LCD language 12 Clear voicemail 12 Key tone 13 Set date/time 13 CID time synchronization 14 Home area code 14 Dial mode 15 Website 15 Answering system settings........ 16 Answering system setup 16 Answer ON/OFF 16 Call screening 17 Number of rings 17 Remote access code 18 Message alert tone...
User Manual
Page 4
..., ACTA and IC regulations...... 68 Technical specifications 70 Index 71 Answering system operation..... 43 Answering system and voicemail 43 Message capacity 43 New message indication 44 Call intercept 44 Message playback 44 Delete all messages 46 Record and play memos 46 Message window displays 47 Remote access 48 Appendix 49 Handset display screen messages 49 Handset and telephone base indicators 51 Battery 52 Expand your telephone system..... 53 Add and register a handset (optional 53 Replace a handset 54 Troubleshooting 55 Important safety instructions......... 62 ii
..., ACTA and IC regulations...... 68 Technical specifications 70 Index 71 Answering system operation..... 43 Answering system and voicemail 43 Message capacity 43 New message indication 44 Call intercept 44 Message playback 44 Delete all messages 46 Record and play memos 46 Message window displays 47 Remote access 48 Appendix 49 Handset display screen messages 49 Handset and telephone base indicators 51 Battery 52 Expand your telephone system..... 53 Add and register a handset (optional 53 Replace a handset 54 Troubleshooting 55 Important safety instructions......... 62 ii
User Manual
Page 16
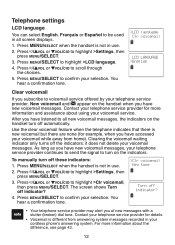
... voicemail waiting indicator only turns off indicator? 4. To manually turn on the handset turn off automatically. Press MENU/SELECT when the handset is not in use . 2. You hear a confirmation tone. >Clr voicemail Key tone Turn off these indicators: 1. Press MENU/SELECT to voicemail service offered by your telephone service provider, New voicemail and appear on the handset when you of new messages with a stutter (broken) dial tone. it does not delete your voicemail while away from answering system messages recorded in all new voicemail messages, the indicators...
... voicemail waiting indicator only turns off indicator? 4. To manually turn on the handset turn off automatically. Press MENU/SELECT when the handset is not in use . 2. You hear a confirmation tone. >Clr voicemail Key tone Turn off these indicators: 1. Press MENU/SELECT to voicemail service offered by your telephone service provider, New voicemail and appear on the handset when you of new messages with a stutter (broken) dial tone. it does not delete your voicemail while away from answering system messages recorded in all new voicemail messages, the indicators...
User Manual
Page 17
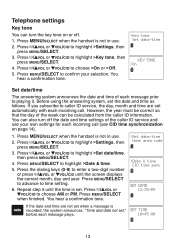
... turn the key tone on page 14). 1. Press / VOL or VOL/CID to highlight >Settings, then press MENU/SELECT. 3. Press MENU/SELECT when the handset is set the date and time as follows. Telephone settings Key tone You can turn off . 1. Press the dialing keys (0-9) to time setting. 6. Press MENU/SELECT to advance to enter a two-digit number or press / VOL or VOL/CID until the time is not in use...
... turn the key tone on page 14). 1. Press / VOL or VOL/CID to highlight >Settings, then press MENU/SELECT. 3. Press MENU/SELECT when the handset is set the date and time as follows. Telephone settings Key tone You can turn off . 1. Press the dialing keys (0-9) to time setting. 6. Press MENU/SELECT to advance to enter a two-digit number or press / VOL or VOL/CID until the time is not in use...

User Manual
Page 18
..., the telephone number is not in use . 2. Press MENU/SELECT to be set by incoming >Set date/time caller ID information. Home area code 1. Press MENU/SELECT when the handset is On. Press / VOL or VOL/CID to choose >On or >Off, then press MENU/SELECT to highlight >Settings, then press MENU/SELECT. >Home area code Dial mode 3. Press / VOL or VOL/CID to confirm your telephone service provider...
..., the telephone number is not in use . 2. Press MENU/SELECT to be set by incoming >Set date/time caller ID information. Home area code 1. Press MENU/SELECT when the handset is On. Press / VOL or VOL/CID to choose >On or >Off, then press MENU/SELECT to highlight >Settings, then press MENU/SELECT. >Home area code Dial mode 3. Press / VOL or VOL/CID to confirm your telephone service provider...

User Manual
Page 21
... call . Answering system settings Call screening You can choose from two, four, or six rings; This enables you to check for that call. • If call screening is set to On while the answering system is answering a call, press /VOL once on the telephone base to the desired level for new messages and avoid paying unnecessary long distance charges if you have new messages, and after four rings when you are being recorded...
... call . Answering system settings Call screening You can choose from two, four, or six rings; This enables you to check for that call. • If call screening is set to On while the answering system is answering a call, press /VOL once on the telephone base to the desired level for new messages and avoid paying unnecessary long distance charges if you have new messages, and after four rings when you are being recorded...
User Manual
Page 22
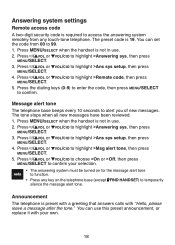
... code from any key on the telephone base (except /FIND HANDSET) to 99. 1. Answering system settings Remote access code A two-digit security code is required to highlight >Answering sys, then press MENU/SELECT. 3. Press MENU/SELECT when the handset is preset with a greeting that answers calls with your selection. • The answering system must be turned on for the message alert tone to function. • Press any touch-tone telephone. The tone stops when all new messages have been reviewed...
... code from any key on the telephone base (except /FIND HANDSET) to 99. 1. Answering system settings Remote access code A two-digit security code is required to highlight >Answering sys, then press MENU/SELECT. 3. Press MENU/SELECT when the handset is preset with a greeting that answers calls with your selection. • The answering system must be turned on for the message alert tone to function. • Press any touch-tone telephone. The tone stops when all new messages have been reviewed...
User Manual
Page 24
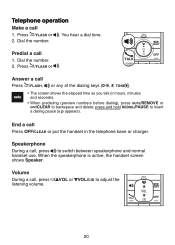
... MUTE/REMOVE or OFF/CLEAR to backspace and delete; Volume During a call Press /FLASH, or any of the dialing keys (0-9, #, TONE ). • The screen shows the elapsed time as you talk (in the telephone base or charger. Press /FLASH or . Answer a call , press / VOL or VOL/CID to adjust the listening volume. 20 Dial the number. 2. Speakerphone During a call 1. Press /FLASH or . Telephone operation Make a call , press to switch between speakerphone and normal handset use. When the speakerphone is active, the handset screen shows Speaker...
... MUTE/REMOVE or OFF/CLEAR to backspace and delete; Volume During a call Press /FLASH, or any of the dialing keys (0-9, #, TONE ). • The screen shows the elapsed time as you talk (in the telephone base or charger. Press /FLASH or . Answer a call , press / VOL or VOL/CID to adjust the listening volume. 20 Dial the number. 2. Speakerphone During a call 1. Press /FLASH or . Telephone operation Make a call , press to switch between speakerphone and normal handset use. When the speakerphone is active, the handset screen shows Speaker...
User Manual
Page 26
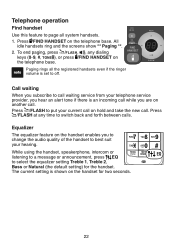
... default setting) for two seconds. 22 Press /FIND HANDSET on hold and take the new call . While using the handset, speakerphone, intercom or listening to a message or announcement, press EQ to page all the registered handsets even if the ringer volume is set to switch back and forth between calls. All idle handsets ring and the screens show ** Paging **. 2. Call waiting When you subscribe to call waiting service from your telephone service provider, you to change the...
... default setting) for two seconds. 22 Press /FIND HANDSET on hold and take the new call . While using the handset, speakerphone, intercom or listening to a message or announcement, press EQ to page all the registered handsets even if the ringer volume is set to switch back and forth between calls. All idle handsets ring and the screens show ** Paging **. 2. Call waiting When you subscribe to call waiting service from your telephone service provider, you to change the...

User Manual
Page 29
... out of the dialing keys (0-9, #, TONE ) on the originating or destination handset. The intercom call ends automatically. • To end the intercom call without answering the incoming call , press OFF/CLEAR or place the handset in the telephone base or charger. Both screens show Intercom. 4. Telephone operation Intercom Use the intercom feature for an outside call during an intercom call If you have a two-handset system, your handset screen shows Calling other handsets for conversations between two system handsets. >Intercom Ringers 1. Press MUTE/REMOVE again to...
... out of the dialing keys (0-9, #, TONE ) on the originating or destination handset. The intercom call ends automatically. • To end the intercom call without answering the incoming call , press OFF/CLEAR or place the handset in the telephone base or charger. Both screens show Intercom. 4. Telephone operation Intercom Use the intercom feature for an outside call during an intercom call If you have a two-handset system, your handset screen shows Calling other handsets for conversations between two system handsets. >Intercom Ringers 1. Press MUTE/REMOVE again to...

User Manual
Page 34
... dialing keys (0-9, #, TONE ) to answer the intercom call , press OFF/CLEAR or place the handset in the telephone base or charger. Speak towards the handset. • While you can press and hold PUSH TO TALK on , and your handset shows PTT From HSX to HSX (the first X represents the initiating handset number, the second X represents your handset number; a maximum of four handset numbers appear). • Your voice is off (the screen...
... dialing keys (0-9, #, TONE ) to answer the intercom call , press OFF/CLEAR or place the handset in the telephone base or charger. Speak towards the handset. • While you can press and hold PUSH TO TALK on , and your handset shows PTT From HSX to HSX (the first X represents the initiating handset number, the second X represents your handset number; a maximum of four handset numbers appear). • Your voice is off (the screen...

User Manual
Page 47
... have voicemail. The actual recording time depends on the telephone base (page 44). Some service providers bundle or combine multiple services like voicemail and call , the second caller can also use your answering system rather than your answering system, turn off your answering system to answer after six rings, set to program your voicemail settings, contact your voicemail answers after four rings. To use your telephone answering system and voicemail together by a security code or PIN. • To listen to messages recorded on a call...
... have voicemail. The actual recording time depends on the telephone base (page 44). Some service providers bundle or combine multiple services like voicemail and call , the second caller can also use your answering system rather than your answering system, turn off your answering system to answer after six rings, set to program your voicemail settings, contact your voicemail answers after four rings. To use your telephone answering system and voicemail together by a security code or PIN. • To listen to messages recorded on a call...

User Manual
Page 51
...Total number of messages recorded. 1-8 Telephone base speaker volume level while adjusting. -- The clock needs to be set , it flashes 0, or total number of new messages recorded, or total number of old messages recorded. The system is answering a call or being programmed. 0-6 Telephone base ringer level while adjusting. The answering system is full with total number of old messages recorded. Current message number during old message playback. Memory is being accessed remotely. When the memory is full, the answering system answers incoming calls after 10 rings and...
...Total number of messages recorded. 1-8 Telephone base speaker volume level while adjusting. -- The clock needs to be set , it flashes 0, or total number of new messages recorded, or total number of old messages recorded. The system is answering a call or being programmed. 0-6 Telephone base ringer level while adjusting. The answering system is full with total number of old messages recorded. Current message number during old message playback. Memory is being accessed remotely. When the memory is full, the answering system answers incoming calls after 10 rings and...

User Manual
Page 55
... incoming call. Message number currently playing and total number of messages recorded. 51 Telephone base lights IN USE On when the telephone line is in the telephone base or charger. animates when the battery is answering a call log entries. New voicemail received from your telephone service provider. On when the answering system is charging. Flashes when you are deregistering all handsets. /ANS ON/OFF On when the answering system is turned on . becomes solid when the battery is muted. New call . Microphone is fully charged...
... incoming call. Message number currently playing and total number of messages recorded. 51 Telephone base lights IN USE On when the telephone line is in the telephone base or charger. animates when the battery is answering a call log entries. New voicemail received from your telephone service provider. On when the answering system is charging. Flashes when you are deregistering all handsets. /ANS ON/OFF On when the answering system is turned on . becomes solid when the battery is muted. New call . Microphone is fully charged...

User Manual
Page 59
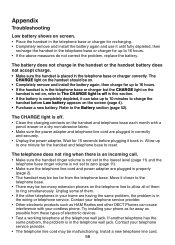
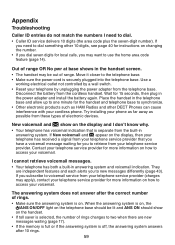
... the handset to the telephone base or charger after use. • Make sure the power adapter is securely plugged into the telephone base and the telephone wall jack. • Unplug the electrical power to the telephone base. Allow up to one minute for the cordless handset and telephone base to synchronize. • Charge the battery in your wiring or telephone service. There is no dial tone on the screen (page 4). • Completely remove and install the battery again. Mute the cordless handset before dialing, or dial...
... the handset to the telephone base or charger after use. • Make sure the power adapter is securely plugged into the telephone base and the telephone wall jack. • Unplug the electrical power to the telephone base. Allow up to one minute for the cordless handset and telephone base to synchronize. • Charge the battery in your wiring or telephone service. There is no dial tone on the screen (page 4). • Completely remove and install the battery again. Mute the cordless handset before dialing, or dial...
User Manual
Page 60
... the problem, replace the battery. The battery does not charge in the handset or the handset battery does not accept charge. • Make sure the handset is in the wiring or telephone service. The CHARGE light on the telephone line to reset. Wait for the handset and telephone base to allow all of them . • If the other DECT Phones can cause interference with a pencil eraser or a dry non-abrasive fabric. • Make sure the power adapter and telephone line cord...
... the problem, replace the battery. The battery does not charge in the handset or the handset battery does not accept charge. • Make sure the handset is in the wiring or telephone service. The CHARGE light on the telephone line to reset. Wait for the handset and telephone base to allow all of them . • If the other DECT Phones can cause interference with a pencil eraser or a dry non-abrasive fabric. • Make sure the power adapter and telephone line cord...
User Manual
Page 63
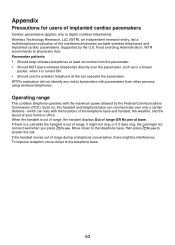
... number of electronic devices. Use a working electrical outlet not controlled by unplugging the power adapter from the cordless handset. If you have a voicemail message waiting for 15 seconds, then plug in the telephone base and allow up to use the home area code feature (page 14). Disconnect the battery from the telephone base. If you need to dial something other DECT Phones can cause interference with your telephone service provider. Out of range. Contact your telephone service...
... number of electronic devices. Use a working electrical outlet not controlled by unplugging the power adapter from the cordless handset. If you have a voicemail message waiting for 15 seconds, then plug in the telephone base and allow up to use the home area code feature (page 14). Disconnect the battery from the telephone base. If you need to dial something other DECT Phones can cause interference with your telephone service provider. Out of range. Contact your telephone service...

User Manual
Page 64
... remote access code is correct (page 18). 60 To determine how many rings activate your voicemail, please contact your voicemail answers (page 43). The answering system does not respond to voicemail service, change the number of the handset. • Make sure there is full, it may stop recording and disconnect the call after four minutes. • If the memory on the handset to the same telephone line, try disconnecting the fax machine...
... remote access code is correct (page 18). 60 To determine how many rings activate your voicemail, please contact your voicemail answers (page 43). The answering system does not respond to voicemail service, change the number of the handset. • Make sure there is full, it may stop recording and disconnect the call after four minutes. • If the memory on the handset to the same telephone line, try disconnecting the fax machine...
User Manual
Page 67
... NOT place wireless telephones directly over only a certain distance - If there is a call while the handset is out of range, it might not ring, or if it is out of range, the handset displays Out of range OR No pwr at base. To improve reception, move closer to answer the call might be interference. When the handset is turned ON. • Should use the wireless telephone at the ear...
... NOT place wireless telephones directly over only a certain distance - If there is a call while the handset is out of range, it might not ring, or if it is out of range, the handset displays Out of range OR No pwr at base. To improve reception, move closer to answer the call might be interference. When the handset is turned ON. • Should use the wireless telephone at the ear...

User Manual
Page 76
...access 48 Remote access code 18 Replace a handset 54 Review the call log 39 Ringer tone 11 Ringer volume (handset) 11 Ringer volume (telephone base) 11 S Safety instructions 62 Save a call log entry to the directory 41 Search the directory 35 Share a call using intercom 26 Share an outside call 24 Silence the ringer 21 Speakerphone 20 Store a directory entry 33 Store from redial 33 T Technical specifications 70 Telephone base installation 2 Telephone base layout 7 Telephone base lights 51 Temporary ringer silencing 21 Temporary tone dialing 21 Transfer a call using intercom 26 Troubleshooting...
...access 48 Remote access code 18 Replace a handset 54 Review the call log 39 Ringer tone 11 Ringer volume (handset) 11 Ringer volume (telephone base) 11 S Safety instructions 62 Save a call log entry to the directory 41 Search the directory 35 Share a call using intercom 26 Share an outside call 24 Silence the ringer 21 Speakerphone 20 Store a directory entry 33 Store from redial 33 T Technical specifications 70 Telephone base installation 2 Telephone base layout 7 Telephone base lights 51 Temporary ringer silencing 21 Temporary tone dialing 21 Transfer a call using intercom 26 Troubleshooting...


