E502AR User Manual
Page 7
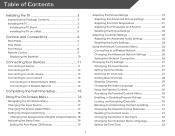
...the TV Stand 3 Installing the TV on a Wall 5 Controls and Connections 6 Rear Panel 6 Side Panel 7 Front Panel 8 Remote Control 9 Replacing the Batteries 10 Connecting Your Devices 11 Connecting A Device 11 Connecting A PC 12 Connecting an audio device 13 Connecting to your network 14 Connecting to... Connecting to a Wireless Network 14 Completing the First-Time Setup 15 Using the On-Screen Menu 16 Navigating the On-Screen Menu 16 Changing the Input Source 17 Changing the Screen Aspect Ratio 17 Setting Up Closed Captioning 18 Changing the Appearance of Digital Closed Captions.....
...the TV Stand 3 Installing the TV on a Wall 5 Controls and Connections 6 Rear Panel 6 Side Panel 7 Front Panel 8 Remote Control 9 Replacing the Batteries 10 Connecting Your Devices 11 Connecting A Device 11 Connecting A PC 12 Connecting an audio device 13 Connecting to your network 14 Connecting to... Connecting to a Wireless Network 14 Completing the First-Time Setup 15 Using the On-Screen Menu 16 Navigating the On-Screen Menu 16 Changing the Input Source 17 Changing the Screen Aspect Ratio 17 Setting Up Closed Captioning 18 Changing the Appearance of Digital Closed Captions.....
E502AR User Manual
Page 52
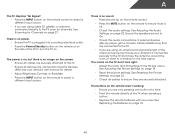
... Scanning for details. • Adjust Brightness, Contrast, or Backlight. • Press the INPUT button on page 23. There is no image on the screen. • Ensure all cables are securely attached to the TV. • Ensure all cables to ensure they are only pressing one button at a time.... • Point the remote directly at the TV when pressing a button. • Replace the remote batteries with new ones. Ensure your device's user manual for Channels on page 19. • Reset the picture settings. See Adjusting the Picture...
... Scanning for details. • Adjust Brightness, Contrast, or Backlight. • Press the INPUT button on page 23. There is no image on the screen. • Ensure all cables are securely attached to the TV. • Ensure all cables to ensure they are only pressing one button at a time.... • Point the remote directly at the TV when pressing a button. • Replace the remote batteries with new ones. Ensure your device's user manual for Channels on page 19. • Reset the picture settings. See Adjusting the Picture...


