
DVR865HD User Manual
Page 2
... System Requirements for Macintosh 5 A Quick Look at your Digital Video Camera 6 Preparing Your Camera for Use 7 Inserting an SD Memory Card 8 Software Installation: Snap 'n Share Pro and Video Express 10 Software Installation ...10 DVR Function Control ...17 Transferring Images to your PC using the software 43... Manually transfer media to your Digital Camera 51 Everything you need to get the most of your media and MORE ...
... System Requirements for Macintosh 5 A Quick Look at your Digital Video Camera 6 Preparing Your Camera for Use 7 Inserting an SD Memory Card 8 Software Installation: Snap 'n Share Pro and Video Express 10 Software Installation ...10 DVR Function Control ...17 Transferring Images to your PC using the software 43... Manually transfer media to your Digital Camera 51 Everything you need to get the most of your media and MORE ...

DVR865HD User Manual
Page 3
...DVR camera. Key Features • 5 modes - Introduction Thank you can shoot video clips, take individual photos and record audio files. DSC Camera, Video, Playback, Set Up and Audio. • Digital Video resolutions - 1280x720 Pixels (HD), 640x480 (VGA), 320x240 (QVGA). • 8.1 mega-pixels camera with choice of your camera.... In addition, a SD compatible memory card of up to 16GB • Built-in order to expand the memory of 6 digital camera resolutions- 3264*2448pixels (8.1M),3072*2304 pixels (7M),2592*1944 pixels (5M),2048*1536 pixels (3M),1600*1200 pixels (2M),1280*960...
...DVR camera. Key Features • 5 modes - Introduction Thank you can shoot video clips, take individual photos and record audio files. DSC Camera, Video, Playback, Set Up and Audio. • Digital Video resolutions - 1280x720 Pixels (HD), 640x480 (VGA), 320x240 (QVGA). • 8.1 mega-pixels camera with choice of your camera.... In addition, a SD compatible memory card of up to 16GB • Built-in order to expand the memory of 6 digital camera resolutions- 3264*2448pixels (8.1M),3072*2304 pixels (7M),2592*1944 pixels (5M),2048*1536 pixels (3M),1600*1200 pixels (2M),1280*960...

DVR865HD User Manual
Page 4
... photos, videos and record audio files • Delete, protect and print photos directly from your camera • Snap 'n Share Pro software application can be used to download the photos and videos from your camera with the touch of a button • Edit, add text, clipart and more on your ... upload, copy to CD/DVD and much more with Video Express software. • Plugging in your camera to the PC automatically opens up YouTube on your internet browser What your digital video camera includes • Digital Video Camcorder • USB cable • TV cable • Li-ion Rechargeable...
... photos, videos and record audio files • Delete, protect and print photos directly from your camera • Snap 'n Share Pro software application can be used to download the photos and videos from your camera with the touch of a button • Edit, add text, clipart and more on your ... upload, copy to CD/DVD and much more with Video Express software. • Plugging in your camera to the PC automatically opens up YouTube on your internet browser What your digital video camera includes • Digital Video Camcorder • USB cable • TV cable • Li-ion Rechargeable...
DVR865HD User Manual
Page 6
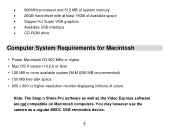
You may however use the camera as the Video Express software are not compatible on Macintosh computers. • 800MHz processor and 512 MB of system memory • 20GB hard driver with ...
You may however use the camera as the Video Express software are not compatible on Macintosh computers. • 800MHz processor and 512 MB of system memory • 20GB hard driver with ...

DVR865HD User Manual
Page 8
Insert the battery in packaging). 1. Plug in the camera and connect to charge for at least 6 hours before using the camera for Use Battery Installation Your DVR camcorder requires a Li-ion rechargeable battery (included in accordance with the polarity indicated. 3. To charge your battery the camera should be off. Open the battery compartment on the side of the PC. Allow the rechargeable battery to the USB port of the camera. 2. Return and close the battery cover. 4. Preparing Your Camera for the first time. 7
Insert the battery in packaging). 1. Plug in the camera and connect to charge for at least 6 hours before using the camera for Use Battery Installation Your DVR camcorder requires a Li-ion rechargeable battery (included in accordance with the polarity indicated. 3. To charge your battery the camera should be off. Open the battery compartment on the side of the PC. Allow the rechargeable battery to the USB port of the camera. 2. Return and close the battery cover. 4. Preparing Your Camera for the first time. 7

DVR865HD User Manual
Page 9
...memory will be lost if no SD Memory Card has been inserted in the DVR when you remove your battery or when the camera is required for normal use for an extended period. Inserting an SD Memory Card... SD compatible memory card of up to 16GB (not included) should be inserted into your DVR camera. SD Memory cards expand the amount of memory thus allowing an increase in use . Note: • On...your photos and videos regularly to your computer. • Remove the battery from the DVR camera when not in the number of movies, photos and audio clips that can be captured before transferring them to a computer...
...memory will be lost if no SD Memory Card has been inserted in the DVR when you remove your battery or when the camera is required for normal use for an extended period. Inserting an SD Memory Card... SD compatible memory card of up to 16GB (not included) should be inserted into your DVR camera. SD Memory cards expand the amount of memory thus allowing an increase in use . Note: • On...your photos and videos regularly to your computer. • Remove the battery from the DVR camera when not in the number of movies, photos and audio clips that can be captured before transferring them to a computer...
DVR865HD User Manual
Page 10
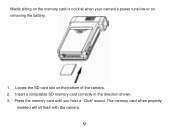
Locate the SD card slot on removing the battery. 1. Insert a compatible SD memory card correctly in the direction shown. 3. The memory card when properly inserted will sit flush with the camera. 9 Press the memory card until you hear a "Click" sound. Media sitting on the memory card is not lost when your camera's power runs low or on the bottom of the camera. 2.
Locate the SD card slot on removing the battery. 1. Insert a compatible SD memory card correctly in the direction shown. 3. The memory card when properly inserted will sit flush with the camera. 9 Press the memory card until you hear a "Click" sound. Media sitting on the memory card is not lost when your camera's power runs low or on the bottom of the camera. 2.
DVR865HD User Manual
Page 11
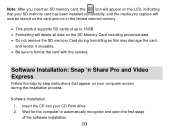
... into your computer screen during formatting as this may damage the card and render it unusable. • Be sure to format the card with the camera. Software Installation 1. Software Installation: Snap 'n Share Pro and Video Express Follow the step by step instructions that your SD memory card has been installed successfully...
... into your computer screen during formatting as this may damage the card and render it unusable. • Be sure to format the card with the camera. Software Installation 1. Software Installation: Snap 'n Share Pro and Video Express Follow the step by step instructions that your SD memory card has been installed successfully...

DVR865HD User Manual
Page 18
..., a "Low Battery" message will switch off . The camera will switch off automatically. Press the Mode button to select VIDEO. 17 DVR Function Control Power on Press the Power button on the top of up indicating that your DVR. The LCD monitor will light up to 16 GB for ...mode for 120 seconds (default) it will appear on your DVR is not in use . Capturing Videos In order to capture videos (with audio) using your DVR camera off a few moments later. If the DVR camera is ready for normal operation. 1. The DVR camera will automatically power off . Press the Up/Down button ...
..., a "Low Battery" message will switch off . The camera will switch off automatically. Press the Mode button to select VIDEO. 17 DVR Function Control Power on Press the Power button on the top of up indicating that your DVR. The LCD monitor will light up to 16 GB for ...mode for 120 seconds (default) it will appear on your DVR is not in use . Capturing Videos In order to capture videos (with audio) using your DVR camera off a few moments later. If the DVR camera is ready for normal operation. 1. The DVR camera will automatically power off . Press the Up/Down button ...
DVR865HD User Manual
Page 19
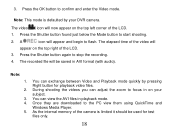
... the Mode button to stop the recording. 4. You can exchange between Video and Playback mode quickly by your subject. As the internal memory of the camera is defaulted by pressing Right button for test files only. 18 A icon will now appear on the top left corner of the LCD. 3. You... and Windows Media Player. Note: This mode is limited it should be saved in AVI format (with audio). The recorded file will appear on your DVR camera. During shooting the videos you can view the AVI files in on the top right of the LCD. 1. Note: 1. 2. 3. 4. 5. Press the OK button to...
... the Mode button to stop the recording. 4. You can exchange between Video and Playback mode quickly by your subject. As the internal memory of the camera is defaulted by pressing Right button for test files only. 18 A icon will now appear on the top left corner of the LCD. 3. You... and Windows Media Player. Note: This mode is limited it should be saved in AVI format (with audio). The recorded file will appear on your DVR camera. During shooting the videos you can view the AVI files in on the top right of the LCD. 1. Note: 1. 2. 3. 4. 5. Press the OK button to...
DVR865HD User Manual
Page 23
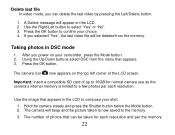
...the LCD screen. Press the OK button. The number of up to 16GB for each resolution. A Delete message will be taken for normal camera use as the camera's internal memory is now saved to compose your shot. 1. After you can be deleted from the menu that can delete the last video ...SD card of photos that appears. 3. Press the OK button to a few photos per each resolution and per the memory 22 The camera icon now appears on your choice. 4. Hold the camera steady and press the Shutter button below the Mode button. 2. Use the Right/Left button to select "Yes" or "No". ...
...the LCD screen. Press the OK button. The number of up to 16GB for each resolution. A Delete message will be taken for normal camera use as the camera's internal memory is now saved to compose your shot. 1. After you can be deleted from the menu that can delete the last video ...SD card of photos that appears. 3. Press the OK button to a few photos per each resolution and per the memory 22 The camera icon now appears on your choice. 4. Hold the camera steady and press the Shutter button below the Mode button. 2. Use the Right/Left button to select "Yes" or "No". ...

DVR865HD User Manual
Page 24
... but also on the LCD screen when you attempt to press the Shutter button to take more photos. Use the Right/Left button to the camera mode. 23 card inserted appears on the LCD 3. After the shot is taken the number is full, "Disk Full" will also take many more memory... is reduced by pressing the Right button for previewing photos. Better quality photos are available to capture the best quality photos with your camera: Delete last file While in camera mode, you can exchange the playback and DSC mode quickly by one. 5. A Delete message appears on the top right of photos that...
... but also on the LCD screen when you attempt to press the Shutter button to take more photos. Use the Right/Left button to the camera mode. 23 card inserted appears on the LCD 3. After the shot is taken the number is full, "Disk Full" will also take many more memory... is reduced by pressing the Right button for previewing photos. Better quality photos are available to capture the best quality photos with your camera: Delete last file While in camera mode, you can exchange the playback and DSC mode quickly by one. 5. A Delete message appears on the top right of photos that...
DVR865HD User Manual
Page 26
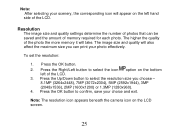
... to select the icon option on the bottom left hand side of the LCD. 3. To set the resolution: 1. Note: The resolution icon appears beneath the camera icon on the left of the LCD. Press the Right/Left button to confirm, save your scenery, the corresponding icon will appear on the LCD...
... to select the icon option on the bottom left hand side of the LCD. 3. To set the resolution: 1. Note: The resolution icon appears beneath the camera icon on the left of the LCD. Press the Right/Left button to confirm, save your scenery, the corresponding icon will appear on the LCD...

DVR865HD User Manual
Page 31
... appears on the bottom left of the LCD screen. 3. Multi-Snapshot Take 3 consecutive photos automatically. Press the Right/Left button to use this feature 1. The camera will take the photo. 7. Press the Shutter button to begin the timer to select one of the LCD accompanied by loud beeps until the photo...
... appears on the bottom left of the LCD screen. 3. Multi-Snapshot Take 3 consecutive photos automatically. Press the Right/Left button to use this feature 1. The camera will take the photo. 7. Press the Shutter button to begin the timer to select one of the LCD accompanied by loud beeps until the photo...
DVR865HD User Manual
Page 32
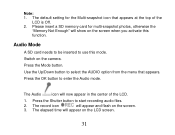
... at the top of the LCD. 1. The elapsed time will appear and flash on the LCD screen. 31 The Audio icon will show on the camera. Press the Mode button. Note: 1. The default setting for multi-snapshot photos, otherwise the "Memory Not Enough" will now appear in the center of the...
... at the top of the LCD. 1. The elapsed time will appear and flash on the LCD screen. 31 The Audio icon will show on the camera. Press the Mode button. Note: 1. The default setting for multi-snapshot photos, otherwise the "Memory Not Enough" will now appear in the center of the...
DVR865HD User Manual
Page 33
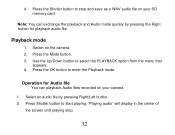
... to start playing, "Playing audio" will display in the center of the screen until playing stop and save as a WAV audio file on the camera. 2. Switch on your camera 1. Press the Mode button. 3. Use the Up/Down button to enter the Playback mode. Press Shutter button to stop . 32 4. Select an audio...
... to start playing, "Playing audio" will display in the center of the screen until playing stop and save as a WAV audio file on the camera. 2. Switch on your camera 1. Press the Mode button. 3. Use the Up/Down button to enter the Playback mode. Press Shutter button to stop . 32 4. Select an audio...

DVR865HD User Manual
Page 34
... you select an AVI file, the icon will appear on the LCD screen. Operation for AVI file You can also print photos directly from your camera 1. Select an AVI file you can protect and delete video clips. Note: When you select an Audio file, the icon will appear on the LCD...
... you select an AVI file, the icon will appear on the LCD screen. Operation for AVI file You can also print photos directly from your camera 1. Select an AVI file you can protect and delete video clips. Note: When you select an Audio file, the icon will appear on the LCD...

DVR865HD User Manual
Page 37
... the photo. 5. Press the OK button to confirm, save your camcorder to allow for direct printing. 7. Select a photo you to print photos directly from your camera to a compatible printer with the provided USB cable to a compatible printer with PictBridge. 1.
... the photo. 5. Press the OK button to confirm, save your camcorder to allow for direct printing. 7. Select a photo you to print photos directly from your camera to a compatible printer with the provided USB cable to a compatible printer with PictBridge. 1.
DVR865HD User Manual
Page 38
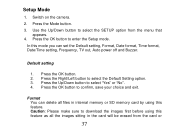
... you can set the Default setting, Format, Date format, Time format, Date/Time setting, Frequency, TV out, Auto power off and Buzzer. Switch on the camera. 2. Press the OK button. 2.
... you can set the Default setting, Format, Date format, Time format, Date/Time setting, Frequency, TV out, Auto power off and Buzzer. Switch on the camera. 2. Press the OK button. 2.
DVR865HD User Manual
Page 39
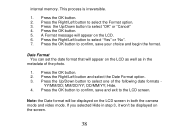
... LCD screen. Press the OK button. 5. If you selected Hide in step 3, it won't be displayed on the LCD as well as in both the camera mode and video mode. internal memory. Hide. 4.
... LCD screen. Press the OK button. 5. If you selected Hide in step 3, it won't be displayed on the LCD as well as in both the camera mode and video mode. internal memory. Hide. 4.


