Warranty
Page 1
... repair or replace the product at no charge for a period of one year from the purchase, use or inability to use this product even if Vivitar has been advised of purchase. Limited One Year Warranty Vivitar warrants this quality product to be free of defects in or exposure to you. -1- WHAT IS NOT COVERED...
... repair or replace the product at no charge for a period of one year from the purchase, use or inability to use this product even if Vivitar has been advised of purchase. Limited One Year Warranty Vivitar warrants this quality product to be free of defects in or exposure to you. -1- WHAT IS NOT COVERED...
Warranty
Page 2
WHAT TO DO WHEN SERVICE IS NEEDED STEP 1. Package the product and relevant accessories carefully, using ample padding materials and a sturdy mailing container to : (in the U.S.): Vivitar Attn: Technical Support 195 Carter Drive Edison NJ 08817 (in transit. Return item (insured) to prevent damage in the U.K.) ... deemed to be returned to you would like to State thereof. If you shipping prepaid. For more information visit our website www.vivitar.com TECHNICAL SUPPORT support team members will be not faulty or the defect is complete, the product will answer your local toll free...
WHAT TO DO WHEN SERVICE IS NEEDED STEP 1. Package the product and relevant accessories carefully, using ample padding materials and a sturdy mailing container to : (in the U.S.): Vivitar Attn: Technical Support 195 Carter Drive Edison NJ 08817 (in transit. Return item (insured) to prevent damage in the U.K.) ... deemed to be returned to you would like to State thereof. If you shipping prepaid. For more information visit our website www.vivitar.com TECHNICAL SUPPORT support team members will be not faulty or the defect is complete, the product will answer your local toll free...

Camera Manual
Page 2
... Requirement for Windows Vista 4 Computer System Requirements for Macintosh 5 A Quick Look at your Digital Video Camera 6 Preparing Your Camera for Use 7 Inserting an SD Memory Card 8 DVR Function Control ...10 Install the Vivitar Experience Image Manager Software 35 Connect your camera to the computer 39 Get photos and videos from your camera to...
... Requirement for Windows Vista 4 Computer System Requirements for Macintosh 5 A Quick Look at your Digital Video Camera 6 Preparing Your Camera for Use 7 Inserting an SD Memory Card 8 DVR Function Control ...10 Install the Vivitar Experience Image Manager Software 35 Connect your camera to the computer 39 Get photos and videos from your camera to...
Camera Manual
Page 3
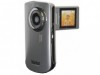
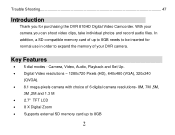
... memory of up to 8GB needs to be inserted for purchasing the DVR 810HD Digital Video Camcorder. Key Features 5 dial modes - In addition, a SD compatible memory card of your camera you for normal use in order to 8GB 2 With your DVR camera. Trouble Shooting...47 Introduction Thank you can shoot video clips, take...
... memory of up to 8GB needs to be inserted for purchasing the DVR 810HD Digital Video Camcorder. Key Features 5 dial modes - In addition, a SD compatible memory card of your camera you for normal use in order to 8GB 2 With your DVR camera. Trouble Shooting...47 Introduction Thank you can shoot video clips, take...

Camera Manual
Page 8
Insert the batteries in accordance with the polarity indicated in the battery compartment. 3. Return and close the battery cover. 7 It is recommended that alkaline batteries be used. 1. Preparing Your Camera for Use Battery Installation Your DVR camcorder requires 4 "AAA" batteries (not included). Open the battery compartment on the side of the camera. 2.
Insert the batteries in accordance with the polarity indicated in the battery compartment. 3. Return and close the battery cover. 7 It is recommended that alkaline batteries be used. 1. Preparing Your Camera for Use Battery Installation Your DVR camcorder requires 4 "AAA" batteries (not included). Open the battery compartment on the side of the camera. 2.

Camera Manual
Page 9
... Card An SD compatible memory card of movies, photos and audio that can be lost if no SD Memory Card has been inserted in the DVR when you change your batteries. We strongly recommend downloading your photos and videos regularly to your DV camera. All the media in the ... memory thus allowing an increase in the number of up to 8GB (not included) is needed for normal use . Note: On removing the batteries from the DVR camera when not in use for normal use and should be inserted into your computer. Remove the batteries from the camera all photos and videos...
... Card An SD compatible memory card of movies, photos and audio that can be lost if no SD Memory Card has been inserted in the DVR when you change your batteries. We strongly recommend downloading your photos and videos regularly to your DV camera. All the media in the ... memory thus allowing an increase in the number of up to 8GB (not included) is needed for normal use . Note: On removing the batteries from the DVR camera when not in use for normal use and should be inserted into your computer. Remove the batteries from the camera all photos and videos...

Camera Manual
Page 11
... may damage the card and render it unusable. Be sure to format the card with the camera. DVR Function Control To power on the camera you need to turn on your DVR is situated on Press the Power button to flip open the LCD Screen. Power off 10 The Power button...
... may damage the card and render it unusable. Be sure to format the card with the camera. DVR Function Control To power on the camera you need to turn on your DVR is situated on Press the Power button to flip open the LCD Screen. Power off 10 The Power button...
Camera Manual
Page 12
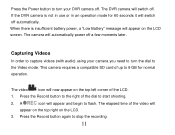
Capturing Videos In order to capture videos (with audio) using your camera you need to turn your DVR camera off a few moments later. Press the Record button to the right of up to turn the dial to start shooting. 2. The DVR camera will switch off automatically. A icon will appear and begin to... stop the recording. 11 Press the Record button again to flash. If the DVR camera is insufficient battery power, a "Low Battery" message will appear on the LCD. 3. When there is not in use or in an operation mode for normal operation. The video icon will now appear on ...
Capturing Videos In order to capture videos (with audio) using your camera you need to turn your DVR camera off a few moments later. Press the Record button to the right of up to turn the dial to start shooting. 2. The DVR camera will switch off automatically. A icon will appear and begin to... stop the recording. 11 Press the Record button again to flash. If the DVR camera is insufficient battery power, a "Low Battery" message will appear on the LCD. 3. When there is not in use or in an operation mode for normal operation. The video icon will now appear on ...

Camera Manual
Page 13
...memory card of the camera is full, a "Disk Full" message will be used for you to choose from before capturing your subject. 2. During shooting the video you attempt to the PC... view them using Quick Time and Windows Media Player. 4. When the internal memory is limited it should be...different modes are explained in on your video. To enter the Setup options for normal use up to focus in detail below. 12 The higher the resolution selected the better the quality of the ...
...memory card of the camera is full, a "Disk Full" message will be used for you to choose from before capturing your subject. 2. During shooting the video you attempt to the PC... view them using Quick Time and Windows Media Player. 4. When the internal memory is limited it should be...different modes are explained in on your video. To enter the Setup options for normal use up to focus in detail below. 12 The higher the resolution selected the better the quality of the ...
Camera Manual
Page 16
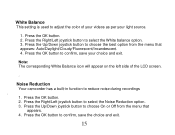
... icon will appear on the left side of your videos as per your choice and exit. Press the OK button. 2. White Balance This setting is used to adjust the color of the LCD screen. .
... icon will appear on the left side of your videos as per your choice and exit. Press the OK button. 2. White Balance This setting is used to adjust the color of the LCD screen. .
Camera Manual
Page 17
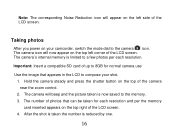
... the mode dial to compose your shot. 1. Taking photos After you power on the left corner of photos that can be taken for normal camera use Use the image that appears in the LCD to the camera icon. Important: Insert a compatible SD card of the camera near the zoom control. 2. The camera...
... the mode dial to compose your shot. 1. Taking photos After you power on the left corner of photos that can be taken for normal camera use Use the image that appears in the LCD to the camera icon. Important: Insert a compatible SD card of the camera near the zoom control. 2. The camera...

Camera Manual
Page 18
... more photos and videos 6. When the camcorder's internal memory is full, "Disk Full" will also take a photo. Either download the photo to your computer using the Vivitar Experience Image Manager software as described below in camera mode, you attempt to press the Shutter button to select either "Yes" or "No". 4. Better quality...
... more photos and videos 6. When the camcorder's internal memory is full, "Disk Full" will also take a photo. Either download the photo to your computer using the Vivitar Experience Image Manager software as described below in camera mode, you attempt to press the Shutter button to select either "Yes" or "No". 4. Better quality...
Camera Manual
Page 19
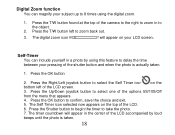
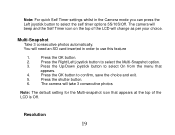
... zoom in to the object. 2. The digital zoom icon will appear in the center of the LCD accompanied by using this feature to delay the time between your subject up to 8 times using the digital zoom. 1. Press the OK button to take the photo. 7. Self-Timer You can magnify your pressing of...
... zoom in to the object. 2. The digital zoom icon will appear in the center of the LCD accompanied by using this feature to delay the time between your subject up to 8 times using the digital zoom. 1. Press the OK button to take the photo. 7. Self-Timer You can magnify your pressing of...
Camera Manual
Page 20
... appears at the top of the LCD will need an SD card inserted in the Camera mode you can press the Left joystick button to use this feature 1. The camera will beep and the Self Timer icon on the top of the LCD is Off. You will change as per your...
... appears at the top of the LCD will need an SD card inserted in the Camera mode you can press the Left joystick button to use this feature 1. The camera will beep and the Self Timer icon on the top of the LCD is Off. You will change as per your...
Camera Manual
Page 22
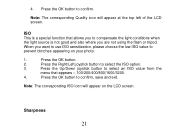
When you are not using the flash or tripod. Note: The corresponding ISO icon will appear at the top left of the LCD screen. 4. Press the Right/Left joystick button ... the OK button to confirm. Press the OK button to confirm, save and exit. ISO This is not good and also where you want to use ISO sensitization, please choose the low ISO value to select the ISO option. 3. Press the Up/Down joystick button to select an ISO value from...
When you are not using the flash or tripod. Note: The corresponding ISO icon will appear at the top left of the LCD screen. 4. Press the Right/Left joystick button ... the OK button to confirm. Press the OK button to confirm, save and exit. ISO This is not good and also where you want to use ISO sensitization, please choose the low ISO value to select the ISO option. 3. Press the Up/Down joystick button to select an ISO value from...
Camera Manual
Page 23
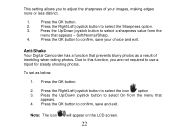
... photos as below: 1. Due to this function, you to adjust the sharpness of trembling when taking photos. This setting allows you are not required to use a tripod for steady shooting photos. Press the OK button. 2. Press the OK button to confirm, save and exit.
... photos as below: 1. Due to this function, you to adjust the sharpness of trembling when taking photos. This setting allows you are not required to use a tripod for steady shooting photos. Press the OK button. 2. Press the OK button to confirm, save and exit.

Camera Manual
Page 25
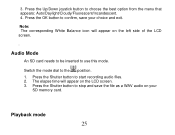
... the Exposure option. 3. Press the Right/Left joystick button to select the White balance option. 24 Press the OK button. 2. White Balance This setting is used to confirm, save your images. 1. Note: The corresponding exposure number will appear on the left hand side of the LCD. Note: After selecting your light...
... the Exposure option. 3. Press the Right/Left joystick button to select the White balance option. 24 Press the OK button. 2. White Balance This setting is used to confirm, save your images. 1. Note: The corresponding exposure number will appear on the left hand side of the LCD. Note: After selecting your light...
Camera Manual
Page 26
3. Switch the mode dial to use this mode. Playback mode 25 Press the OK button to stop and save your SD memory card. Press the Shutter button to confirm, save the ...
3. Switch the mode dial to use this mode. Playback mode 25 Press the OK button to stop and save your SD memory card. Press the Shutter button to confirm, save the ...
Camera Manual
Page 27
.... Operation for the images to appear as thumbnails. 2. Select a JPG file and press the OK button for the image to enter zoom in your camcorder using PictBridge. Press the Up/Down/Left/Right joystick button to the icon position. Note: when you can playback the photos and videos in your camcorder...
.... Operation for the images to appear as thumbnails. 2. Select a JPG file and press the OK button for the image to enter zoom in your camcorder using PictBridge. Press the Up/Down/Left/Right joystick button to the icon position. Note: when you can playback the photos and videos in your camcorder...

Camera Manual
Page 31
... still photos section above. Setup Mode To access the Setup mode turn the mode dial all files in internal memory or SD memory card by using this feature. Note: For how to protect and delete photos/videos, please refer to download the images first before...
... still photos section above. Setup Mode To access the Setup mode turn the mode dial all files in internal memory or SD memory card by using this feature. Note: For how to protect and delete photos/videos, please refer to download the images first before...

