

Camera Manual
Page 21
... images from the thumbnails. 1. Thumbnail View Easily navigate and select the image you wish to view. Video Playback Mode The Playback mode allows you to review and edit photos and videos that you‟ve already taken with you camera. When you first turn on your camera will be in...
... images from the thumbnails. 1. Thumbnail View Easily navigate and select the image you wish to view. Video Playback Mode The Playback mode allows you to review and edit photos and videos that you‟ve already taken with you camera. When you first turn on your camera will be in...
Camera Manual
Page 38
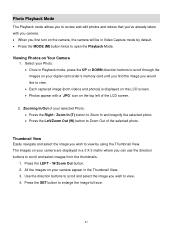
... a 3 X 3 matrix where you can use the direction buttons to scroll and select images from the thumbnails. 1. Photo Playback Mode The Playback mode allows you to review and edit photos and videos that you‟ve already taken with a „JPG‟ icon on the top left of the selected photo. W/Zoom...
... a 3 X 3 matrix where you can use the direction buttons to scroll and select images from the thumbnails. 1. Photo Playback Mode The Playback mode allows you to review and edit photos and videos that you‟ve already taken with a „JPG‟ icon on the top left of the selected photo. W/Zoom...
Camera Manual
Page 43
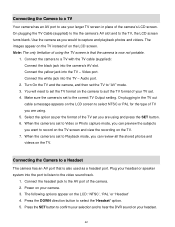
... TV set to Playback mode, you can preview the subjects you are using . 5. Press the SET button to confirm your selection and to hear the DVR sound on the TV. 7. On plugging in place of TV you want to record on the TV screen and view the recording on your headset... or speaker system into the camera‟s AV slot. Turn On the TV and the camera, and then set you can review all the stored photos and videos on the LCD: „NTSC‟, „PAL‟ or „Headset‟ 4. Press the DOWN direction button to...
... TV set to Playback mode, you can preview the subjects you are using . 5. Press the SET button to confirm your selection and to hear the DVR sound on the TV. 7. On plugging in place of TV you want to record on the TV screen and view the recording on your headset... or speaker system into the camera‟s AV slot. Turn On the TV and the camera, and then set you can review all the stored photos and videos on the LCD: „NTSC‟, „PAL‟ or „Headset‟ 4. Press the DOWN direction button to...

Camera Manual
Page 45
... the device. 4. As your camera is inserted in USB connector. If you will be installed, and then click "Install". 11. Click the "Launch Vivitar Experience Image Manager" to open the next window. 7. Select your language and click "Next" to open the application. 14. Connect the camera‟s ...to the USB port of your computer. Make sure the SD Memory Card is a mass storage device, "MSDC" appears on your computer. 3. Please review the license terms. On PC and Macintosh: Click the "I accept the terms of the camera to open the next window. 6. Please wait while ...
... the device. 4. As your camera is inserted in USB connector. If you will be installed, and then click "Install". 11. Click the "Launch Vivitar Experience Image Manager" to open the next window. 7. Select your language and click "Next" to open the application. 14. Connect the camera‟s ...to the USB port of your computer. Make sure the SD Memory Card is a mass storage device, "MSDC" appears on your computer. 3. Please review the license terms. On PC and Macintosh: Click the "I accept the terms of the camera to open the next window. 6. Please wait while ...
