
Camera Manual
Page 1
All other trademarks are registered trademarks of their respective companies. All rights reserved. Windows and the Windows logo are the property of Microsoft Corporation. DVR 518 Digital Video Camcorder User's Manual © 2009 Sakar International, Inc.
All other trademarks are registered trademarks of their respective companies. All rights reserved. Windows and the Windows logo are the property of Microsoft Corporation. DVR 518 Digital Video Camcorder User's Manual © 2009 Sakar International, Inc.
Camera Manual
Page 2
...Requirement for Windows Vista 5 Computer System Requirements for Macintosh 5 A Quick Look at your Digital Video Camcorder 7 Preparing Your Camcorder for Use 8 Inserting an SD Memory Card 9 Maintenance and Care 11 DVR Function Control 12 Capturing Videos 15 Taking Photos 21 Audio Mode 34 Playback mode 35 ...Setup Mode 50 Connecting the Camcorder to a TV 59 Install the Vivitar Experience Image Manager Software 59 Connect your camcorder to the computer 63 Get ...
...Requirement for Windows Vista 5 Computer System Requirements for Macintosh 5 A Quick Look at your Digital Video Camcorder 7 Preparing Your Camcorder for Use 8 Inserting an SD Memory Card 9 Maintenance and Care 11 DVR Function Control 12 Capturing Videos 15 Taking Photos 21 Audio Mode 34 Playback mode 35 ...Setup Mode 50 Connecting the Camcorder to a TV 59 Install the Vivitar Experience Image Manager Software 59 Connect your camcorder to the computer 63 Get ...
Camera Manual
Page 3
...Video, Audio, Camera, Playback and Set Up. Digital Video resolutions - 640x480 (VGA), 320x240 (QVGA). 2 Transfer media from my camcorder to my computer manually (Using Windows) ...66 Transfer media from my camcorder to my computer manually (Using Macintosh 67 Using your camcorder as a PC Camera (on Windows 68 Sakar Warranty Card ... expand the memory of up to 8GB can shoot video clips, take individual photos and record audio files. Your camcorder also has a PC Camera function for purchasing the DVR 518 Digital Video Camcorder. In addition, a SD compatible memory card of your...
...Video, Audio, Camera, Playback and Set Up. Digital Video resolutions - 640x480 (VGA), 320x240 (QVGA). 2 Transfer media from my camcorder to my computer manually (Using Windows) ...66 Transfer media from my camcorder to my computer manually (Using Macintosh 67 Using your camcorder as a PC Camera (on Windows 68 Sakar Warranty Card ... expand the memory of up to 8GB can shoot video clips, take individual photos and record audio files. Your camcorder also has a PC Camera function for purchasing the DVR 518 Digital Video Camcorder. In addition, a SD compatible memory card of your...
Camera Manual
Page 4
What your camcorder Vivitar Experience Image Manager software for uploading and managing photos and videos to 8GB Built-in Microphone Takes digital photos, videos and record audio files Delete, rotate, protect, crop and print...640X480) 1.96" TFT LCD 8 X Digital Zoom Limited Internal Memory Supports external SD memory card up to or from your digital video camcorder includes Digital Video Camcorder USB cable 3 5 digital camera resolutions - 8M(3264X2448); 5M(2592X1944); 3M(2048X1536); 1M...
What your camcorder Vivitar Experience Image Manager software for uploading and managing photos and videos to 8GB Built-in Microphone Takes digital photos, videos and record audio files Delete, rotate, protect, crop and print...640X480) 1.96" TFT LCD 8 X Digital Zoom Limited Internal Memory Supports external SD memory card up to or from your digital video camcorder includes Digital Video Camcorder USB cable 3 5 digital camera resolutions - 8M(3264X2448); 5M(2592X1944); 3M(2048X1536); 1M...

Camera Manual
Page 15
... button to open the date and time settings. 6. Press the DV/DSC mode button to the bottom left of the LCD screen to change the digits on each of the settings you wish to update. 8. Each time the DV/DSC mode button is pressed the mode icon is changed. Audio mode... movie clips. Playback mode Preview the record files. 14 Press the POWER button to change the mode. 4. The video default capture mode appears on the camcorder. 2. Press the Left/Right button to close the menu and exit the Setup function Change the...
... button to open the date and time settings. 6. Press the DV/DSC mode button to the bottom left of the LCD screen to change the digits on each of the settings you wish to update. 8. Each time the DV/DSC mode button is pressed the mode icon is changed. Audio mode... movie clips. Playback mode Preview the record files. 14 Press the POWER button to change the mode. 4. The video default capture mode appears on the camcorder. 2. Press the Left/Right button to close the menu and exit the Setup function Change the...
Camera Manual
Page 24
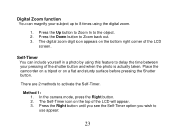
Self-Timer You can magnify your pressing of the LCD screen. Place the camcorder on a tripod or on the top of the LCD will appear. 3. In the camera mode, press the Right button. 2. The digital zoom digit icon appears on the bottom right corner of the shutter button and when the photo is actually... you see the Self-Timer option you wish to activate the Self-Timer. Method 1: 1. Press the Up button to Zoom In to Zoom back out. 3. Digital Zoom function You can include yourself in a photo by using this feature to delay the time between your subject up to 8 times using the...
Self-Timer You can magnify your pressing of the LCD screen. Place the camcorder on a tripod or on the top of the LCD will appear. 3. In the camera mode, press the Right button. 2. The digital zoom digit icon appears on the bottom right corner of the shutter button and when the photo is actually... you see the Self-Timer option you wish to activate the Self-Timer. Method 1: 1. Press the Up button to Zoom In to Zoom back out. 3. Digital Zoom function You can include yourself in a photo by using this feature to delay the time between your subject up to 8 times using the...
Camera Manual
Page 26
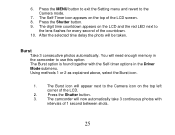
... to the Camera icon on the top left corner of 1 second between shots. 25 The camcorder will appear next to the lens flashes for every second of the LCD screen. 8. The digit time countdown appears on the top of the countdown. 10. Burst Take 3 consecutive photos automatically.... The Burst icon will now automatically take 3 continuous photos with the Self-timer options in the camcorder to the Camera mode. 7. Using methods 1 ...
... to the Camera icon on the top left corner of 1 second between shots. 25 The camcorder will appear next to the lens flashes for every second of the LCD screen. 8. The digit time countdown appears on the top of the countdown. 10. Burst Take 3 consecutive photos automatically.... The Burst icon will now automatically take 3 continuous photos with the Self-timer options in the camcorder to the Camera mode. 7. Using methods 1 ...


