User Guide
Page 7
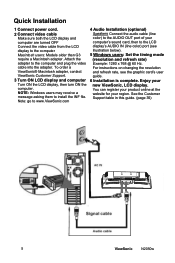
..., then turn ON the computer. You can register your product online at the website for your new ViewSonic, LCD display. NOTE: Windows users may receive a message asking them to the computer and plug the video cable into the adapter. Attach the adapter ... the resolution and refresh rate, see illustration below). 5 Windows users: Set the timing mode (resolution and refresh rate) Example: 1280 x 768 @ 60 Hz. See the Customer Support table in this guide. (page 35) 5 ViewSonic N2050w Note: go to www.ViewSonic.com 4 Audio Installation (optional) Speakers Connect the audio cable ...
..., then turn ON the computer. You can register your product online at the website for your new ViewSonic, LCD display. NOTE: Windows users may receive a message asking them to the computer and plug the video cable into the adapter. Attach the adapter ... the resolution and refresh rate, see illustration below). 5 Windows users: Set the timing mode (resolution and refresh rate) Example: 1280 x 768 @ 60 Hz. See the Customer Support table in this guide. (page 35) 5 ViewSonic N2050w Note: go to www.ViewSonic.com 4 Audio Installation (optional) Speakers Connect the audio cable ...
User Guide
Page 8
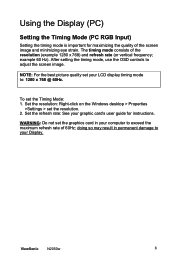
... timing mode, use the OSD controls to your LCD display timing mode to exceed the maximum refresh rate of 60Hz; Set the resolution: Right-click on the Windows desktop > Properties >Settings > set the Timing Mode: 1. ViewSonic N2050w 6 doing so may result in your graphic card's user guide for maximizing the quality of the resolution (example...
... timing mode, use the OSD controls to your LCD display timing mode to exceed the maximum refresh rate of 60Hz; Set the resolution: Right-click on the Windows desktop > Properties >Settings > set the Timing Mode: 1. ViewSonic N2050w 6 doing so may result in your graphic card's user guide for maximizing the quality of the resolution (example...


