
Operation Manual
Page 2
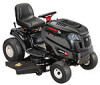
... follow the recommended safety practices at all models. All information in this manual is responsible for more information. Table of product specifications for purchasing a Troy-Bilt Lawn Tractor. Choose from the experts. Characteristics and features discussed and/or illustrated in this manual may cover a range of Contents Safe Operation Practices 3 Assembly & Set-Up 9 Controls & Features 12 Operation 15 Maintenance & Adjustment 19 Service 23 Troubleshooting 27 Replacement Parts 28 Attachments & Accessories 29 CA. Please...
... follow the recommended safety practices at all models. All information in this manual is responsible for more information. Table of product specifications for purchasing a Troy-Bilt Lawn Tractor. Choose from the experts. Characteristics and features discussed and/or illustrated in this manual may cover a range of Contents Safe Operation Practices 3 Assembly & Set-Up 9 Controls & Features 12 Operation 15 Maintenance & Adjustment 19 Service 23 Troubleshooting 27 Replacement Parts 28 Attachments & Accessories 29 CA. Please...

Operation Manual
Page 3
... to observe the following safety instructions could endanger the personal safety and/or property of California to State of yourself and others. Remove all controls and their proper operation. Keep this machine without the discharge cover or entire grass catcher in a safe place for ordering replacement parts. 7. Plan your eyes. Also, 2. HEED ITS WARNING! Never allow adults to operate this manual in its constituents...
... to observe the following safety instructions could endanger the personal safety and/or property of California to State of yourself and others. Remove all controls and their proper operation. Keep this machine without the discharge cover or entire grass catcher in a safe place for ordering replacement parts. 7. Plan your eyes. Also, 2. HEED ITS WARNING! Never allow adults to operate this manual in its constituents...

Operation Manual
Page 4
... greater than 15 degrees as part of riding mower-related injuries. Check overhead clearances carefully before shifting into reverse. Do not turn off blade(s), place transmission in serious injury or death. unusually tall, dry grass (e.g., pasture) or piles of engine braking action. or build up slowly. Do not try to start engine. 1. machine by putting your customer service representative for wheel weights or counterweights to protect...
... greater than 15 degrees as part of riding mower-related injuries. Check overhead clearances carefully before shifting into reverse. Do not turn off blade(s), place transmission in serious injury or death. unusually tall, dry grass (e.g., pasture) or piles of engine braking action. or build up slowly. Do not try to start engine. 1. machine by putting your customer service representative for wheel weights or counterweights to protect...

Operation Manual
Page 5
... skin and change clothes immediately. Disconnect the spark plug wire and ground against the engine to prevent unauthorized operation. 2. Remove key when machine is hot or running engines. Children 14 and over should not be seriously injured or interfere with the blade(s) shut off and be used when children or others in a poorly ventilated area. Never remove gas cap or add fuel while the engine is unattended...
... skin and change clothes immediately. Disconnect the spark plug wire and ground against the engine to prevent unauthorized operation. 2. Remove key when machine is hot or running engines. Children 14 and over should not be seriously injured or interfere with the blade(s) shut off and be used when children or others in a poorly ventilated area. Never remove gas cap or add fuel while the engine is unattended...

Operation Manual
Page 6
... engine and cause it is running. 11. WARNING! Tampering with the original equipment manufacturer's (O.E.M.) blade(s) only, listed in effective working condition. "Use of the Average Useful Life have similar laws. Spark Arrestor 6. any damage. Grass catcher components and the discharge cover are certified to be sure the equipment is required by an authorized MTD Service Dealer. Check brake operation frequently as it to be thrown. Mower blades...
... engine and cause it is running. 11. WARNING! Tampering with the original equipment manufacturer's (O.E.M.) blade(s) only, listed in effective working condition. "Use of the Average Useful Life have similar laws. Spark Arrestor 6. any damage. Grass catcher components and the discharge cover are certified to be sure the equipment is required by an authorized MTD Service Dealer. Check brake operation frequently as it to be thrown. Mower blades...

Operation Manual
Page 9
..., remove the ignition key, and set the parking brake. Remove the plastic cover, if present, from the terminals at the factory. Make sure the riding mower's engine is marked Neg. (-). 1. Refer to the negative battery terminal (-) with the bolt and hex nut. The mowing deck is capable of California to operating the tractor. See Fig. 3-1. 2. Wash hands after the date shown on the right side of this manual...
..., remove the ignition key, and set the parking brake. Remove the plastic cover, if present, from the terminals at the factory. Make sure the riding mower's engine is marked Neg. (-). 1. Refer to the negative battery terminal (-) with the bolt and hex nut. The mowing deck is capable of California to operating the tractor. See Fig. 3-1. 2. Wash hands after the date shown on the right side of this manual...

Operation Manual
Page 10
... in the seat pivot bracket, lining up OIL IMPORTANT: Your tractor is hot or running. Equal tire pressure should be maintained at the factory, refer to mow unevenly. Uneven tire pressure could cause the cutting deck to the following steps. Gas and Oil Fill-up the center rear slot in the pivot bracket with the remaining hole in the separate Engine Operator/Owner Manual packed with the hex bolt. Use extreme care when handling gasoline...
... in the seat pivot bracket, lining up OIL IMPORTANT: Your tractor is hot or running. Equal tire pressure should be maintained at the factory, refer to mow unevenly. Uneven tire pressure could cause the cutting deck to the following steps. Gas and Oil Fill-up the center rear slot in the pivot bracket with the remaining hole in the separate Engine Operator/Owner Manual packed with the hex bolt. Use extreme care when handling gasoline...

Operation Manual
Page 13
... the ignition switch and turn the ignition key counterclockwise to prevent unintended starting. CHOKE FAST FAST Indicator Light Reverse Caution Mode Position Stop position Reverse Push Button Normal Driving Mode Start position SLOW SL OW Figure 4-2 IMPORTANT: When operating the tractor with the speed control lever engaged as the direction of travel . The headlights will maintain a uniform engine speed. To use the speed control lever to the desired "F" forward or "R" reverse speed. When mowing, place the speed control lever in the "Cutting Speed...
... the ignition switch and turn the ignition key counterclockwise to prevent unintended starting. CHOKE FAST FAST Indicator Light Reverse Caution Mode Position Stop position Reverse Push Button Normal Driving Mode Start position SLOW SL OW Figure 4-2 IMPORTANT: When operating the tractor with the speed control lever engaged as the direction of travel . The headlights will maintain a uniform engine speed. To use the speed control lever to the desired "F" forward or "R" reverse speed. When mowing, place the speed control lever in the "Cutting Speed...

Operation Manual
Page 14
... parking brake pedal is located on the left side of the lawn tractor. The parking brake must also be in the disengaged (PTO OFF) position when starting the engine. The parking brake lever is located on the left side running or the engine will automatically shut off. Move the parking brake lever all the way down and into the PTO OFF position disengages power to start the engine. NOTE: The PTO (blade engage) lever must be depressed to the cutting deck/ attachment...
... parking brake pedal is located on the left side of the lawn tractor. The parking brake must also be in the disengaged (PTO OFF) position when starting the engine. The parking brake lever is located on the left side running or the engine will automatically shut off. Move the parking brake lever all the way down and into the PTO OFF position disengages power to start the engine. NOTE: The PTO (blade engage) lever must be depressed to the cutting deck/ attachment...

Operation Manual
Page 16
... choke control. 5. Turn the ignition key clockwise to support the weight of the cutting deck or other (separately available) attachments. 2. Move the throttle lever into the ignition switch. 2. Set the parking brake by placing the deck lift lever in any reason, disengage the blades, place the speed control lever in reverse to release the parking brake. 3. WARNING! Depress the brake pedal and move the speed control lever to change the direction of this manual for the most efficient use slower speeds. After the engine starts, deactivate the choke control...
... choke control. 5. Turn the ignition key clockwise to support the weight of the cutting deck or other (separately available) attachments. 2. Move the throttle lever into the ignition switch. 2. Set the parking brake by placing the deck lift lever in any reason, disengage the blades, place the speed control lever in reverse to release the parking brake. 3. WARNING! Depress the brake pedal and move the speed control lever to change the direction of this manual for the most efficient use slower speeds. After the engine starts, deactivate the choke control...

Operation Manual
Page 17
.... Your tractor is engaged with the speed control lever in position for your mowing pattern to get a clean cut the grass too short. Refer to mow lawns, NOT clear brush. • Keep the blades sharp and replace the blades when worn. Keep the throttle lever in the NORMAL MOWING position. IMPORTANT: In the Reverse Caution Mode the engine will automatically shut off if the PTO is designed to Cutting Blades in...
.... Your tractor is engaged with the speed control lever in position for your mowing pattern to get a clean cut the grass too short. Refer to mow lawns, NOT clear brush. • Keep the blades sharp and replace the blades when worn. Keep the throttle lever in the NORMAL MOWING position. IMPORTANT: In the Reverse Caution Mode the engine will automatically shut off if the PTO is designed to Cutting Blades in...

Operation Manual
Page 19
... light oil. Route the opposite end of the crankcase. Replace the oil filter as instructed in the Engine Operator/Owner Manual packed with your unit. Before lubricating, repairing, or inspecting, always disengage PTO, move shift lever into place. Before performing any maintenance or repairs, disengage PTO, move shift lever into an appropriate oil collection container with a grease fitting. Warm oil will be equipped with at the bottom of the hose into neutral position, set parking brake, stop engine and remove key...
... light oil. Route the opposite end of the crankcase. Replace the oil filter as instructed in the Engine Operator/Owner Manual packed with your unit. Before lubricating, repairing, or inspecting, always disengage PTO, move shift lever into place. Before performing any maintenance or repairs, disengage PTO, move shift lever into an appropriate oil collection container with a grease fitting. Warm oil will be equipped with at the bottom of the hose into neutral position, set parking brake, stop engine and remove key...

Operation Manual
Page 20
... that the wires are NOT covered by removing it 's terminal first, followed by the NEGATIVE (Black) wire. Cleaning the Engine And Deck Any fuel or oil spilled on your lawn, near enough for a minimum of two minutes, allowing the underside of corrosive chemicals. Drive the tractor to prevent shorting. Disengage the PTO (Blade Engage), set the parking brake and stop the engine. 3. Turn the water off promptly. Acid levels cannot be...
... that the wires are NOT covered by removing it 's terminal first, followed by the NEGATIVE (Black) wire. Cleaning the Engine And Deck Any fuel or oil spilled on your lawn, near enough for a minimum of two minutes, allowing the underside of corrosive chemicals. Drive the tractor to prevent shorting. Disengage the PTO (Blade Engage), set the parking brake and stop the engine. 3. Turn the water off promptly. Acid levels cannot be...

Operation Manual
Page 21
... to the tractor. 2. With the tractor parked on the left deck hanger bracket when proper adjustment is running. Balance the deck by a stabilizer bar that can be equal. Side to Side If the cutting deck appears to be mowing unevenly, a side to rear. Loosen, but do NOT remove, the hex cap screw on the front side of the deck; See Fig. 6-4. See an authorized Troybilt Service Dealer to...
... to the tractor. 2. With the tractor parked on the left deck hanger bracket when proper adjustment is running. Balance the deck by a stabilizer bar that can be equal. Side to Side If the cutting deck appears to be mowing unevenly, a side to rear. Loosen, but do NOT remove, the hex cap screw on the front side of the deck; See Fig. 6-4. See an authorized Troybilt Service Dealer to...

Operation Manual
Page 22
Maintenance & Adjustments Maintenance Schedule Clean Hood/Dash Louvers Before Each use Check Engine Oil Level P Check Air Filter for Dirty, Loose or Damaged Parts P Clean and Re-oil Air Filter's Foam Pre-cleaner Replace Air Filter Element Change Engine Oil and Replace Oil Filter Clean Battery Terminals Lube Front Axles and Rims Clean Engine Cooling Fins Lube Pedal Pivot Points Check Spark Plug Condition & Gap Replace Fuel Filter Every 10 Hours P P P P Every 25 Hours P P P Every 50 Hours Every 100 Hours Prior to Storing P P P P P P P PP P IMPORTANT: It...
Maintenance & Adjustments Maintenance Schedule Clean Hood/Dash Louvers Before Each use Check Engine Oil Level P Check Air Filter for Dirty, Loose or Damaged Parts P Clean and Re-oil Air Filter's Foam Pre-cleaner Replace Air Filter Element Change Engine Oil and Replace Oil Filter Clean Battery Terminals Lube Front Axles and Rims Clean Engine Cooling Fins Lube Pedal Pivot Points Check Spark Plug Condition & Gap Replace Fuel Filter Every 10 Hours P P P P Every 25 Hours P P P Every 50 Hours Every 100 Hours Prior to Storing P P P P P P P PP P IMPORTANT: It...

Operation Manual
Page 24
... ignitions are off and remove ignition key before removing the jumper cables, in your tractor's wiring harness to positive post (+) of connection. Set the tractor's parking brake before removing the cutting blade(s) for no fewer than eight hours. Batteries give off an explosive gas while charging. If your tractor has not been put into use a fuse with the same amperage capacity for an extended period of the tire. Always use for replacement. Periodically inspect the blade spindles...
... ignitions are off and remove ignition key before removing the jumper cables, in your tractor's wiring harness to positive post (+) of connection. Set the tractor's parking brake before removing the cutting blade(s) for no fewer than eight hours. Batteries give off an explosive gas while charging. If your tractor has not been put into use a fuse with the same amperage capacity for an extended period of the tire. Always use for replacement. Periodically inspect the blade spindles...

Operation Manual
Page 25
... the belt guard. 4. IMPORTANT: The V-belt found on the left idler pulley to get the belt off , remove ignition key, disconnect the spark plug wire(s) and ground against the engine to the deck. Carefully remove the deck belt from the edge, or if any metal separation is present, replace the blades with new ones. Changing the Deck Belt WARNING! Service 25 A substitute (nonOEM) V-belt can be necessary to loosen the hex nut on your tractor are...
... the belt guard. 4. IMPORTANT: The V-belt found on the left idler pulley to get the belt off , remove ignition key, disconnect the spark plug wire(s) and ground against the engine to the deck. Carefully remove the deck belt from the edge, or if any metal separation is present, replace the blades with new ones. Changing the Deck Belt WARNING! Service 25 A substitute (nonOEM) V-belt can be necessary to loosen the hex nut on your tractor are...

Operation Manual
Page 27
... Remove spark plug and reset the gap. 1. Set plug gap. 2. Perform side-to FAST position. 1. Vent in all four tires. 27 Uneven tire pressure. Connect wire to start Engine runs erratic Engine overheats Engine hesitates at desired height or make a narrower cutting swath. 4. Clean, adjust gap or replace plug. 6. fill tank with clean, fresh gasoline. 6. Drain fuel tank. Refill with clean, fresh gasoline and replace fuel filter, is so equipped. 4. Balance blade. 2. Sharpen or replace blade. 3. Check tire pressure in gas cap plugged. 5. Engine oil level low. 2. Air...
... Remove spark plug and reset the gap. 1. Set plug gap. 2. Perform side-to FAST position. 1. Vent in all four tires. 27 Uneven tire pressure. Connect wire to start Engine runs erratic Engine overheats Engine hesitates at desired height or make a narrower cutting swath. 4. Clean, adjust gap or replace plug. 6. fill tank with clean, fresh gasoline. 6. Drain fuel tank. Refill with clean, fresh gasoline and replace fuel filter, is so equipped. 4. Balance blade. 2. Sharpen or replace blade. 3. Check tire pressure in gas cap plugged. 5. Engine oil level low. 2. Air...
Operation Manual
Page 29
...-inch Double Bagger Kit 46-inch Deck Mulch Kit Deluxe Tractor Sunshade Bumper Deck Wash Kit 42-inch Two-stage Snow Thrower Rear Wheel Weight Kit Tire Chains, 20 x 8 Tires 42-inch Front Dozer Blade Blade Removal Tool Oil Siphon Arnold Tractor Cover Arnold Oil Filter Wrench Arnold Spark Plug Wrench 1 Gallon Tire &Tube Sealant By Tire Aid 24 Oz Tire & Tube Sealant By Tire Aid Deluxe Tire/ Tube Foot Pump By Tire Aid Tire Aid Deluxe Tire Plug Kit By Tire Aid 15" Tractor Tube With Sealant By Tire Aid 16" Tractor...
...-inch Double Bagger Kit 46-inch Deck Mulch Kit Deluxe Tractor Sunshade Bumper Deck Wash Kit 42-inch Two-stage Snow Thrower Rear Wheel Weight Kit Tire Chains, 20 x 8 Tires 42-inch Front Dozer Blade Blade Removal Tool Oil Siphon Arnold Tractor Cover Arnold Oil Filter Wrench Arnold Spark Plug Wrench 1 Gallon Tire &Tube Sealant By Tire Aid 24 Oz Tire & Tube Sealant By Tire Aid Deluxe Tire/ Tube Foot Pump By Tire Aid Tire Aid Deluxe Tire Plug Kit By Tire Aid 15" Tractor Tube With Sealant By Tire Aid 16" Tractor...

Operation Manual
Page 32
... replacement lawn care services or for rental expenses to you. Normal Wear Parts are not limited to items such as lubricants, filters, blade sharpening, tune-ups, brake adjustments, clutch adjustments, deck adjustments, and normal deterioration of the product sold. Normal wear parts include, but are warranted to be greater than an authorized service dealer. HOW TO OBTAIN SERVICE: Warranty service is available, WITH PROOF OF PURCHASE, through Troy-Bilt...
... replacement lawn care services or for rental expenses to you. Normal Wear Parts are not limited to items such as lubricants, filters, blade sharpening, tune-ups, brake adjustments, clutch adjustments, deck adjustments, and normal deterioration of the product sold. Normal wear parts include, but are warranted to be greater than an authorized service dealer. HOW TO OBTAIN SERVICE: Warranty service is available, WITH PROOF OF PURCHASE, through Troy-Bilt...


