
User Manual
Page 17
17 Approved Countries/Regions for use for the Toshiba Mini PCI Wireless LAN Card This equipment is approved to the radio standard by the countries/regions in the following table. Do not use this ... 3945ABG Network Connection This equipment is not available in the following table. Do not use for use this equipment except in the countries/regions in battery mode. 802.11b/g (2.4 GHz) Australia Chile Indonesia New Zealand USA Brunei Hong Kong Malaysia Saudi Arabia Venezuela Canada India Mexico Taiwan Vietnam
17 Approved Countries/Regions for use for the Toshiba Mini PCI Wireless LAN Card This equipment is approved to the radio standard by the countries/regions in the following table. Do not use this ... 3945ABG Network Connection This equipment is not available in the following table. Do not use for use this equipment except in the countries/regions in battery mode. 802.11b/g (2.4 GHz) Australia Chile Indonesia New Zealand USA Brunei Hong Kong Malaysia Saudi Arabia Venezuela Canada India Mexico Taiwan Vietnam
User Manual
Page 27
Contents Introduction 35 This guide 36 Safety icons 37 Other icons used 37 Other documentation 38 Service options 38 Chapter 1: Getting Started 39 Selecting a place to work 39 Creating a computer-friendly environment........39 Keeping yourself comfortable 40 Precautions 40 Important information on your computer's cooling fan 41 Setting up your computer 42 Setting up your software 42 Registering your computer with Toshiba 43 Adding optional external devices 43 Connecting to a power source 44 Charging the main battery 46 27
Contents Introduction 35 This guide 36 Safety icons 37 Other icons used 37 Other documentation 38 Service options 38 Chapter 1: Getting Started 39 Selecting a place to work 39 Creating a computer-friendly environment........39 Keeping yourself comfortable 40 Precautions 40 Important information on your computer's cooling fan 41 Setting up your computer 42 Setting up your software 42 Registering your computer with Toshiba 43 Adding optional external devices 43 Connecting to a power source 44 Charging the main battery 46 27
User Manual
Page 30
... Computing 98 Toshiba's energy-saver design 98 Running the computer on battery power 99 Battery Notice 99 Power management 100 Using additional batteries 101 Charging batteries 101 Charging the main battery 101 Charging the RTC battery 102 Monitoring main battery power 103 Determining remaining battery power 105 What to do when the main battery runs low ...105 Setting battery alarms 106...
... Computing 98 Toshiba's energy-saver design 98 Running the computer on battery power 99 Battery Notice 99 Power management 100 Using additional batteries 101 Charging batteries 101 Charging the main battery 101 Charging the RTC battery 102 Monitoring main battery power 103 Determining remaining battery power 105 What to do when the main battery runs low ...105 Setting battery alarms 106...

User Manual
Page 33
... Resolving hardware conflicts on your own .....180 Fixing a problem with Device Manager ...........181 Memory problems 183 Power and the batteries 184 Keyboard problems 185 Display problems 186 Disk drive problems 188 Optical drive problems 189 Sound system problems 190 PC Card problems... backup in the Windows® operating system 202 If you need further assistance 207 Before you contact Toshiba 207 Contacting Toshiba 207 Other Toshiba Internet Web sites 208 Toshiba's worldwide offices 208 Appendix A: Hot Keys 210 Volume Mute 210 Password security 210 Without a password ...
... Resolving hardware conflicts on your own .....180 Fixing a problem with Device Manager ...........181 Memory problems 183 Power and the batteries 184 Keyboard problems 185 Display problems 186 Disk drive problems 188 Optical drive problems 189 Sound system problems 190 PC Card problems... backup in the Windows® operating system 202 If you need further assistance 207 Before you contact Toshiba 207 Contacting Toshiba 207 Other Toshiba Internet Web sites 208 Toshiba's worldwide offices 208 Appendix A: Hot Keys 210 Volume Mute 210 Password security 210 Without a password ...
User Manual
Page 40
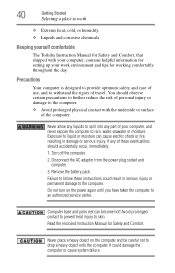
...Never place a heavy object on the power again until you have taken the computer to the computer. Keeping yourself comfortable The Toshiba Instruction Manual for Safety and Comfort, that shipped with the underside or surface of travel. Avoid prolonged contact to prevent heat.... You should accidentally occur, immediately: 1. If any part of these instructions could damage the computer or cause system failure. Remove the battery pack. Disconnect the AC adaptor from the power plug socket and computer. 3. 40 Getting Started Selecting a place to skin. Computer base...
...Never place a heavy object on the power again until you have taken the computer to the computer. Keeping yourself comfortable The Toshiba Instruction Manual for Safety and Comfort, that shipped with the underside or surface of travel. Avoid prolonged contact to prevent heat.... You should accidentally occur, immediately: 1. If any part of these instructions could damage the computer or cause system failure. Remove the battery pack. Disconnect the AC adaptor from the power plug socket and computer. 3. 40 Getting Started Selecting a place to skin. Computer base...

User Manual
Page 42
Setting up your software" on page 42 before you can use external power or to charge the battery you must complete all setup steps up to and including "Setting up your software When you turn off the power again until the operating system ... external or internal components to the Internet and click Next. These components include, but are not limited to be chosen." Your computer contains a rechargeable main battery that needs to , a mouse, keyboard, printer, memory, and PC Cards. To use it. NOTE The names of Microsoft's End User License Agreement and click Next...
Setting up your software" on page 42 before you can use external power or to charge the battery you must complete all setup steps up to and including "Setting up your software When you turn off the power again until the operating system ... external or internal components to the Internet and click Next. These components include, but are not limited to be chosen." Your computer contains a rechargeable main battery that needs to , a mouse, keyboard, printer, memory, and PC Cards. To use it. NOTE The names of Microsoft's End User License Agreement and click Next...

User Manual
Page 44
... cord/cable to remove a plug from a socket. Failure to ensure a secure electrical connection. Always use the TOSHIBA AC adaptor that was provided with your computer and the TOSHIBA Battery Charger (that the power plug (and extension cable plug if used) has been fully inserted into the socket, to... shock, possibly resulting in serious injury. Always confirm that may have been provided with your computer), or use AC adaptors and battery chargers specified by TOSHIBA to the computer. Be careful if you use of fire or other damage to avoid any damage caused by use a multiple ...
... cord/cable to remove a plug from a socket. Failure to ensure a secure electrical connection. Always use the TOSHIBA AC adaptor that was provided with your computer and the TOSHIBA Battery Charger (that the power plug (and extension cable plug if used) has been fully inserted into the socket, to... shock, possibly resulting in serious injury. Always confirm that may have been provided with your computer), or use AC adaptors and battery chargers specified by TOSHIBA to the computer. Be careful if you use of fire or other damage to avoid any damage caused by use a multiple ...
User Manual
Page 46
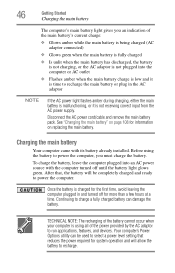
...is time to recharge. Your computer's Power Options utility can damage the battery. To charge the battery, leave the computer plugged into the computer or AC outlet ❖ Flashes amber when the main battery charge is low and it is not receiving correct input from the AC...provided by the AC adaptor to power the computer. 46 Getting Started Charging the main battery The computer's main battery light gives you must charge the battery. Continuing to charge a fully charged battery can be completely charged and ready to run applications, features, and devices. Disconnect the...
...is time to recharge. Your computer's Power Options utility can damage the battery. To charge the battery, leave the computer plugged into the computer or AC outlet ❖ Flashes amber when the main battery charge is low and it is not receiving correct input from the AC...provided by the AC adaptor to power the computer. 46 Getting Started Charging the main battery The computer's main battery light gives you must charge the battery. Continuing to charge a fully charged battery can be completely charged and ready to run applications, features, and devices. Disconnect the...
User Manual
Page 47
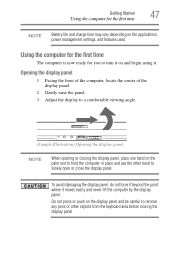
... the applications, power management settings, and features used. Using the computer for the first time The computer is now ready for the first time NOTE Battery life and charge time may vary depending on and begin using it moves easily and never lift the computer by the display panel.
... the applications, power management settings, and features used. Using the computer for the first time The computer is now ready for the first time NOTE Battery life and charge time may vary depending on and begin using it moves easily and never lift the computer by the display panel.
User Manual
Page 48
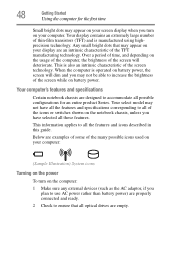
...icons Turning on the power To turn on the computer: 1 Make sure any external devices (such as the AC adaptor, if you turn on battery power. When the computer is also an intrinsic characteristic of thin-film transistors (TFT) and is manufactured using highprecision technology. Your computer's features and ...may not be able to increase the brightness of the screen while on your screen display when you plan to use AC power rather than battery power) are properly connected and ready. 2 Check to ensure that all optical drives are designed to all those features. Your display contains an...
...icons Turning on the power To turn on the computer: 1 Make sure any external devices (such as the AC adaptor, if you turn on battery power. When the computer is also an intrinsic characteristic of thin-film transistors (TFT) and is manufactured using highprecision technology. Your computer's features and ...may not be able to increase the brightness of the screen while on your screen display when you plan to use AC power rather than battery power) are properly connected and ready. 2 Check to ensure that all optical drives are designed to all those features. Your display contains an...
User Manual
Page 51
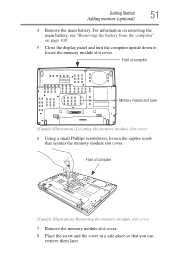
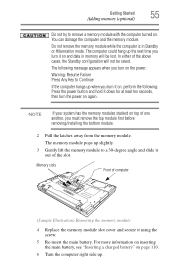
For information on removing the main battery, see "Removing the battery from the computer" on page 109. 5 Close the display panel and turn the computer upside down to locate the memory module slot cover. Front of ... slot cover 6 Using a small Phillips screwdriver, loosen the captive screw that you can retrieve them later. Getting Started 51 Adding memory (optional) 4 Remove the main battery.
For information on removing the main battery, see "Removing the battery from the computer" on page 109. 5 Close the display panel and turn the computer upside down to locate the memory module slot cover. Front of ... slot cover 6 Using a small Phillips screwdriver, loosen the captive screw that you can retrieve them later. Getting Started 51 Adding memory (optional) 4 Remove the main battery.

User Manual
Page 54
... Restart the computer. You can verify that the computer has recognized it using the screw. 15 Re-insert the main battery. For more information on inserting the main battery, see "Inserting a charged battery" on page 50 to shut down the computer and open the memory module slot cover. TECHNICAL NOTE: You must have...
... Restart the computer. You can verify that the computer has recognized it using the screw. 15 Re-insert the main battery. For more information on inserting the main battery, see "Inserting a charged battery" on page 50 to shut down the computer and open the memory module slot cover. TECHNICAL NOTE: You must have...
User Manual
Page 55
... slightly. 3 Gently lift the memory module to a 30-degree angle and slide it using the screw. 5 Re-insert the main battery. For more information on inserting the main battery, see "Inserting a charged battery" on again. The following message appears when you turn on the power: Warning: Resume Failure Press Any Key to remove...
... slightly. 3 Gently lift the memory module to a 30-degree angle and slide it using the screw. 5 Re-insert the main battery. For more information on inserting the main battery, see "Inserting a charged battery" on again. The following message appears when you turn on the power: Warning: Resume Failure Press Any Key to remove...
User Manual
Page 71
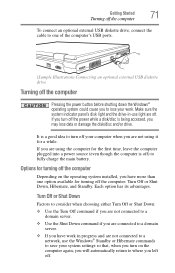
It is a good idea to where you to fully charge the main battery. Turn Off or Shut Down Factors to consider when choosing either Turn Off or Shut Down: ❖ Use the Turn Off command if you are ...
It is a good idea to where you to fully charge the main battery. Turn Off or Shut Down Factors to consider when choosing either Turn Off or Shut Down: ❖ Use the Turn Off command if you are ...
User Manual
Page 72
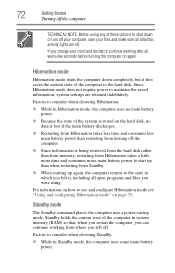
... information is being retrieved from the hard disk rather than from memory, restarting from Hibernation takes a little more time and consumes more main battery power to start up again, the computer returns to the state in which you left off. Standby mode The Standby command places the computer... into a power-saving mode. If you were using any of the system is stored on the hard disk, no main battery power. ❖ Because the state of these options to continue working after all disk/disc activity lights are retained indefinitely. Hibernation mode Hibernation...
... information is being retrieved from the hard disk rather than from memory, restarting from Hibernation takes a little more time and consumes more main battery power to start up again, the computer returns to the state in which you left off. Standby mode The Standby command places the computer... into a power-saving mode. If you were using any of the system is stored on the hard disk, no main battery power. ❖ Because the state of these options to continue working after all disk/disc activity lights are retained indefinitely. Hibernation mode Hibernation...
User Manual
Page 73
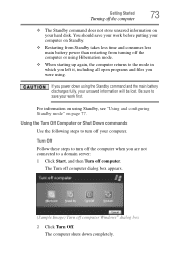
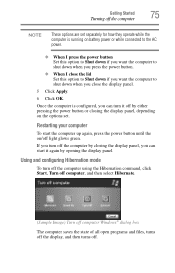
... off your work first. The Turn off computer dialog box appears. (Sample Image) Turn off the computer or using the Standby command and the main battery discharges fully, your hard disk. Be sure to the mode in which you left it, including all open programs and files you power down completely... 77. If you were using Standby, see "Using and configuring Standby mode" on Standby. ❖ Restarting from Standby takes less time and consumes less main battery power than restarting from turning off computer Windows® dialog box 2 Click Turn Off.
... off your work first. The Turn off computer dialog box appears. (Sample Image) Turn off the computer or using the Standby command and the main battery discharges fully, your hard disk. Be sure to the mode in which you left it, including all open programs and files you power down completely... 77. If you were using Standby, see "Using and configuring Standby mode" on Standby. ❖ Restarting from Standby takes less time and consumes less main battery power than restarting from turning off computer Windows® dialog box 2 Click Turn Off.
User Manual
Page 75
... is running on /off by opening the display panel. Restarting your computer To start the computer up again, press the power button until the on battery power or while connected to the AC power. ❖ When I press the power button Set this option to Shut down if you want the computer...
... is running on /off by opening the display panel. Restarting your computer To start the computer up again, press the power button until the on battery power or while connected to the AC power. ❖ When I press the power button Set this option to Shut down if you want the computer...

User Manual
Page 76
... them in Hibernation mode by closing the display panel, you can start up the computer from Hibernation mode, press the power button until the on battery power or while connected to the AC power. ❖ When I close the display panel. 5 Click Apply. 6 Click OK. The computer... the computer automatically goes into Hibernation mode when you want . If you put the computer in Toshiba's Power Saver utility. 1 Click Start, Control Panel, and then Performance and Maintenance. 2 Click the TOSHIBA Power Saver icon. 3 Click the Setup Action tab. 4 Select Hibernation for how they operate ...
... them in Hibernation mode by closing the display panel, you can start up the computer from Hibernation mode, press the power button until the on battery power or while connected to the AC power. ❖ When I close the display panel. 5 Click Apply. 6 Click OK. The computer... the computer automatically goes into Hibernation mode when you want . If you put the computer in Toshiba's Power Saver utility. 1 Click Start, Control Panel, and then Performance and Maintenance. 2 Click the TOSHIBA Power Saver icon. 3 Click the Setup Action tab. 4 Select Hibernation for how they operate ...

User Manual
Page 77
...status of all open programs and files, turns off light blinks amber indicating the computer is in Toshiba's Power Saver utility. 1 Click Start, Control Panel, and then Performance and Maintenance. 2 Click the TOSHIBA Power Saver icon. 3 Click the Setup Action tab. 4 Select Standby for how they operate... while the computer is running on /off the display, and enters into Standby mode. The on battery power or while connected to the AC power. &#...
...status of all open programs and files, turns off light blinks amber indicating the computer is in Toshiba's Power Saver utility. 1 Click Start, Control Panel, and then Performance and Maintenance. 2 Click the TOSHIBA Power Saver icon. 3 Click the Setup Action tab. 4 Select Standby for how they operate... while the computer is running on /off the display, and enters into Standby mode. The on battery power or while connected to the AC power. &#...

User Manual
Page 78
...the screen(s) you have turned off light glows green. See "Utilities" on page 112. For information about taking care of your computer's battery, see "Power Profiles" on the Standby options set. Never use harsh or caustic chemical products to customize your particular requirements. Refer to your ... computer in which you can customize your computer to suit your power usage settings. For more information, see "Taking care of your battery" on page 134. Starting again from Standby mode, press the power button until the on cleaning and moving your computer clean, gently...
...the screen(s) you have turned off light glows green. See "Utilities" on page 112. For information about taking care of your computer's battery, see "Power Profiles" on the Standby options set. Never use harsh or caustic chemical products to customize your particular requirements. Refer to your ... computer in which you can customize your computer to suit your power usage settings. For more information, see "Taking care of your battery" on page 134. Starting again from Standby mode, press the power button until the on cleaning and moving your computer clean, gently...


