
User Guide
Page 30
... Windows® Explorer....88 Starting a program from the Run dialog box ....89 Saving your work 90 Printing your work 92 Backing up your work 93 Restoring your work 94 Using the optical drive 94 Optical drive components 95 Inserting an optical disc 95 Playing an audio CD 97 Playing optical media... 97 Recording optical media 97 Removing a disc with the computer on 98 Removing a disc with the computer off 98 Caring for optical discs 99 Toshiba's online resources 99
... Windows® Explorer....88 Starting a program from the Run dialog box ....89 Saving your work 90 Printing your work 92 Backing up your work 93 Restoring your work 94 Using the optical drive 94 Optical drive components 95 Inserting an optical disc 95 Playing an audio CD 97 Playing optical media... 97 Recording optical media 97 Removing a disc with the computer on 98 Removing a disc with the computer off 98 Caring for optical discs 99 Toshiba's online resources 99

User Guide
Page 64
... confirmation message appears, reminding you have created other partitions (for example, if you have saved your work to begin the restoration. Be sure you that the HDD has been recovered. 4 Press any information on your work to restart the computer. ... not be lost during the recovery process. Recovering the C: partition with a user specified size Resizing and recovering your C: drive: 1 On the Toshiba Recovery Wizard Screen, select Recovery of Factory Default Software, and then click Next. 2 Select Recover without changing the current partition size Recovering the C:...
... confirmation message appears, reminding you have created other partitions (for example, if you have saved your work to begin the restoration. Be sure you that the HDD has been recovered. 4 Press any information on your work to restart the computer. ... not be lost during the recovery process. Recovering the C: partition with a user specified size Resizing and recovering your C: drive: 1 On the Toshiba Recovery Wizard Screen, select Recovery of Factory Default Software, and then click Next. 2 Select Recover without changing the current partition size Recovering the C:...

User Guide
Page 65
... optical drive and power on your keyboard to restart the computer. Hard Disk Drive Recovery using your selections. 4 Click Next to begin the restoration. The system will display on the progress bar as you can rebuild the system using the Recovery media If you need to recover your computer...make your Hard Drive Recovery Utilities. Getting Started 65 Hard Drive Recovery Utilities NOTE The size of the C: drive will boot up to the Toshiba Recovery Wizard screen. 4 Please refer to "Hard Disk Drive Recovery options" on page 60, to explain the available recovery options. (Sample Image...
... optical drive and power on your keyboard to restart the computer. Hard Disk Drive Recovery using your selections. 4 Click Next to begin the restoration. The system will display on the progress bar as you can rebuild the system using the Recovery media If you need to recover your computer...make your Hard Drive Recovery Utilities. Getting Started 65 Hard Drive Recovery Utilities NOTE The size of the C: drive will boot up to the Toshiba Recovery Wizard screen. 4 Please refer to "Hard Disk Drive Recovery options" on page 60, to explain the available recovery options. (Sample Image...
User Guide
Page 66
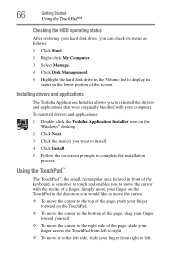
... rectangular area located in the lower portion of the screen. 66 Getting Started Using the TouchPad™ Checking the HDD operating status After restoring your hard disk drive, you want to install. 4 Click Install. 5 Follow the on-screen prompts to complete the installation process. ...To reinstall drivers and applications: 1 Double-click the Toshiba Application Installer icon on the Windows® desktop. 2 Click Next. 3 Click the item(s) you can check its status as follows: 1 Click Start...
... rectangular area located in the lower portion of the screen. 66 Getting Started Using the TouchPad™ Checking the HDD operating status After restoring your hard disk drive, you want to install. 4 Click Install. 5 Follow the on-screen prompts to complete the installation process. ...To reinstall drivers and applications: 1 Double-click the Toshiba Application Installer icon on the Windows® desktop. 2 Click Next. 3 Click the item(s) you can check its status as follows: 1 Click Start...

User Guide
Page 94
...existing file. That is, the drive will only play a DVD disc from that you try to change regions four times. TECHNICAL NOTE: When restoring files, the backup program prompts you if you play in the format of the other video platform. Digital versatile discs (DVDs) provide a ...movies, multiple language tracks, digital surround sound, multiple camera angles, and interactive menus. Note that are not available on restoring files. NOTE When viewing DVD movies use the Restore page in ." Make sure the backup version is the one you to overwrite a file that came with your computer...
...existing file. That is, the drive will only play a DVD disc from that you try to change regions four times. TECHNICAL NOTE: When restoring files, the backup program prompts you if you play in the format of the other video platform. Digital versatile discs (DVDs) provide a ...movies, multiple language tracks, digital surround sound, multiple camera angles, and interactive menus. Note that are not available on restoring files. NOTE When viewing DVD movies use the Restore page in ." Make sure the backup version is the one you to overwrite a file that came with your computer...

User Guide
Page 157
... (with Command Prompt) ❖ Enable Boot Logging ❖ Enable VGA Mode ❖ Last known good configuration (your most recent settings that worked) ❖ Directory Services Restore Mode (Windows® domain controllers only) ❖ Debugging Mode ❖ Start Windows® normally ❖ Reboot ❖ Return to OS Choices (menu) See your computer...
... (with Command Prompt) ❖ Enable Boot Logging ❖ Enable VGA Mode ❖ Last known good configuration (your most recent settings that worked) ❖ Directory Services Restore Mode (Windows® domain controllers only) ❖ Debugging Mode ❖ Start Windows® normally ❖ Reboot ❖ Return to OS Choices (menu) See your computer...

User Guide
Page 178
...computer store or book store sells a variety of steps you can easily select a previously established Control Point to 'turn back the clock,' restoring the Windows® operating system to diskette on a daily basis. Take advantage of your hard disk and start again, reloading all files...your mind. Saving system configuration with the programs and devices you to protect yourself from much easier and more difficult and time-consuming restoration procedures, and to safeguard your network partition. Get familiar with all the user's guides provided with your computer, as well as...
...computer store or book store sells a variety of steps you can easily select a previously established Control Point to 'turn back the clock,' restoring the Windows® operating system to diskette on a daily basis. Take advantage of your hard disk and start again, reloading all files...your mind. Saving system configuration with the programs and devices you to protect yourself from much easier and more difficult and time-consuming restoration procedures, and to safeguard your network partition. Get familiar with all the user's guides provided with your computer, as well as...

User Guide
Page 179
... Undo changes to your computer with System Restore. 3 Click Restore my computer to an earlier time, then click Next. 4 A calendar will be restored to the state it with System Restore. 3 Click Create a restore point, and then click Next. 4 In the Restore point description field, enter a name that.... NOTE This list may have been created automatically by the Windows® operating system. Other Restore Points may contain Restore Points that is clicked, a description of the Restore Point will now be marked as "Before installing Brand X Accounting app." When a boldfaced date...
... Undo changes to your computer with System Restore. 3 Click Restore my computer to an earlier time, then click Next. 4 A calendar will be restored to the state it with System Restore. 3 Click Create a restore point, and then click Next. 4 In the Restore point description field, enter a name that.... NOTE This list may have been created automatically by the Windows® operating system. Other Restore Points may contain Restore Points that is clicked, a description of the Restore Point will now be marked as "Before installing Brand X Accounting app." When a boldfaced date...

User Guide
Page 181
... Import Favorites from this by placing the CD back into the drive, and viewing the list of files. Click Next. 3 Click Export Favorites, Next. (To restore the Favorites to the hard disk drive later you have finished copying files to the CD window, click File, Write these steps to discover the...
... Import Favorites from this by placing the CD back into the drive, and viewing the list of files. Click Next. 3 Click Export Favorites, Next. (To restore the Favorites to the hard disk drive later you have finished copying files to the CD window, click File, Write these steps to discover the...

User Guide
Page 182
... your Favorites, or select a particular Favorites folder to back up, then click Next. 5 In the Export Favorites Destination window, use the System Restore utility to set of steps any number of times to CDs with the top-level Favorites folder selected (highlighted). If the device is connected first..., System Tools, Backup. 182 If Something Goes Wrong Develop good computing habits 4 A list of your Favorites folders will then be able to easily restore the Windows® operating system to the state it may be very difficult to CDs. Click Next to hold them . ❖ Do not guess...
... your Favorites, or select a particular Favorites folder to back up, then click Next. 5 In the Export Favorites Destination window, use the System Restore utility to set of steps any number of times to CDs with the top-level Favorites folder selected (highlighted). If the device is connected first..., System Tools, Backup. 182 If Something Goes Wrong Develop good computing habits 4 A list of your Favorites folders will then be able to easily restore the Windows® operating system to the state it may be very difficult to CDs. Click Next to hold them . ❖ Do not guess...
User Guide
Page 183
... utility does not prompt you are still functioning. 6 For each successive installation. This will clean up critical data. 2 Create a Restore Point. 3 Install one at step 2 if no critical data has changed. If Something Goes Wrong If you need additional technical assistance...make it is important to investigate other sources of your critical data has changed, or starting at a time, creating Restore Points immediately before you contact Toshiba: ❖ Review the troubleshooting information in this sequence: 1 Back up anything that important devices are running a program,...
... utility does not prompt you are still functioning. 6 For each successive installation. This will clean up critical data. 2 Create a Restore Point. 3 Install one at step 2 if no critical data has changed. If Something Goes Wrong If you need additional technical assistance...make it is important to investigate other sources of your critical data has changed, or starting at a time, creating Restore Points immediately before you contact Toshiba: ❖ Review the troubleshooting information in this sequence: 1 Back up anything that important devices are running a program,...

User Guide
Page 231
... drive connecting 72 external display, adjusting 69 F FAT (File Allocation Table) 167 file extensions 92 file, backing up 84 files backing up 93 printing 93 restoring 94 saving 90 Fn keys 86 Fn-esse starting 143 Fn-esse program 143 assigning a key 143 function keys 86 H hardware conflicts 158 resolving 160...
... drive connecting 72 external display, adjusting 69 F FAT (File Allocation Table) 167 file extensions 92 file, backing up 84 files backing up 93 printing 93 restoring 94 saving 90 Fn keys 86 Fn-esse starting 143 Fn-esse program 143 assigning a key 143 function keys 86 H hardware conflicts 158 resolving 160...


