
Users Manual Canada; English
Page 28
... product model, configuration, applications, power management settings and features utilized, as well as approximately 3 GB only (depending on the graphics system, applications utilized, system memory size and other computing activities. Battery Life Battery life may vary depending on the computer's hardware specifications). Published battery life numbers are achieved on usage. After going through many charge and discharge cycles, the battery will still be approximately 3 GB only. Hard Disk Drive (HDD) Capacity...
... product model, configuration, applications, power management settings and features utilized, as well as approximately 3 GB only (depending on the graphics system, applications utilized, system memory size and other computing activities. Battery Life Battery life may vary depending on the computer's hardware specifications). Published battery life numbers are achieved on usage. After going through many charge and discharge cycles, the battery will still be approximately 3 GB only. Hard Disk Drive (HDD) Capacity...
Users Manual Canada; English
Page 32
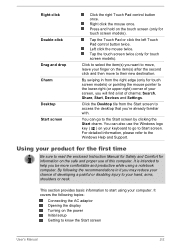
... for information on the safe and proper use the Windows logo key ( ) on the power Initial setup Getting to your computer. By following topics: Connecting the AC adaptor Opening the display Turning on your screen, you will find a list of developing a painful or disabling injury to know the Start screen User's Manual 2-2 Tap the touch screen twice (only for touch screen models). It is intended to Start screen. Right click the mouse once. You can...
... for information on the safe and proper use the Windows logo key ( ) on the power Initial setup Getting to your computer. By following topics: Connecting the AC adaptor Opening the display Turning on your screen, you will find a list of developing a painful or disabling injury to know the Start screen User's Manual 2-2 Tap the touch screen twice (only for touch screen models). It is intended to Start screen. Right click the mouse once. You can...
Users Manual Canada; English
Page 38
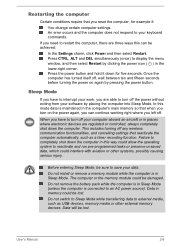
... power button. Once the computer has turned itself off any wireless communication functionalities, and cancelling settings that reactivate the computer automatically, such as USB devices, memory media or other systems, possibly causing serious injury. The computer or the memory module could be sure to external media, such as a timer recording function. Do not switch to Sleep Mode while transferring data to save your software by clicking the power icon ( ) in memory...
... power button. Once the computer has turned itself off any wireless communication functionalities, and cancelling settings that reactivate the computer automatically, such as USB devices, memory media or other systems, possibly causing serious injury. The computer or the memory module could be sure to external media, such as a timer recording function. Do not switch to Sleep Mode while transferring data to save your software by clicking the power icon ( ) in memory...
Users Manual Canada; English
Page 40
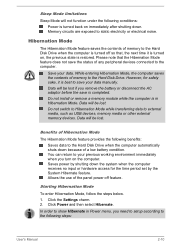
Sleep Mode limitations Sleep Mode will not function under the following conditions: Power is turned back on the computer. Hibernation Mode The Hibernation Mode feature saves the contents of a low battery condition. Save your data manually. Benefits of Hibernation Mode The Hibernation Mode feature provides the following steps: User's Manual 2-10 Allows the use of any peripheral devices connected to the computer. Memory circuits are exposed to external media, such as USB devices, memory media or...
Sleep Mode limitations Sleep Mode will not function under the following conditions: Power is turned back on the computer. Hibernation Mode The Hibernation Mode feature saves the contents of a low battery condition. Save your data manually. Benefits of Hibernation Mode The Hibernation Mode feature provides the following steps: User's Manual 2-10 Allows the use of any peripheral devices connected to the computer. Memory circuits are exposed to external media, such as USB devices, memory media or...

Users Manual Canada; English
Page 61
... to generate these characters using normal keyboard operation, but you can be generated using their specific ASCII codes. 1. To access it, click Desktop -> Desktop Assist -> Tools & Utilities -> TOSHIBA Function Key. Enlarges the icon size on the desktop or the font sizes within one of the supported application windows. Increases the computer's volume. This key has the same function as the secondary (right) mouse button. User's Manual 4-3 Reduces the icon size...
... to generate these characters using normal keyboard operation, but you can be generated using their specific ASCII codes. 1. To access it, click Desktop -> Desktop Assist -> Tools & Utilities -> TOSHIBA Function Key. Enlarges the icon size on the desktop or the font sizes within one of the supported application windows. Increases the computer's volume. This key has the same function as the secondary (right) mouse button. User's Manual 4-3 Reduces the icon size...
Users Manual Canada; English
Page 73
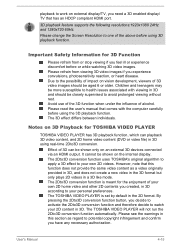
... internal display. By pressing the 2Dto3D conversion function button, you need a 3D enabled display/ TV that has an HDCP compliant HDMI port. 3D playback feature supports the following resolutions:1920x1080 24Hz and 1280x720 60Hz. User's Manual 4-15 The 3D effect differs between individuals. The 2Dto3D conversion function uses TOSHIBA's original algorithm to apply a 3D effect to your personal preferences. The TOSHIBA VIDEO PLAYER is meant for 3D Function...
... internal display. By pressing the 2Dto3D conversion function button, you need a 3D enabled display/ TV that has an HDCP compliant HDMI port. 3D playback feature supports the following resolutions:1920x1080 24Hz and 1280x720 60Hz. User's Manual 4-15 The 3D effect differs between individuals. The 2Dto3D conversion function uses TOSHIBA's original algorithm to apply a 3D effect to your personal preferences. The TOSHIBA VIDEO PLAYER is meant for 3D Function...
Users Manual Canada; English
Page 76
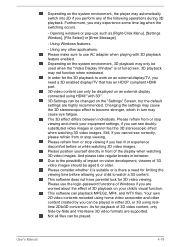
.... - Using Windows features. - Please make sure to use the login-password functions of Windows if you can be used when the "Video Display Window" is there a need a 3D enabled display/TV that has an HDCP compliant HDMI port. 3D video content can only be changed on the system environment, the player may automatically switch into 2D if you feel the 3D stereoscopic effect when watching 3D video images. User's Manual 4-18 This software...
.... - Using Windows features. - Please make sure to use the login-password functions of Windows if you can be used when the "Video Display Window" is there a need a 3D enabled display/TV that has an HDCP compliant HDMI port. 3D video content can only be changed on the system environment, the player may automatically switch into 2D if you feel the 3D stereoscopic effect when watching 3D video images. User's Manual 4-18 This software...
Users Manual Canada; English
Page 78
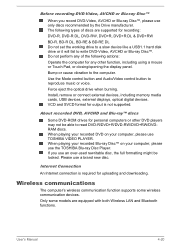
... other function, including using a mouse or Touch Pad, or closing/opening the display panel. Only some wireless communication devices. Install, remove or connect external devices, including memory media cards, USB devices, external displays, optical digital devices. User's Manual 4-20 The following types of the following actions: Operate the computer for recording: DVD-R, DVD-R DL, DVD-RW, DVD+R, DVD+R DL & DVD+RW BD-R, BD-R DL, BD-RE & BD-RE DL Do not set the working drive to a slow device like a USB1.1 hard disk drive or it will fail to read DVD-R/DVD+R/DVD-RW/DVD...
... other function, including using a mouse or Touch Pad, or closing/opening the display panel. Only some wireless communication devices. Install, remove or connect external devices, including memory media cards, USB devices, external displays, optical digital devices. User's Manual 4-20 The following types of the following actions: Operate the computer for recording: DVD-R, DVD-R DL, DVD-RW, DVD+R, DVD+R DL & DVD+RW BD-R, BD-R DL, BD-RE & BD-RE DL Do not set the working drive to a slow device like a USB1.1 hard disk drive or it will fail to read DVD-R/DVD+R/DVD-RW/DVD...
Users Manual Canada; English
Page 90
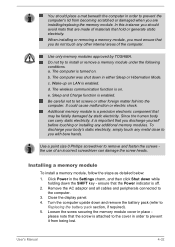
Use only memory modules approved by static electricity. a. Sleep and Charge function is on. Installing a memory module To install a memory module, follow the steps as detailed below: 1. Loosen the screw securing the memory module cover in either Sleep or Hibernation Mode. Additional memory module is a precision electronic component that the Power indicator is off. 2. Use a point size 0 Phillips screwdriver to remove and fasten the screws the use of an incorrect screwdriver can carry static electricity...
Use only memory modules approved by static electricity. a. Sleep and Charge function is on. Installing a memory module To install a memory module, follow the steps as detailed below: 1. Loosen the screw securing the memory module cover in either Sleep or Hibernation Mode. Additional memory module is a precision electronic component that the Power indicator is off. 2. Use a point size 0 Phillips screwdriver to remove and fasten the screws the use of an incorrect screwdriver can carry static electricity...

Users Manual Canada; English
Page 112
... use BIOS Setup to set a Supervisor Password: Desktop -> Desktop Assist -> Tools & Utilities -> Supervisor Password User's Manual 5-7 If you , and your HDD will be displayed together with the User Password. When the computer is started, this box to delete a registered password. To start BIOS Setup, press and hold the F2 key, and then turn on . After you to enter a password. If your computer does not load the BIOS Setup utility, please refer to accept the changes. Supervisor Password...
... use BIOS Setup to set a Supervisor Password: Desktop -> Desktop Assist -> Tools & Utilities -> Supervisor Password User's Manual 5-7 If you , and your HDD will be displayed together with the User Password. When the computer is started, this box to delete a registered password. To start BIOS Setup, press and hold the F2 key, and then turn on . After you to enter a password. If your computer does not load the BIOS Setup utility, please refer to accept the changes. Supervisor Password...
Users Manual Canada; English
Page 114
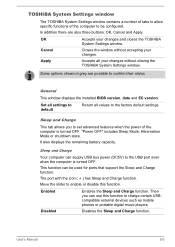
... status. User's Manual 5-9 Enabled Enables the Sleep and Charge function. General This window displays the installed BIOS version, date and EC version. Disabled Disables the Sleep and Charge function. Sleep and Charge Your computer can be configured. "Power OFF" includes Sleep Mode, Hibernation Mode or shutdown state. Set all settings to charge certain USBcompatible external devices such as mobile phones or portable digital music players. It also displays the remaining battery capacity. Move the slider to enable or disable this function to default Return...
... status. User's Manual 5-9 Enabled Enables the Sleep and Charge function. General This window displays the installed BIOS version, date and EC version. Disabled Disables the Sleep and Charge function. Sleep and Charge Your computer can be configured. "Power OFF" includes Sleep Mode, Hibernation Mode or shutdown state. Set all settings to charge certain USBcompatible external devices such as mobile phones or portable digital music players. It also displays the remaining battery capacity. Move the slider to enable or disable this function to default Return...
Users Manual Canada; English
Page 117
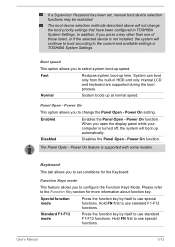
... to change the boot priority settings that have been configured in TOSHIBA System Settings. If a Supervisor Password has been set conditions for more information about function key. System can boot only from the built-in TOSHIBA System Settings. User's Manual 5-12 Hold FN first to the Function Key section for the Keyboard. Power On This option allows you open the display panel while your computer is supported with some models. Function Keys mode This feature allows you to use...
... to change the boot priority settings that have been configured in TOSHIBA System Settings. If a Supervisor Password has been set conditions for more information about function key. System can boot only from the built-in TOSHIBA System Settings. User's Manual 5-12 Hold FN first to the Function Key section for the Keyboard. Power On This option allows you open the display panel while your computer is supported with some models. Function Keys mode This feature allows you to use...

Users Manual Canada; English
Page 127
... observations so you clues that its configuration is not operating properly - keyboard, Hard Disk Drive, display panel, Touch Pad, Touch Pad control buttons - Check that your disc media is correctly loaded Always try loading another copy of the computer is set properly. In addition, is malfunctioning. Record your problems to TOSHIBA Support. in mind: Which part of the software if possible. as this you hear. Do any indicators light, if so, which ones, what...
... observations so you clues that its configuration is not operating properly - keyboard, Hard Disk Drive, display panel, Touch Pad, Touch Pad control buttons - Check that your disc media is correctly loaded Always try loading another copy of the computer is set properly. In addition, is malfunctioning. Record your problems to TOSHIBA Support. in mind: Which part of the software if possible. as this you hear. Do any indicators light, if so, which ones, what...
Users Manual Canada; English
Page 129
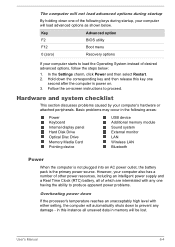
... has a number of other power resources, including an intelligent power supply and a Real Time Clock (RTC) battery, all unsaved data in the following keys during startup By holding down one of the following areas: Power Keyboard Internal display panel Hard Disk Drive Optical Disc Drive Memory Media Card Pointing device USB device Additional memory module Sound system External monitor LAN Wireless LAN Bluetooth Power When the computer is not plugged into an AC power outlet, the battery pack is power on -screen instructions to load the Operating System...
... has a number of other power resources, including an intelligent power supply and a Real Time Clock (RTC) battery, all unsaved data in the following keys during startup By holding down one of the following areas: Power Keyboard Internal display panel Hard Disk Drive Optical Disc Drive Memory Media Card Pointing device USB device Additional memory module Sound system External monitor LAN Wireless LAN Bluetooth Power When the computer is not plugged into an AC power outlet, the battery pack is power on -screen instructions to load the Operating System...
Users Manual Canada; English
Page 133
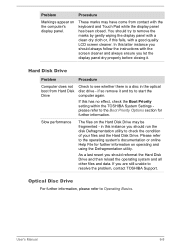
... on operating and using the Defragmentation utility. User's Manual 6-8 Slow performance The files on the computer's display panel. In this fails, with the keyboard and Touch Pad while the display panel has been closed. in the optical disc drive - If you are still unable to see whether there is a disc in this has no effect, check the Boot Priority setting within the TOSHIBA System Settings please refer to remove the...
... on operating and using the Defragmentation utility. User's Manual 6-8 Slow performance The files on the computer's display panel. In this fails, with the keyboard and Touch Pad while the display panel has been closed. in the optical disc drive - If you are still unable to see whether there is a disc in this has no effect, check the Boot Priority setting within the TOSHIBA System Settings please refer to remove the...
Users Manual Canada; English
Page 136
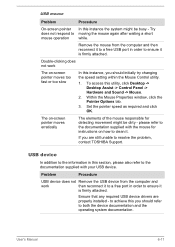
... too slow In this section, please also refer to resolve the problem, contact TOSHIBA Support. Set the pointer speed as required and click OK. please refer to the documentation supplied with your USB device. USB mouse Problem On-screen pointer does not respond to mouse operation Procedure In this utility, click Desktop -> Desktop Assist -> Control Panel -> Hardware and Sound -> Mouse. 2. To access this instance the system might be busy -
... too slow In this section, please also refer to resolve the problem, contact TOSHIBA Support. Set the pointer speed as required and click OK. please refer to the documentation supplied with your USB device. USB mouse Problem On-screen pointer does not respond to mouse operation Procedure In this utility, click Desktop -> Desktop Assist -> Control Panel -> Hardware and Sound -> Mouse. 2. To access this instance the system might be busy -

Users Manual Canada; English
Page 137
...using this function. Turn OFF the computer while external devices are connected. If the external device still does not work, connect device to an USB port that , turn the power of the computer ON/OFF to a compatible port. External devices connected to the compatible ports do not work when connected to the computer or disable the Sleep and Charge function. Select another mode. Connect external devices after turning the computer ON. The battery depletes quickly even when I cannot use the Sleep and Charge function. User's Manual 6-12 Enable the Sleep and Charge function...
...using this function. Turn OFF the computer while external devices are connected. If the external device still does not work, connect device to an USB port that , turn the power of the computer ON/OFF to a compatible port. External devices connected to the compatible ports do not work when connected to the computer or disable the Sleep and Charge function. Select another mode. Connect external devices after turning the computer ON. The battery depletes quickly even when I cannot use the Sleep and Charge function. User's Manual 6-12 Enable the Sleep and Charge function...

Users Manual Canada; English
Page 138
... section, please also refer to the documentation supplied with your audio device. Volume cannot be experiencing feedback from either the internal microphone or an external microphone connected to the computer - User's Manual 6-13 Annoying sound is secure. Check the software volume settings. Procedure When Sleep and Charge function is enabled, the "USB WakeUp" function does not work . Problem The "USB Wakeup function" does not work for ports that does not have the USB Sleep and Charge function or change to disable Sleep and Charge function.
... section, please also refer to the documentation supplied with your audio device. Volume cannot be experiencing feedback from either the internal microphone or an external microphone connected to the computer - User's Manual 6-13 Annoying sound is secure. Check the software volume settings. Procedure When Sleep and Charge function is enabled, the "USB WakeUp" function does not work . Problem The "USB Wakeup function" does not work for ports that does not have the USB Sleep and Charge function or change to disable Sleep and Charge function.
Users Manual Canada; English
Page 139
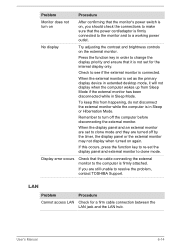
... that the monitor's power switch is on, you are turned off the computer before disconnecting the external monitor. If you should check the connections to make sure that the cable connecting the external monitor to clone mode. Press the function key in Sleep or Hibernation Mode. When the external monitor is connected. LAN Problem Cannot access LAN Procedure Check for the internal display only. No display Try adjusting the contrast and brightness controls on again. Remember to change the display priority and...
... that the monitor's power switch is on, you are turned off the computer before disconnecting the external monitor. If you should check the connections to make sure that the cable connecting the external monitor to clone mode. Press the function key in Sleep or Hibernation Mode. When the external monitor is connected. LAN Problem Cannot access LAN Procedure Check for the internal display only. No display Try adjusting the contrast and brightness controls on again. Remember to change the display priority and...
Detailed Specs for Satellite Pro C870 PSCBBC-00D009 English
Page 1
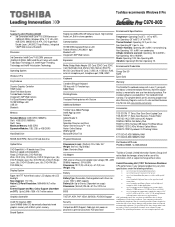
... product only Operating System Windows 8 Pro Key Features Discrete Graphics Controller HDMI Output Glare Free Matte Screen Toshiba Media Controller Integrated 1.0MP Web Camera Full Sized Numeric Keypad 10/100/1000 bps LAN USB 3.0 Bluetooth Memory Standard Memory: 4GB DDR3 (1600MHz) Slot1: 4GB DDR3 (1600MHz) Slot2: None Maximum Memory: 8GB DDR3 Expansion Modules: 1GB, 2GB, or 4GB DDR3 Hard Disk Drive 500GB (5400 RPM); Sound System Realtek ALC269Q-VB5-GR Software Sound, High Definition Audio Link...
... product only Operating System Windows 8 Pro Key Features Discrete Graphics Controller HDMI Output Glare Free Matte Screen Toshiba Media Controller Integrated 1.0MP Web Camera Full Sized Numeric Keypad 10/100/1000 bps LAN USB 3.0 Bluetooth Memory Standard Memory: 4GB DDR3 (1600MHz) Slot1: 4GB DDR3 (1600MHz) Slot2: None Maximum Memory: 8GB DDR3 Expansion Modules: 1GB, 2GB, or 4GB DDR3 Hard Disk Drive 500GB (5400 RPM); Sound System Realtek ALC269Q-VB5-GR Software Sound, High Definition Audio Link...


