

User Manual
Page 26
...Chapter 5 The Keyboard Typewriter keys 5-1 F1 ... F12 function keys 5-2 Soft keys: Fn key combinations 5-2 Emulating keys on enhanced keyboard 5-2 Hot keys 5-3 Fn Sticky key 5-7 Windows special keys 5-7 Keypad overlay 5-7 Turning on the overlays 5-7 Arrow mode 5-8 Numeric mode 5-8 Temporarily using normal keyboard (overlay on) ........ 5-8 Temporarily using overlay (overlay off 5-9 ... 6-4 Battery types 6-4 Battery 6-4 Real time clock battery 6-5 Care and use of the battery pack 6-5 Safety precautions 6-5 Charging the batteries 6-8 Monitoring battery capacity 6-10 xxvi
...Chapter 5 The Keyboard Typewriter keys 5-1 F1 ... F12 function keys 5-2 Soft keys: Fn key combinations 5-2 Emulating keys on enhanced keyboard 5-2 Hot keys 5-3 Fn Sticky key 5-7 Windows special keys 5-7 Keypad overlay 5-7 Turning on the overlays 5-7 Arrow mode 5-8 Numeric mode 5-8 Temporarily using normal keyboard (overlay on) ........ 5-8 Temporarily using overlay (overlay off 5-9 ... 6-4 Battery types 6-4 Battery 6-4 Real time clock battery 6-5 Care and use of the battery pack 6-5 Safety precautions 6-5 Charging the batteries 6-8 Monitoring battery capacity 6-10 xxvi
User Manual
Page 27
... 6-16 Panel power on/off 6-16 System Auto Off 6-16 Chapter 7 HW Setup and Passwords HW Setup 7-1 Accessing HW Setup 7-1 HW Setup window 7-2 Chapter 8 Optional Devices Cards/memory 8-1 Power devices 8-1 Peripheral devices 8-1 Other 8-1 PC cards 8-2 Installing a PC card 8-2 Removing a PC... Multiple Digital Media Card Slot (Supported with some models 8-6 Installing a SD/MS/MS Pro/MMC/xD card 8-6 Removing a SD/MS/MS Pro/MMC/xD card 8-7 Memory expansion 8-8 Installing memory module 8-8 Removing memory module 8-10 Additional battery pack (4 Cell, 6 Cell and 8 Cell ).... 8-11 xxvii
... 6-16 Panel power on/off 6-16 System Auto Off 6-16 Chapter 7 HW Setup and Passwords HW Setup 7-1 Accessing HW Setup 7-1 HW Setup window 7-2 Chapter 8 Optional Devices Cards/memory 8-1 Power devices 8-1 Peripheral devices 8-1 Other 8-1 PC cards 8-2 Installing a PC card 8-2 Removing a PC... Multiple Digital Media Card Slot (Supported with some models 8-6 Installing a SD/MS/MS Pro/MMC/xD card 8-6 Removing a SD/MS/MS Pro/MMC/xD card 8-7 Memory expansion 8-8 Installing memory module 8-8 Removing memory module 8-10 Additional battery pack (4 Cell, 6 Cell and 8 Cell ).... 8-11 xxvii

User Manual
Page 78
... set by shutting down the computer in hibernation mode or in memory will be sure to save your data. 2. In Windows® XP, open Performance and Maintenance and open TOSHIBA Power Saver. 3-10 Press the power button. Do not install or remove a memory module while the computer is connected to avoid radio signal...
... set by shutting down the computer in hibernation mode or in memory will be sure to save your data. 2. In Windows® XP, open Performance and Maintenance and open TOSHIBA Power Saver. 3-10 Press the power button. Do not install or remove a memory module while the computer is connected to avoid radio signal...

User Manual
Page 79
...source prior to recovering your system's Recovery media to re-install the Windows operating system. Restarting the computer Certain conditions require that you are two ways to do say may result in hibernation mode. There are using Windows® XP, click start then click Turn off computer menu select ...Restart. 2. Wait 10 to 15 seconds, then turn the power back on immediately after shutting down. ❑ Memory circuits...
...source prior to recovering your system's Recovery media to re-install the Windows operating system. Restarting the computer Certain conditions require that you are two ways to do say may result in hibernation mode. There are using Windows® XP, click start then click Turn off computer menu select ...Restart. 2. Wait 10 to 15 seconds, then turn the power back on immediately after shutting down. ❑ Memory circuits...

User Manual
Page 91
..., LCD/TV and Multi-Monitor. 4-9 Note: Press F1 to perform DVD and CD playback without using Windows. CAUTION: Express Media Player is available only for Express Media Player and this guide available while Express Media ...Player AV Button function (Provided with some models) This section describes a button function. OPERATING BASICS Figure 4-10 AV Button Windows mode Icon AV Button DVD (WinDVD5) *CD/DVD (WMP10) CD/DVD Detect and Detect and activate ...media Play/Pause Stop Previous tune Next tune *Windows Media Player 10 Express Media Player Express Media Player is active.
..., LCD/TV and Multi-Monitor. 4-9 Note: Press F1 to perform DVD and CD playback without using Windows. CAUTION: Express Media Player is available only for Express Media Player and this guide available while Express Media ...Player AV Button function (Provided with some models) This section describes a button function. OPERATING BASICS Figure 4-10 AV Button Windows mode Icon AV Button DVD (WinDVD5) *CD/DVD (WMP10) CD/DVD Detect and Detect and activate ...media Play/Pause Stop Previous tune Next tune *Windows Media Player 10 Express Media Player Express Media Player is active.

User Manual
Page 101
... button in the drive. 7. Click [Edit] button then drag the video clips from the DV-Camcorder via IEEE1394. 3. RW/+RW disc in the Virtual Memory window. 9. Click the OK button in with Administrator rights to the edit track. 4. Specify much higher values for additional InterVideo WinDVD Creator information. Click [Start] to... Creator 2] - [InterVideo WinDVD Creator] to the on DVD Super Multi (+-R Double Layer) drive 4. Writing CD/DVDs on -line Help for "Initial size" and "Maximum size." 10. Click the Settings icon in the "Performance" section. 6.
... button in the drive. 7. Click [Edit] button then drag the video clips from the DV-Camcorder via IEEE1394. 3. RW/+RW disc in the Virtual Memory window. 9. Click the OK button in with Administrator rights to the edit track. 4. Specify much higher values for additional InterVideo WinDVD Creator information. Click [Start] to... Creator 2] - [InterVideo WinDVD Creator] to the on DVD Super Multi (+-R Double Layer) drive 4. Writing CD/DVDs on -line Help for "Initial size" and "Maximum size." 10. Click the Settings icon in the "Performance" section. 6.

User Manual
Page 221
... with two screws removed in this instruction or touch any other peripheral devices. 3. The following is preinstalled. Save your data, quit Windows and turn off the power. 2. Remove one screw. 10. Install the battery pack. Turn the computer upside down and remove the battery pack. 4. Secure the modem board with one screw...
... with two screws removed in this instruction or touch any other peripheral devices. 3. The following is preinstalled. Save your data, quit Windows and turn off the power. 2. Remove one screw. 10. Install the battery pack. Turn the computer upside down and remove the battery pack. 4. Secure the modem board with one screw...

User Manual
Page 222
... two screws removed in step 5. 9. APPENDIX F User's Manual Removing the modem board To remove the internal modem. 1. Save your data, quit Windows and turn off the power. 2. Remove one screw. 10. The internal modem is approved by Japan Approvals Institute for Telecommunications Equipment. Install the battery pack. Secure the modem board with...
... two screws removed in step 5. 9. APPENDIX F User's Manual Removing the modem board To remove the internal modem. 1. Save your data, quit Windows and turn off the power. 2. Remove one screw. 10. The internal modem is approved by Japan Approvals Institute for Telecommunications Equipment. Install the battery pack. Secure the modem board with...

User Manual
Page 246
... (ScrLock) 5-3 Fn Sticky key 5-7 Function Keys 5-2 H Hard disk drive 1-4 automatic power off ) 5-9 turning on 5-7 Windows special keys 5-7 L LAN, See also Wireless LAN 1-8 cable types 4-33 connecting 4-33 disconnecting 4-34 problems 9-24 using overlay (overlay off... 5-4 HW Setup 1-12 accessing 7-1 Boot Priority 7-6 CPU 7-5 Display 7-4 General 7-2 Keyboard 7-7 LAN 7-8 Parallel/Printer 7-4 Password 7-2 USB 7-8 Index-2 I Indicators 2-10, 6-3 Infrared port, See also Ports problems 9-15 Instant security, See Hot keys Interfaces, See Ports K Keyboard 1-6, 5-1 emulating enhanced keyboard 5-2 F1 . . ....
... (ScrLock) 5-3 Fn Sticky key 5-7 Function Keys 5-2 H Hard disk drive 1-4 automatic power off ) 5-9 turning on 5-7 Windows special keys 5-7 L LAN, See also Wireless LAN 1-8 cable types 4-33 connecting 4-33 disconnecting 4-34 problems 9-24 using overlay (overlay off... 5-4 HW Setup 1-12 accessing 7-1 Boot Priority 7-6 CPU 7-5 Display 7-4 General 7-2 Keyboard 7-7 LAN 7-8 Parallel/Printer 7-4 Password 7-2 USB 7-8 Index-2 I Indicators 2-10, 6-3 Infrared port, See also Ports problems 9-15 Instant security, See Hot keys Interfaces, See Ports K Keyboard 1-6, 5-1 emulating enhanced keyboard 5-2 F1 . . ....
Detailed Specs for Satellite Pro A100 PSAAPC-CS307C English
Page 1
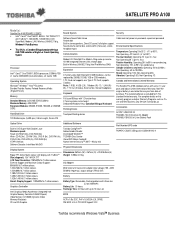
....3.4, PCI BIOS Support V2.2. Part Number/UPC code PSAAPC-CS307C (Bilingual)/ 6-23506-01443-4 Toshiba recommends Windows VistaTM Business Communication ModemV.92 Data/56K Fax Modem, Ring wake up to 10,000m. Non Operating 20° C per hr. max Relative Humidity: Operating 20% to...colours 1,920x1,440x16.7 million colours Simult. SATELLITE PRO A100 Model (s): Satellite Pro Ai100 PSAAPC-CS307C ƒ Intel® Core2® Duo T5600-1.83GHz, 15.4"WXGA TFT with TruBriteTM, 1GB DDR2, 120GB HDD, DVD SuperMulti, Modem, LAN, Wireless LAN 802.11b/g, Windows® Vista Business ƒ This SKU...
....3.4, PCI BIOS Support V2.2. Part Number/UPC code PSAAPC-CS307C (Bilingual)/ 6-23506-01443-4 Toshiba recommends Windows VistaTM Business Communication ModemV.92 Data/56K Fax Modem, Ring wake up to 10,000m. Non Operating 20° C per hr. max Relative Humidity: Operating 20% to...colours 1,920x1,440x16.7 million colours Simult. SATELLITE PRO A100 Model (s): Satellite Pro Ai100 PSAAPC-CS307C ƒ Intel® Core2® Duo T5600-1.83GHz, 15.4"WXGA TFT with TruBriteTM, 1GB DDR2, 120GB HDD, DVD SuperMulti, Modem, LAN, Wireless LAN 802.11b/g, Windows® Vista Business ƒ This SKU...


