User Manual
Page 10
...it must be sent to trade-in accordance with the related European Directives. For information on recycling and reuse. This product is TOSHIBA Europe GmbH, Hammfelddamm 8, 41460 Neuss, Germany. The European Union WEEE (Waste from Electrical and Electronic Equipment) Directive Information The ...engineers, suppliers, and other countries such as the United States. If the product's battery or accumulator contains more than the specified values of electrical and electronic products put on the battery. This Directive requires producers of lead (Pb), mercury (Hg), and/or cadmium ...
...it must be sent to trade-in accordance with the related European Directives. For information on recycling and reuse. This product is TOSHIBA Europe GmbH, Hammfelddamm 8, 41460 Neuss, Germany. The European Union WEEE (Waste from Electrical and Electronic Equipment) Directive Information The ...engineers, suppliers, and other countries such as the United States. If the product's battery or accumulator contains more than the specified values of electrical and electronic products put on the battery. This Directive requires producers of lead (Pb), mercury (Hg), and/or cadmium ...
User Manual
Page 22
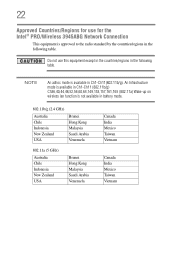
NOTE An adhoc mode is available in battery mode. 802.11b/g (2.4 GHz) Australia Chile Indonesia New Zealand USA Brunei Hong Kong Malaysia Saudi Arabia Venezuela 802.11a (5 GHz) Australia Chile Indonesia New Zealand ...
NOTE An adhoc mode is available in battery mode. 802.11b/g (2.4 GHz) Australia Chile Indonesia New Zealand USA Brunei Hong Kong Malaysia Saudi Arabia Venezuela 802.11a (5 GHz) Australia Chile Indonesia New Zealand ...
User Manual
Page 30
Contents Introduction 38 This guide 40 Safety icons 41 Other icons used 41 Your computer's features and specifications ....42 Other documentation 42 Service options 42 Chapter 1: Getting Started 43 Selecting a place to work 43 Setting up a work environment 43 Keeping yourself comfortable 44 Precautions 44 Important information on your computer's cooling fan 46 Setting up your computer 46 Connecting to a power source 47 Charging the main battery 49 Using the computer for the first time 50 Opening the display panel 50 30
Contents Introduction 38 This guide 40 Safety icons 41 Other icons used 41 Your computer's features and specifications ....42 Other documentation 42 Service options 42 Chapter 1: Getting Started 43 Selecting a place to work 43 Setting up a work environment 43 Keeping yourself comfortable 44 Precautions 44 Important information on your computer's cooling fan 46 Setting up your computer 46 Connecting to a power source 47 Charging the main battery 49 Using the computer for the first time 50 Opening the display panel 50 30

User Manual
Page 33
... Caring for optical discs 112 Toshiba's online resources 112 Chapter 3: Mobile Computing 113 Toshiba's energy-saver design 113 Running the computer on battery power 114 Battery Notice 114 Power management 115 Using additional batteries 115 Charging batteries 115 Charging the main battery 116 Charging the RTC battery 116 Monitoring main battery power 117 Determining remaining battery power 118 What to...
... Caring for optical discs 112 Toshiba's online resources 112 Chapter 3: Mobile Computing 113 Toshiba's energy-saver design 113 Running the computer on battery power 114 Battery Notice 114 Power management 115 Using additional batteries 115 Charging batteries 115 Charging the main battery 116 Charging the RTC battery 116 Monitoring main battery power 117 Determining remaining battery power 118 What to...
User Manual
Page 35
... Sleep and Charge Utility.......165 USB Sleep and Charge 165 Enabling USB Sleep and Charge 167 Power supply mode settings 167 Battery settings 167 TOSHIBA Zooming Utility 168 TOSHIBA Button Support 169 TOSHIBA Accessibility 170 Fingerprint Authentication Utility 171 Fingerprint utility limitations 171 Using the Fingerprint Authentication Utility.....171 Fingerprint Logon 171 Care and...
... Sleep and Charge Utility.......165 USB Sleep and Charge 165 Enabling USB Sleep and Charge 167 Power supply mode settings 167 Battery settings 167 TOSHIBA Zooming Utility 168 TOSHIBA Button Support 169 TOSHIBA Accessibility 170 Fingerprint Authentication Utility 171 Fingerprint utility limitations 171 Using the Fingerprint Authentication Utility.....171 Fingerprint Logon 171 Care and...
User Manual
Page 36
...a hardware conflict 190 A plan of action 190 Fixing a problem with Device Manager ...........191 Memory problems 192 Power and the batteries 193 Keyboard problems 194 Display problems 195 Disk or internal storage drive problems ..........197 Optical drive problems (tray-type drive)..........198 Sound...174; operating system 207 If you need further assistance 212 Before you contact Toshiba 212 Contacting Toshiba 213 Other Toshiba Internet Web sites 214 Toshiba's worldwide offices 214 Appendix A: Hot Keys/TOSHIBA Cards 216 Hot Key Cards 216 Using the Hot Key Cards 217 Application ...
...a hardware conflict 190 A plan of action 190 Fixing a problem with Device Manager ...........191 Memory problems 192 Power and the batteries 193 Keyboard problems 194 Display problems 195 Disk or internal storage drive problems ..........197 Optical drive problems (tray-type drive)..........198 Sound...174; operating system 207 If you need further assistance 212 Before you contact Toshiba 212 Contacting Toshiba 213 Other Toshiba Internet Web sites 214 Toshiba's worldwide offices 214 Appendix A: Hot Keys/TOSHIBA Cards 216 Hot Key Cards 216 Using the Hot Key Cards 217 Application ...

User Manual
Page 38
...Your computer ships with the ENERGY STAR® logo on using power management settings to conserve computer energy. 38 With your Toshiba computer, your computer is labeled with the power management options preset to a configuration that you go. Introduction Welcome to the world of ...the Toshiba User's Guide for both AC power and battery modes. You can accompany you wherever you leave this computer to meet the latest ENERGY STAR® guidelines for energy...
...Your computer ships with the ENERGY STAR® logo on using power management settings to conserve computer energy. 38 With your Toshiba computer, your computer is labeled with the power management options preset to a configuration that you go. Introduction Welcome to the world of ...the Toshiba User's Guide for both AC power and battery modes. You can accompany you wherever you leave this computer to meet the latest ENERGY STAR® guidelines for energy...
User Manual
Page 44
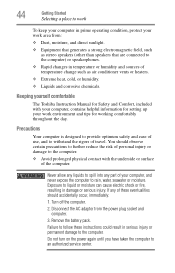
... as air conditioner vents or heaters. ❖ Extreme heat, cold, or humidity. ❖ Liquids and corrosive chemicals. Turn off the computer. 2. Remove the battery pack. Failure to follow these eventualities should observe certain precautions to further reduce the risk of these instructions could result in serious injury or permanent... computer is designed to provide optimum safety and ease of use, and to withstand the rigors of the computer. Keeping yourself comfortable The Toshiba Instruction Manual for Safety and Comfort, included with the underside or surface of travel.
... as air conditioner vents or heaters. ❖ Extreme heat, cold, or humidity. ❖ Liquids and corrosive chemicals. Turn off the computer. 2. Remove the battery pack. Failure to follow these eventualities should observe certain precautions to further reduce the risk of these instructions could result in serious injury or permanent... computer is designed to provide optimum safety and ease of use, and to withstand the rigors of the computer. Keeping yourself comfortable The Toshiba Instruction Manual for Safety and Comfort, included with the underside or surface of travel.
User Manual
Page 46
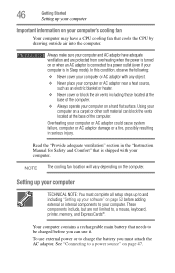
... your computer on a carpet or other soft material can use external power or to charge the battery you can block the vents located at the base of the computer. Your computer contains a rechargeable main battery that is in Sleep mode). Using your computer or AC adaptor could cause system failure, computer or...
... your computer on a carpet or other soft material can use external power or to charge the battery you can block the vents located at the base of the computer. Your computer contains a rechargeable main battery that is in Sleep mode). Using your computer or AC adaptor could cause system failure, computer or...
User Manual
Page 47
... connect the computer to a live electrical outlet, or to operate. Always confirm that may have been provided with your computer and the TOSHIBA Battery Charger (that the power plug (and extension cable plug if used) has been fully inserted into the socket, to the computer. Always use...the cord/cable, and/or result in a fire or electric shock, possibly resulting in serious injury. Use of an incompatible AC adaptor or Battery Charger could cause a fire or electric shock, possibly resulting in serious injury. AC adaptor Power cord/cable AC adaptor cord (Sample Illustration) Power...
... connect the computer to a live electrical outlet, or to operate. Always confirm that may have been provided with your computer and the TOSHIBA Battery Charger (that the power plug (and extension cable plug if used) has been fully inserted into the socket, to the computer. Always use...the cord/cable, and/or result in a fire or electric shock, possibly resulting in serious injury. Use of an incompatible AC adaptor or Battery Charger could cause a fire or electric shock, possibly resulting in serious injury. AC adaptor Power cord/cable AC adaptor cord (Sample Illustration) Power...
User Manual
Page 49
...for system operation and will be used to select a power level setting that , the battery will allow the battery to run applications, features, and devices. Charging the main battery Before using all of the battery cannot occur when your computer is not receiving correct input from the AC power supply. ...NOTE: The recharging of the power provided by the AC adaptor to recharge. See "Changing the main battery" on page 124 for more than a few hours at a time. Once the battery is charged for the first time, avoid leaving the computer plugged in the AC adaptor NOTE If the...
...for system operation and will be used to select a power level setting that , the battery will allow the battery to run applications, features, and devices. Charging the main battery Before using all of the battery cannot occur when your computer is not receiving correct input from the AC power supply. ...NOTE: The recharging of the power provided by the AC adaptor to recharge. See "Changing the main battery" on page 124 for more than a few hours at a time. Once the battery is charged for the first time, avoid leaving the computer plugged in the AC adaptor NOTE If the...
User Manual
Page 50
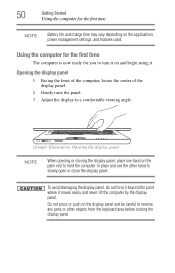
..., place one hand on and begin using it. Using the computer for the first time The computer is now ready for the first time NOTE Battery life and charge time may vary depending on the display panel and be careful to remove any pens or other hand to slowly open or...
..., place one hand on and begin using it. Using the computer for the first time The computer is now ready for the first time NOTE Battery life and charge time may vary depending on the display panel and be careful to remove any pens or other hand to slowly open or...
User Manual
Page 51
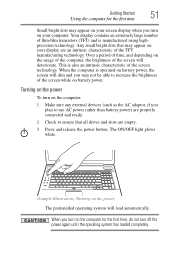
...turn on the computer: 1 Make sure any external devices (such as the AC adaptor, if you plan to use AC power rather than battery power) are properly connected and ready. 2 Check to increase the brightness of the screen while on the power The preinstalled operating system will deteriorate.... The ON/OFF light glows white. (Sample Illustration) Turning on battery power. When the computer is also an intrinsic characteristic of the screen technology. Over a period of time, and depending on your display are...
...turn on the computer: 1 Make sure any external devices (such as the AC adaptor, if you plan to use AC power rather than battery power) are properly connected and ready. 2 Check to increase the brightness of the screen while on the power The preinstalled operating system will deteriorate.... The ON/OFF light glows white. (Sample Illustration) Turning on battery power. When the computer is also an intrinsic characteristic of the screen technology. Over a period of time, and depending on your display are...
User Manual
Page 55
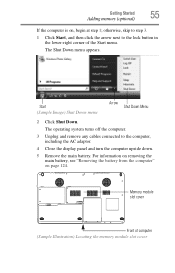
... next to the computer, including the AC adaptor. 4 Close the display panel and turn the computer upside down. 5 Remove the main battery. For information on removing the main battery, see "Removing the battery from the computer" on , begin at step 1; The Shut Down menu appears. The operating system turns off the computer. 3 Unplug...
... next to the computer, including the AC adaptor. 4 Close the display panel and turn the computer upside down. 5 Remove the main battery. For information on removing the main battery, see "Removing the battery from the computer" on , begin at step 1; The Shut Down menu appears. The operating system turns off the computer. 3 Unplug...
User Manual
Page 59
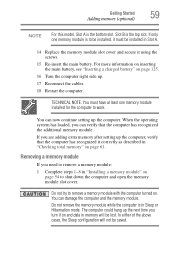
... memory will not be installed in Slot A. 14 Replace the memory module slot cover and secure it using the screws. 15 Re-insert the main battery. Removing a memory module If you are adding extra memory after setting up the next time you can verify that the computer has recognized it on... page 54 to be lost. For more information on inserting the main battery, see "Inserting a charged battery" on page 61. Do not remove the memory module while the computer is to shut down the computer and open the memory module...
... memory will not be installed in Slot A. 14 Replace the memory module slot cover and secure it using the screws. 15 Re-insert the main battery. Removing a memory module If you are adding extra memory after setting up the next time you can verify that the computer has recognized it on... page 54 to be lost. For more information on inserting the main battery, see "Inserting a charged battery" on page 61. Do not remove the memory module while the computer is to shut down the computer and open the memory module...
User Manual
Page 61
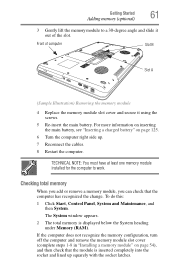
... memory is inserted completely into the socket and lined up . 7 Reconnect the cables. 8 Restart the computer. For more information on inserting the main battery, see "Inserting a charged battery" on page 54), and then check that the computer has recognized the change. Front of the slot. TECHNICAL NOTE: You must have at least... computer Slot B Slot A (Sample Illustration) Removing the memory module 4 Replace the memory module slot cover and secure it using the screws. 5 Re-insert the main battery.
... memory is inserted completely into the socket and lined up . 7 Reconnect the cables. 8 Restart the computer. For more information on inserting the main battery, see "Inserting a charged battery" on page 54), and then check that the computer has recognized the change. Front of the slot. TECHNICAL NOTE: You must have at least... computer Slot B Slot A (Sample Illustration) Removing the memory module 4 Replace the memory module slot cover and secure it using the screws. 5 Re-insert the main battery.
User Manual
Page 82
... source (even though the computer is being accessed, you to lose your printer installation guide for the first time. Refer to fully charge the main battery. Turning off the computer Pressing the power button before completing the following procedure. If you are off the computer Setting up for instructions before shutting...
... source (even though the computer is being accessed, you to lose your printer installation guide for the first time. Refer to fully charge the main battery. Turning off the computer Pressing the power button before completing the following procedure. If you are off the computer Setting up for instructions before shutting...
User Manual
Page 83
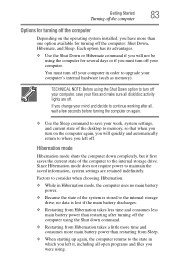
... memory). Hibernation mode Hibernation mode shuts the computer down command. ❖ Restarting from Hibernation takes a little more time and consumes more main battery power than one option available for several days or if you have more than restarting from Sleep. ❖ When starting up again, the computer... the computer: Shut Down, Hibernate, and Sleep. TECHNICAL NOTE: Before using the Shut Down option to the internal storage drive, no main battery power. ❖ Because the state of the computer to upgrade your computer in which you left off. If you change your mind and ...
... memory). Hibernation mode Hibernation mode shuts the computer down command. ❖ Restarting from Hibernation takes a little more time and consumes more main battery power than one option available for several days or if you have more than restarting from Sleep. ❖ When starting up again, the computer... the computer: Shut Down, Hibernate, and Sleep. TECHNICAL NOTE: Before using the Shut Down option to the internal storage drive, no main battery power. ❖ Because the state of the computer to upgrade your computer in which you left off. If you change your mind and ...
User Manual
Page 84
...computer. NOTE After your computer sleeps for an extended period of the system is stored in memory, you will lose data if the main battery discharges while the computer is in which you were using Sleep, see "Using and configuring Hibernation mode" on page 89. If you ... including all open documents and programs to your unsaved information will try to enter Hibernation mode. For information on using . ❖ If the battery charge becomes critically low, the computer will be lost. Sleep mode The Sleep command places the computer into a power-saving mode. 84 Getting ...
...computer. NOTE After your computer sleeps for an extended period of the system is stored in memory, you will lose data if the main battery discharges while the computer is in which you were using Sleep, see "Using and configuring Hibernation mode" on page 89. If you ... including all open documents and programs to your unsaved information will try to enter Hibernation mode. For information on using . ❖ If the battery charge becomes critically low, the computer will be lost. Sleep mode The Sleep command places the computer into a power-saving mode. 84 Getting ...

User Manual
Page 86
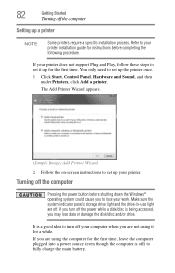
... 4 Click Power buttons and lid to display the actions that you can be set separately for how they operate while the computer is running on battery power or while connected to AC power. ❖ Lid close action Set this option to Shut down if you want the computer to shut down...
... 4 Click Power buttons and lid to display the actions that you can be set separately for how they operate while the computer is running on battery power or while connected to AC power. ❖ Lid close action Set this option to Shut down if you want the computer to shut down...


