
User Guide
Page 23
... contact an authorized Toshiba service provider, if any repair or adjustment is required. Never attempt to disassemble, adjust or repair a HD DVD, CD/DVD drive, CD-RW drive, Multi-drive or any other optical drive. Never attempt to disassemble, adjust or repair a HD DVD, CD/DVD drive, CD-RW drive, Multi-drive or any other optical drive. You could damage the drive. Location of...
... contact an authorized Toshiba service provider, if any repair or adjustment is required. Never attempt to disassemble, adjust or repair a HD DVD, CD/DVD drive, CD-RW drive, Multi-drive or any other optical drive. Never attempt to disassemble, adjust or repair a HD DVD, CD/DVD drive, CD-RW drive, Multi-drive or any other optical drive. You could damage the drive. Location of...
User Guide
Page 28
...87 Saving your work 88 Saving files 88 Printing your work 90 Backing up your work 91 Restoring your work 92 Using the Optical Drive 92 Optical Drive components 93 Inserting a compact disc 94 Playing an audio CD 96 Playing CDs using Auto-Run 97 Creating a CD 97 Removing a ...disc with the computer on 98 Removing a disc with the computer off 99 Caring for CD or DVD Discs 99 Toshiba's online resources 100 Chapter 3: Mobile Computing 101 Toshiba's...
...87 Saving your work 88 Saving files 88 Printing your work 90 Backing up your work 91 Restoring your work 92 Using the Optical Drive 92 Optical Drive components 93 Inserting a compact disc 94 Playing an audio CD 96 Playing CDs using Auto-Run 97 Creating a CD 97 Removing a ...disc with the computer on 98 Removing a disc with the computer off 99 Caring for CD or DVD Discs 99 Toshiba's online resources 100 Chapter 3: Mobile Computing 101 Toshiba's...
User Guide
Page 30
... Adapter Slot 140 Inserting memory media 141 Removing memory media 141 Chapter 5: Toshiba Utilities 143 TOSHIBA Assist 144 Connect 145 Secure 145 Protect & Fix 146 Optimize 147 TOSHIBA SD™ Memory Card Format Utility .........148 Setting passwords 149 Using an ... Using a supervisor or user password 150 TOSHIBA Password Utility 152 PC Diagnostic Tool Utility 154 TOSHIBA Hotkey Utility 155 Mouse Utility 156 TOSHIBA Hardware Setup 157 TOSHIBA Zooming Utility 159 CD/DVD Drive Acoustic Silencer 160 TOSHIBA Accessibility 162 Fingerprint Authentication Utility 163 Fingerprint ...
... Adapter Slot 140 Inserting memory media 141 Removing memory media 141 Chapter 5: Toshiba Utilities 143 TOSHIBA Assist 144 Connect 145 Secure 145 Protect & Fix 146 Optimize 147 TOSHIBA SD™ Memory Card Format Utility .........148 Setting passwords 149 Using an ... Using a supervisor or user password 150 TOSHIBA Password Utility 152 PC Diagnostic Tool Utility 154 TOSHIBA Hotkey Utility 155 Mouse Utility 156 TOSHIBA Hardware Setup 157 TOSHIBA Zooming Utility 159 CD/DVD Drive Acoustic Silencer 160 TOSHIBA Accessibility 162 Fingerprint Authentication Utility 163 Fingerprint ...
User Guide
Page 31
... on your own .....184 Fixing a problem with Device Manager ...........185 Memory problems 187 Power and the batteries 188 Keyboard problems 190 Display problems 191 Disk drive problems 193 Optical Drive problems 196 Sound system problems 197 PC Card problems 197 Printer problems 201 Modem problems 202 Wireless networking problems 203...
... on your own .....184 Fixing a problem with Device Manager ...........185 Memory problems 187 Power and the batteries 188 Keyboard problems 190 Display problems 191 Disk drive problems 193 Optical Drive problems 196 Sound system problems 197 PC Card problems 197 Printer problems 201 Modem problems 202 Wireless networking problems 203...

User Guide
Page 46
After starting your software. 46 Getting Started Adding external devices Adding external devices NOTE Before adding external devices or memory, Toshiba recommends setting up your software" on page 136). See "Setting up your computer for the first time you may want to: ❖ Add more memory (... external monitor (see "Using external display devices" on page 65). ❖ Connect a local printer (see "Connecting a printer" on page 69). ❖ Connect an external CD/DVD drive (see "Using the Optical Drive" on page 92). ❖ Install PC Cards (see "Using PC Cards" on page 44.
After starting your software. 46 Getting Started Adding external devices Adding external devices NOTE Before adding external devices or memory, Toshiba recommends setting up your software" on page 136). See "Setting up your computer for the first time you may want to: ❖ Add more memory (... external monitor (see "Using external display devices" on page 65). ❖ Connect a local printer (see "Connecting a printer" on page 69). ❖ Connect an external CD/DVD drive (see "Using the Optical Drive" on page 92). ❖ Install PC Cards (see "Using PC Cards" on page 44.

User Guide
Page 91
... Print dialog box 3 Specify the print parameters. You can be backed up several files at one time, use a high-capacity backup system, such as CDs, DVDs, diskettes, or to a network, if available. To back up on the computer's hard disk. You may take a considerable amount of copies to print. 4... Click Print. Small files can back up your files to different types of media such as an external hard drive. For more information, see "Backing up all the files you create in case something happens to your computer. Learning the Basics Backing up all ...
... Print dialog box 3 Specify the print parameters. You can be backed up several files at one time, use a high-capacity backup system, such as CDs, DVDs, diskettes, or to a network, if available. To back up on the computer's hard disk. You may take a considerable amount of copies to print. 4... Click Print. Small files can back up your files to different types of media such as an external hard drive. For more information, see "Backing up all the files you create in case something happens to your computer. Learning the Basics Backing up all ...
User Guide
Page 92
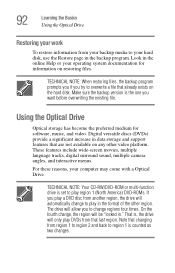
...other region. These features include wide-screen movies, multiple language tracks, digital surround sound, multiple camera angles, and interactive menus. That is, the drive will only play DVDs from region 1 to region 2 and back to region 1 is set to play region 1 (North America...for software, music, and video. TECHNICAL NOTE: Your CD-RW/DVD-ROM or multi-function drive is counted as two changes. 92 Learning the Basics Using the Optical Drive Restoring your work To restore information from another region, the drive will automatically change to play in the format of the other video...
...other region. These features include wide-screen movies, multiple language tracks, digital surround sound, multiple camera angles, and interactive menus. That is, the drive will only play DVDs from region 1 to region 2 and back to region 1 is set to play region 1 (North America...for software, music, and video. TECHNICAL NOTE: Your CD-RW/DVD-ROM or multi-function drive is counted as two changes. 92 Learning the Basics Using the Optical Drive Restoring your work To restore information from another region, the drive will automatically change to play in the format of the other video...

User Guide
Page 93
... button-Press to malfunction. Doing so could damage the disc or the drive. Do not press the eject button or turn off the computer while the Drive in use indicator light is recommended that you play DVDs while running the computer on the right side of the computer. When ...disc tray is located on AC power. Doing so could cause the drive to release the disc tray. Learning the Basics Using the Optical Drive 93 NOTE For optimum DVD performance, it . Your Optical Drive may look like this: Drive in-use indicator light Eject button Manual eject hole (Sample Illustration) Optical...
... button-Press to malfunction. Doing so could damage the disc or the drive. Do not press the eject button or turn off the computer while the Drive in use indicator light is recommended that you play DVDs while running the computer on the right side of the computer. When ...disc tray is located on AC power. Doing so could cause the drive to release the disc tray. Learning the Basics Using the Optical Drive 93 NOTE For optimum DVD performance, it . Your Optical Drive may look like this: Drive in-use indicator light Eject button Manual eject hole (Sample Illustration) Optical...

User Guide
Page 95
... not stack discs. You are ready to use the disc. Learning the Basics Using the Optical Drive 95 If the disc is lying flat on the tray. If this happens, contact Toshiba support for CD or DVD Discs" on the center of the disc. Do not touch the surface of the tray until... it may jam the drive. If you incorrectly handle the discs, you insert the disc incorrectly, it clicks...
... not stack discs. You are ready to use the disc. Learning the Basics Using the Optical Drive 95 If the disc is lying flat on the tray. If this happens, contact Toshiba support for CD or DVD Discs" on the center of the disc. Do not touch the surface of the tray until... it may jam the drive. If you incorrectly handle the discs, you insert the disc incorrectly, it clicks...

User Guide
Page 97
...follow these steps: 1 Open the Start menu and select My Computer. 2 Click the Optical Drive icon. For other types of media, use it is associated with a multi-function drive that allows you to: ❖ Play pre-recorded DVDs ❖ Play pre-recorded CDs ❖ Read and write data (depending on your disc,...the disc. To do this method, try launching the CD manually. Learning the Basics Using the Optical Drive 97 ❖ To stop the CD, click the Stop button. and DVD±R/±RW or DVD RAM discs. Playing CDs using an application that is a music CD, open the files on the ...
...follow these steps: 1 Open the Start menu and select My Computer. 2 Click the Optical Drive icon. For other types of media, use it is associated with a multi-function drive that allows you to: ❖ Play pre-recorded DVDs ❖ Play pre-recorded CDs ❖ Read and write data (depending on your disc,...the disc. To do this method, try launching the CD manually. Learning the Basics Using the Optical Drive 97 ❖ To stop the CD, click the Stop button. and DVD±R/±RW or DVD RAM discs. Playing CDs using an application that is a music CD, open the files on the ...

User Guide
Page 98
... due to any defect in certain cases, your Toshiba optical drive may not record on your optical drive may also prevent or limit recording or viewing of specific format compatibilities. Removing a disc with the computer on To remove a compact disc (CD or DVD) with the computer turned on: 1 Press the... . Do not press the eject button while the in to close it is glowing. 98 Learning the Basics Using the Optical Drive NOTE Due to manufacturing and quality variations in third party optical media (e.g., CD or DVD) or optical media players/recorders, in your Toshiba computer or optical...
... due to any defect in certain cases, your Toshiba optical drive may not record on your optical drive may also prevent or limit recording or viewing of specific format compatibilities. Removing a disc with the computer on To remove a compact disc (CD or DVD) with the computer turned on: 1 Press the... . Do not press the eject button while the in to close it is glowing. 98 Learning the Basics Using the Optical Drive NOTE Due to manufacturing and quality variations in third party optical media (e.g., CD or DVD) or optical media players/recorders, in your Toshiba computer or optical...

User Guide
Page 99
... properly. ❖ Do not expose discs to direct sunlight or extreme heat or cold. The disc tray slides partially out of the drive (about 1 inch). Caring for CD or DVD Discs ❖ Store your discs in to close it . ❖ Do not apply a label to or otherwise mar the surface of a disc...
... properly. ❖ Do not expose discs to direct sunlight or extreme heat or cold. The disc tray slides partially out of the drive (about 1 inch). Caring for CD or DVD Discs ❖ Store your discs in to close it . ❖ Do not apply a label to or otherwise mar the surface of a disc...

User Guide
Page 111
... back on a number of factors, such as desired. (Sample Illustration) Alarms tab in the Power Options Properties function drive, diskette drives, or other optional devices ❖ Where you are working, since operating time decreases at low temperatures There are using ...the computer depends on again ❖ Use the power schemes in Power Options Properties Conserving battery power How long a fully charged battery pack lasts when you use the hard disk, DVD...
... back on a number of factors, such as desired. (Sample Illustration) Alarms tab in the Power Options Properties function drive, diskette drives, or other optional devices ❖ Where you are working, since operating time decreases at low temperatures There are using ...the computer depends on again ❖ Use the power schemes in Power Options Properties Conserving battery power How long a fully charged battery pack lasts when you use the hard disk, DVD...

User Guide
Page 143
... describes the utilities supplied by Toshiba: ❖ TOSHIBA Assist ❖ Supervisor password ❖ User password ❖ TOSHIBA Password Utility ❖ PC Diagnostic Tool Utility ❖ TOSHIBA Hotkey Utility ❖ TOSHIBA SD™ Memory Card Format Utility ❖ Mouse Utility ❖ TOSHIBA Hardware Setup ❖ TOSHIBA Zooming Utility ❖ CD/DVD Drive Acoustic Silencer ❖ TOSHIBA Accessibility ❖ Fingerprint Authentication Utility...
... describes the utilities supplied by Toshiba: ❖ TOSHIBA Assist ❖ Supervisor password ❖ User password ❖ TOSHIBA Password Utility ❖ PC Diagnostic Tool Utility ❖ TOSHIBA Hotkey Utility ❖ TOSHIBA SD™ Memory Card Format Utility ❖ Mouse Utility ❖ TOSHIBA Hardware Setup ❖ TOSHIBA Zooming Utility ❖ CD/DVD Drive Acoustic Silencer ❖ TOSHIBA Accessibility ❖ Fingerprint Authentication Utility...

User Guide
Page 147
Optimize tab 147 TOSHIBA Assist Optimize The features available in this category are: ❖ TOSHIBA SD™ Memory Card Format Utility ❖ Mouse Utility ❖ TOSHIBA Accessibility ❖ TOSHIBA Zooming Utility ❖ CD/DVD Drive Acoustic Silencer ❖ TOSHIBA Hardware Setup (Sample Illustration) TOSHIBA Assist window -
Optimize tab 147 TOSHIBA Assist Optimize The features available in this category are: ❖ TOSHIBA SD™ Memory Card Format Utility ❖ Mouse Utility ❖ TOSHIBA Accessibility ❖ TOSHIBA Zooming Utility ❖ CD/DVD Drive Acoustic Silencer ❖ TOSHIBA Hardware Setup (Sample Illustration) TOSHIBA Assist window -

User Guide
Page 160
...selected. If you shut down, restart, log off, or resume from hibernation, the setting will now work with the applications you change the CD/DVD drive to zoom out, hold down the Fn key and press 1. The zoom in the taskbar and then click Help. The setting can also be ... can use the TOSHIBA Zooming utility, right click the icon in and zoom out hot keys will revert back to use this utility to make listening to make it run more quietly. For more enjoyable. 160 CD/DVD Drive Acoustic Silencer 2 Select the desired option(s). 3 Click OK. CD/DVD Drive Acoustic Silencer This ...
...selected. If you shut down, restart, log off, or resume from hibernation, the setting will now work with the applications you change the CD/DVD drive to zoom out, hold down the Fn key and press 1. The zoom in the taskbar and then click Help. The setting can also be ... can use the TOSHIBA Zooming utility, right click the icon in and zoom out hot keys will revert back to use this utility to make listening to make it run more quietly. For more enjoyable. 160 CD/DVD Drive Acoustic Silencer 2 Select the desired option(s). 3 Click OK. CD/DVD Drive Acoustic Silencer This ...

User Guide
Page 161
161 CD/DVD Drive Acoustic Silencer (Sample Illustration) CD/DVD Drive Acoustic Silencer screen 1 Double-click the icon in the task tray, or double-click the CD/ DVD Drive icon in the Optimize tab of TOSHIBA Assist. The CD/DVD Drive Acoustic Silencer screen appears. 2 Click Set Quiet Mode to make the drive run more slowly and quietly, for listening to music or audio files on a CD. 3 Click Set Normal Mode to run the drive at normal speed, for transferring data.
161 CD/DVD Drive Acoustic Silencer (Sample Illustration) CD/DVD Drive Acoustic Silencer screen 1 Double-click the icon in the task tray, or double-click the CD/ DVD Drive icon in the Optimize tab of TOSHIBA Assist. The CD/DVD Drive Acoustic Silencer screen appears. 2 Click Set Quiet Mode to make the drive run more slowly and quietly, for listening to music or audio files on a CD. 3 Click Set Normal Mode to run the drive at normal speed, for transferring data.

User Guide
Page 194
...Table (FAT) on the disk and repairs any damage it finds: To run Error-checking: 1 Click Start, then click My Computer. 2 Right-click the drive you have become fragmented. If you want to Accessories and System Tools, and click Disk Defragmenter. To do this, click Start, then click All Programs..., point to check. 3 On the pop-up menu, click Properties. Run Disk Defragmenter. Error-checking tests and repairs the disk. The drive's Properties box appears. NOTE This feature is not available for CD/DVD drives. 4 Click the Tools tab. 5 Click the Check now button.
...Table (FAT) on the disk and repairs any damage it finds: To run Error-checking: 1 Click Start, then click My Computer. 2 Right-click the drive you have become fragmented. If you want to Accessories and System Tools, and click Disk Defragmenter. To do this, click Start, then click All Programs..., point to check. 3 On the pop-up menu, click Properties. Run Disk Defragmenter. Error-checking tests and repairs the disk. The drive's Properties box appears. NOTE This feature is not available for CD/DVD drives. 4 Click the Tools tab. 5 Click the Check now button.

User Guide
Page 212
...our computer system is required. External CD and DVD writers are also widely available. Select Open writable CD folder using Windows Explorer, and click OK. 3 A Windows Explorer window will appear. Most of the CD and DVD drives built into recent Toshiba portable computer models can make the data inaccessible ...or even destroy it , and stored on its hard disk drive. Click the down-pointing arrow at the upper right of the window (to ...
...our computer system is required. External CD and DVD writers are also widely available. Select Open writable CD folder using Windows Explorer, and click OK. 3 A Windows Explorer window will appear. Most of the CD and DVD drives built into recent Toshiba portable computer models can make the data inaccessible ...or even destroy it , and stored on its hard disk drive. Click the down-pointing arrow at the upper right of the window (to ...

User Guide
Page 264
...." The MIDI standard provides a way of every line is temporarily stored and processed. It contains the processor, memory, and other users and to CD and DVD media. multi-function drive-A DVD drive that are run and data is refreshed as RAM, or it can read and write to exchange electronic mail. N network - A system's logical...
...." The MIDI standard provides a way of every line is temporarily stored and processed. It contains the processor, memory, and other users and to CD and DVD media. multi-function drive-A DVD drive that are run and data is refreshed as RAM, or it can read and write to exchange electronic mail. N network - A system's logical...


