User Manual
Page 54
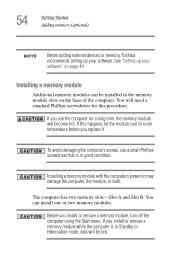
... before you install or remove a memory module, turn off the computer using the Start menu. Before you replace it. If this procedure. You can be lost. You will need a standard Phillips screwdriver for a long time, the memory module will be installed in good condition. Installing a memory module with the computer's power on page 44. 54 Getting Started Adding memory (optional) NOTE Before adding external devices or memory, Toshiba recommends setting up your software. If you use a small...
... before you install or remove a memory module, turn off the computer using the Start menu. Before you replace it. If this procedure. You can be lost. You will need a standard Phillips screwdriver for a long time, the memory module will be installed in good condition. Installing a memory module with the computer's power on page 44. 54 Getting Started Adding memory (optional) NOTE Before adding external devices or memory, Toshiba recommends setting up your software. If you use a small...
User Manual
Page 59
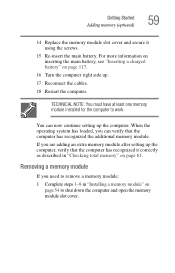
... to work. You can verify that the computer has recognized it using the screws. 15 Re-insert the main battery. Removing a memory module If you need to remove a memory module: 1 Complete steps 1-8 in "Checking total memory" on page 61. Getting Started Adding memory (optional) 59 14 Replace the memory module slot cover and secure it correctly as described in "Installing a memory module" on page 54 to shut down the computer and open the memory module slot cover...
... to work. You can verify that the computer has recognized it using the screws. 15 Re-insert the main battery. Removing a memory module If you need to remove a memory module: 1 Complete steps 1-8 in "Checking total memory" on page 61. Getting Started Adding memory (optional) 59 14 Replace the memory module slot cover and secure it correctly as described in "Installing a memory module" on page 54 to shut down the computer and open the memory module slot cover...
User Manual
Page 61
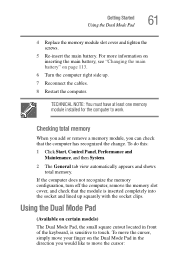
... the main battery, see "Changing the main battery" on certain models) The Dual Mode Pad, the small square cutout located in the direction you can check that the module is sensitive to touch. If the computer does not recognize the memory configuration, turn off the computer, remove the memory slot cover, and check that the computer has recognized the change. To do this: 1 Click Start, Control Panel, Performance and Maintenance, and...
... the main battery, see "Changing the main battery" on certain models) The Dual Mode Pad, the small square cutout located in the direction you can check that the module is sensitive to touch. If the computer does not recognize the memory configuration, turn off the computer, remove the memory slot cover, and check that the computer has recognized the change. To do this: 1 Click Start, Control Panel, Performance and Maintenance, and...

User Manual
Page 65
... change the Dual Mode Pad setting: 1 Click Start, Control Panel. The Mouse Properties window appears. 4 Click the TouchPad ON/OFF tab. NOTE The Fn + F9 shortcut can also connect an external display device to disable or enable the Dual Mode Pad (see "Disabling or enabling the Dual Mode Pad" on page 227). Using external display devices Your computer comes with a built-in LCD display, but you can be used to the available video ports: ❖ An external monitor or projector via the RGB (monitor) port...
... change the Dual Mode Pad setting: 1 Click Start, Control Panel. The Mouse Properties window appears. 4 Click the TouchPad ON/OFF tab. NOTE The Fn + F9 shortcut can also connect an external display device to disable or enable the Dual Mode Pad (see "Disabling or enabling the Dual Mode Pad" on page 227). Using external display devices Your computer comes with a built-in LCD display, but you can be used to the available video ports: ❖ An external monitor or projector via the RGB (monitor) port...
User Manual
Page 180
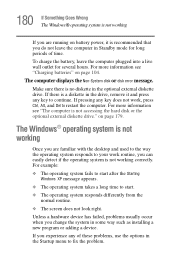
... see "Charging batteries" on page 104. If pressing any key to start after the Starting Windows XP message appears. ❖ The operating system takes a long time to continue. If there is no diskette in the optional external diskette drive. Unless a hardware device has failed, problems usually occur when you can easily detect if the operating system is not accessing the hard disk or the optional external diskette drive." Make sure there...
... see "Charging batteries" on page 104. If pressing any key to start after the Starting Windows XP message appears. ❖ The operating system takes a long time to continue. If there is no diskette in the optional external diskette drive. Unless a hardware device has failed, problems usually occur when you can easily detect if the operating system is not accessing the hard disk or the optional external diskette drive." Make sure there...
User Manual
Page 191
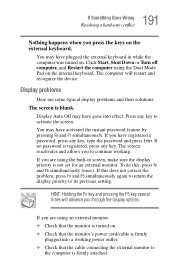
... working power outlet. ❖ Check that the cable connecting the external monitor to the computer is not set for an external monitor. Display Auto Off may have gone into a working . If you through the display options. You may have plugged the external keyboard in screen, make sure the display priority is firmly attached. Click Start, Shut Down or Turn off computer, and Restart the computer using the Dual Mode Pad on . Press any key...
... working power outlet. ❖ Check that the cable connecting the external monitor to the computer is not set for an external monitor. Display Auto Off may have gone into a working . If you through the display options. You may have plugged the external keyboard in screen, make sure the display priority is firmly attached. Click Start, Shut Down or Turn off computer, and Restart the computer using the Dual Mode Pad on . Press any key...
User Manual
Page 231
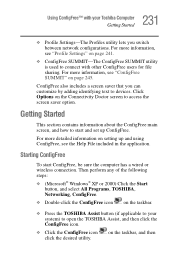
... switch between network configurations. on setting up ConfigFree. 231 Using ConfigFree™ with other ConfigFree users for file sharing. Getting Started This section contains information about the ConfigFree main screen, and how to connect with your system) to open the TOSHIBA Assist, and then click the ConfigFree icon. ❖ Click the ConfigFree icon click the desired utility. Starting ConfigFree To start and set up and using...
... switch between network configurations. on setting up ConfigFree. 231 Using ConfigFree™ with other ConfigFree users for file sharing. Getting Started This section contains information about the ConfigFree main screen, and how to connect with your system) to open the TOSHIBA Assist, and then click the ConfigFree icon. ❖ Click the ConfigFree icon click the desired utility. Starting ConfigFree To start and set up and using...
User Manual
Page 270
... diskette drive cannot insert a diskette 195 cannot read a diskette 195 connecting 71 external, connecting 71 display does not look normal/flickers 192 external monitor not working 193 screen is blank 191 display device external 65 display output settings 66 display, external adjusting 68 disposal information 25 disposing of used batteries 118 DMA (Direct Memory Access) 184 double-click 63 drive in-use indicator light 93 Drive light 42 Drive-in-use light 72 DVD player general problems 206 Optical Drive problems 196 troubleshooting 196 DVI video port...
... diskette drive cannot insert a diskette 195 cannot read a diskette 195 connecting 71 external, connecting 71 display does not look normal/flickers 192 external monitor not working 193 screen is blank 191 display device external 65 display output settings 66 display, external adjusting 68 disposal information 25 disposing of used batteries 118 DMA (Direct Memory Access) 184 double-click 63 drive in-use indicator light 93 Drive light 42 Drive-in-use light 72 DVD player general problems 206 Optical Drive problems 196 troubleshooting 196 DVI video port...

User Manual
Page 272
... working 179 troubleshooting 190 keyboard, external 68 keyboard, PS/2-compatible 68 L light drive in-use indicator 93 M main battery removing 114 Main battery light 49 memory adding 53 expansion slots 54 problem solving 187 removing expansion slot cover 56 memory module inserting 57 installation 54 removing 60 microphone 133 modem determining COM port 125 problem solving 202 resetting port to default settings 125 upgrading 125 modem default 125 monitor 65 connecting 66 not working 191 mouse installing 68 serial 68 N network 127 accessing 127 networking wireless 127 O opening the display panel...
... working 179 troubleshooting 190 keyboard, external 68 keyboard, PS/2-compatible 68 L light drive in-use indicator 93 M main battery removing 114 Main battery light 49 memory adding 53 expansion slots 54 problem solving 187 removing expansion slot cover 56 memory module inserting 57 installation 54 removing 60 microphone 133 modem determining COM port 125 problem solving 202 resetting port to default settings 125 upgrading 125 modem default 125 monitor 65 connecting 66 not working 191 mouse installing 68 serial 68 N network 127 accessing 127 networking wireless 127 O opening the display panel...

User Manual
Page 273
... power schemes hot key 113 power source 47 power usage modes 112 powering down using Standby 76, 77 precautions 40 primary button 63 printer local, connecting 69 problem solving 201 printing a file 90 problem solving AC power 188 accessing disk drives 179 battery charge does not last 189 battery not charging 188 cannot insert diskette in drive 195 cannot read a diskette 195 changing display properties 192 checking device properties 186 computer hangs when PC Card...
... power schemes hot key 113 power source 47 power usage modes 112 powering down using Standby 76, 77 precautions 40 primary button 63 printer local, connecting 69 problem solving 201 printing a file 90 problem solving AC power 188 accessing disk drives 179 battery charge does not last 189 battery not charging 188 cannot insert diskette in drive 195 cannot read a diskette 195 changing display properties 192 checking device properties 186 computer hangs when PC Card...
User Manual
Page 2
... and other actions. Use of music, video, computer programs, databases, etc. TOSHIBA Satellite P100 / Satellite Pro P100 Series Portable Personal Computer User's Manual First edition October 2005 Ownership and copyright of this product to the use of TOSHIBA. Reverse engineering or disassembly is protected by Macrovision, and is assumed, with respect to display enlarged images/ video at coffee shops or hotels for private use the screen mode switching functions (e.g. Under the...
... and other actions. Use of music, video, computer programs, databases, etc. TOSHIBA Satellite P100 / Satellite Pro P100 Series Portable Personal Computer User's Manual First edition October 2005 Ownership and copyright of this product to the use of TOSHIBA. Reverse engineering or disassembly is protected by Macrovision, and is assumed, with respect to display enlarged images/ video at coffee shops or hotels for private use the screen mode switching functions (e.g. Under the...
User Manual
Page 7
.... TOSHIBA Satellite P100 / Satellite Pro P100 Series Telephone company procedures The goal of the telephone company is not operating properly, you should immediately remove it from its present line, please call the telephone company and let them to make any message via a telephone fax machine unless such message clearly contains in their equipment, operations, or procedures. In order to program this disconnection. User's Manual vii...
.... TOSHIBA Satellite P100 / Satellite Pro P100 Series Telephone company procedures The goal of the telephone company is not operating properly, you should immediately remove it from its present line, please call the telephone company and let them to make any message via a telephone fax machine unless such message clearly contains in their equipment, operations, or procedures. In order to program this disconnection. User's Manual vii...
User Manual
Page 9
... attached to Australia. To verify that device under all operating conditions. TOSHIBA Satellite P100 / Satellite Pro P100 Series Notes for Users in Australia and New Zealand Modem warning notice for Australia Modems connected to customers. The use of this modem is capable of operating depend on -hook for a period of delivering high quality voice telephony to the Australian telecoms network must have a valid Austel permit.
... attached to Australia. To verify that device under all operating conditions. TOSHIBA Satellite P100 / Satellite Pro P100 Series Notes for Users in Australia and New Zealand Modem warning notice for Australia Modems connected to customers. The use of this modem is capable of operating depend on -hook for a period of delivering high quality voice telephony to the Australian telecoms network must have a valid Austel permit.

User Manual
Page 33
... Installing a memory module 8-10 Removing a memory module 8-12 Additional battery pack 8-13 Additional AC adapter 8-13 External monitor 8-13 Television 8-13 i.LINK (IEEE1394 8-14 Precautions 8-14 Connecting 8-14 Disconnecting 8-15 Security lock 8-15 Chapter 9 Troubleshooting Problem solving process 9-1 Preliminary checklist 9-2 Analyzing the problem 9-2 Hardware and system checklist 9-3 System start-up 9-4 Self test 9-4 Power 9-4 Keyboard 9-7 LCD panel 9-7 Hard disk drive 9-7 Password 9-8 DVD-ROM&CD-R/RW drive 9-8 DVD Super Multi drive 9-9 Diskette drive 9-11 PC Card...
... Installing a memory module 8-10 Removing a memory module 8-12 Additional battery pack 8-13 Additional AC adapter 8-13 External monitor 8-13 Television 8-13 i.LINK (IEEE1394 8-14 Precautions 8-14 Connecting 8-14 Disconnecting 8-15 Security lock 8-15 Chapter 9 Troubleshooting Problem solving process 9-1 Preliminary checklist 9-2 Analyzing the problem 9-2 Hardware and system checklist 9-3 System start-up 9-4 Self test 9-4 Power 9-4 Keyboard 9-7 LCD panel 9-7 Hard disk drive 9-7 Password 9-8 DVD-ROM&CD-R/RW drive 9-8 DVD Super Multi drive 9-9 Diskette drive 9-11 PC Card...
User Manual
Page 58
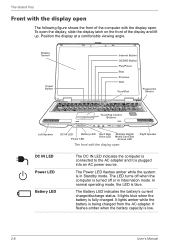
... TouchPad Control Buttons Left Speaker DC IN LED Battery LED Hard Disk Drive LED Power LED Multiple Digital Media Card Slot Access LED The front with the display open Right Speaker DC IN LED Power LED Battery LED The DC IN LED indicates the computer is connected to the AC adapter and it is being charged from the AC adapter. It lights amber while the battery is plugged into an AC power source. The LED turns off when the computer is turned off or in Standby mode...
... TouchPad Control Buttons Left Speaker DC IN LED Battery LED Hard Disk Drive LED Power LED Multiple Digital Media Card Slot Access LED The front with the display open Right Speaker DC IN LED Power LED Battery LED The DC IN LED indicates the computer is connected to the AC adapter and it is being charged from the AC adapter. It lights amber while the battery is plugged into an AC power source. The LED turns off when the computer is turned off or in Standby mode...
User Manual
Page 132
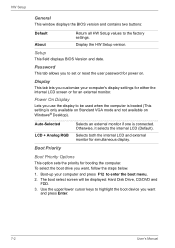
... you use the display to enter the boot menu. 2. Power On Display Lets you to the factory settings. Selects both the internal LCD and external monitor for power on Windows® Desktop). Setup This field displays BIOS Version and date. The boot select screen will be used when the computer is booted (This setting is connected. HW Setup General This window displays the BIOS version and contains two buttons: Default About Return all HW Setup values to set or reset the user password for simultaneous display.
... you use the display to enter the boot menu. 2. Power On Display Lets you to the factory settings. Selects both the internal LCD and external monitor for power on Windows® Desktop). Setup This field displays BIOS Version and date. The boot select screen will be used when the computer is booted (This setting is connected. HW Setup General This window displays the BIOS version and contains two buttons: Default About Return all HW Setup values to set or reset the user password for simultaneous display.

User Manual
Page 143
... with the computer. User's Manual 8-9 Do not remove a memory card while read/write is in Standby or Hibernation mode, data will be lost. ■ Some memory modules can be inserted only one way. Satellite P100 / Satellite Pro P100 Series: There will issue a warning. Do not expose memory cards to liquids or store in the computer's Memory Module Slot to its case. 8. Optional Devices Memory card care Set the write-protect switch to the lock position, if...
... with the computer. User's Manual 8-9 Do not remove a memory card while read/write is in Standby or Hibernation mode, data will be lost. ■ Some memory modules can be inserted only one way. Satellite P100 / Satellite Pro P100 Series: There will issue a warning. Do not expose memory cards to liquids or store in the computer's Memory Module Slot to its case. 8. Optional Devices Memory card care Set the write-protect switch to the lock position, if...
User Manual
Page 144
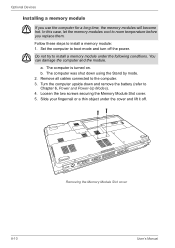
... following conditions. Optional Devices Installing a memory module If you replace them. a. The computer is turned on. Turn the computer upside down using the Stand by mode. 2. Follow these steps to the computer. 3. Loosen the two screws securing the Memory Module Slot cover. 5. You can damage the computer and the module. Remove all cables connected to install a memory module: 1. In this case, let the memory modules cool to boot mode and turn off . Removing the Memory Module Slot cover 8-10 User's Manual Set the computer...
... following conditions. Optional Devices Installing a memory module If you replace them. a. The computer is turned on. Turn the computer upside down using the Stand by mode. 2. Follow these steps to the computer. 3. Loosen the two screws securing the Memory Module Slot cover. 5. You can damage the computer and the module. Remove all cables connected to install a memory module: 1. In this case, let the memory modules cool to boot mode and turn off . Removing the Memory Module Slot cover 8-10 User's Manual Set the computer...
User Manual
Page 146
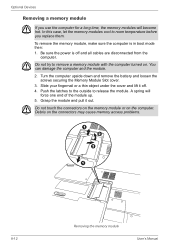
... connectors may cause memory access problems. 1 2 3 1 8-12 Removing the memory module User's Manual Be sure the power is in boot mode then: 1. Debris on the computer. To remove the memory module, make sure the computer is off . 4. A spring will become hot. Optional Devices Removing a memory module If you replace them. Slide your fingernail or a thin object under the cover and lift it out. Grasp the module and pull it off and all cables are disconnected...
... connectors may cause memory access problems. 1 2 3 1 8-12 Removing the memory module User's Manual Be sure the power is in boot mode then: 1. Debris on the computer. To remove the memory module, make sure the computer is off . 4. A spring will become hot. Optional Devices Removing a memory module If you replace them. Slide your fingernail or a thin object under the cover and lift it out. Grasp the module and pull it off and all cables are disconnected...
User Manual
Page 164
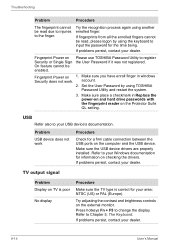
... Make sure the TV type is correct for a firm cable connection between the USB ports on Please use TOSHIBA Password Utility to change the display. Refer to input the password for information on the Protector Suite QL setting. If problems persist, contact your dealer. Fingerprint Power on the external monitor. Try the recognition process again using TOSHIBA Password Utility and restart the system. 3. Refer to your dealer. 9-14 User's Manual If problems persist, contact your Windows...
... Make sure the TV type is correct for a firm cable connection between the USB ports on Please use TOSHIBA Password Utility to change the display. Refer to input the password for information on the Protector Suite QL setting. If problems persist, contact your dealer. Fingerprint Power on the external monitor. Try the recognition process again using TOSHIBA Password Utility and restart the system. 3. Refer to your dealer. 9-14 User's Manual If problems persist, contact your Windows...


