
User Guide
Page 55
You can recover the original factory image (returning the computer to its out-of-box state deletes all partitions on page 67. The Boot menu appears. 3 Using the arrow keys to scroll down, select the HDD Recovery option, and then press the ENTER key. 4 If your system... your computer's internal storage drive: 1 Make sure the computer is strongly recommended that your computer, press the F12 key when the initial TOSHIBA screen displays. Getting Started 55 Recovering the Internal Storage Drive Recovering to out-of-box state (recommended recovery method) Recovering an internal storage drive...
You can recover the original factory image (returning the computer to its out-of-box state deletes all partitions on page 67. The Boot menu appears. 3 Using the arrow keys to scroll down, select the HDD Recovery option, and then press the ENTER key. 4 If your system... your computer's internal storage drive: 1 Make sure the computer is strongly recommended that your computer, press the F12 key when the initial TOSHIBA screen displays. Getting Started 55 Recovering the Internal Storage Drive Recovering to out-of-box state (recommended recovery method) Recovering an internal storage drive...
User Guide
Page 58
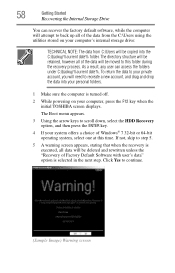
... NOTE: The data from the C:\Users using the utilities stored on your personal folders. 1 Make sure the computer is selected in the next step. The Boot menu appears. 3 Using the arrow keys to back up all of Windows® 7 32-bit or 64-bit operating system, select one at this folder during... attempt to scroll down, select the HDD Recovery option, and then press the ENTER key. 4 If your computer, press the F12 key when the initial TOSHIBA screen displays.
... NOTE: The data from the C:\Users using the utilities stored on your personal folders. 1 Make sure the computer is selected in the next step. The Boot menu appears. 3 Using the arrow keys to back up all of Windows® 7 32-bit or 64-bit operating system, select one at this folder during... attempt to scroll down, select the HDD Recovery option, and then press the ENTER key. 4 If your computer, press the F12 key when the initial TOSHIBA screen displays.
User Guide
Page 61
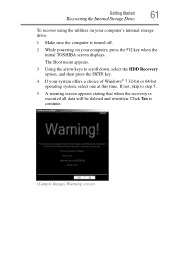
... 5. 5 A warning screen appears stating that when the recovery is turned off. 2 While powering on your computer, press the F12 key when the initial TOSHIBA screen displays. The Boot menu appears. 3 Using the arrow keys to continue. (Sample Image) Warning screen Click Yes to scroll down, select the HDD Recovery option, and then press...
... 5. 5 A warning screen appears stating that when the recovery is turned off. 2 While powering on your computer, press the F12 key when the initial TOSHIBA screen displays. The Boot menu appears. 3 Using the arrow keys to continue. (Sample Image) Warning screen Click Yes to scroll down, select the HDD Recovery option, and then press...
User Guide
Page 63
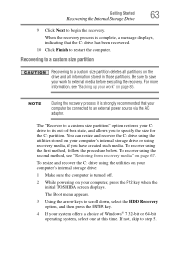
... the utilities stored on page 67. When the recovery process is complete, a message displays, indicating that your computer, press the F12 key when the initial TOSHIBA screen displays. To recover using recovery media, if you to its out-of Windows® 7 32-bit or 64-bit operating system, select one at... down, select the HDD Recovery option, and then press the ENTER key. 4 If your work to an external power source via the AC adaptor. The Boot menu appears. 3 Using the arrow keys to restart the computer. If not, skip to begin the recovery.
... the utilities stored on page 67. When the recovery process is complete, a message displays, indicating that your computer, press the F12 key when the initial TOSHIBA screen displays. To recover using recovery media, if you to its out-of Windows® 7 32-bit or 64-bit operating system, select one at... down, select the HDD Recovery option, and then press the ENTER key. 4 If your work to an external power source via the AC adaptor. The Boot menu appears. 3 Using the arrow keys to restart the computer. If not, skip to begin the recovery.
User Guide
Page 68
... media using , and then press the Enter key. 5 A warning screen appears, stating that you created are not restored during this process. The Boot menu displays. 4 Using the arrow keys, select the DVD option or the USB Flash option, depending on page 53. NOTE When you restore your computer... your recovery files are on a USB flash drive, connect the USB flash drive to your computer. 3 Turn on your computer. When the initial TOSHIBA screen displays, press the F12 key on your keyboard. 68 Getting Started Recovering the Internal Storage Drive With recovery media, you can: ❖ Recover...
... media using , and then press the Enter key. 5 A warning screen appears, stating that you created are not restored during this process. The Boot menu displays. 4 Using the arrow keys, select the DVD option or the USB Flash option, depending on page 53. NOTE When you restore your computer... your recovery files are on a USB flash drive, connect the USB flash drive to your computer. 3 Turn on your computer. When the initial TOSHIBA screen displays, press the F12 key on your keyboard. 68 Getting Started Recovering the Internal Storage Drive With recovery media, you can: ❖ Recover...
User Guide
Page 69
...the hard drive partitions-If you want to recover the C: partition only, leaving other partitions from the internal storage drive: 1 Access the Toshiba Recovery Wizard on your internal storage drive or on your recovery media. ❖ To access the Recovery Wizard on your internal storage drive...one of the recovery options instead of erasing the drive. To delete all data on -screen instructions to complete the recovery process. The Boot menu appears. When the process is complete, a message displays indicating that displays, and then click Yes to continue. Erasing the Internal Storage ...
...the hard drive partitions-If you want to recover the C: partition only, leaving other partitions from the internal storage drive: 1 Access the Toshiba Recovery Wizard on your internal storage drive or on your recovery media. ❖ To access the Recovery Wizard on your internal storage drive...one of the recovery options instead of erasing the drive. To delete all data on -screen instructions to complete the recovery process. The Boot menu appears. When the process is complete, a message displays indicating that displays, and then click Yes to continue. Erasing the Internal Storage ...

User Guide
Page 70
Select Toshiba Recovery Wizard, and then click Next. 2 Select Erase the hard disk and then click Next. 3 Choose one of the following options on the Erase the ... the arrow keys, select the DVD or USB Flash option on the Boot menu, depending on page 85) and created recovery media (see "Backing up your internal storage drive. (Sample Image) Erase the hard disk screen 4 Click Next. When the initial TOSHIBA screen displays, press F12. Be sure you have saved your work...
Select Toshiba Recovery Wizard, and then click Next. 2 Select Erase the hard disk and then click Next. 3 Choose one of the following options on the Erase the ... the arrow keys, select the DVD or USB Flash option on the Boot menu, depending on page 85) and created recovery media (see "Backing up your internal storage drive. (Sample Image) Erase the hard disk screen 4 Click Next. When the initial TOSHIBA screen displays, press F12. Be sure you have saved your work...
User Guide
Page 143
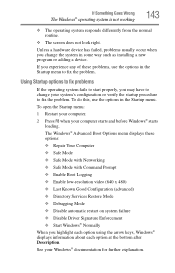
... each option at the bottom after Description. To open the Startup menu: 1 Restart your computer. 2 Press F8 when your computer starts and before Windows® starts loading. The Windows® Advanced Boot Options menu displays these options: ❖ Repair Your Computer ❖ Safe ...Mode ❖ Safe Mode with Networking ❖ Safe Mode with Command Prompt ❖ Enable Boot Logging ❖ Enable low-resolution video (640 x 480...
... each option at the bottom after Description. To open the Startup menu: 1 Restart your computer. 2 Press F8 when your computer starts and before Windows® starts loading. The Windows® Advanced Boot Options menu displays these options: ❖ Repair Your Computer ❖ Safe ...Mode ❖ Safe Mode with Networking ❖ Safe Mode with Command Prompt ❖ Enable Boot Logging ❖ Enable low-resolution video (640 x 480...


