User Guide
Page 9
...interference, including interference that it does not emit RF field in the 5.15 GHz to provide maximum shielding. consult Safety Code 6, obtainable from windows to 5.25 GHz frequency range. L' utilisation de ce dispositif est soumis aux deux conditions suivantes: (1) il ne doit pas produire de brouillage... pointed such that may not cause interference, and (2) this device must ensure that the antenna is subject to co-channel Mobile Satellite systems. High power radars are allocated as primary users of Health Canada limits for the general population; This device is intended to...
...interference, including interference that it does not emit RF field in the 5.15 GHz to provide maximum shielding. consult Safety Code 6, obtainable from windows to 5.25 GHz frequency range. L' utilisation de ce dispositif est soumis aux deux conditions suivantes: (1) il ne doit pas produire de brouillage... pointed such that may not cause interference, and (2) this device must ensure that the antenna is subject to co-channel Mobile Satellite systems. High power radars are allocated as primary users of Health Canada limits for the general population; This device is intended to...
User Guide
Page 29
... are either registered trademarks or trademarks of Adobe Systems Incorporated in the United States and/or other countries. Microsoft, Outlook, Windows, and Windows Media are trademarks of SD Card Association. Wi-Fi is a registered trademark of Atheros Communications, Inc. None of the licenses... or registered trademarks of Sony Corporation. Atheros is a registered trademark of the Wi-Fi Alliance. 29 Trademarks Satellite, Satellite Pro, and eco Utility are owned by Toshiba is under the AVC, the VC-1 and the MPEG-4 Part 2 Visual patent portfolio licenses for any use...
... are either registered trademarks or trademarks of Adobe Systems Incorporated in the United States and/or other countries. Microsoft, Outlook, Windows, and Windows Media are trademarks of SD Card Association. Wi-Fi is a registered trademark of Atheros Communications, Inc. None of the licenses... or registered trademarks of Sony Corporation. Atheros is a registered trademark of the Wi-Fi Alliance. 29 Trademarks Satellite, Satellite Pro, and eco Utility are owned by Toshiba is under the AVC, the VC-1 and the MPEG-4 Part 2 Visual patent portfolio licenses for any use...
User Guide
Page 32
... Using the keyboard 103 Character keys 104 Making your keyboard emulate a full-size keyboard 104 Ctrl, Fn, and Alt keys 105 Function keys 105 Special Windows® keys 105 Overlay keys 106 Starting a program 107 Starting a program from the Start menu.........107 Starting a program from... Windows® Explorer 108 Starting a program using the Search programs and files field 109 Saving your work 109 Printing your work 111 Backing up your work ...
... Using the keyboard 103 Character keys 104 Making your keyboard emulate a full-size keyboard 104 Ctrl, Fn, and Alt keys 105 Function keys 105 Special Windows® keys 105 Overlay keys 106 Starting a program 107 Starting a program from the Start menu.........107 Starting a program from... Windows® Explorer 108 Starting a program using the Search programs and files field 109 Saving your work 109 Printing your work 111 Backing up your work ...
User Guide
Page 35
... Wireless networking problems 186 DVD and Blu-ray Disc™ operating problems.........188 Develop good computing habits 189 Data and system configuration backup in the Windows® operating system 190 If you need further assistance 194 Before you contact Toshiba 194 Contacting Toshiba 195 Other Toshiba Internet Web sites 195 Toshiba's worldwide offices 196
... Wireless networking problems 186 DVD and Blu-ray Disc™ operating problems.........188 Develop good computing habits 189 Data and system configuration backup in the Windows® operating system 190 If you need further assistance 194 Before you contact Toshiba 194 Contacting Toshiba 195 Other Toshiba Internet Web sites 195 Toshiba's worldwide offices 196

User Guide
Page 39
...or to -date product information about your particular model, please visit Toshiba's Web site at pcsupport.toshiba.com. For the most up-to stay current with the various computer software or hardware ...options, visit Toshiba's Web site at pcsupport.toshiba.com. Your particular model may not have all subject to end. ❖ Skim...can: ❖ Read the entire guide from beginning to change without notice. While Toshiba has made every effort at the time of publication to ensure the accuracy of contents and the index...
...or to -date product information about your particular model, please visit Toshiba's Web site at pcsupport.toshiba.com. For the most up-to stay current with the various computer software or hardware ...options, visit Toshiba's Web site at pcsupport.toshiba.com. Your particular model may not have all subject to end. ❖ Skim...can: ❖ Read the entire guide from beginning to change without notice. While Toshiba has made every effort at the time of publication to ensure the accuracy of contents and the index...
User Guide
Page 50
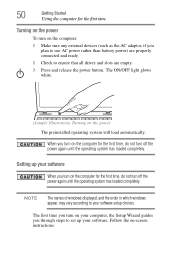
... power rather than battery power) are properly connected and ready. 2 Check to set up your software setup choices. NOTE The names of windows displayed, and the order in which windows appear, may vary according to your software When you turn on the computer for the first time Turning on the power To...
... power rather than battery power) are properly connected and ready. 2 Check to set up your software setup choices. NOTE The names of windows displayed, and the order in which windows appear, may vary according to your software When you turn on the computer for the first time Turning on the power To...
User Guide
Page 60
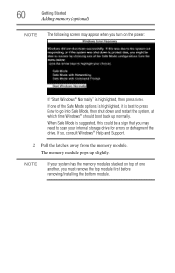
... Mode options is highlighted, it is best to press Enter to scan your system has the memory modules stacked on the power: If "Start Windows® Normally" is highlighted, then press Enter. NOTE If your internal storage drive for errors or defragment the drive. When Safe Mode is ...this could be a sign that you may appear when you must remove the top module first before removing/installing the bottom module. If so, consult Windows® Help and Support. 2 Pull the latches away from the memory module. 60 Getting Started Adding memory (optional) NOTE The following screen may ...
... Mode options is highlighted, it is best to press Enter to scan your system has the memory modules stacked on the power: If "Start Windows® Normally" is highlighted, then press Enter. NOTE If your internal storage drive for errors or defragment the drive. When Safe Mode is ...this could be a sign that you may appear when you must remove the top module first before removing/installing the bottom module. If so, consult Windows® Help and Support. 2 Pull the latches away from the memory module. 60 Getting Started Adding memory (optional) NOTE The following screen may ...
User Guide
Page 62
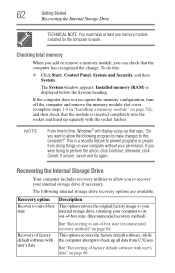
... and try again. This option recovers the factory default software, while the computer attempts to perform the action, click Continue; The System window appears. If you to time, Windows® will display a pop-up all data from doing things on your computer without your permission. NOTE From time to recover your computer...
... and try again. This option recovers the factory default software, while the computer attempts to perform the action, click Continue; The System window appears. If you to time, Windows® will display a pop-up all data from doing things on your computer without your permission. NOTE From time to recover your computer...
User Guide
Page 63
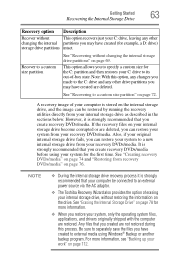
... your computer is strongly recommended that you restore your recovery DVDs/media. Be sure to an external power source via the AC adaptor. ❖ The Toshiba Recovery Wizard also provides the option of your internal storage drive as described in the sections below. NOTE ❖ During the internal storage drive recovery... can be connected to separately save the files you create recovery DVDs/media. For more information. ❖ When you create recovery DVDs/media before using Windows® Backup or another backup program.
... your computer is strongly recommended that you restore your recovery DVDs/media. Be sure to an external power source via the AC adaptor. ❖ The Toshiba Recovery Wizard also provides the option of your internal storage drive as described in the sections below. NOTE ❖ During the internal storage drive recovery... can be connected to separately save the files you create recovery DVDs/media. For more information. ❖ When you create recovery DVDs/media before using Windows® Backup or another backup program.
User Guide
Page 64
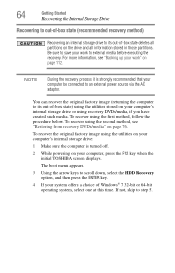
...media before executing the recovery. To recover using the second method, see "Backing up your computer, press the F12 key when the initial TOSHIBA screen displays. 64 Getting Started Recovering the Internal Storage Drive Recovering to out-of-box state (recommended recovery method) Recovering an internal storage ...turned off. 2 While powering on page 76. To recover the original factory image using the utilities on your computer be connected to its out-of Windows® 7 32-bit or 64-bit operating system, select one at this time. The boot menu appears. 3 Using the arrow keys to ...
...media before executing the recovery. To recover using the second method, see "Backing up your computer, press the F12 key when the initial TOSHIBA screen displays. 64 Getting Started Recovering the Internal Storage Drive Recovering to out-of-box state (recommended recovery method) Recovering an internal storage ...turned off. 2 While powering on page 76. To recover the original factory image using the utilities on your computer be connected to its out-of Windows® 7 32-bit or 64-bit operating system, select one at this time. The boot menu appears. 3 Using the arrow keys to ...
User Guide
Page 67
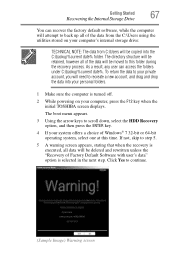
... selected in the next step. As a result, any user can recover the factory default software, while the computer will attempt to back up all of Windows® 7 32-bit or 64-bit operating system, select one at this folder during the recovery process. Click Yes to recreate a new account, and...data into the C:\backup%current date% folder. The boot menu appears. 3 Using the arrow keys to your computer, press the F12 key when the initial TOSHIBA screen displays. To return the data to scroll down, select the HDD Recovery option, and then press the ENTER key. 4 If your system offers a...
... selected in the next step. As a result, any user can recover the factory default software, while the computer will attempt to back up all of Windows® 7 32-bit or 64-bit operating system, select one at this folder during the recovery process. Click Yes to recreate a new account, and...data into the C:\backup%current date% folder. The boot menu appears. 3 Using the arrow keys to your computer, press the F12 key when the initial TOSHIBA screen displays. To return the data to scroll down, select the HDD Recovery option, and then press the ENTER key. 4 If your system offers a...
User Guide
Page 70
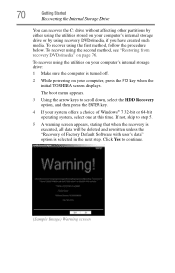
...step 5. 5 A warning screen appears, stating that when the recovery is executed, all data will be deleted and rewritten unless the "Recovery of Windows® 7 32-bit or 64-bit operating system, select one at this time. To recover using the utilities on page 76. 70 Getting Started...While powering on your computer's internal storage drive or by either using the utilities stored on your computer, press the F12 key when the initial TOSHIBA screen displays. To recover using the second method, see "Restoring from recovery DVDs/media" on your computer's internal storage drive: 1 Make sure ...
...step 5. 5 A warning screen appears, stating that when the recovery is executed, all data will be deleted and rewritten unless the "Recovery of Windows® 7 32-bit or 64-bit operating system, select one at this time. To recover using the utilities on page 76. 70 Getting Started...While powering on your computer's internal storage drive or by either using the utilities stored on your computer, press the F12 key when the initial TOSHIBA screen displays. To recover using the second method, see "Restoring from recovery DVDs/media" on your computer's internal storage drive: 1 Make sure ...
User Guide
Page 72
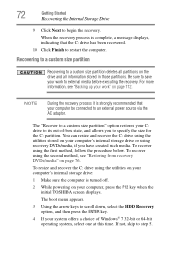
Recovering to a custom size partition Recovering to its out-of Windows® 7 32-bit or 64-bit operating system, select one at this time. The "Recover to a custom size partition" option restores your C: drive to a custom ... restart the computer. To resize and recover the C: drive using the second method, see "Backing up your computer, press the F12 key when the initial TOSHIBA screen displays. For more information, see "Restoring from recovery DVDs/media" on page 112. To recover using the utilities on your computer's internal storage drive...
Recovering to a custom size partition Recovering to its out-of Windows® 7 32-bit or 64-bit operating system, select one at this time. The "Recover to a custom size partition" option restores your C: drive to a custom ... restart the computer. To resize and recover the C: drive using the second method, see "Backing up your computer, press the F12 key when the initial TOSHIBA screen displays. For more information, see "Restoring from recovery DVDs/media" on page 112. To recover using the utilities on your computer's internal storage drive...
User Guide
Page 77
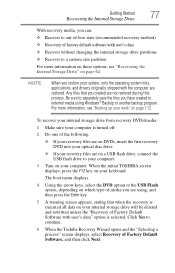
... For more information, see "Recovering the Internal Storage Drive" on a USB flash drive, connect the USB flash drive to continue. 6 When the Toshiba Recovery Wizard opens and the "Selecting a process" screen displays, select Recovery of Factory Default Software with the computer are restored. The boot menu displays...on your recovery files are on page 62. Click Yes to your computer. 3 Turn on which type of media you are using Windows® Backup or another backup program. For more information on these options, see "Backing up your keyboard. To recover your internal ...
... For more information, see "Recovering the Internal Storage Drive" on a USB flash drive, connect the USB flash drive to continue. 6 When the Toshiba Recovery Wizard opens and the "Selecting a process" screen displays, select Recovery of Factory Default Software with the computer are restored. The boot menu displays...on your recovery files are on page 62. Click Yes to your computer. 3 Turn on which type of media you are using Windows® Backup or another backup program. For more information on these options, see "Backing up your keyboard. To recover your internal ...

User Guide
Page 84
... tapping only, you can disable only the tapping feature. To enable/disable the touch pad, do one or more information, please visit www.support.toshiba.com, and enter the phrase "Mouse pointer jumps around "by sliding your hand as you type" into the Search field. For more of your...the touch pad, so that it is enabled by sliding your typing technique to avoid accidental contact with these problems, try one of the Windows Control Panel. 84 Getting Started Using the touch pad Adjusting touch pad settings While you are accessible through the Mouse Properties option of the ...
... tapping only, you can disable only the tapping feature. To enable/disable the touch pad, do one or more information, please visit www.support.toshiba.com, and enter the phrase "Mouse pointer jumps around "by sliding your hand as you type" into the Search field. For more of your...the touch pad, so that it is enabled by sliding your typing technique to avoid accidental contact with these problems, try one of the Windows Control Panel. 84 Getting Started Using the touch pad Adjusting touch pad settings While you are accessible through the Mouse Properties option of the ...
User Guide
Page 87
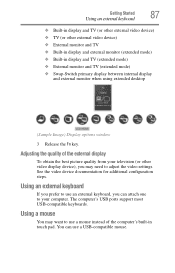
...; External monitor and TV (extended mode) ❖ Swap-Switch primary display between internal display and external monitor when using extended desktop (Sample Image) Display options window 3 Release the Fn key. Adjusting the quality of the computer's built-in touch pad. Getting Started 87 Using an external keyboard ❖ Built-in display...
...; External monitor and TV (extended mode) ❖ Swap-Switch primary display between internal display and external monitor when using extended desktop (Sample Image) Display options window 3 Release the Fn key. Adjusting the quality of the computer's built-in touch pad. Getting Started 87 Using an external keyboard ❖ Built-in display...
User Guide
Page 89
.... Make sure the system indicator panel's storage drive light and the drive in-use light are using it up for instructions before shutting down the Windows® operating system could cause you may lose data or damage the disk/disc and/or drive. If you are off the power while a disk...
.... Make sure the system indicator panel's storage drive light and the drive in-use light are using it up for instructions before shutting down the Windows® operating system could cause you may lose data or damage the disk/disc and/or drive. If you are off the power while a disk...
User Guide
Page 91
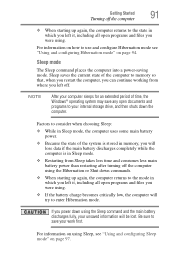
... try to consider when choosing Sleep: ❖ While in Sleep mode, the computer uses some main battery power. ❖ Because the state of time, the Windows® operating system may save your computer sleeps for an extended period of the system is in which you left it , including all open programs...
... try to consider when choosing Sleep: ❖ While in Sleep mode, the computer uses some main battery power. ❖ Because the state of time, the Windows® operating system may save your computer sleeps for an extended period of the system is in which you left it , including all open programs...

User Guide
Page 92
... the Shut down button in the lower-right corner of the computer. By default, pressing your computer using the Power Options feature. The Power Options window appears. This command closes all open programs, shuts down the operating system, and then turns off your work or the current state of the Start...
... the Shut down button in the lower-right corner of the computer. By default, pressing your computer using the Power Options feature. The Power Options window appears. This command closes all open programs, shuts down the operating system, and then turns off your work or the current state of the Start...
User Guide
Page 93
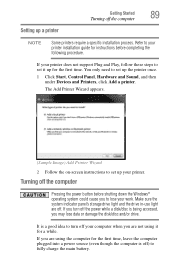
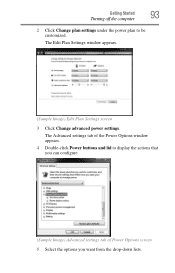
The Advanced settings tab of Power Options screen 5 Select the options you want from the drop-down lists. The Edit Plan Settings window appears. (Sample Image) Edit Plan Settings screen 3 Click Change advanced power settings. Getting Started 93 Turning off the computer 2 Click Change plan settings under the power plan to display the actions that you can configure. (Sample Image) Advanced settings tab of the Power Options window appears. 4 Double-click Power buttons and lid to be customized.
The Advanced settings tab of Power Options screen 5 Select the options you want from the drop-down lists. The Edit Plan Settings window appears. (Sample Image) Edit Plan Settings screen 3 Click Change advanced power settings. Getting Started 93 Turning off the computer 2 Click Change plan settings under the power plan to display the actions that you can configure. (Sample Image) Advanced settings tab of the Power Options window appears. 4 Double-click Power buttons and lid to be customized.


